1. Introduction
GBS BCC (Biometric Capture Component) is an application designed to enroll civil and baby profiles with biographic and biometrics data, such as fingerprints, face, palmprints, irises, and others. The enrolled records are stored in GBDS and can be used in identification and verification processes. As part of the Griaule Biometric Suite, the enrollment process also checks new records for biometric issues (as low quality, duplicates, not matches with sequence control) and possible frauds (duplicated biometrics between records of distinct people).
Note
Depending on the environment, settings, and user permissions, some functionalities and screens may not be available.
This manual will address all the processes of civil capture and identification, baby capture and checkout, and settings management.
This manual is updated for BCC version 1.8.0.
2. Pre-Requisites
- Windows 7, 8, or 10;
- BCC Services installed.
- 2 GB available at Hard Disk
- 8GB of RAM or more.
- Intel i3 or superior
- Windows Visual C++ 2008 Redistributable package (x86).
- Windows Visual C++ 2010 Redistributable package (x86).
See also
If your environment uses a Canon PowerShot camera, it is necessary to install the Zadig package.
3. Access and Authentication
You should access BCC with a web browser, and we recommend Google Chrome. The URL for access is specific to each deployment.
Note
If necessary, contact Griaule Support Team to obtain the correct URL.
Authentication is required to access the application. The credentials needed by BCC are username and password.

Note
At the bottom of the screen, there is an option to change the language to the desired one. This option is also available on the Settings page after login.
3.1. Two-factor Authentication (2FA)
When two-factor authentication (2FA) is turned on, the first time you try to log in, after entering your username and password, you’ll be shown a QR Code that must be registered in Google Authenticator.
Note
Google Authenticator is a time-based code generator that is available as an application for Android and iOS smartphones.
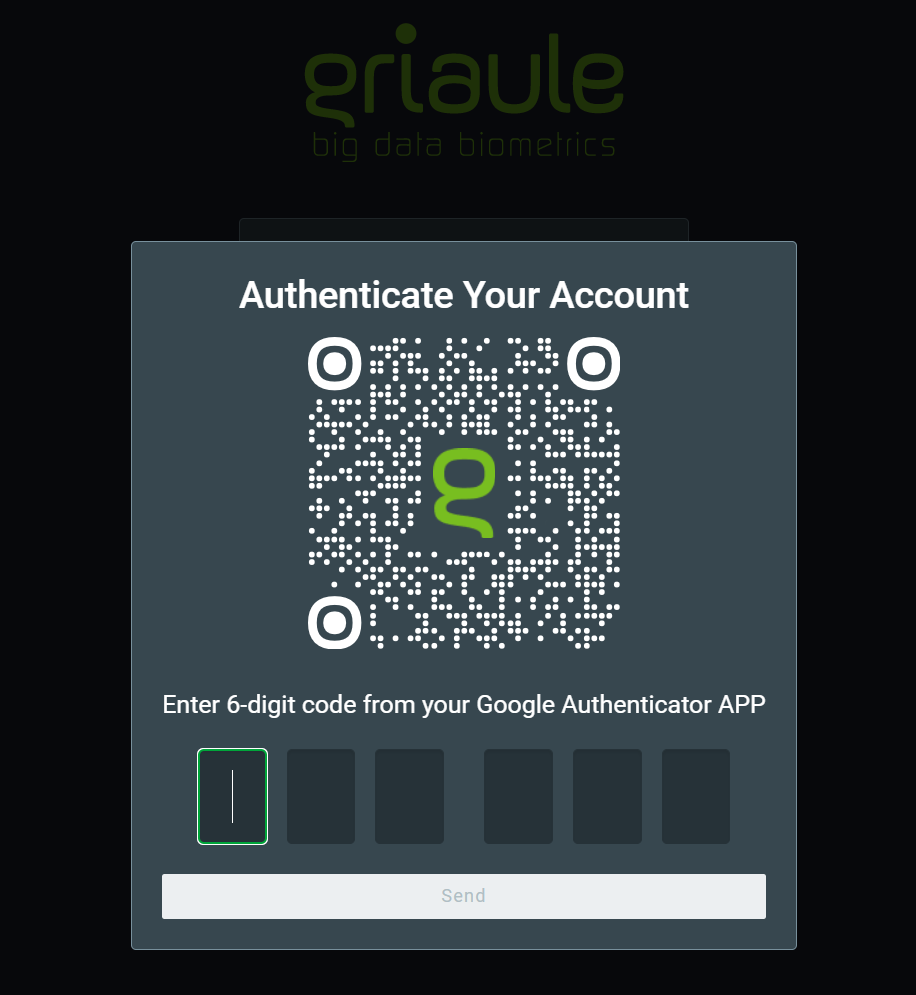
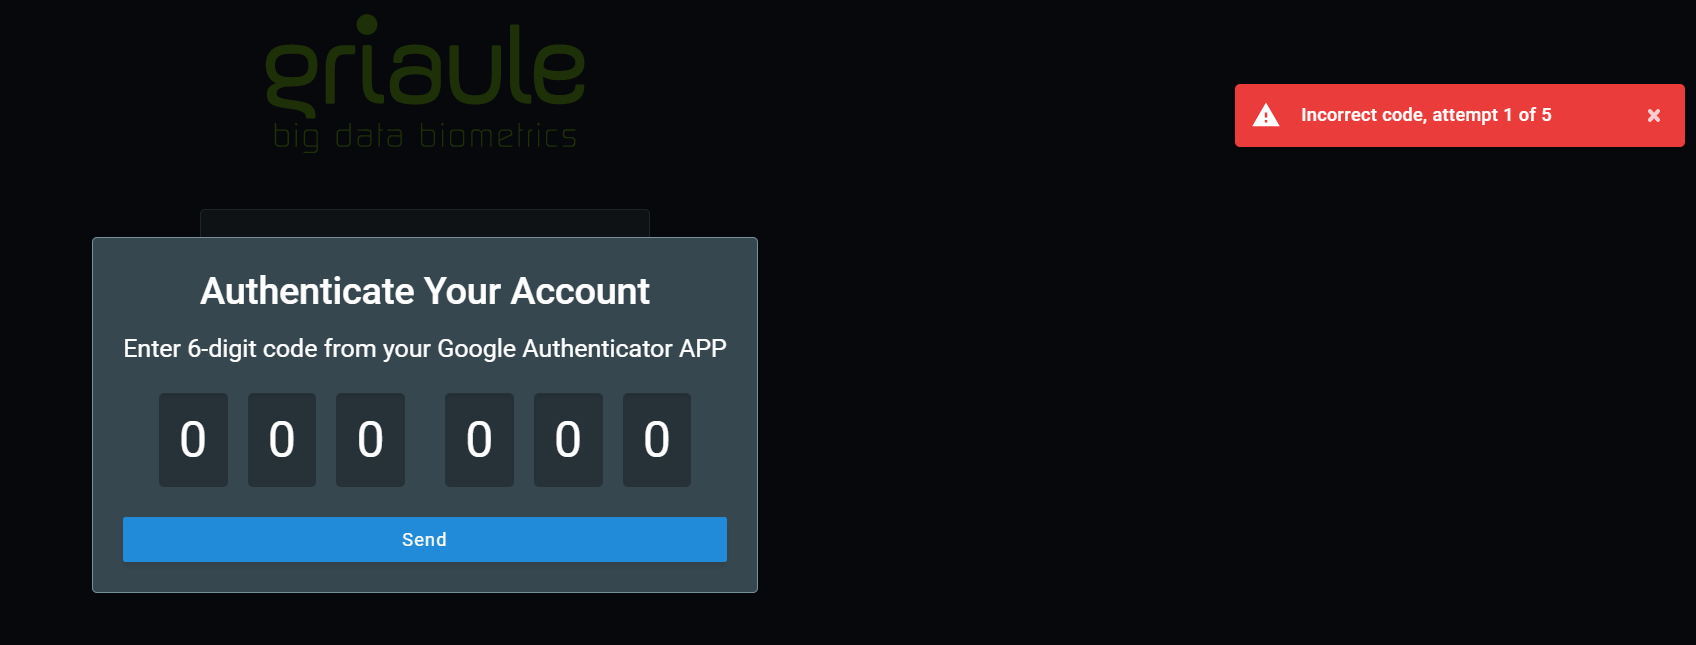
After successfully registering the QR Code in Google Authenticator, enter the unique time-sensitive 6-digit code and click on Send.
You will only need to register the QR Code once. But for each subsequent login, you will be asked to enter the 6-digit code generated by Google Authenticator.
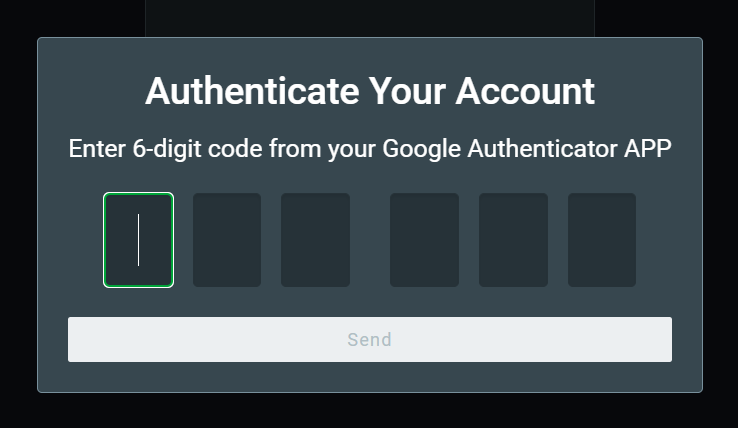
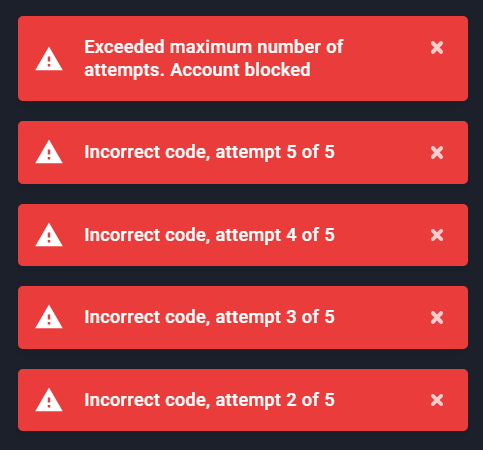
There is a limited number of unsuccessful login attempts a user can make. Every time an incorrect code is entered, an error message will be shown:
If you reach the maximum amount of unsuccessful login attempts, your account will be automatically blocked.
Warning
If your account is blocked, contact your system administrator.
3.2. Simultaneous Login and Browser Enrollment
Only one session per user is allowed. It is not possible to log in with the same profile more than once in the application. If an user is already logged in and another access happens using the same username and password, the user with the oldest session will be warned and logged out in their next action.
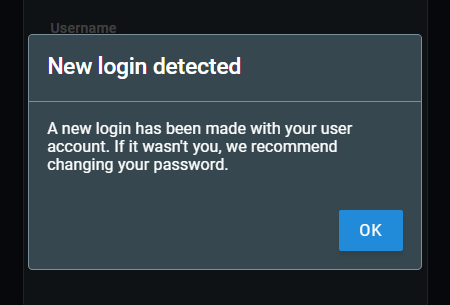
Also, only one browser may be used at a time. When trying to log in using a different browser, the user will be informed that it is necessary to authenticate the new browser. The authentication of a new browser will revoke the access from the previous one.
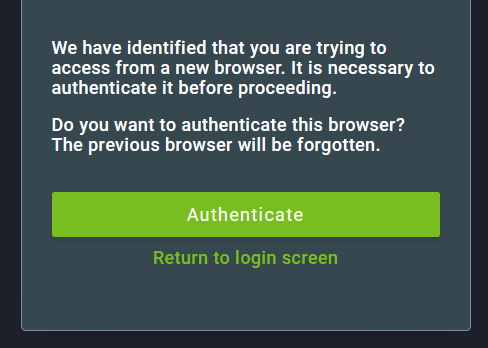
To authenticate a new browser, click on Authenticate and then enter the verification code that will be sent to the email linked to the user account.
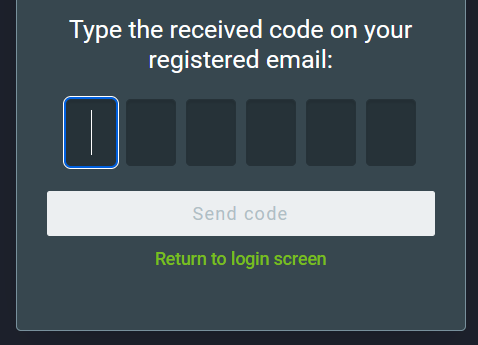
If the authentication is successful, a notification will appear on the upper-right corner of the screen after logging in.

3.3. Change or Reset your Password
For security reasons, you can change your password or reset it if you forget it.
3.3.1. Change your Password
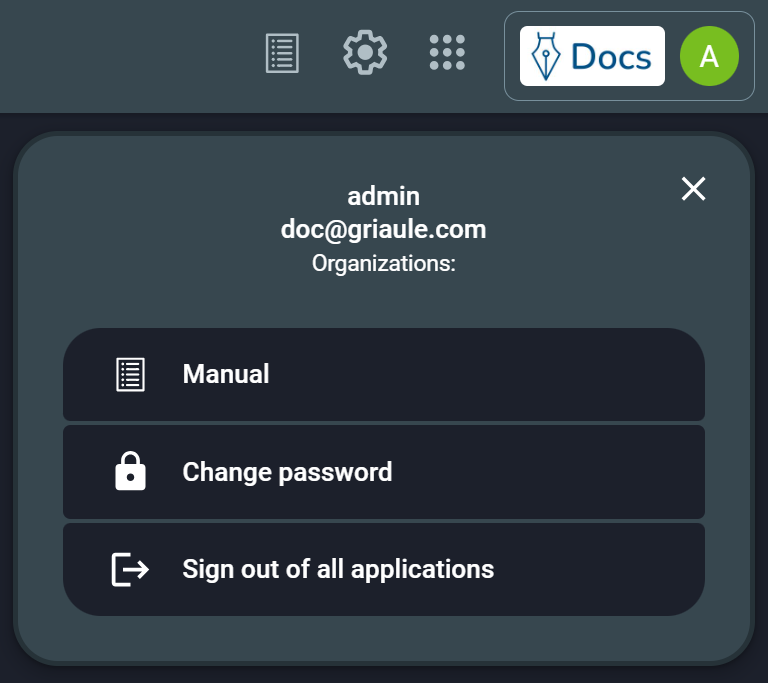
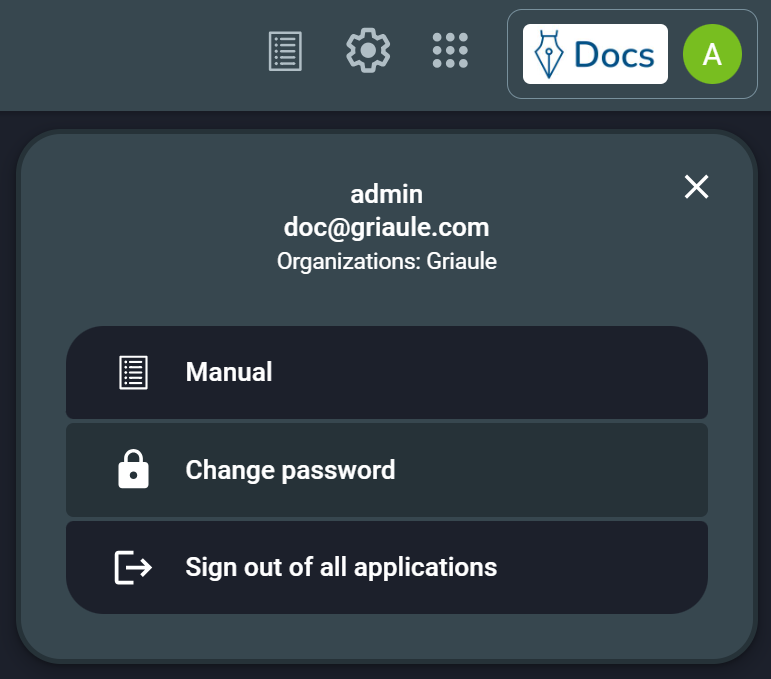
To change your password, after logging in, click to open the user menu, on the upper-right corner of the screen, and click on Change password.
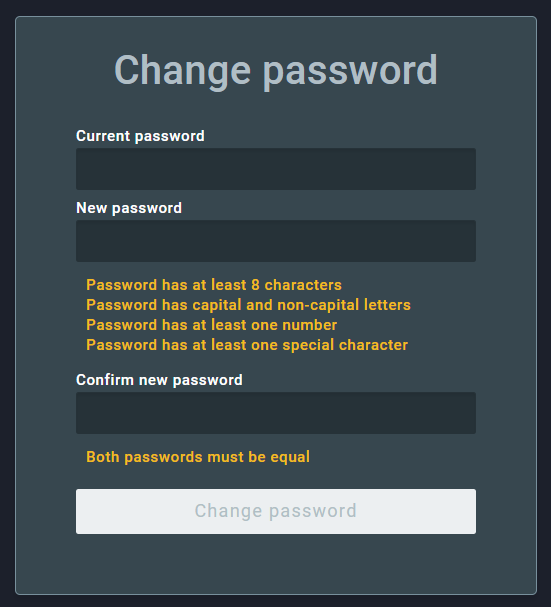
Then, enter the current password and the new password two times. Make sure to meet the password requirements, they are listed under the new password field and will turn green when met. Finally, to confirm the change, click on Change password.
3.3.2. Reset your Password
To reset your password, on the login screen, click on Forgot your password?:
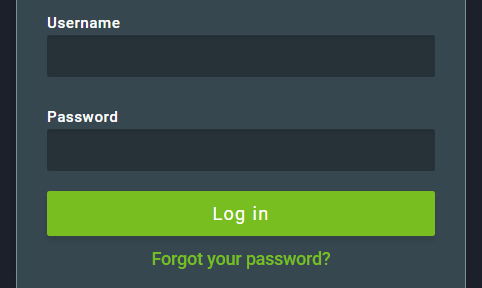
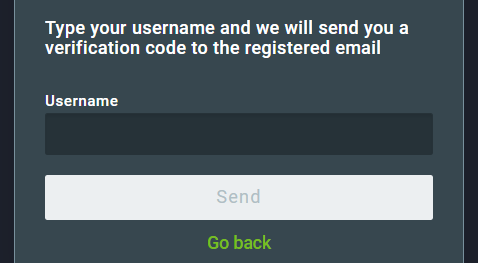
Then, enter the profile username and click on Send.
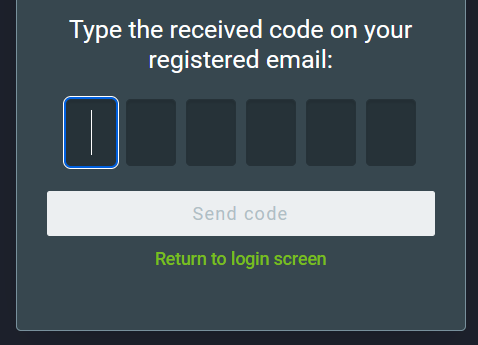
An email containing a verification code will be sent to the email address linked to that profile. Enter the verification code and click on Send code.
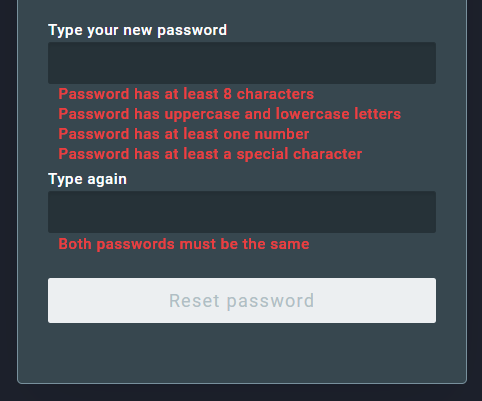
If the code is correct, you will be able to create a new password. Enter the new password two times. Make sure to meet the password requirements, they are listed under the new password field and will turn green when met. Finally, to confirm the reset, click on Reset password.
4. User Interface
When you log in, the main page will be displayed. Depending on your environment and user permissions, the main page may not look as presented in the image below. This manual will assume that all permissions are available for the user.
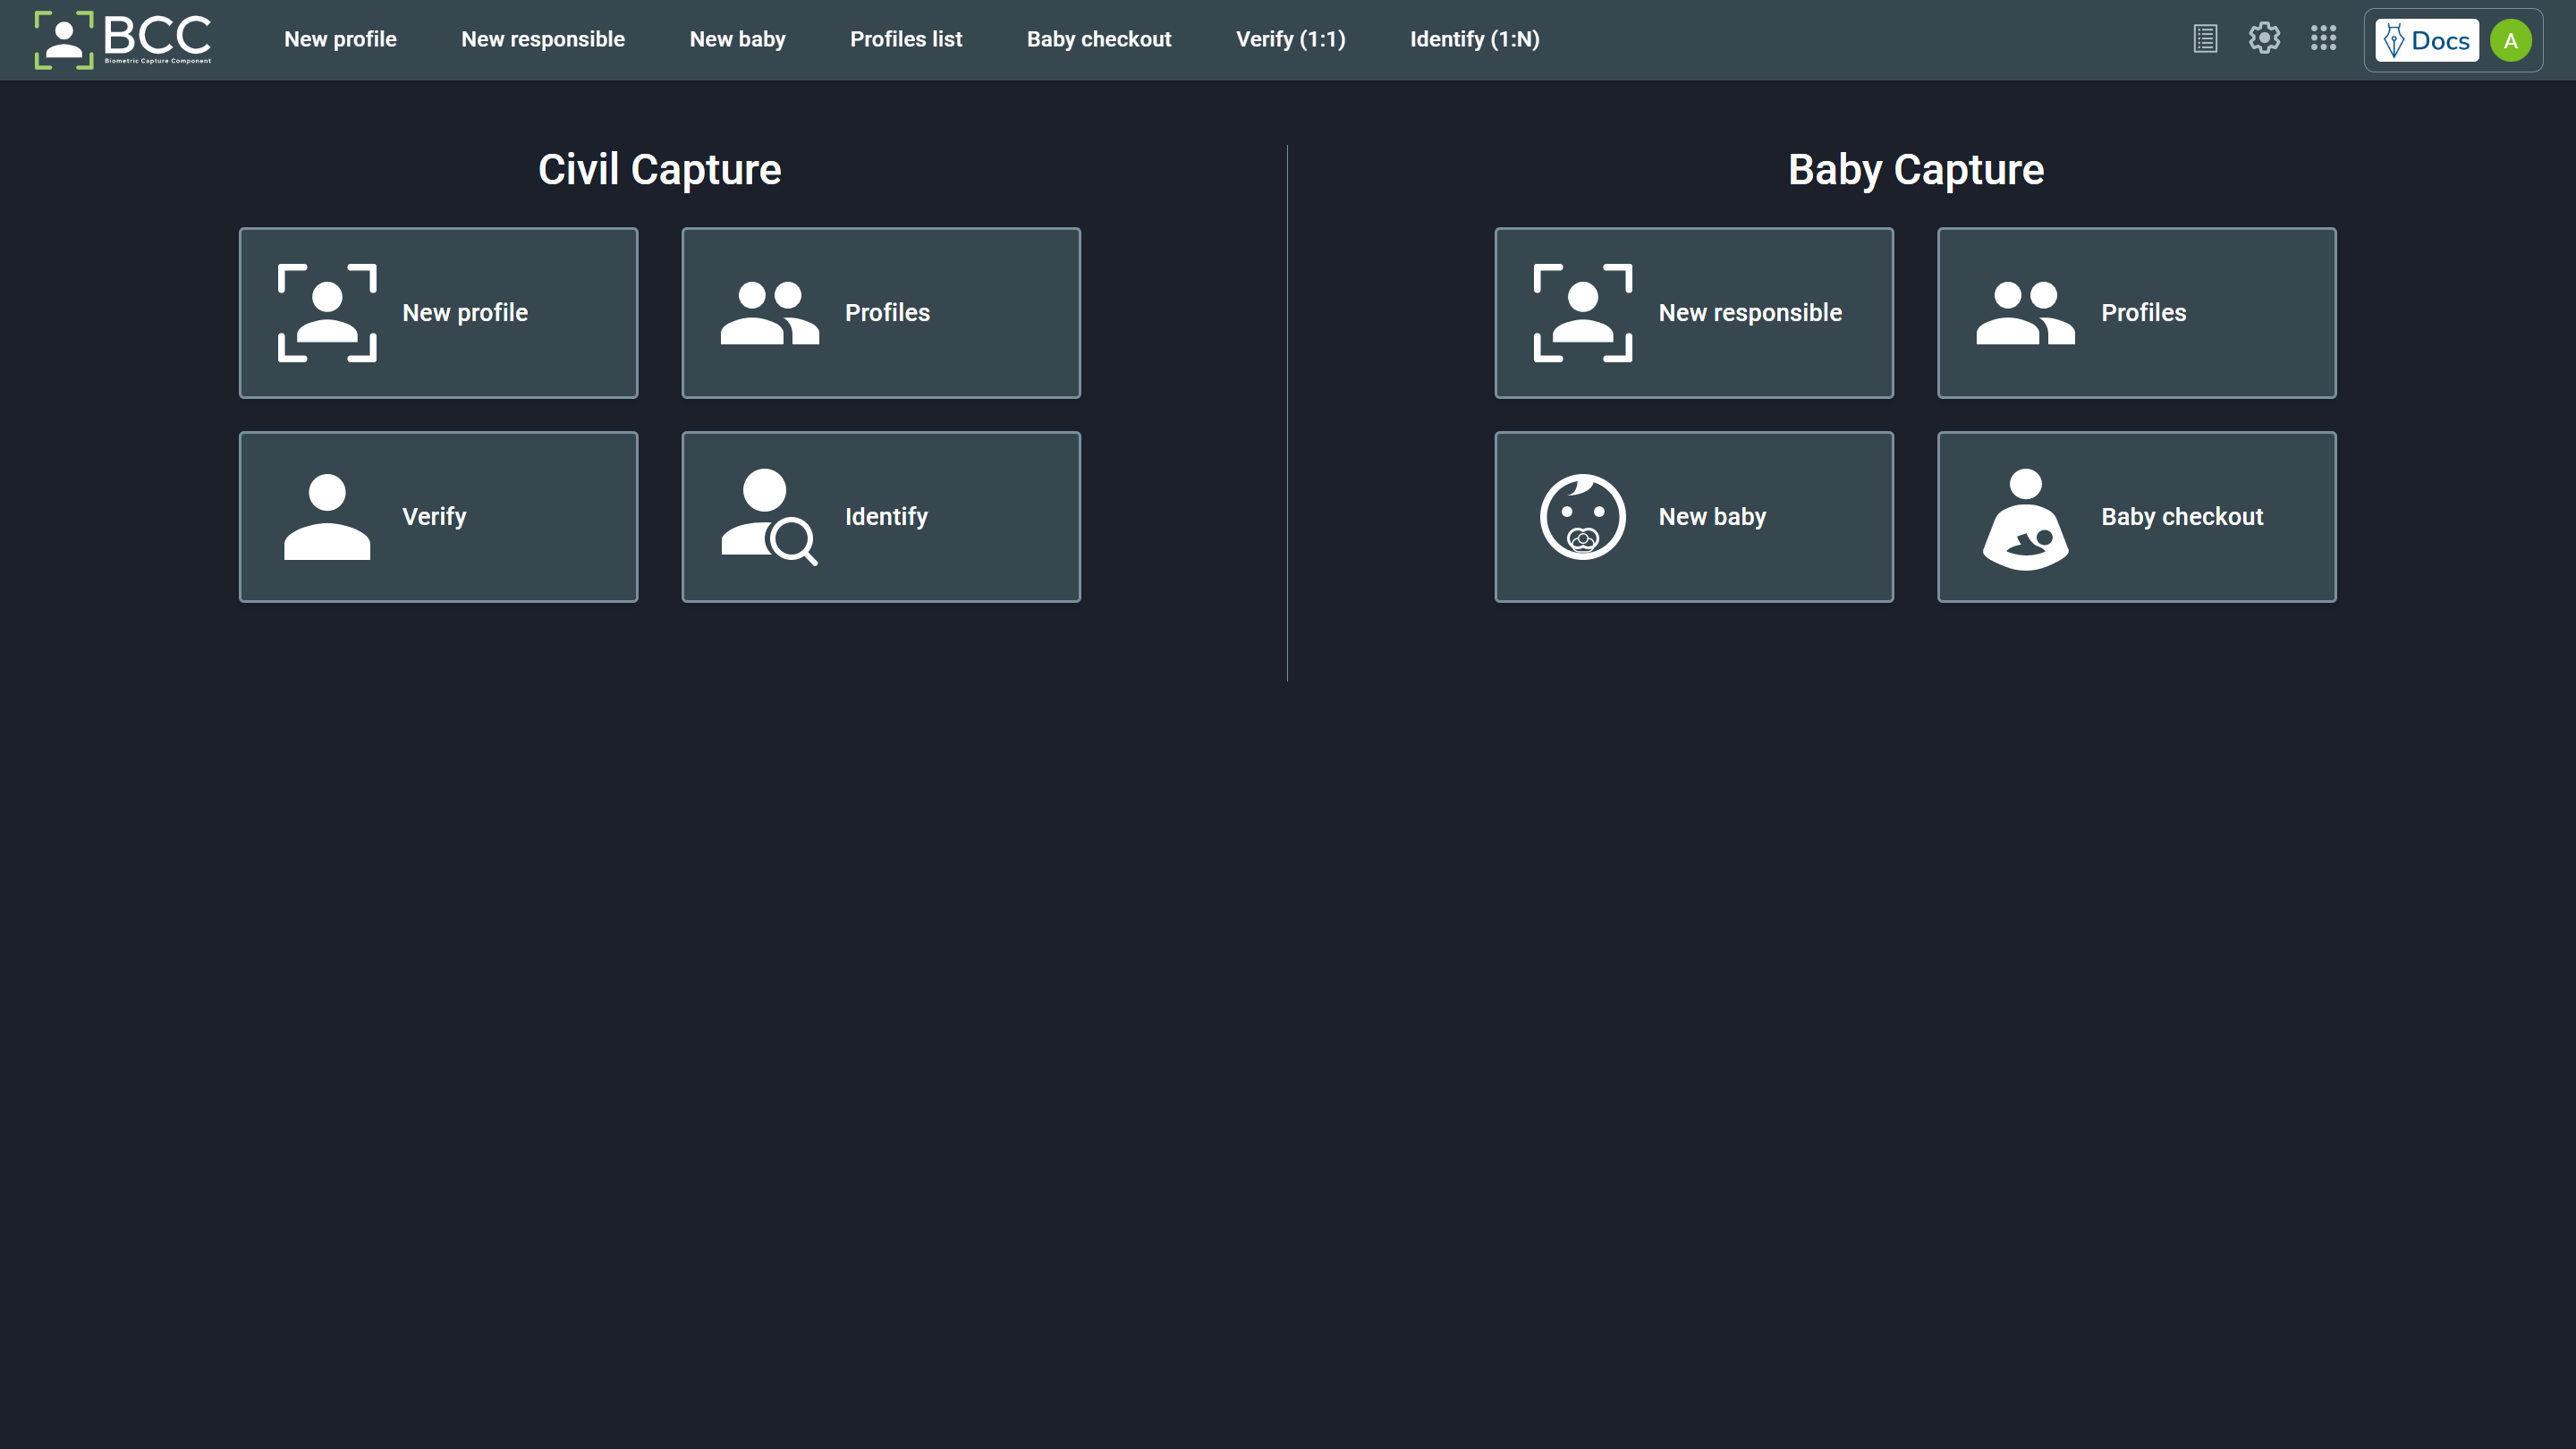
The main page is divided into the Civil Capture and the Baby Capture sections. You can also access those functions through the upper bar. There are some options on the right end of the upper bar, they are listed in the Settings and Shortcuts chapter.
5. Civil Capture
A civil capture is a process of enrolling a person in the database by obtaining their biometric and biographic information. The biometric data that BCC can capture is:
- Fingerprints
- Palmprints
- Iris
- Face
- Signature
And the biographical data are the ones previously configured on the Fields page.
To start a civil capture, click the New Profile box.
5.1. New Profile
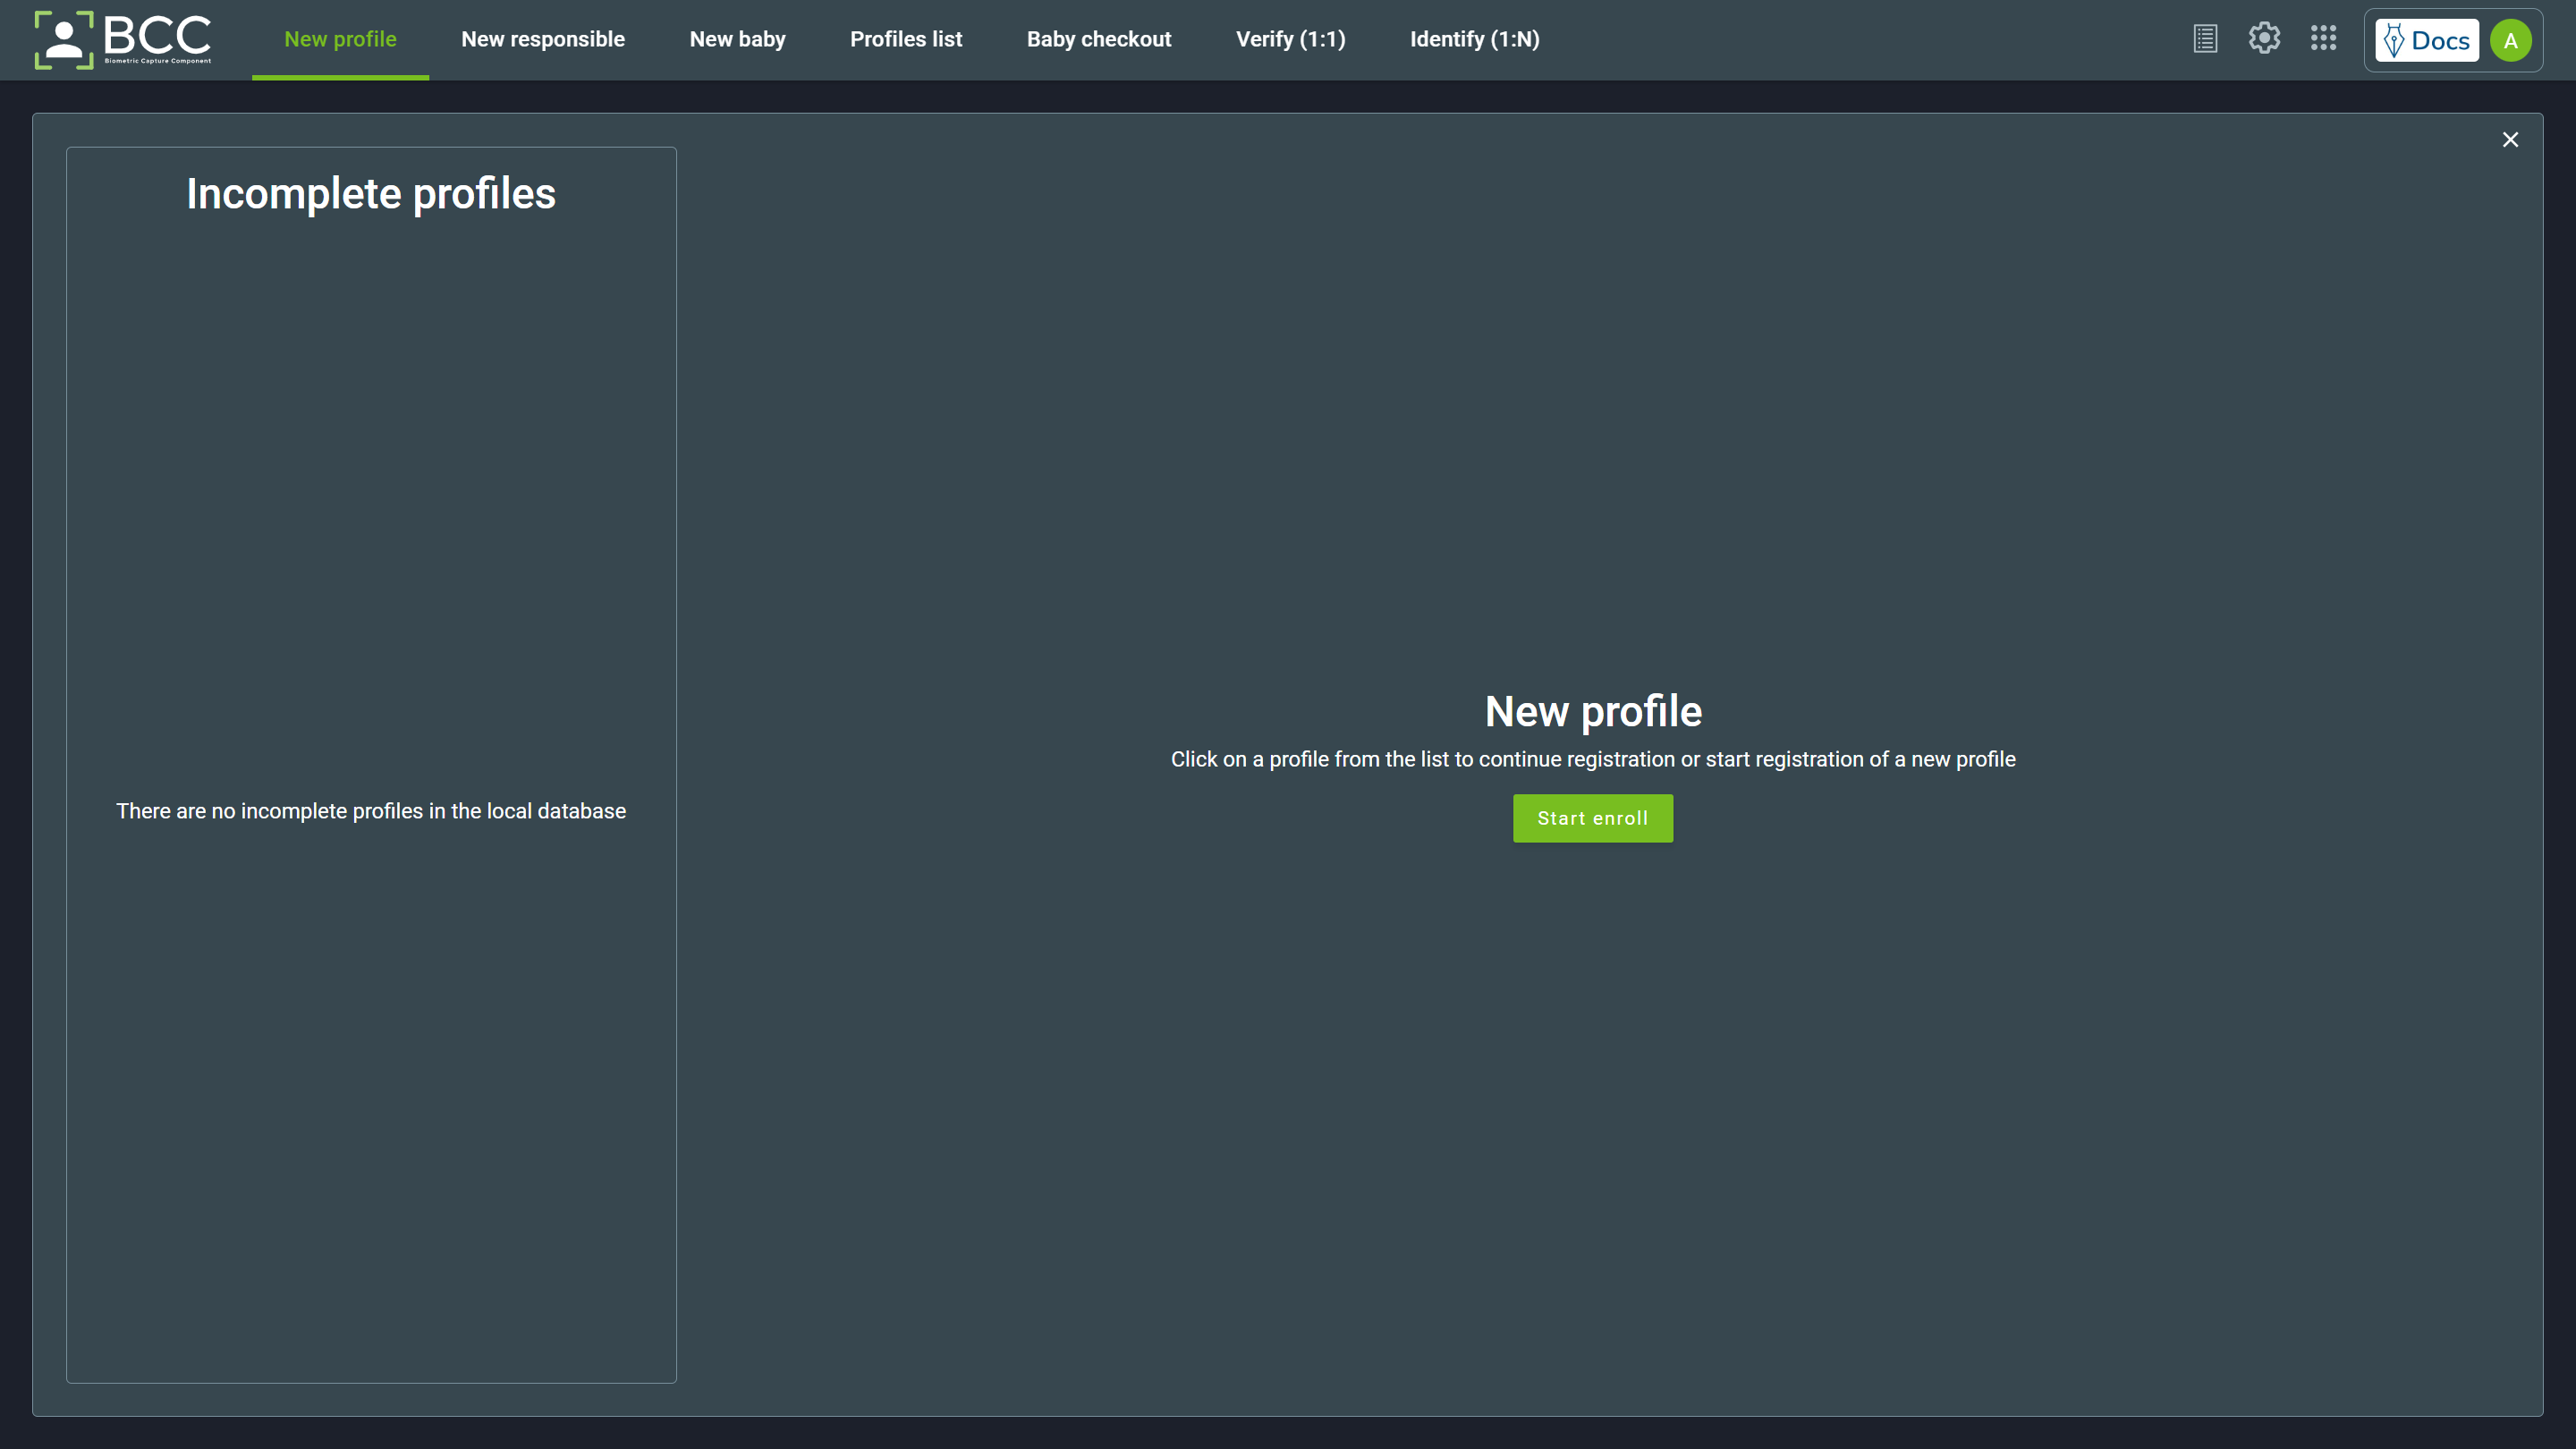
When opening the New Profile page, you will have the option to continue from an incomplete profile through the lateral menu or click the Start enroll button to start a new enrollment.
Clicking the Start enroll will lead you to a page to input the person’s biographical data. You can configure the data to be collected on the Fields page.
Important
The biographic information will always be the first information to be filled in a new profile. However, the order and which biometrics will be present may vary depending on your environment.
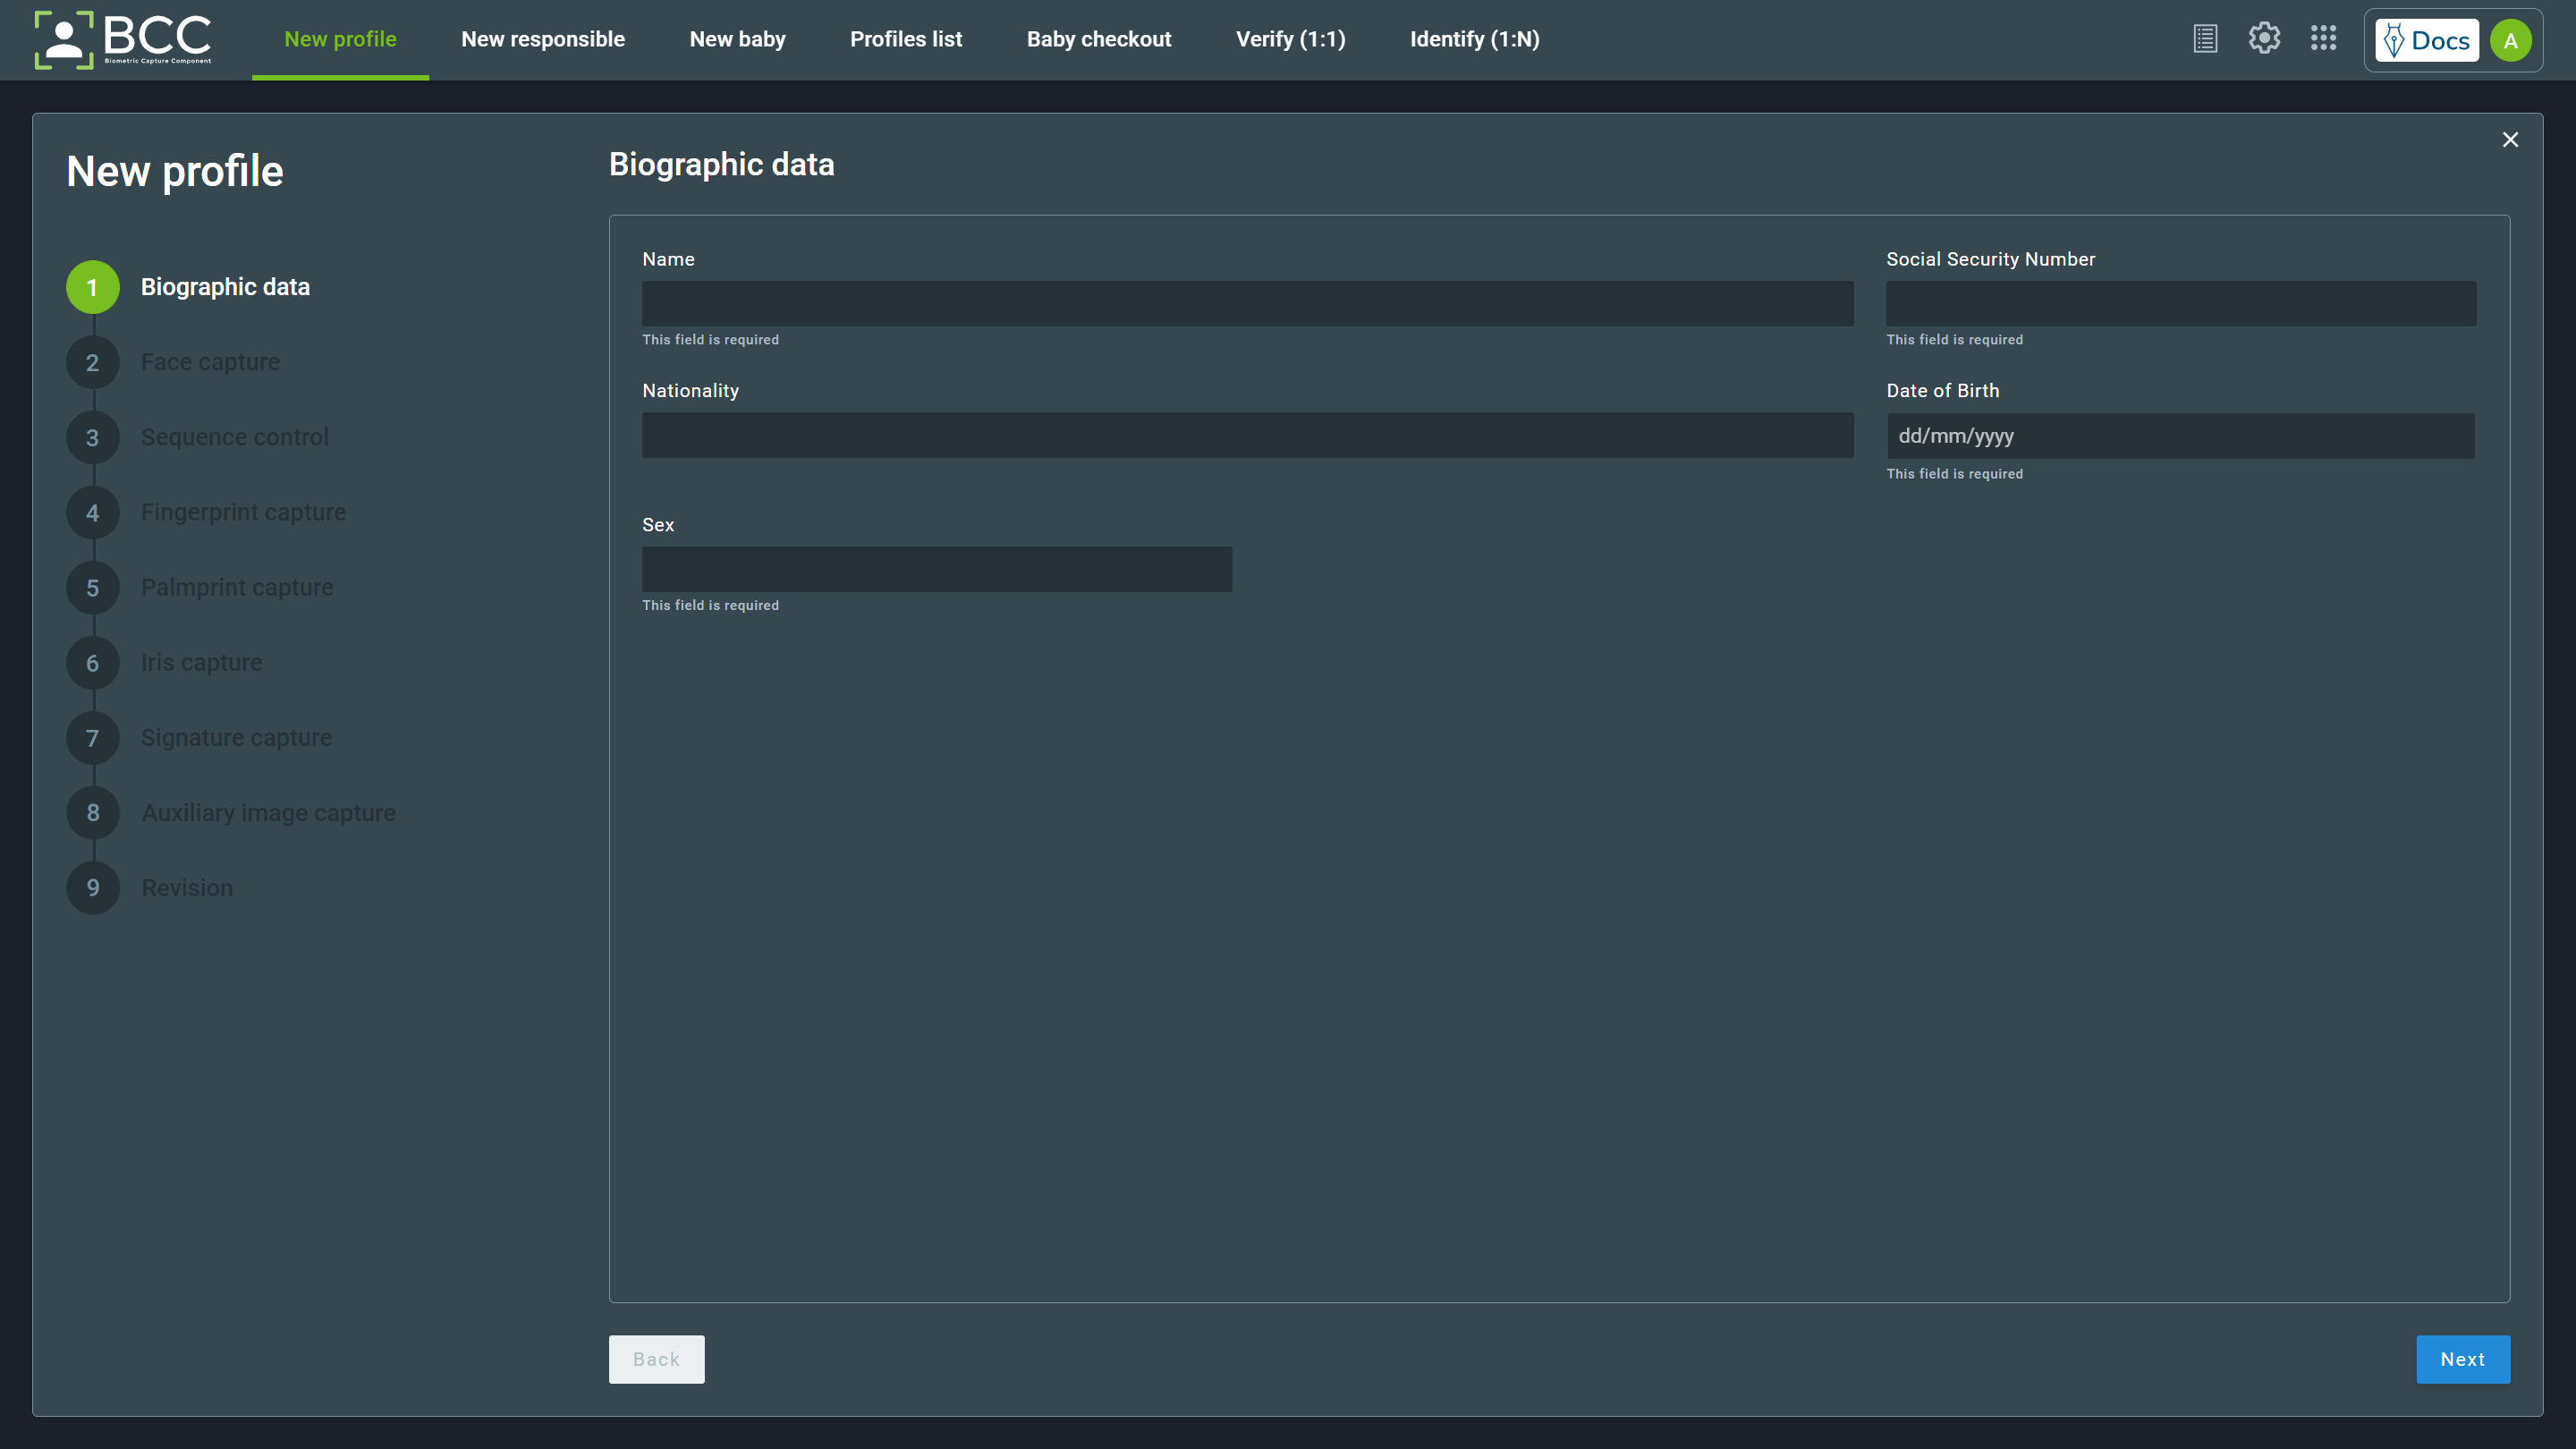
After providing the necessary biographical information, click the Next button. It will lead you to one of the configured biometric pages for collection. The biometric capture pages will be described below.
5.1.1. Face Capture
To capture a face, ensure that a camera is already connected to the computer. If there is no camera or the system does not recognize it, an error will occur:
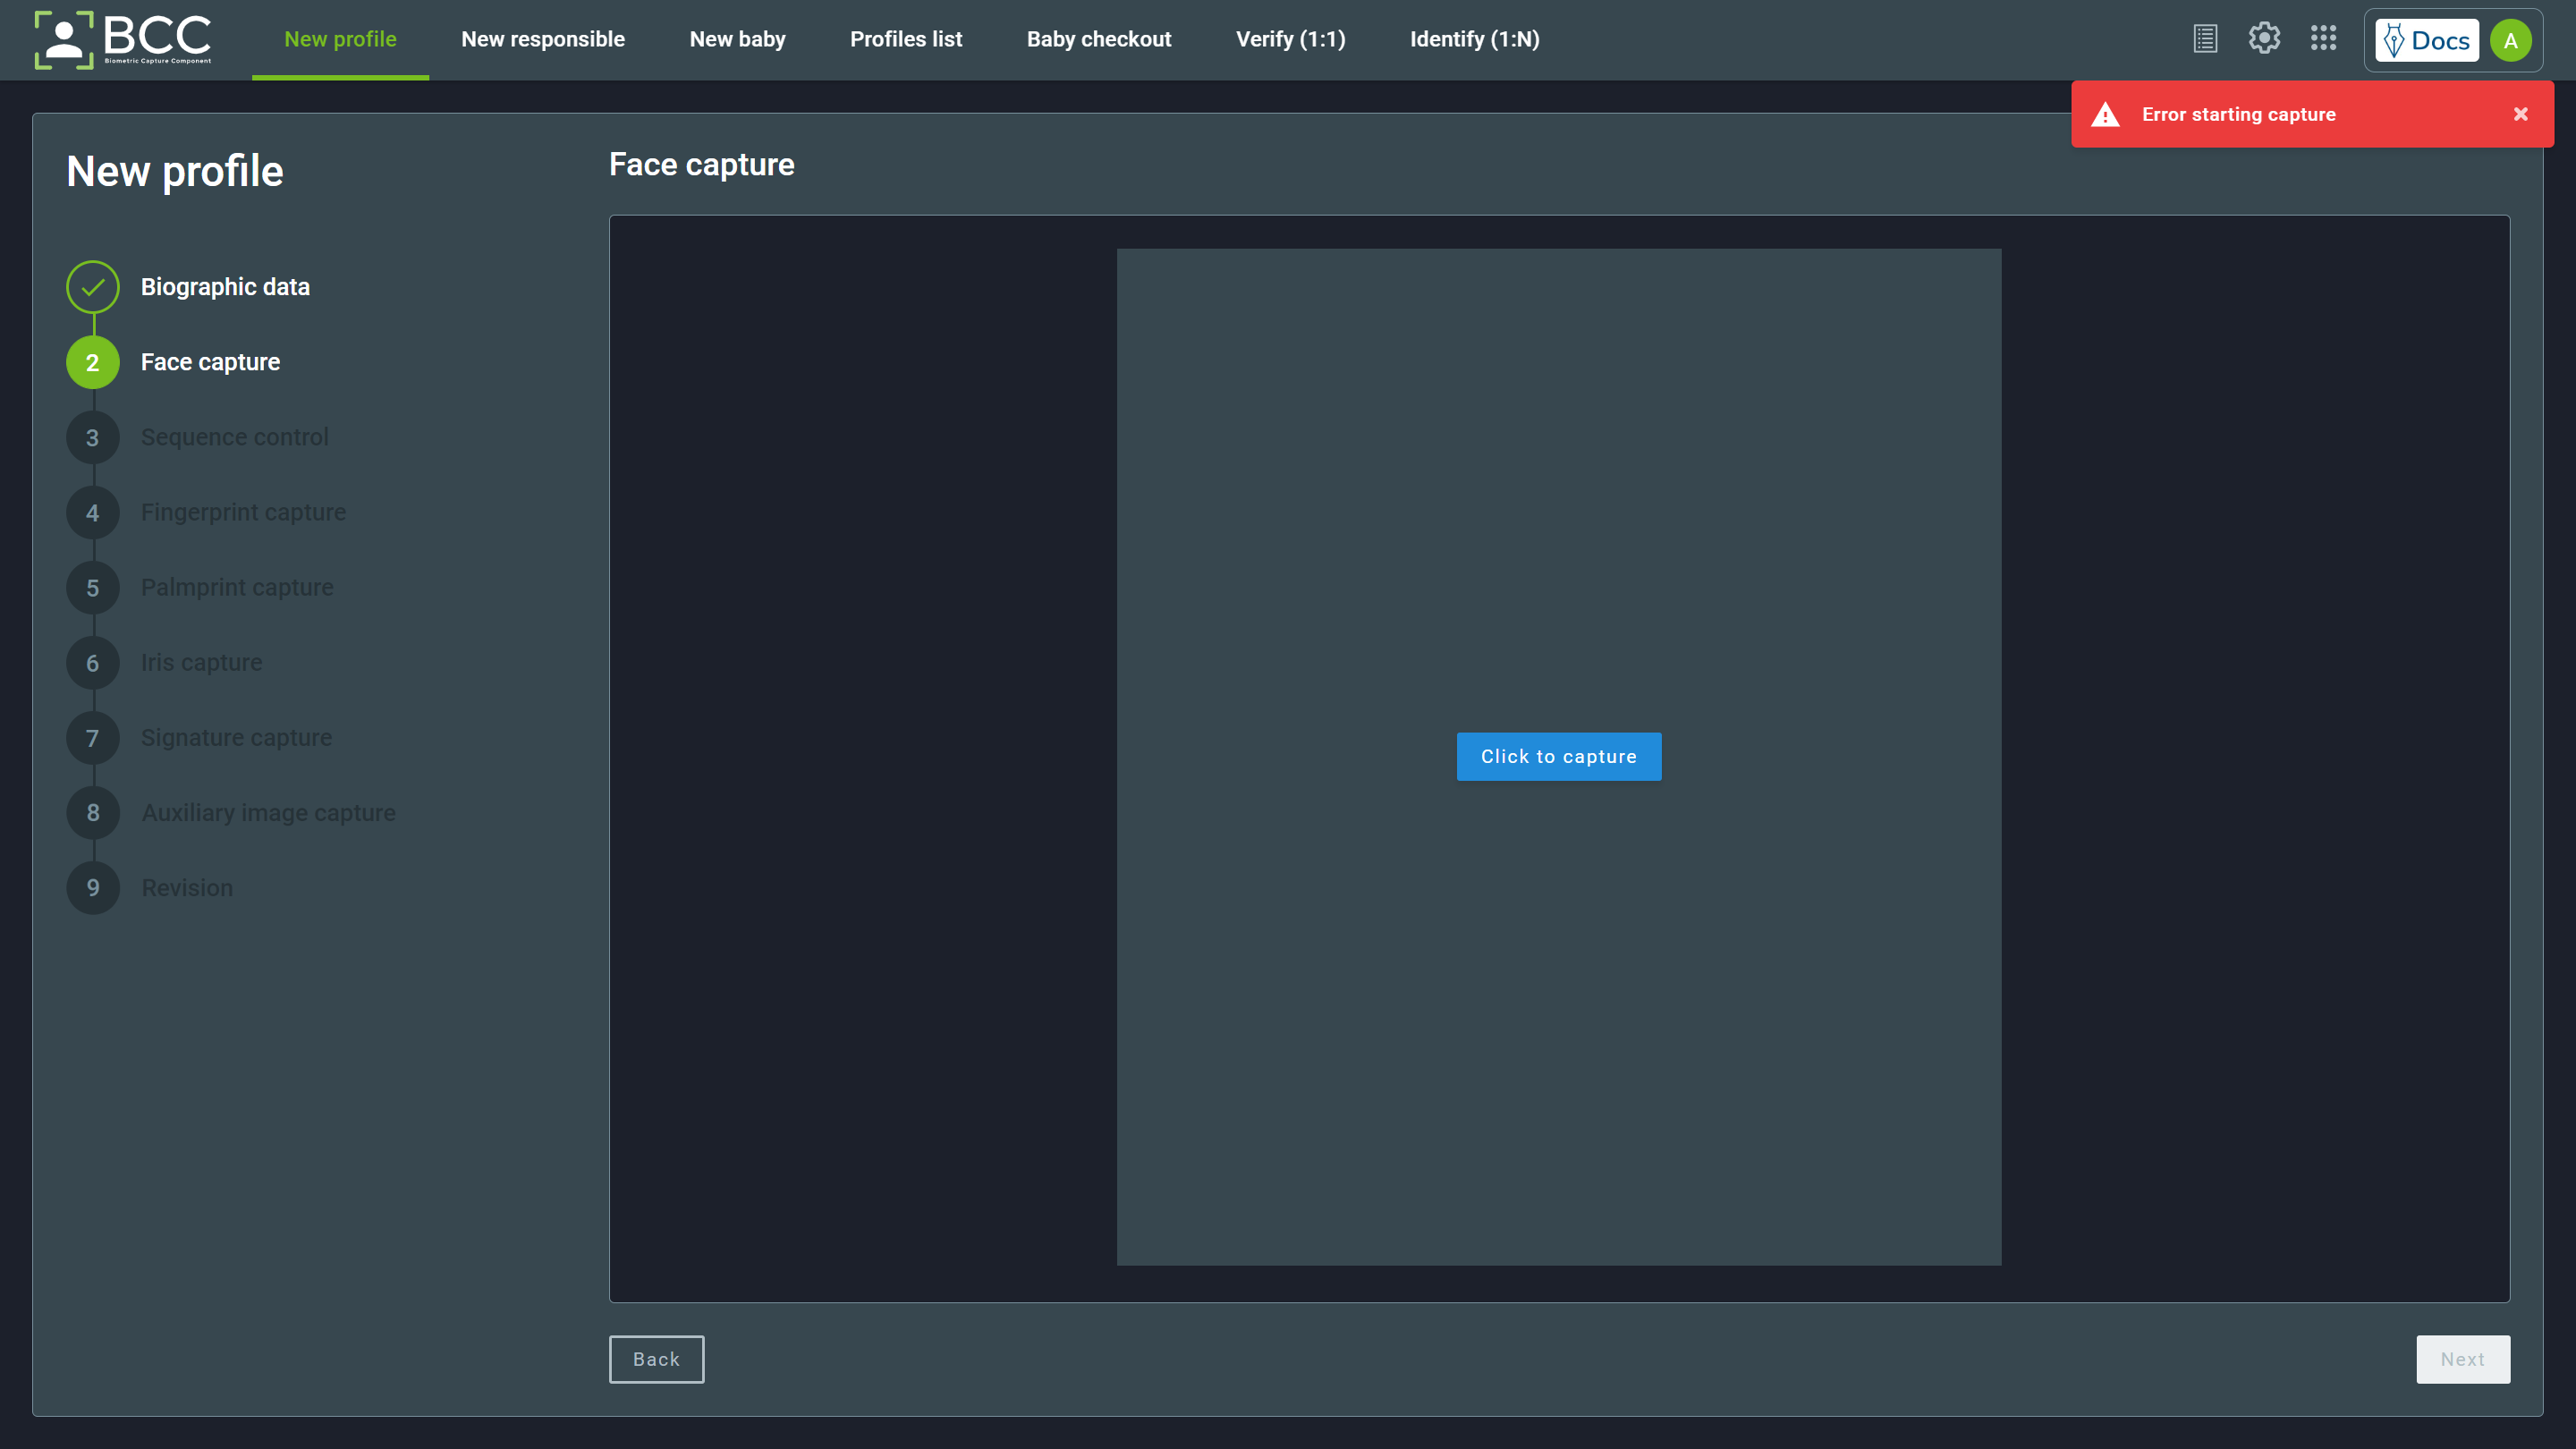
The BCC Services will automatically open the capture window if the camera is connected.
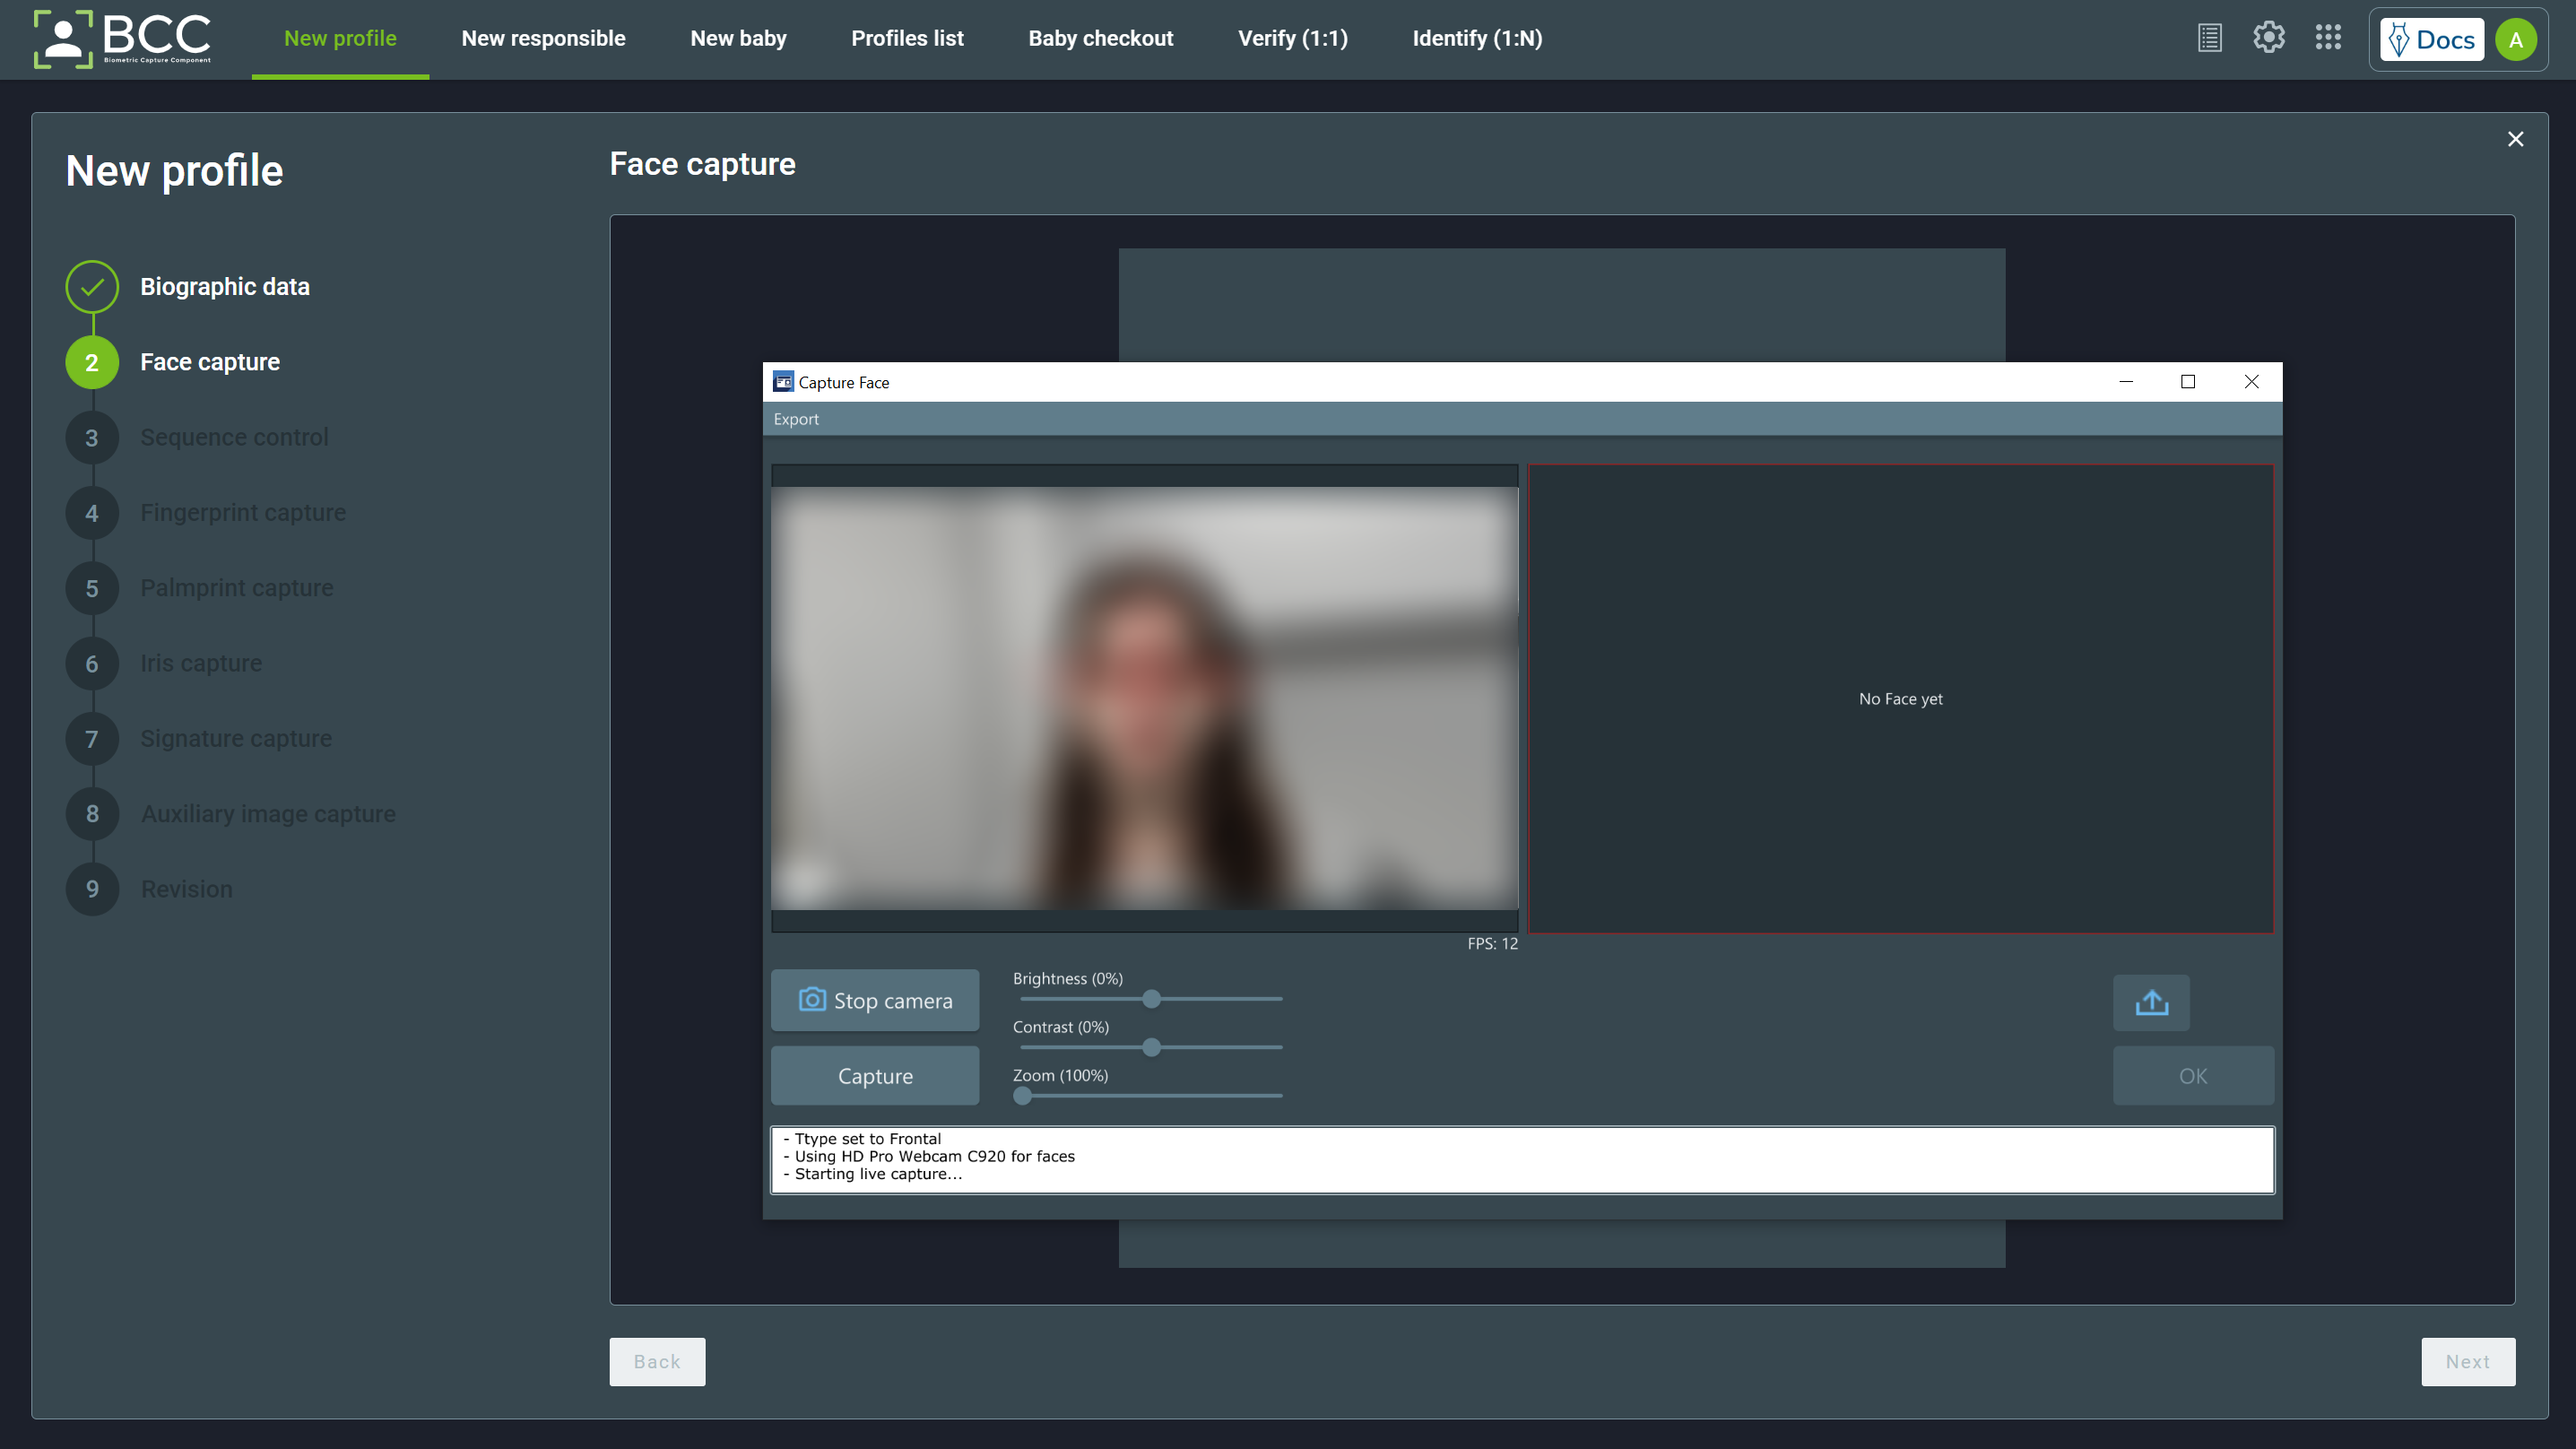
Depending on the settings of your environment, the capture may start automatically. If not, click the Start Camera button. Then, wait for the automatic capture or click the Capture button.
You may correct the brightness, contrast, and image zoom through the sliders on the left side during the capture process.
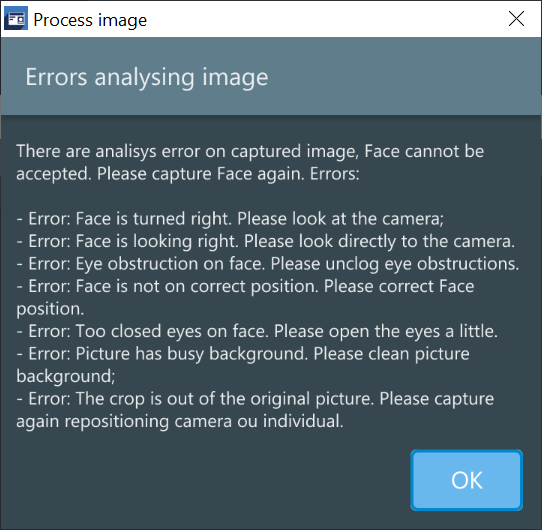
After the capture, BCC will try to cut the image to ICAO standards, and if they are not met, an error message will appear, as shown in the image. After the first capture, you may also upload an image by clicking the import button above the Ok.
Note
Some options may not appear to you if you do not have the user’s permission to access those.
BCC will also try to correct the brightness and contrast after capture. You may also modify this through the sliders.
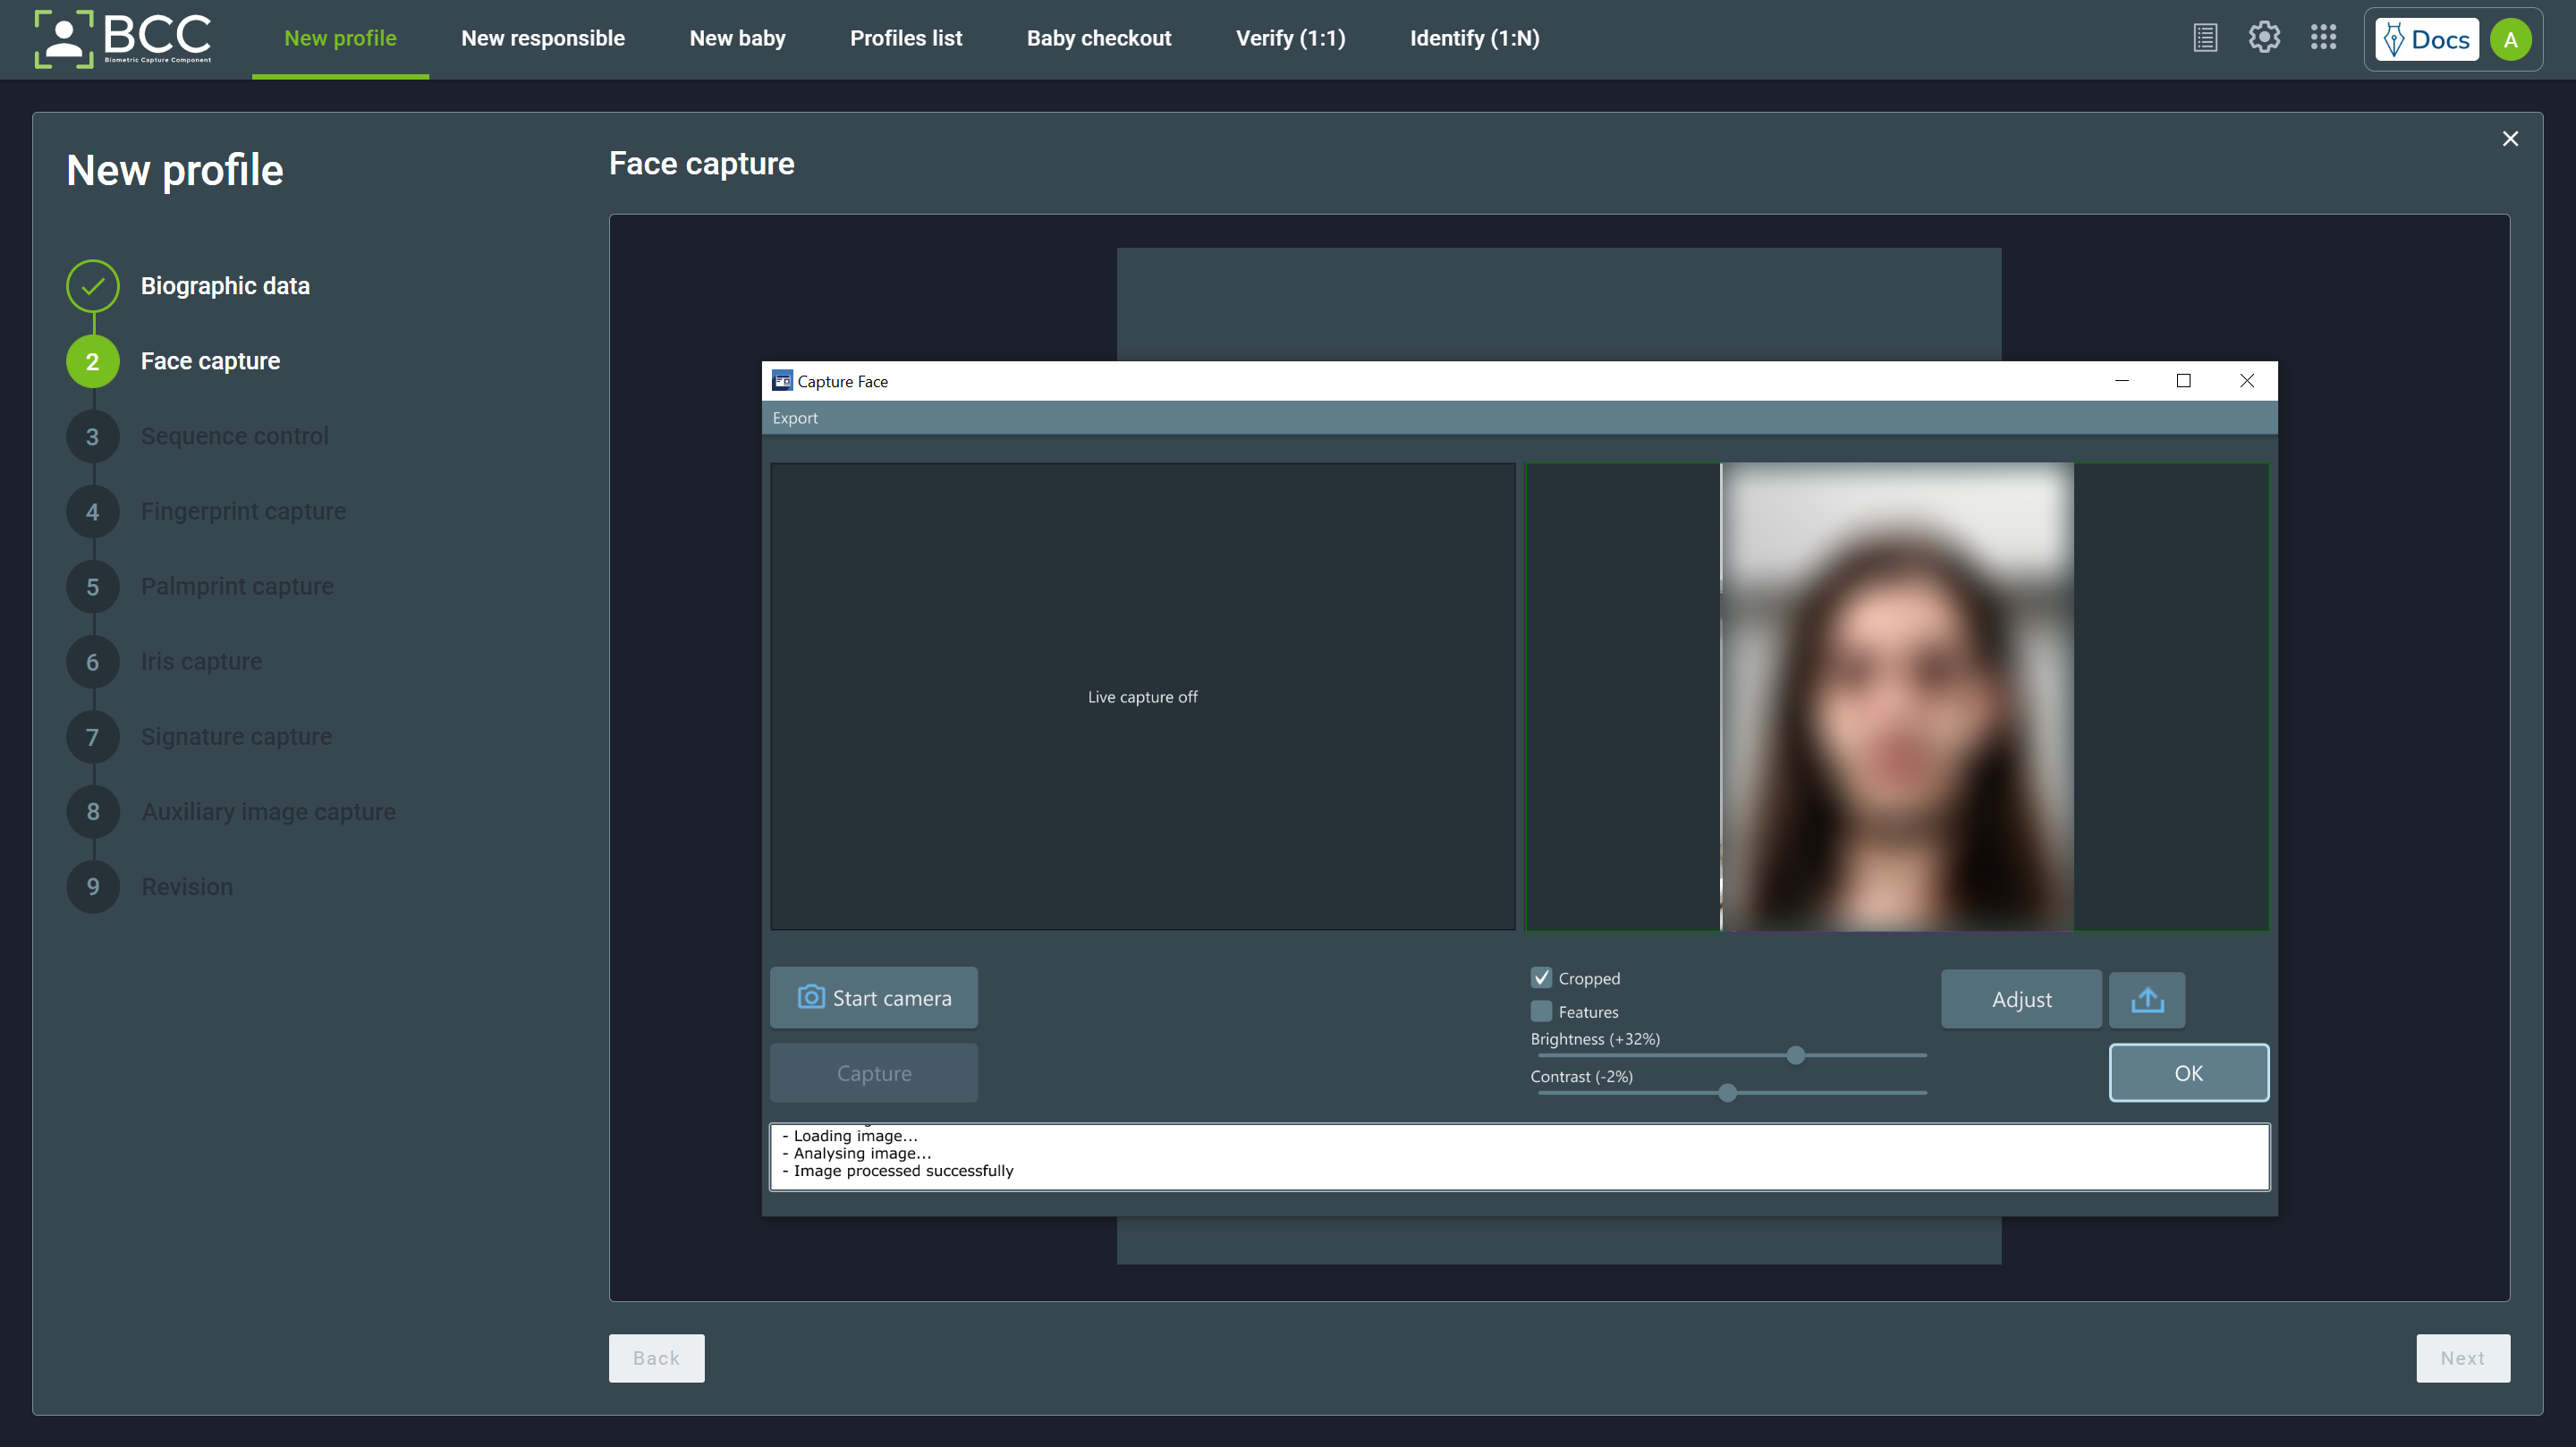
You may also verify if BCC got the correct positions for eyes and mouth by checking the Features box. It will put a + marker on the eyes and mouth. You may correct the marker position by clicking the Adjust button.
After clicking the Adjust button, select the desired eye and correct the positions. After fixing both eyes, click the Reprocess button, then click Ok.
Then, click the Next button to proceed to the subsequent capture.
5.1.2. Sequence Control Capture
BCC offers two capture methods for sequence control: 4-4-2 and 2-2-1. When you get to the page, the capture should automatically start. If not, click the Click to capture button.
In the Capture Screen, you can see some information regarding the capture:
- Live capture window
- Quality properties of the capture (NFIQ, Template, and Contrast quality)
- What fingers must be captured, highlighted in red and written on the top side
- Fingers already captured, highlighted in green
- Fingers with an exception, highlighted in yellow
- Sensor information
- Show features checkbox
- Capture type
- Log information
- Finger exception
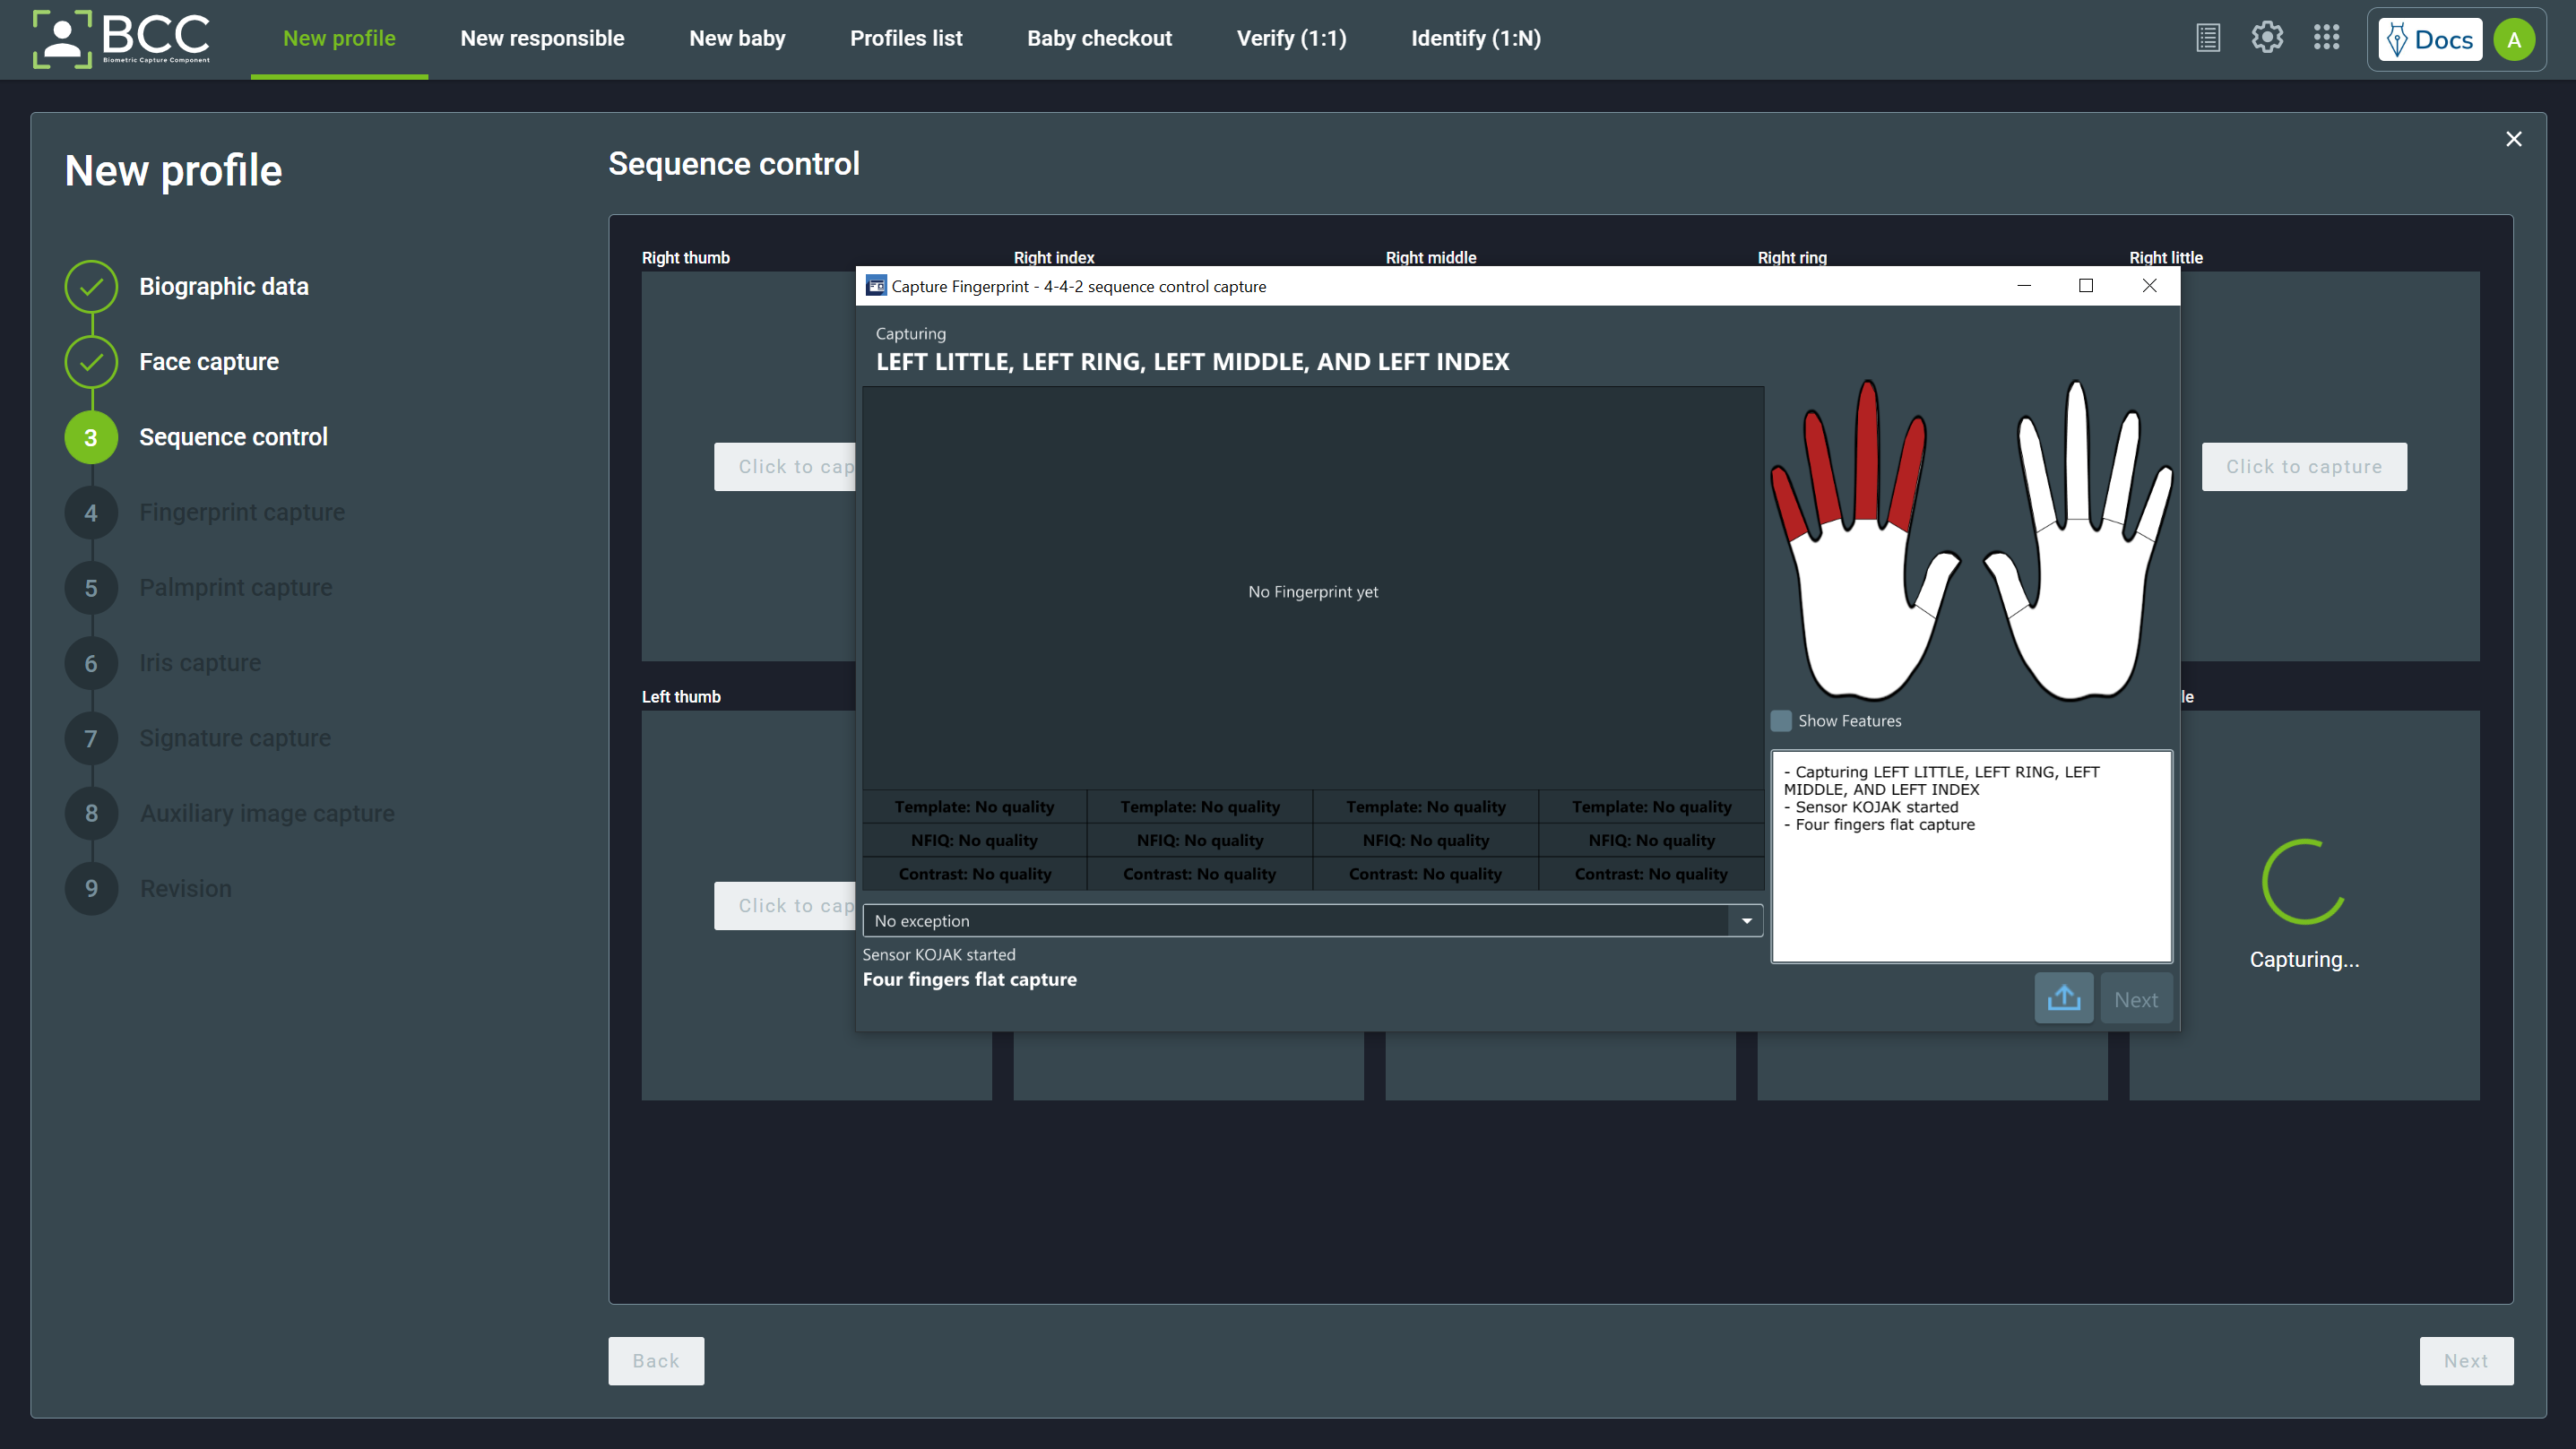
Whether there is an exception that prevents the capture, you can mark it through the dropdown menu on the left side of the capture window. The exceptions are listed at Fingerprint and Palmprint Exceptions. After selecting one of the exception options, the Finish button will change to an Accept button. Press that button to continue the collection.
Warning
Marking an exception in the sequence control capture will mark ALL fingers that are highlighted with the exception.
Additionally, you may check the “Show Features” checkbox and show the minutiae extracted from the fingerprints at the capture screen. If you have the permission, you may also import the fingerprints by clicking the import button.
Note
If you choose to import the sequence control, you need to import an image containing all highlighted fingers.
You will need to recollect the sequence control step if any finger does not meet the configured quality criteria (template, NFIQ, and contrast quality). After the capture is completed, you can see the quality of the capture at the bottom of each fingerprint. You may also check the “Show Features” checkbox. It will show the minutiae extracted from the fingerprints at the capture screen.
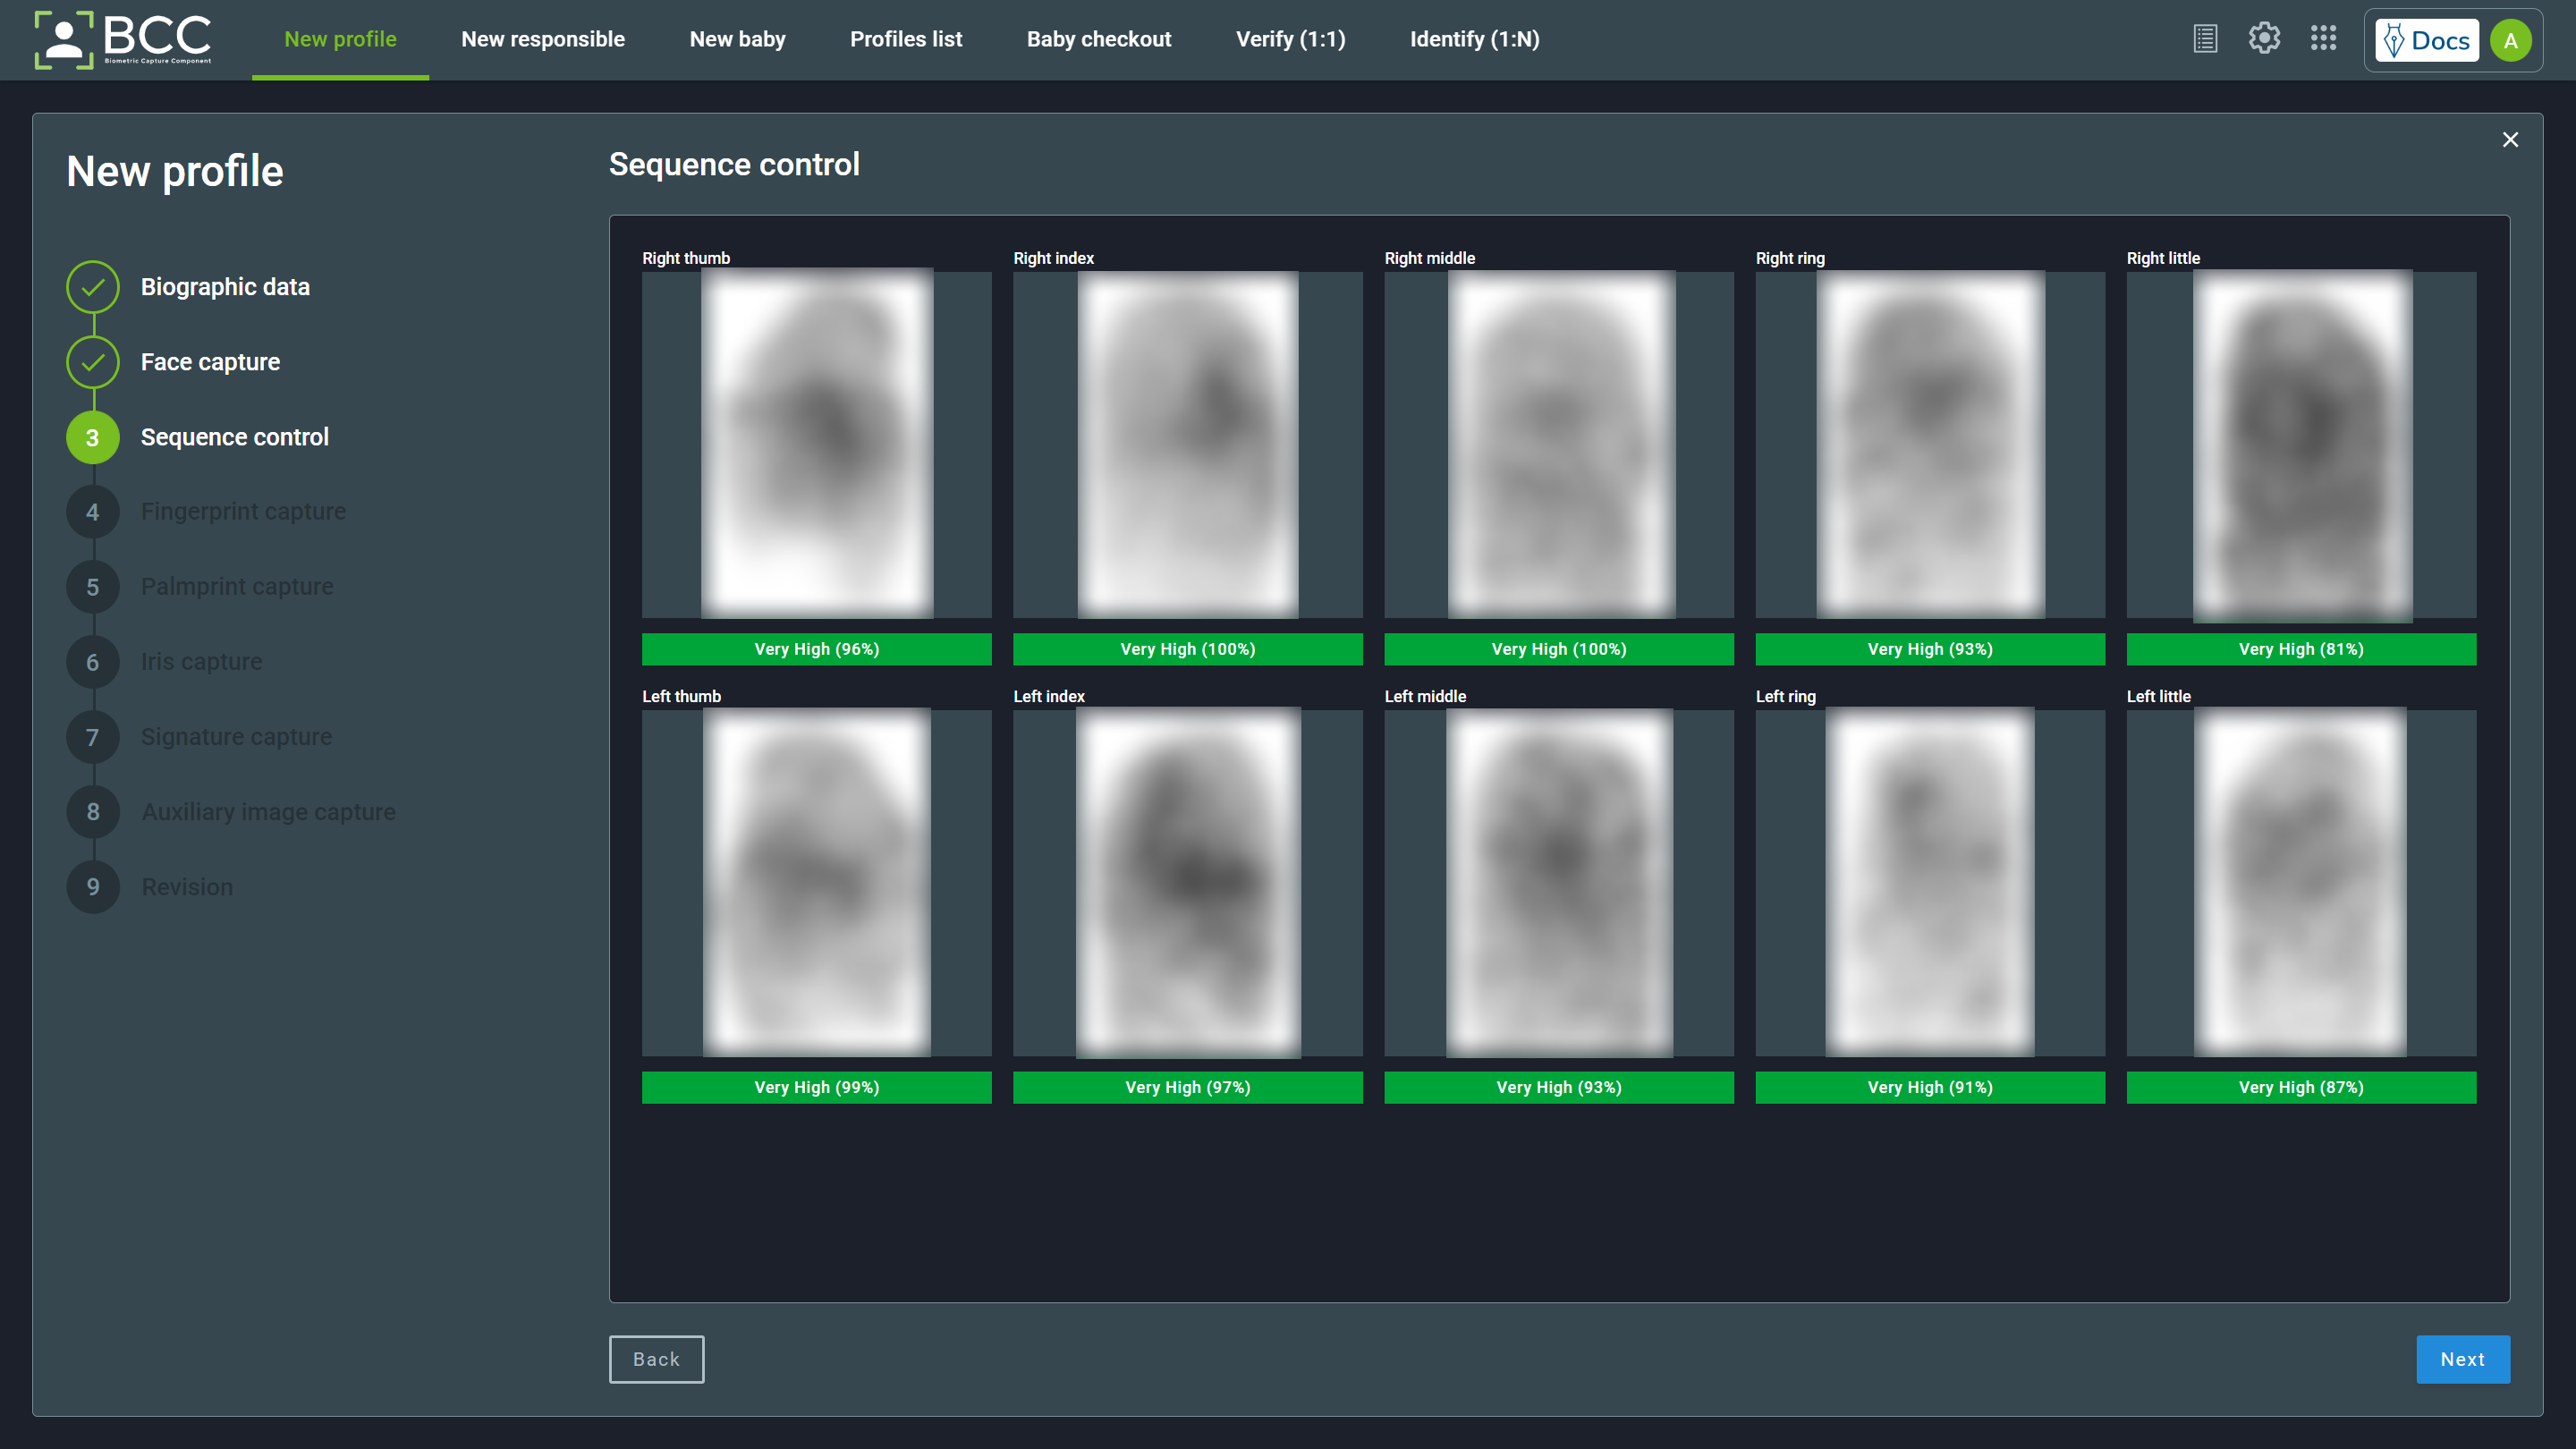
Hover your mouse over the desired fingerprint to remove or recollect them.
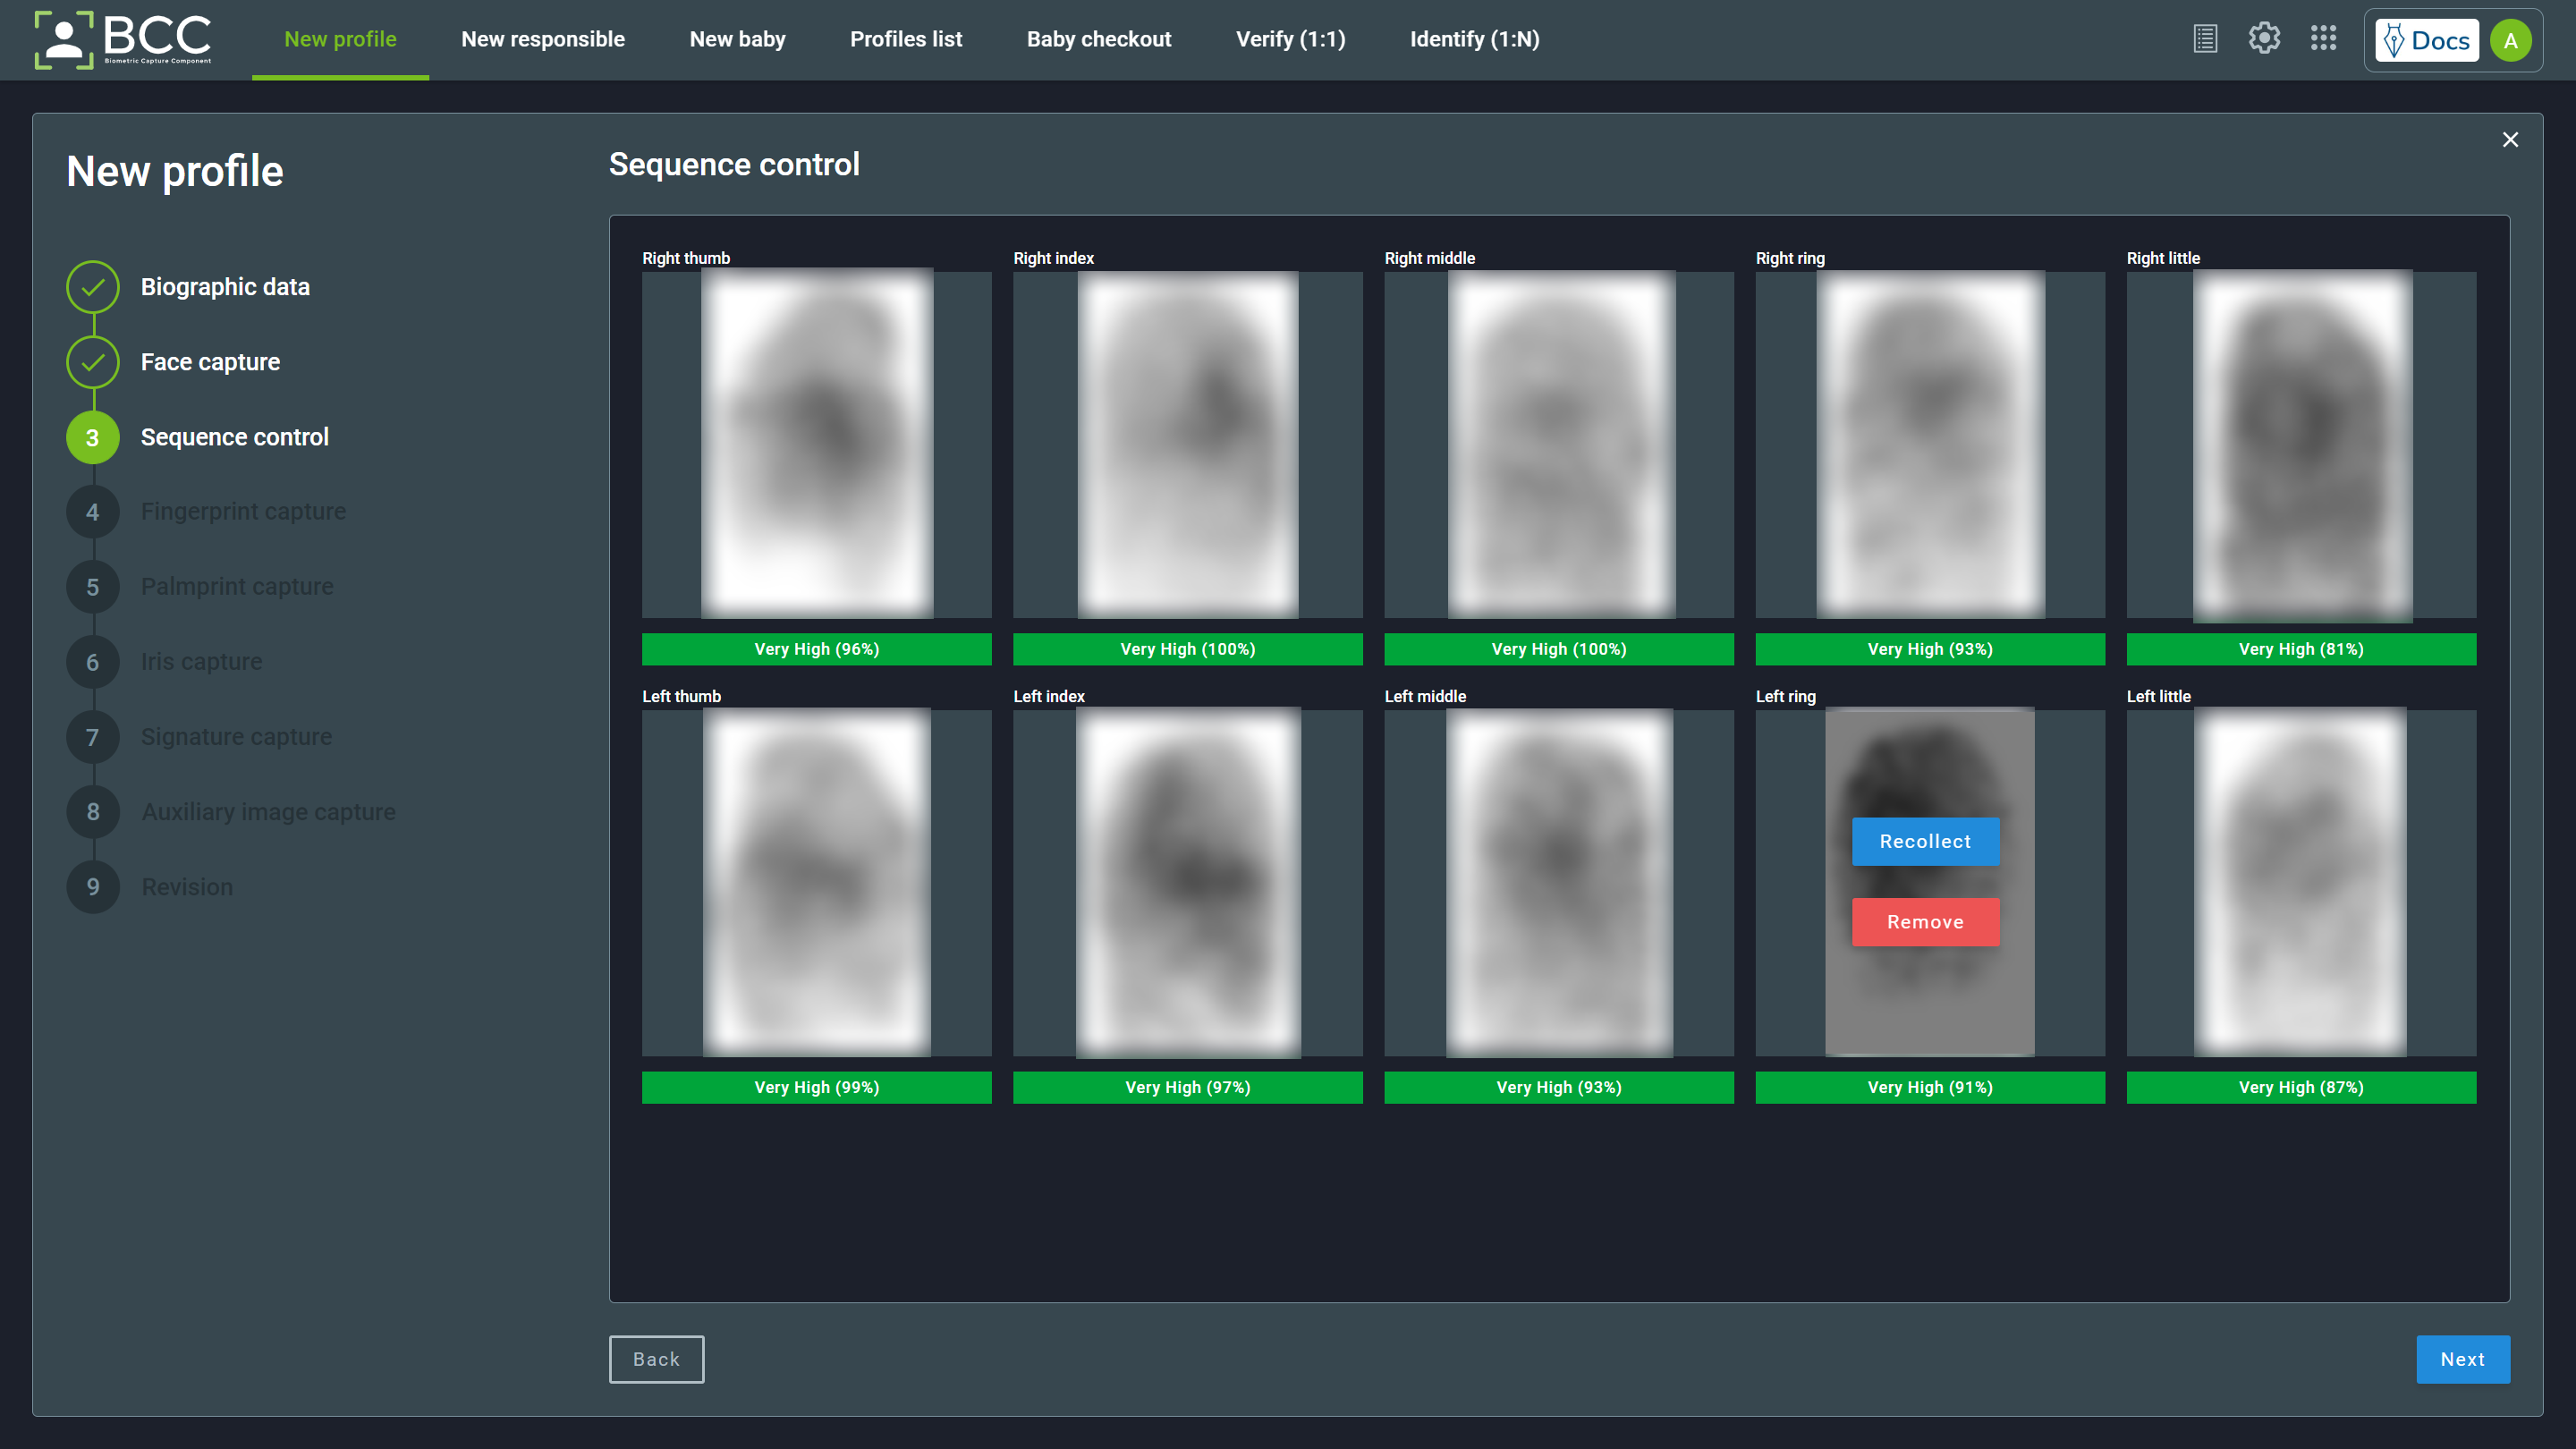
Important
You can only remove or recollect the sequence control fingerprints if none of the fingers from the main capture are collected. If recollection is needed, remove all main capture fingerprints.
Warning
Whether you need to recollect some sequence control capture, ALL sequence control captures steps must be recollected. E.g., After a successful capture, if you click to recollect the thumbs, you will need to recollect all 4-4-2 or 2-2-1 captures.
To progress to the next capture phase, click the Next button.
5.1.3. Fingerprints Capture
BCC offers the possibility to perform rolled and flat capture. When you get to the Fingerprint Capture screen, the Fingerprint Capture window will open. This window will show some information:
- Live capture
- Capture quality properties (NFIQ quality, template quality, and contrast quality)
- What finger needs to be captured, highlighted in red, and written on the top side
- Sensor information
- Show features checkbox
- Capture type (flat or rolled)
- Log information
- Finger exception
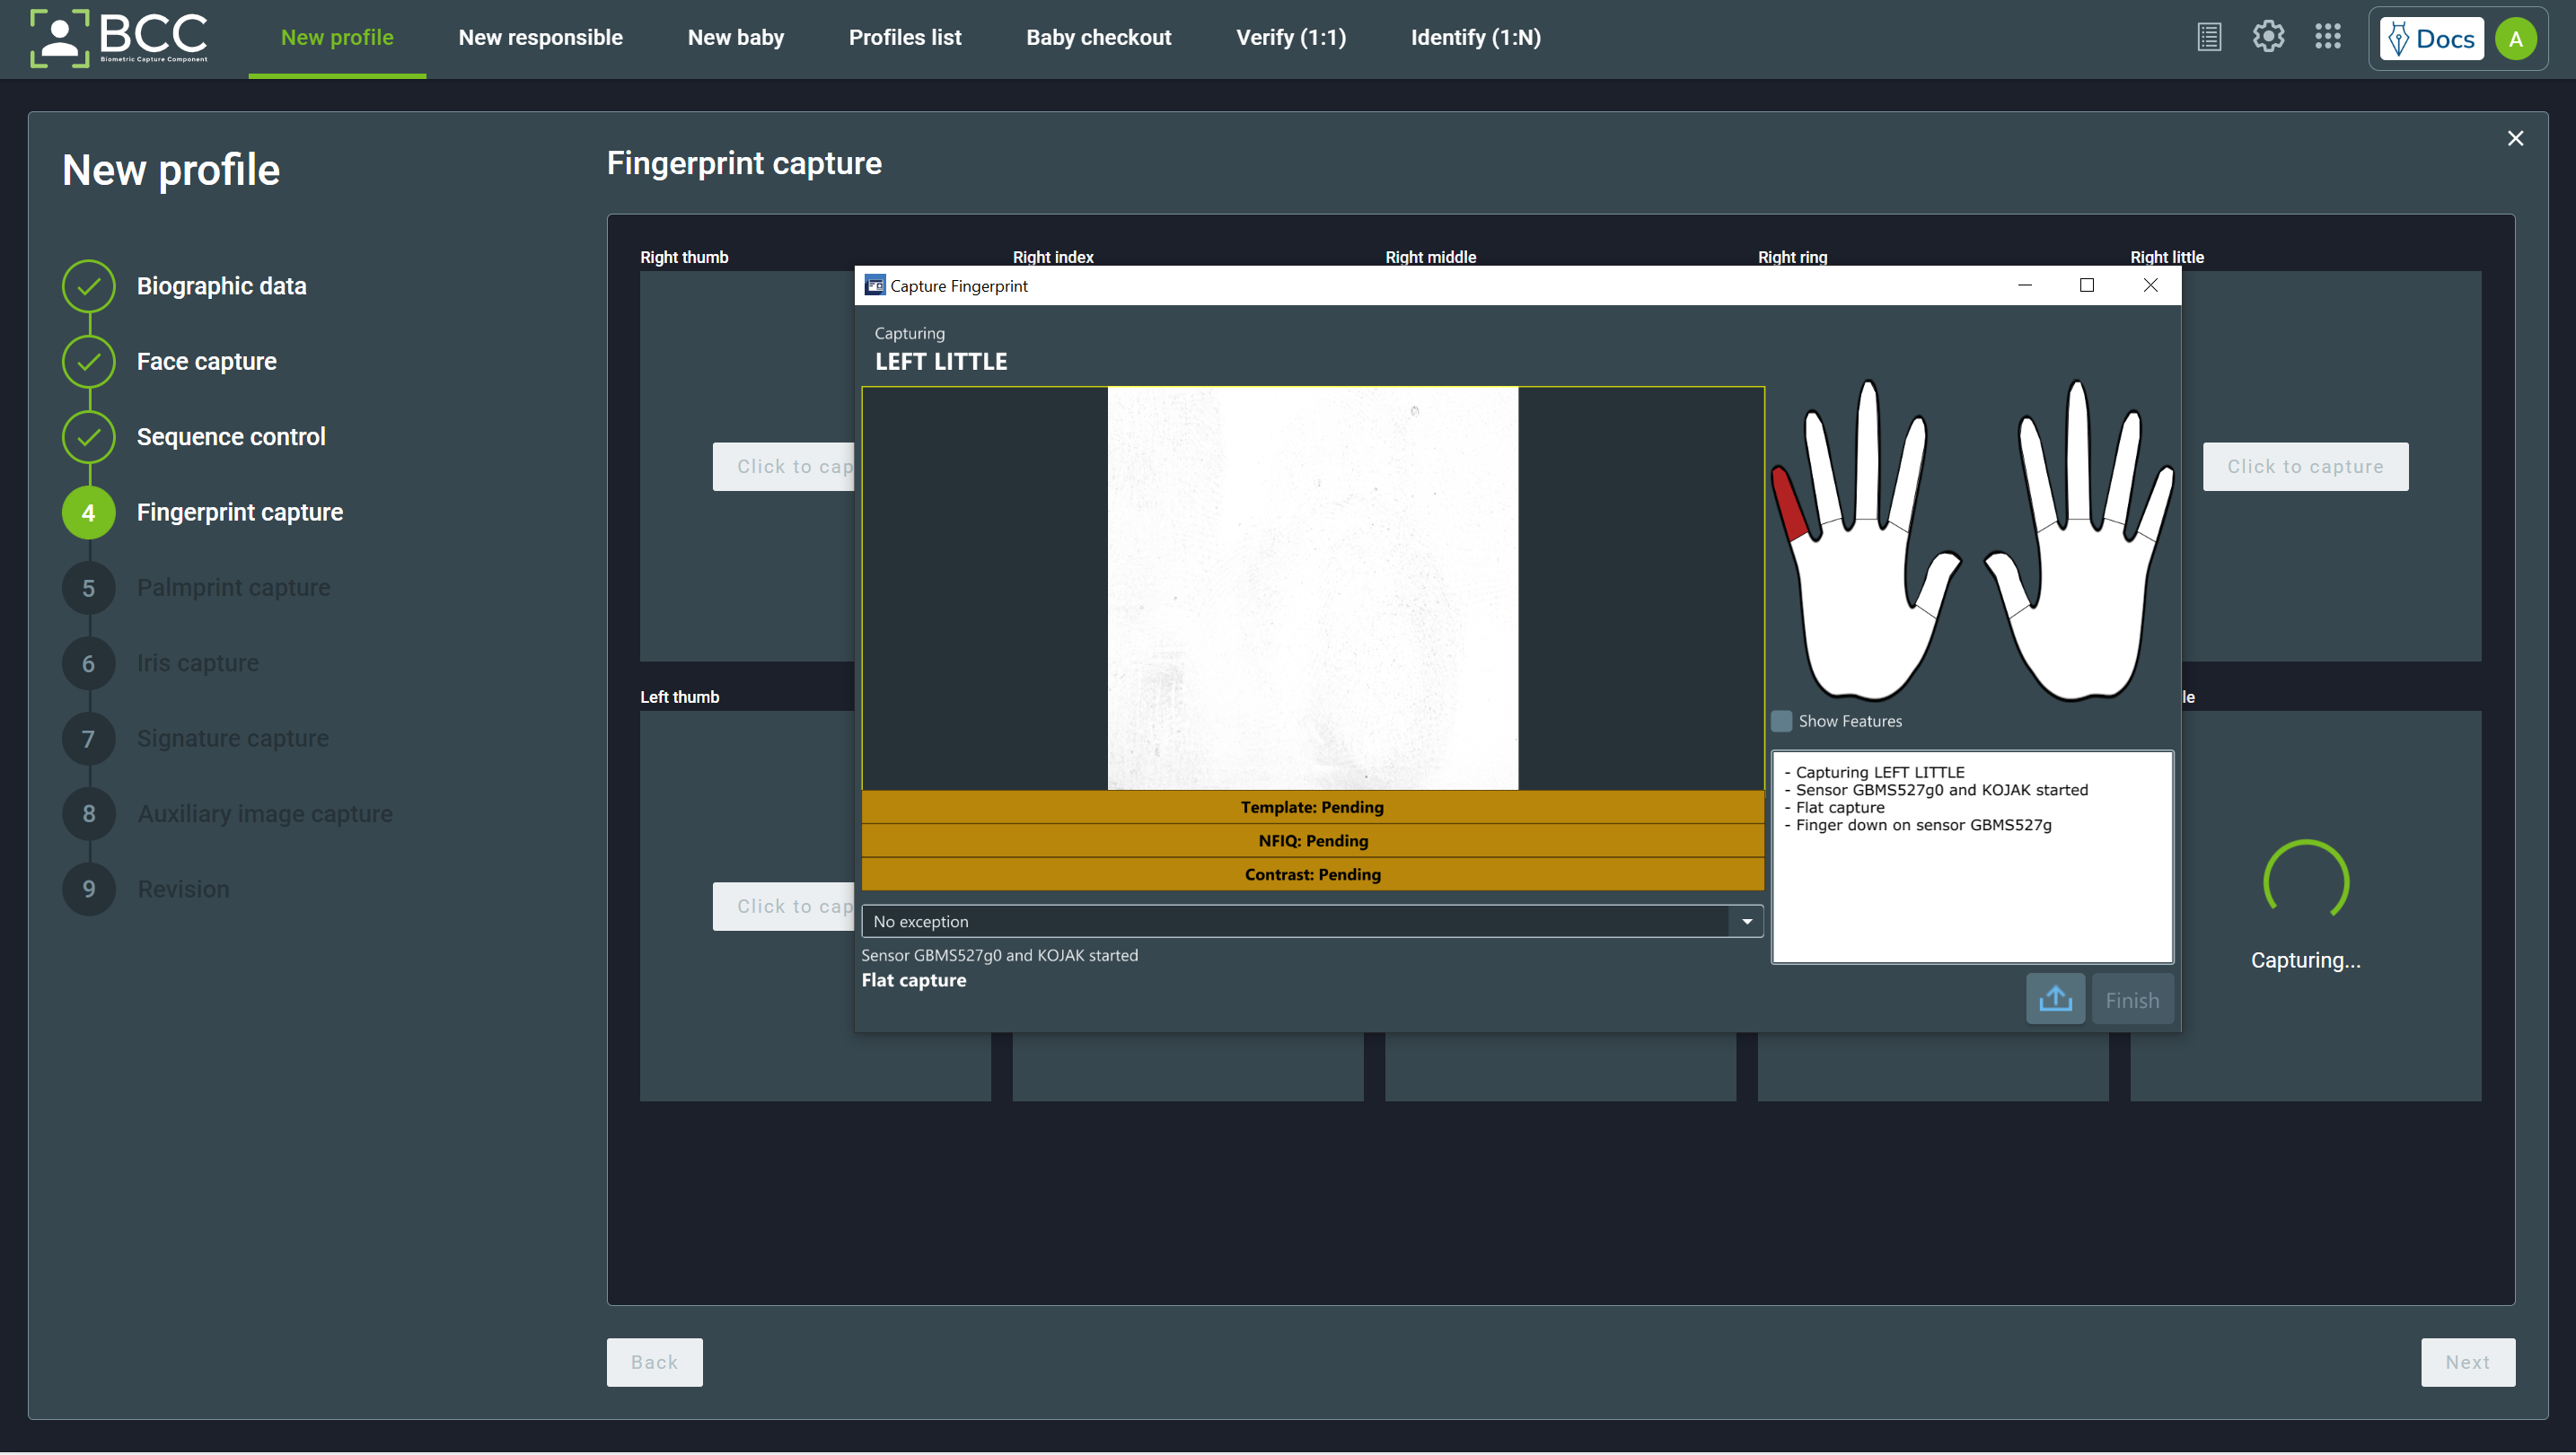
After performing a capture, BCC will calculate the quality of the extraction. If any capture does not meet the configured quality criteria (template, NFIQ, and contrast quality) or does not match with sequence control (when captured), you will need to recollect the fingerprint. You may also import a fingerprint image through the import button near the Next button if you have the proper permission.
Whether there is an exception that prevents the capture, you may mark it through the dropdown menu on the left side of the capture window. The exceptions are listed in Fingerprint and Palmprint Exceptions section. After selecting one of the exception options, the Finish button will change to an Accept button. Press that button to continue the collection.
During the collection, you may check the “Show Features” checkbox. It will show the minutiae extracted from the fingerprint at the capture screen.
To remove or recollect a fingerprint, hover your mouse over the desired fingerprint. An option to remove or recollect the fingerprint will appear.
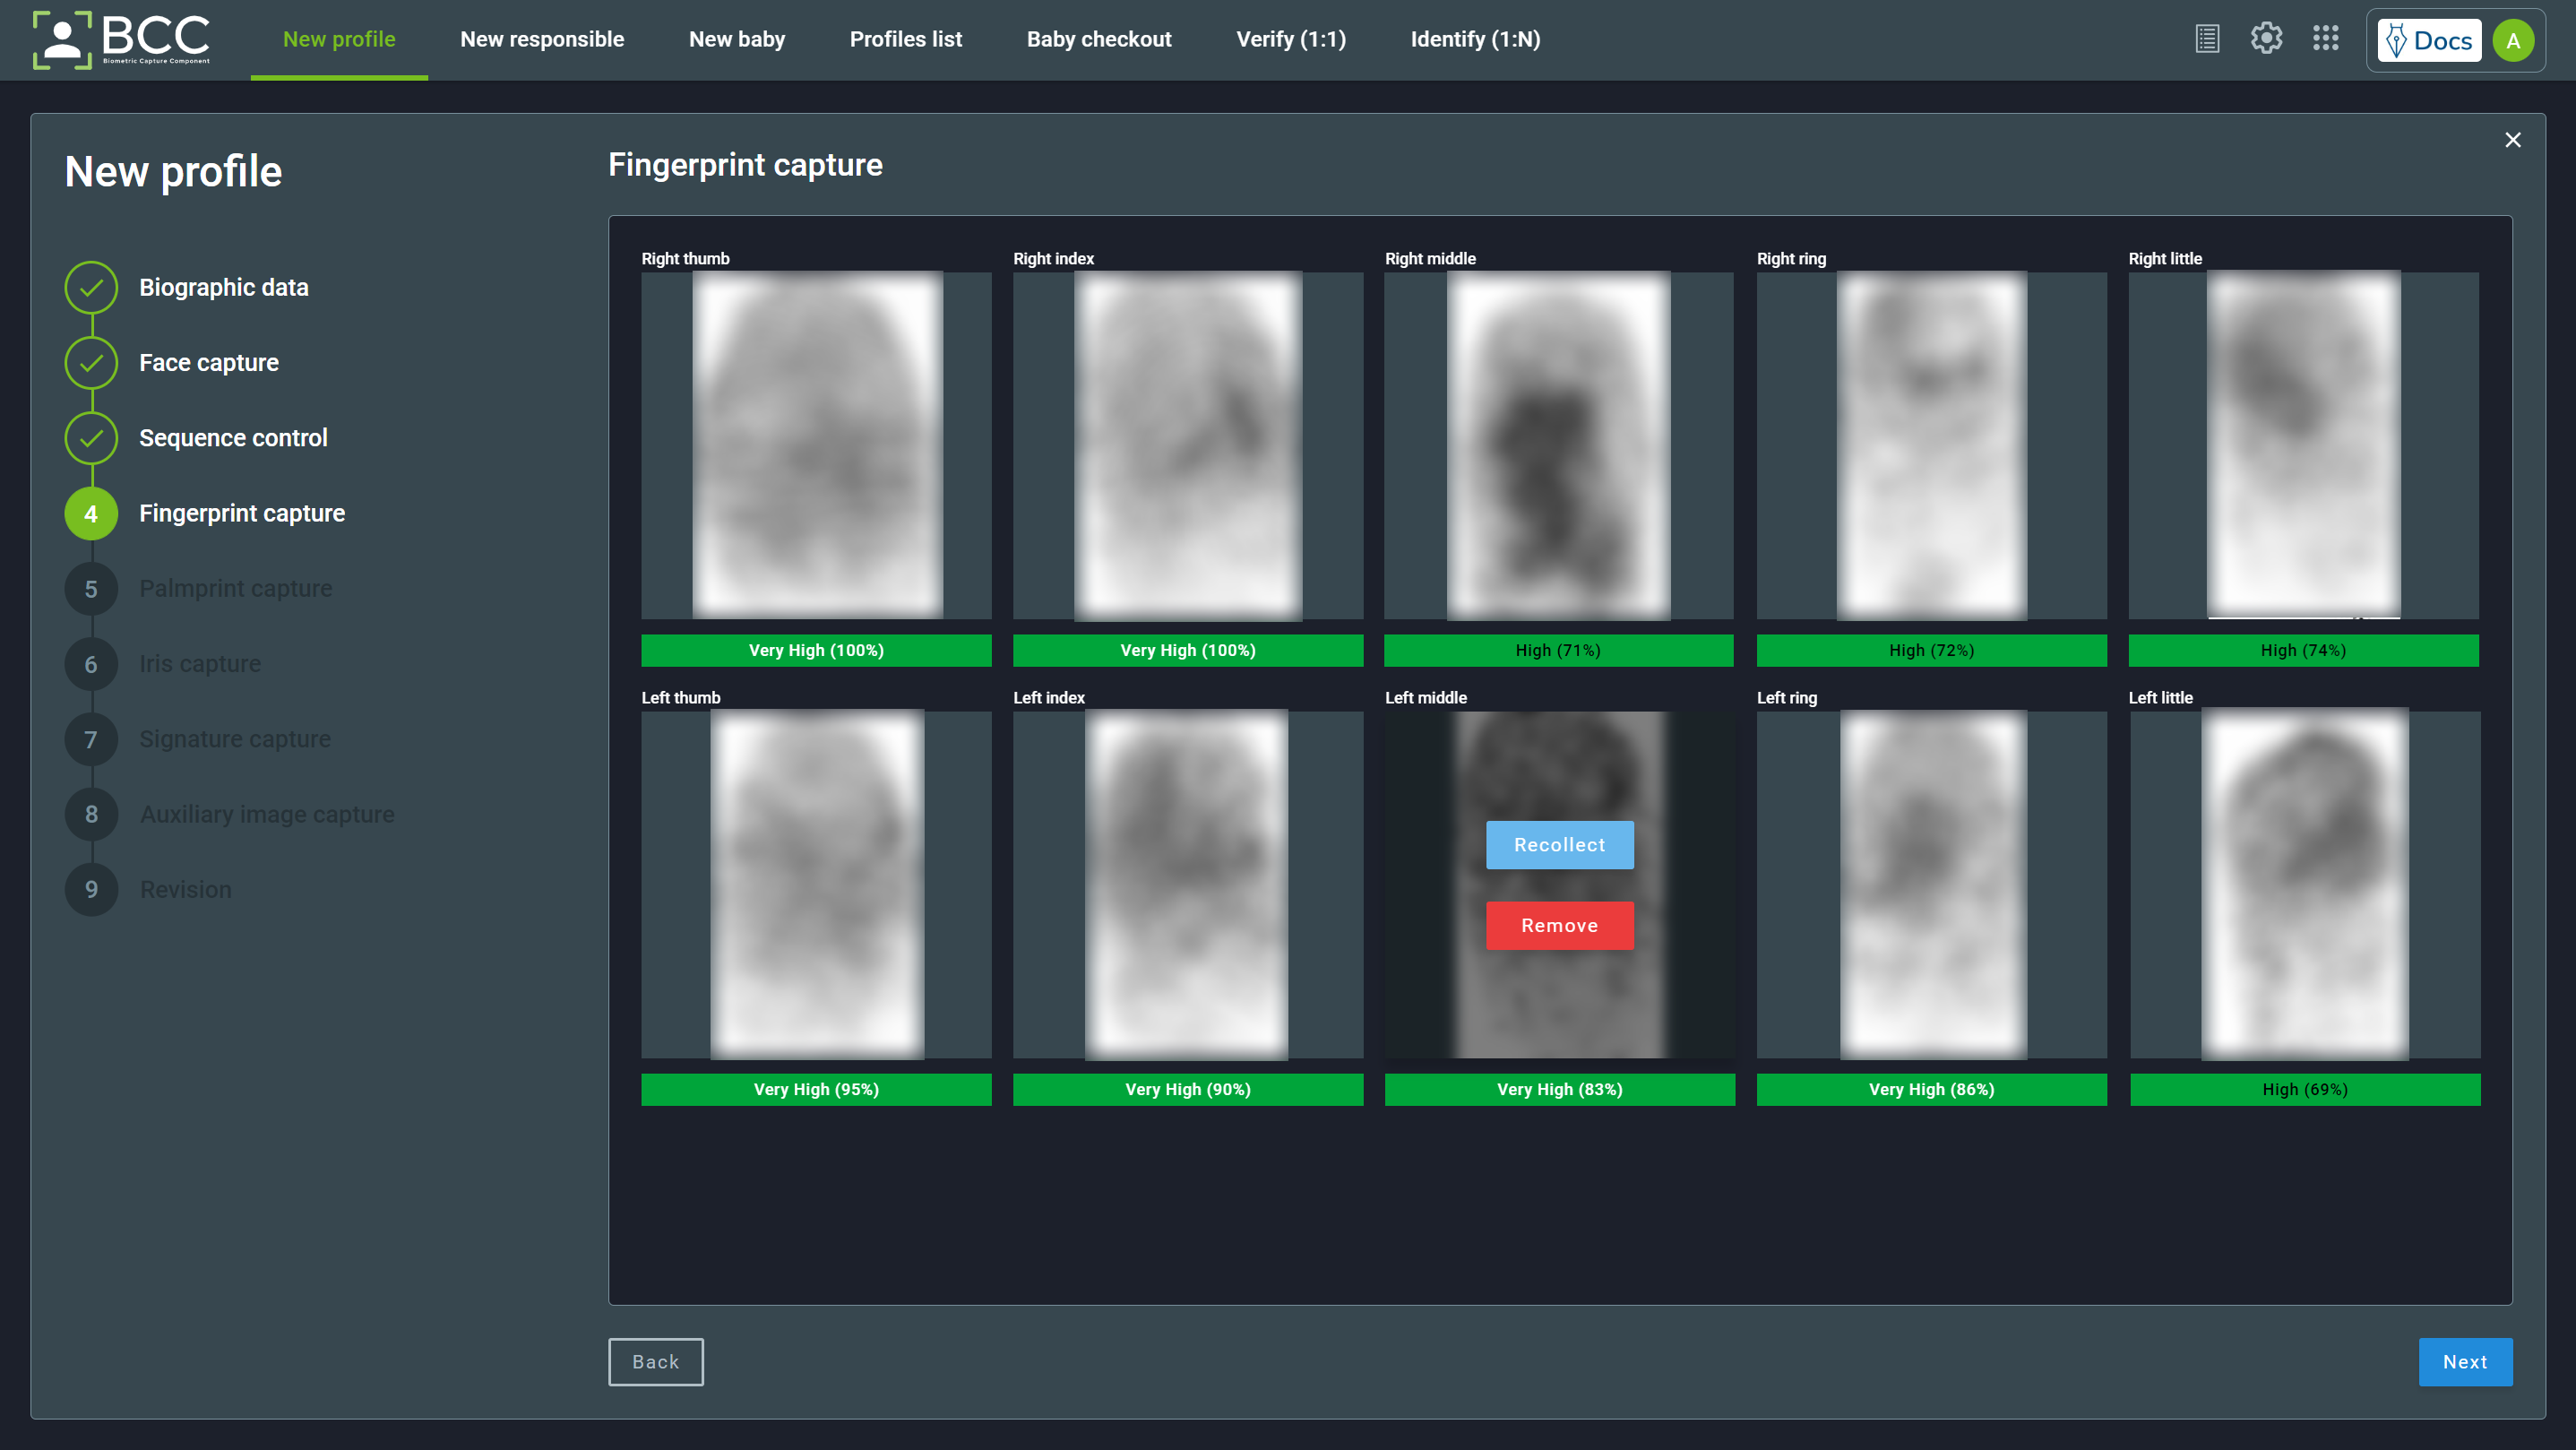
When all fingerprints are collected or classified with exceptions, click the Next button to proceed with revision or other collections.
5.1.4. Palmprint Capture
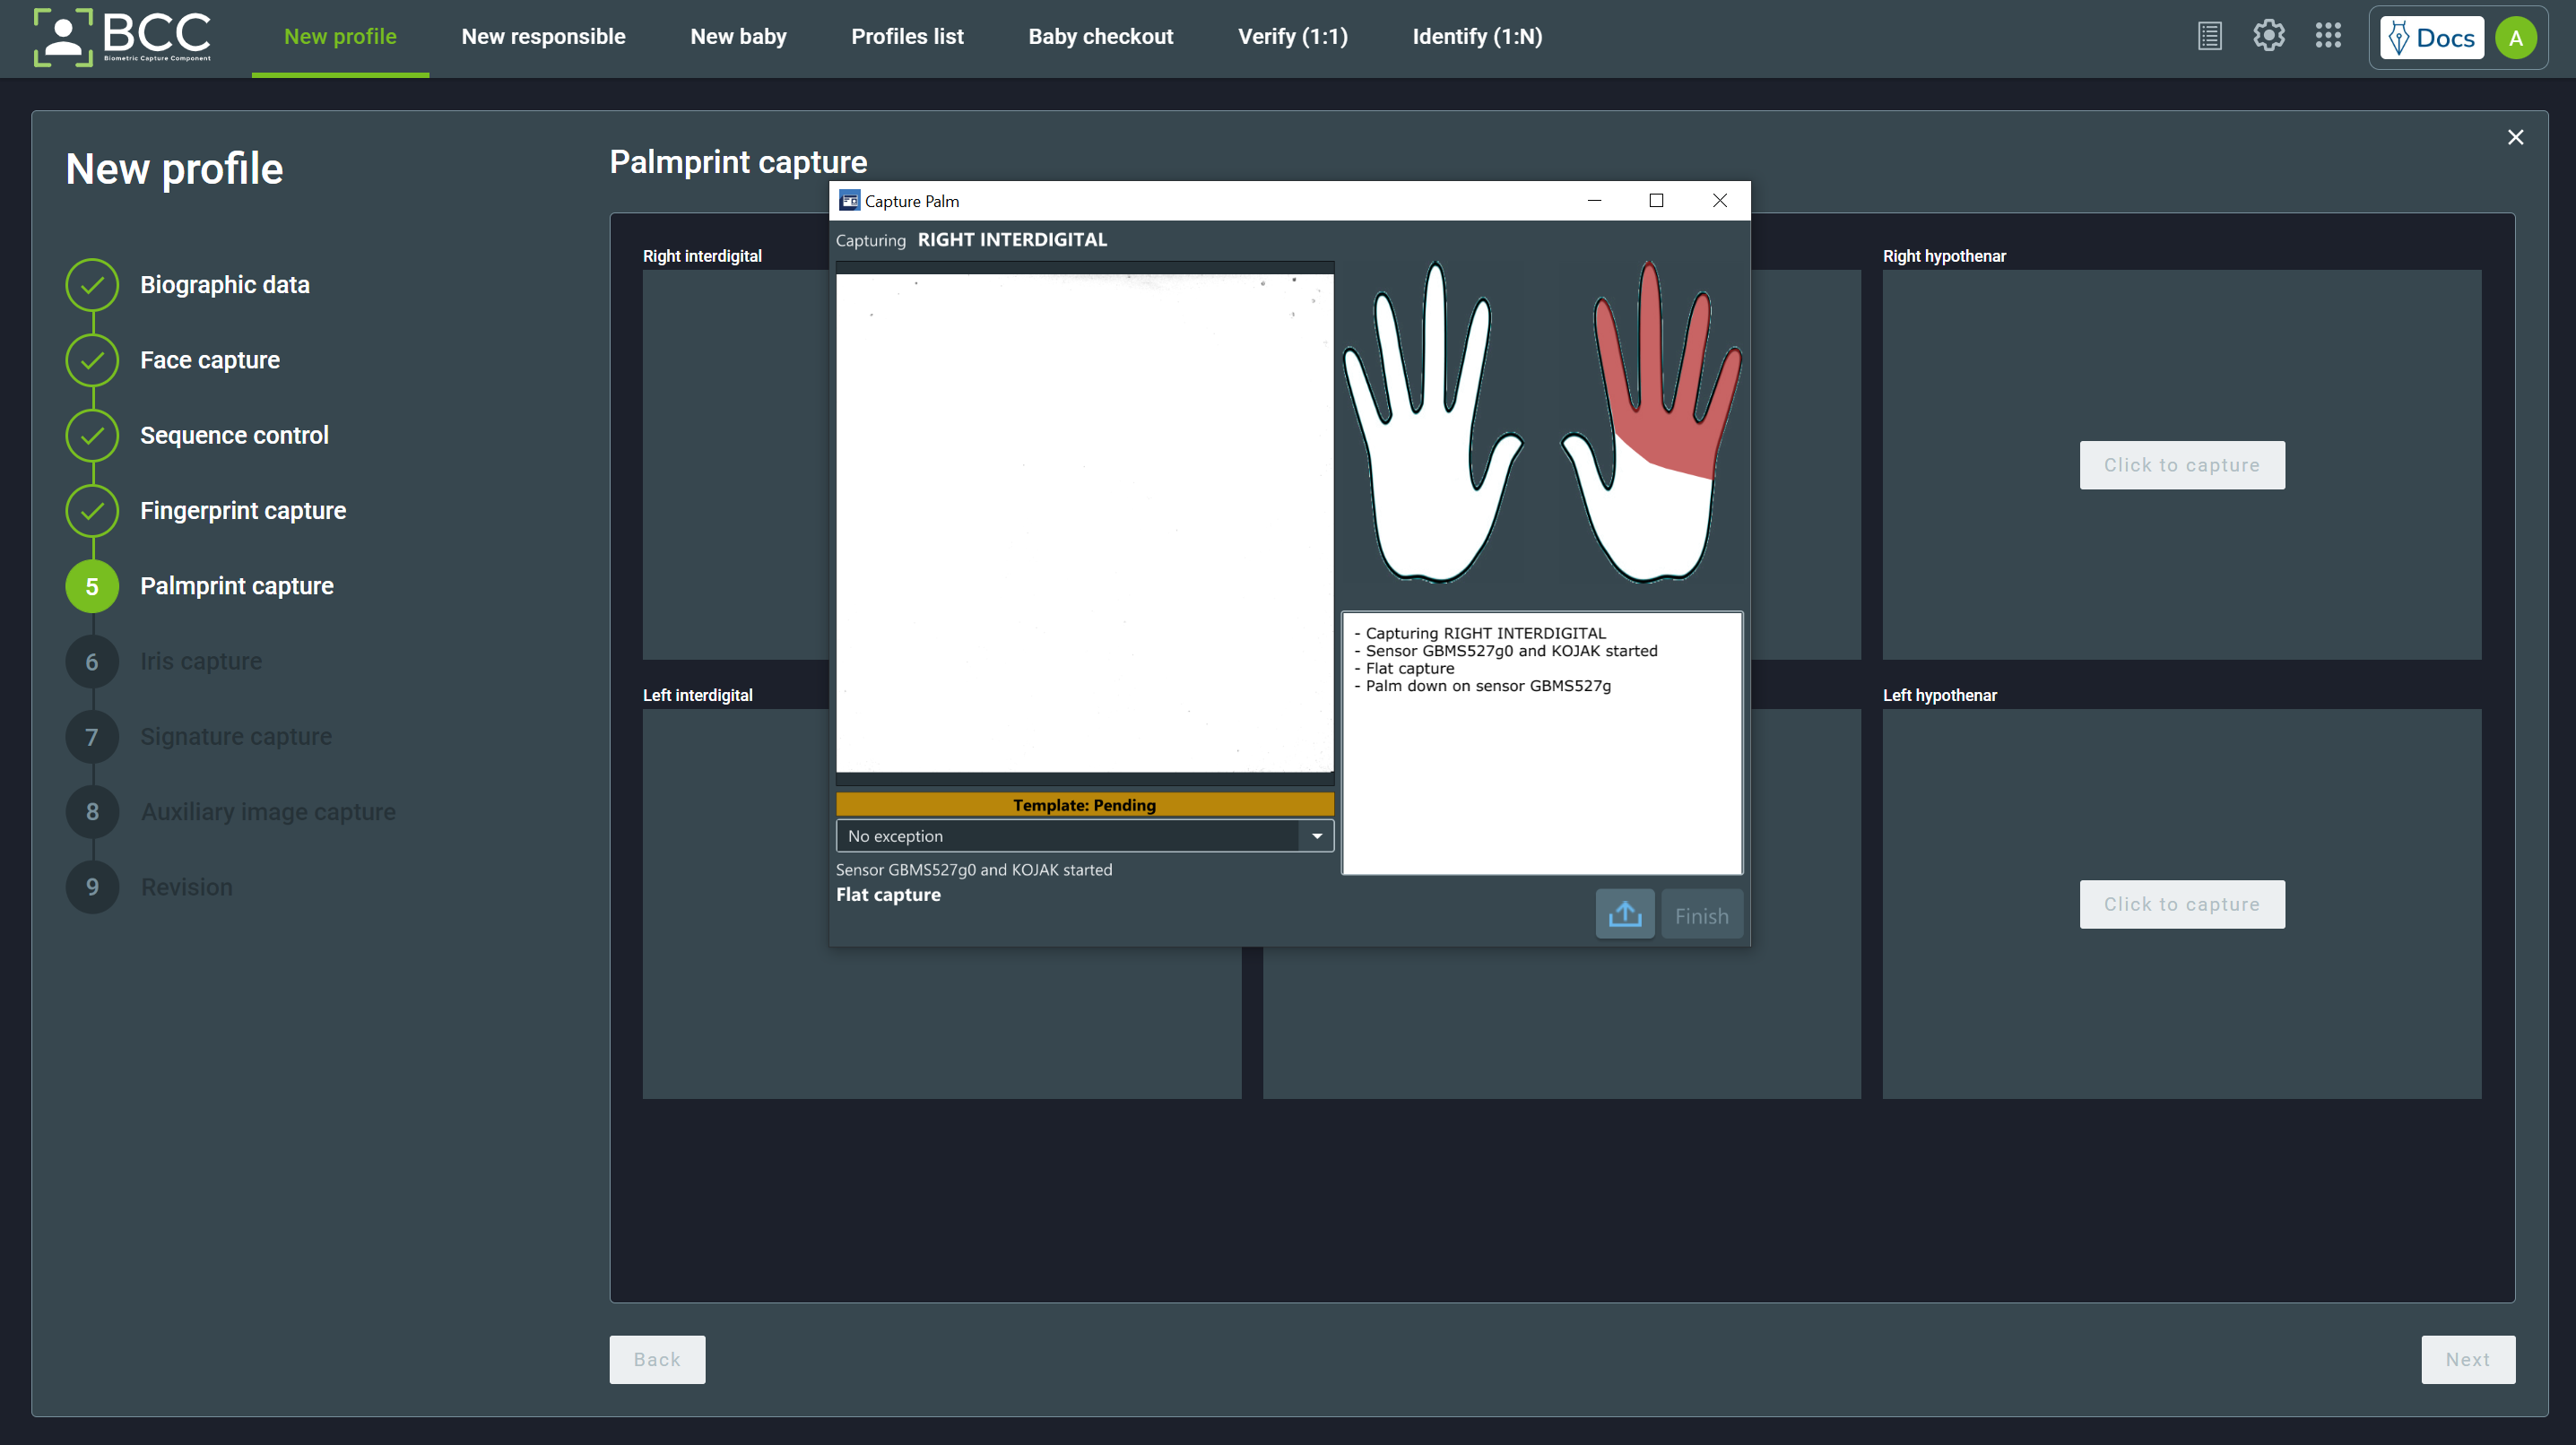
You can capture palmprints with BCC. When you get to the Palmprint capture page, the Capture Window will open automatically. This window will show some information:
- Live capture
- Capture quality properties
- What palm area needs to be captured, highlighted in red, and written on the top side
- Sensor information
- Capture type
- Log information
- Palm exception
Note
Your environment installation may change the palmprints you need to capture.
Performing a capture will show the template quality. If wanted, you may upload a palmprint through the import button near the Next button if you have the proper permission.
Whether an exception prevents the capture, you may mark it through the dropdown menu on the left side of the capture window. The exceptions are listed in Fingerprint and Palmprint Exceptions section.
Hover your mouse over the desired palmprint to remove or recollect a palmprint.
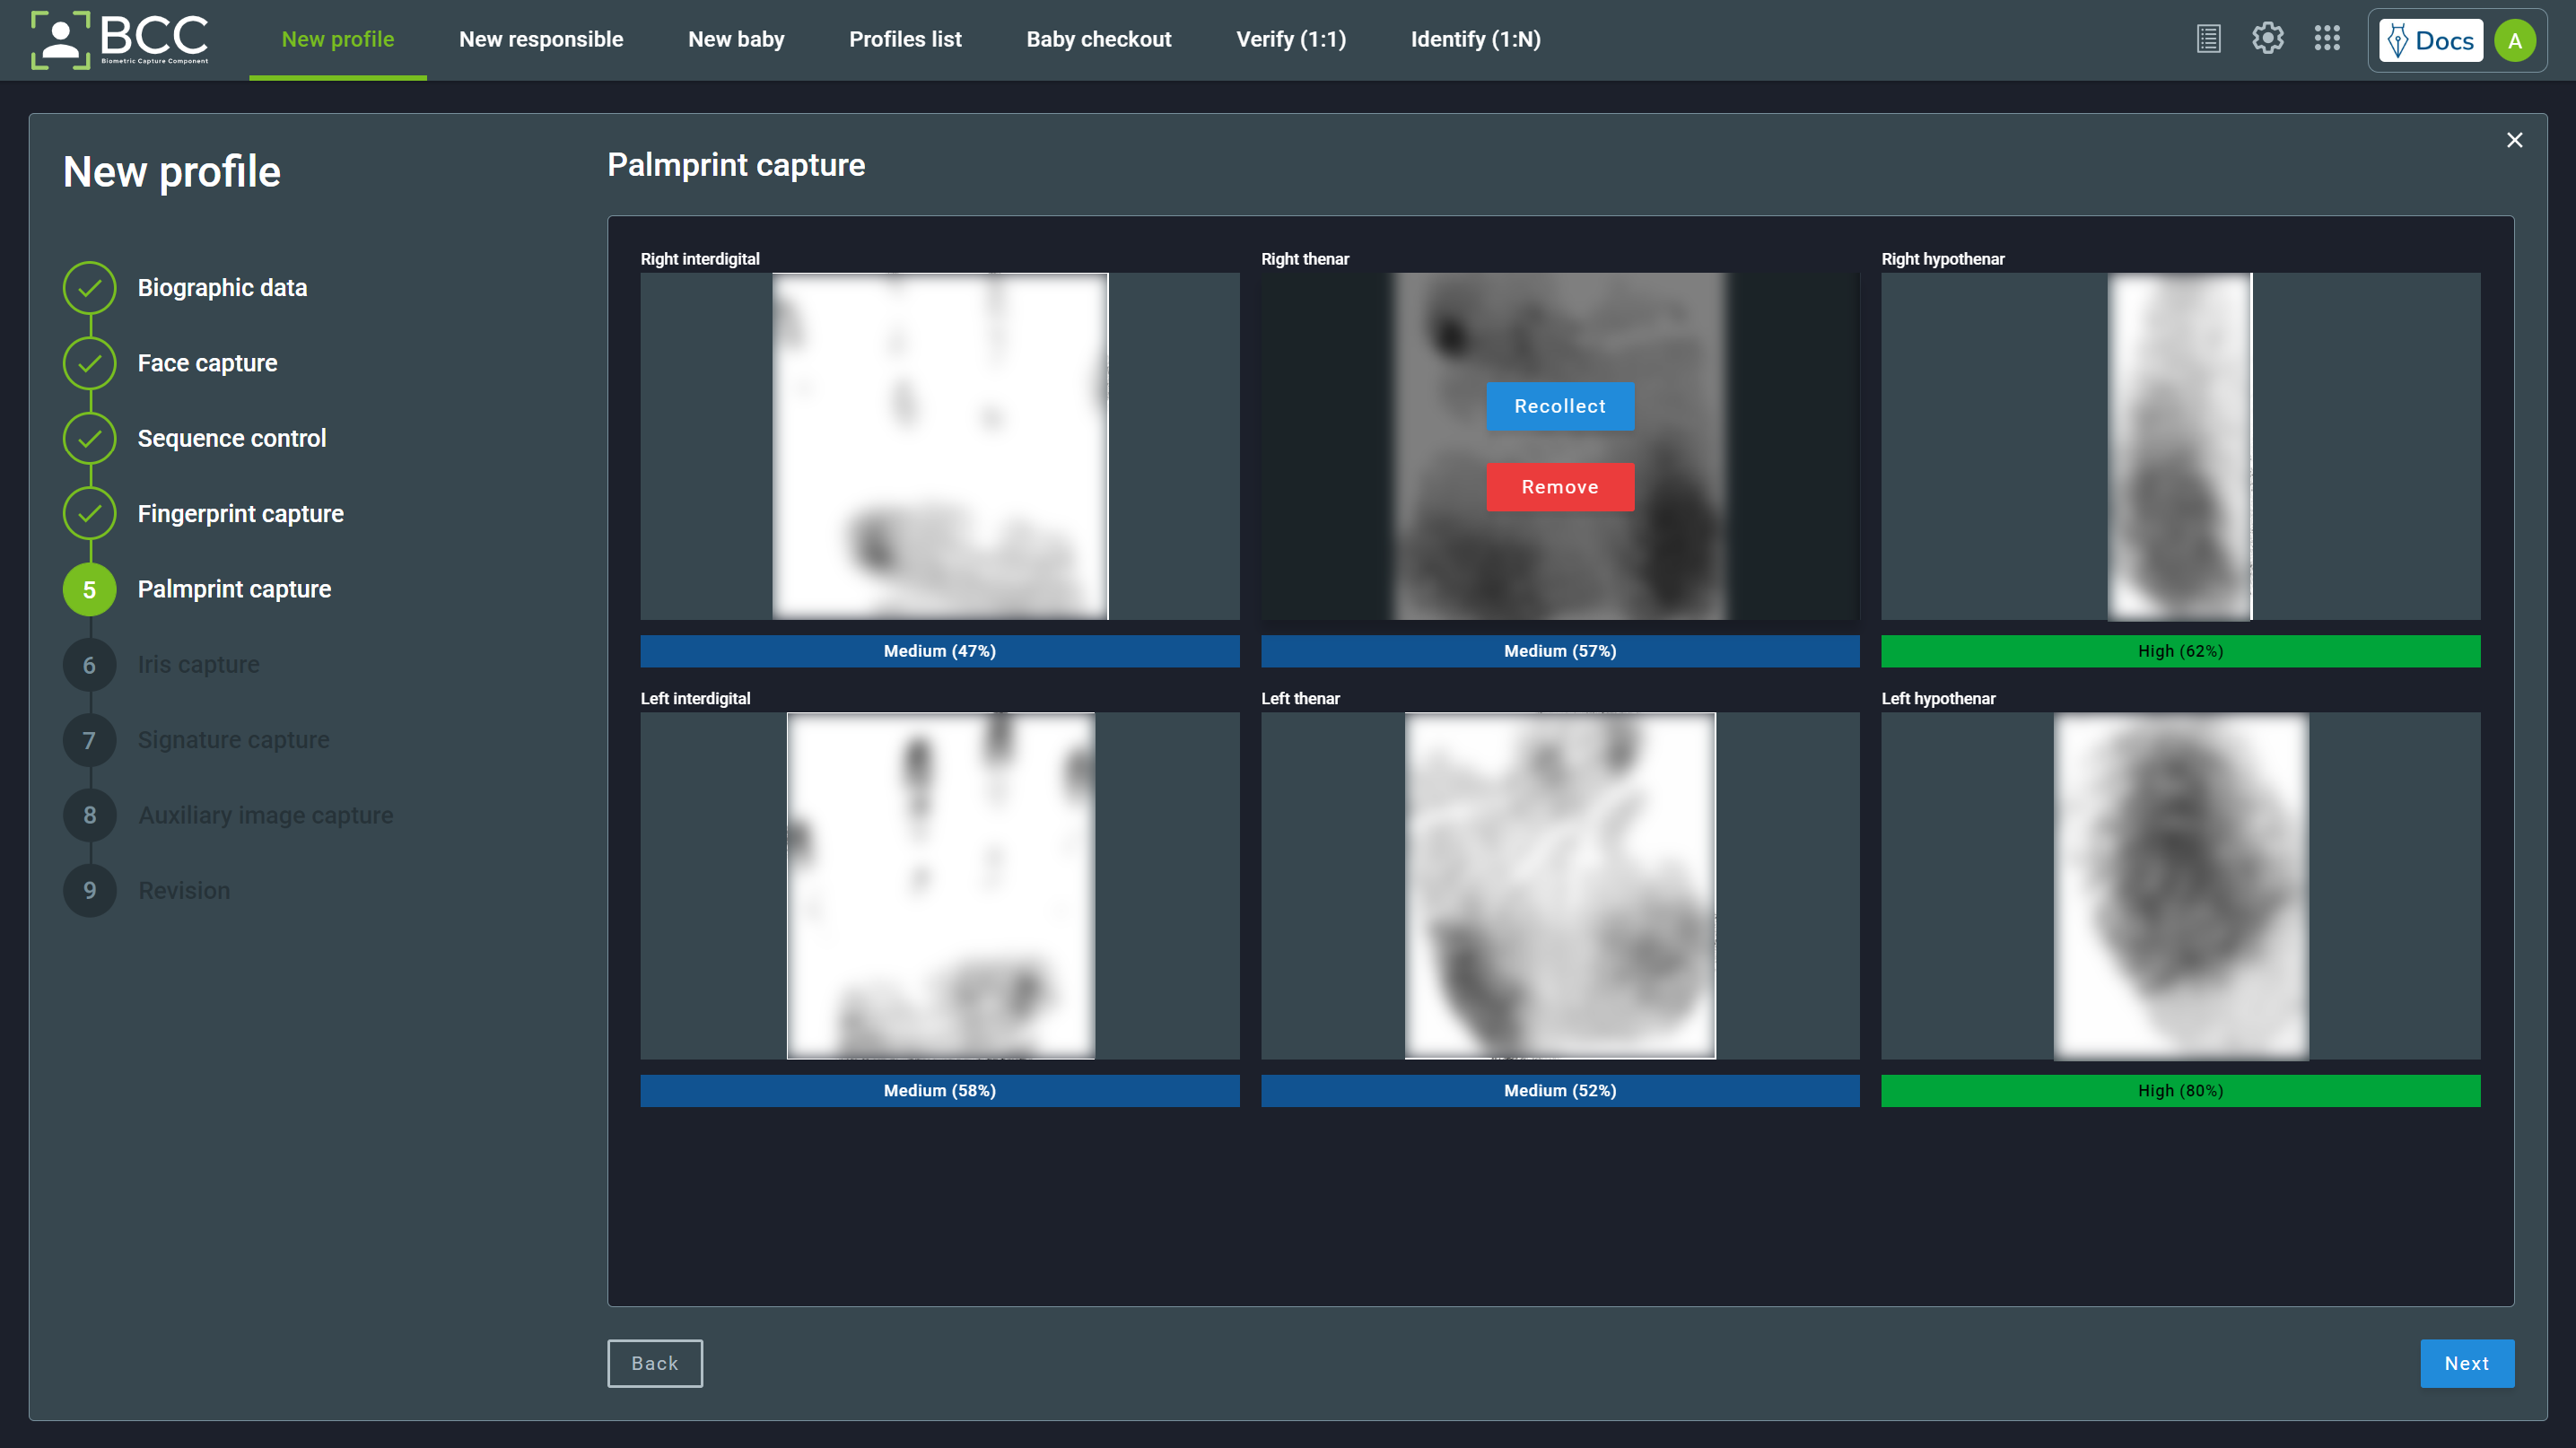
When the captures are finished, click the Next button to proceed.
5.1.5. Iris Capture
The capture window will automatically open when you get to the Iris capture page. If it does not open, click the Click to capture button. This window will show some information:
- Live capture
- What iris is being captured
- The captured irises image
- Log information
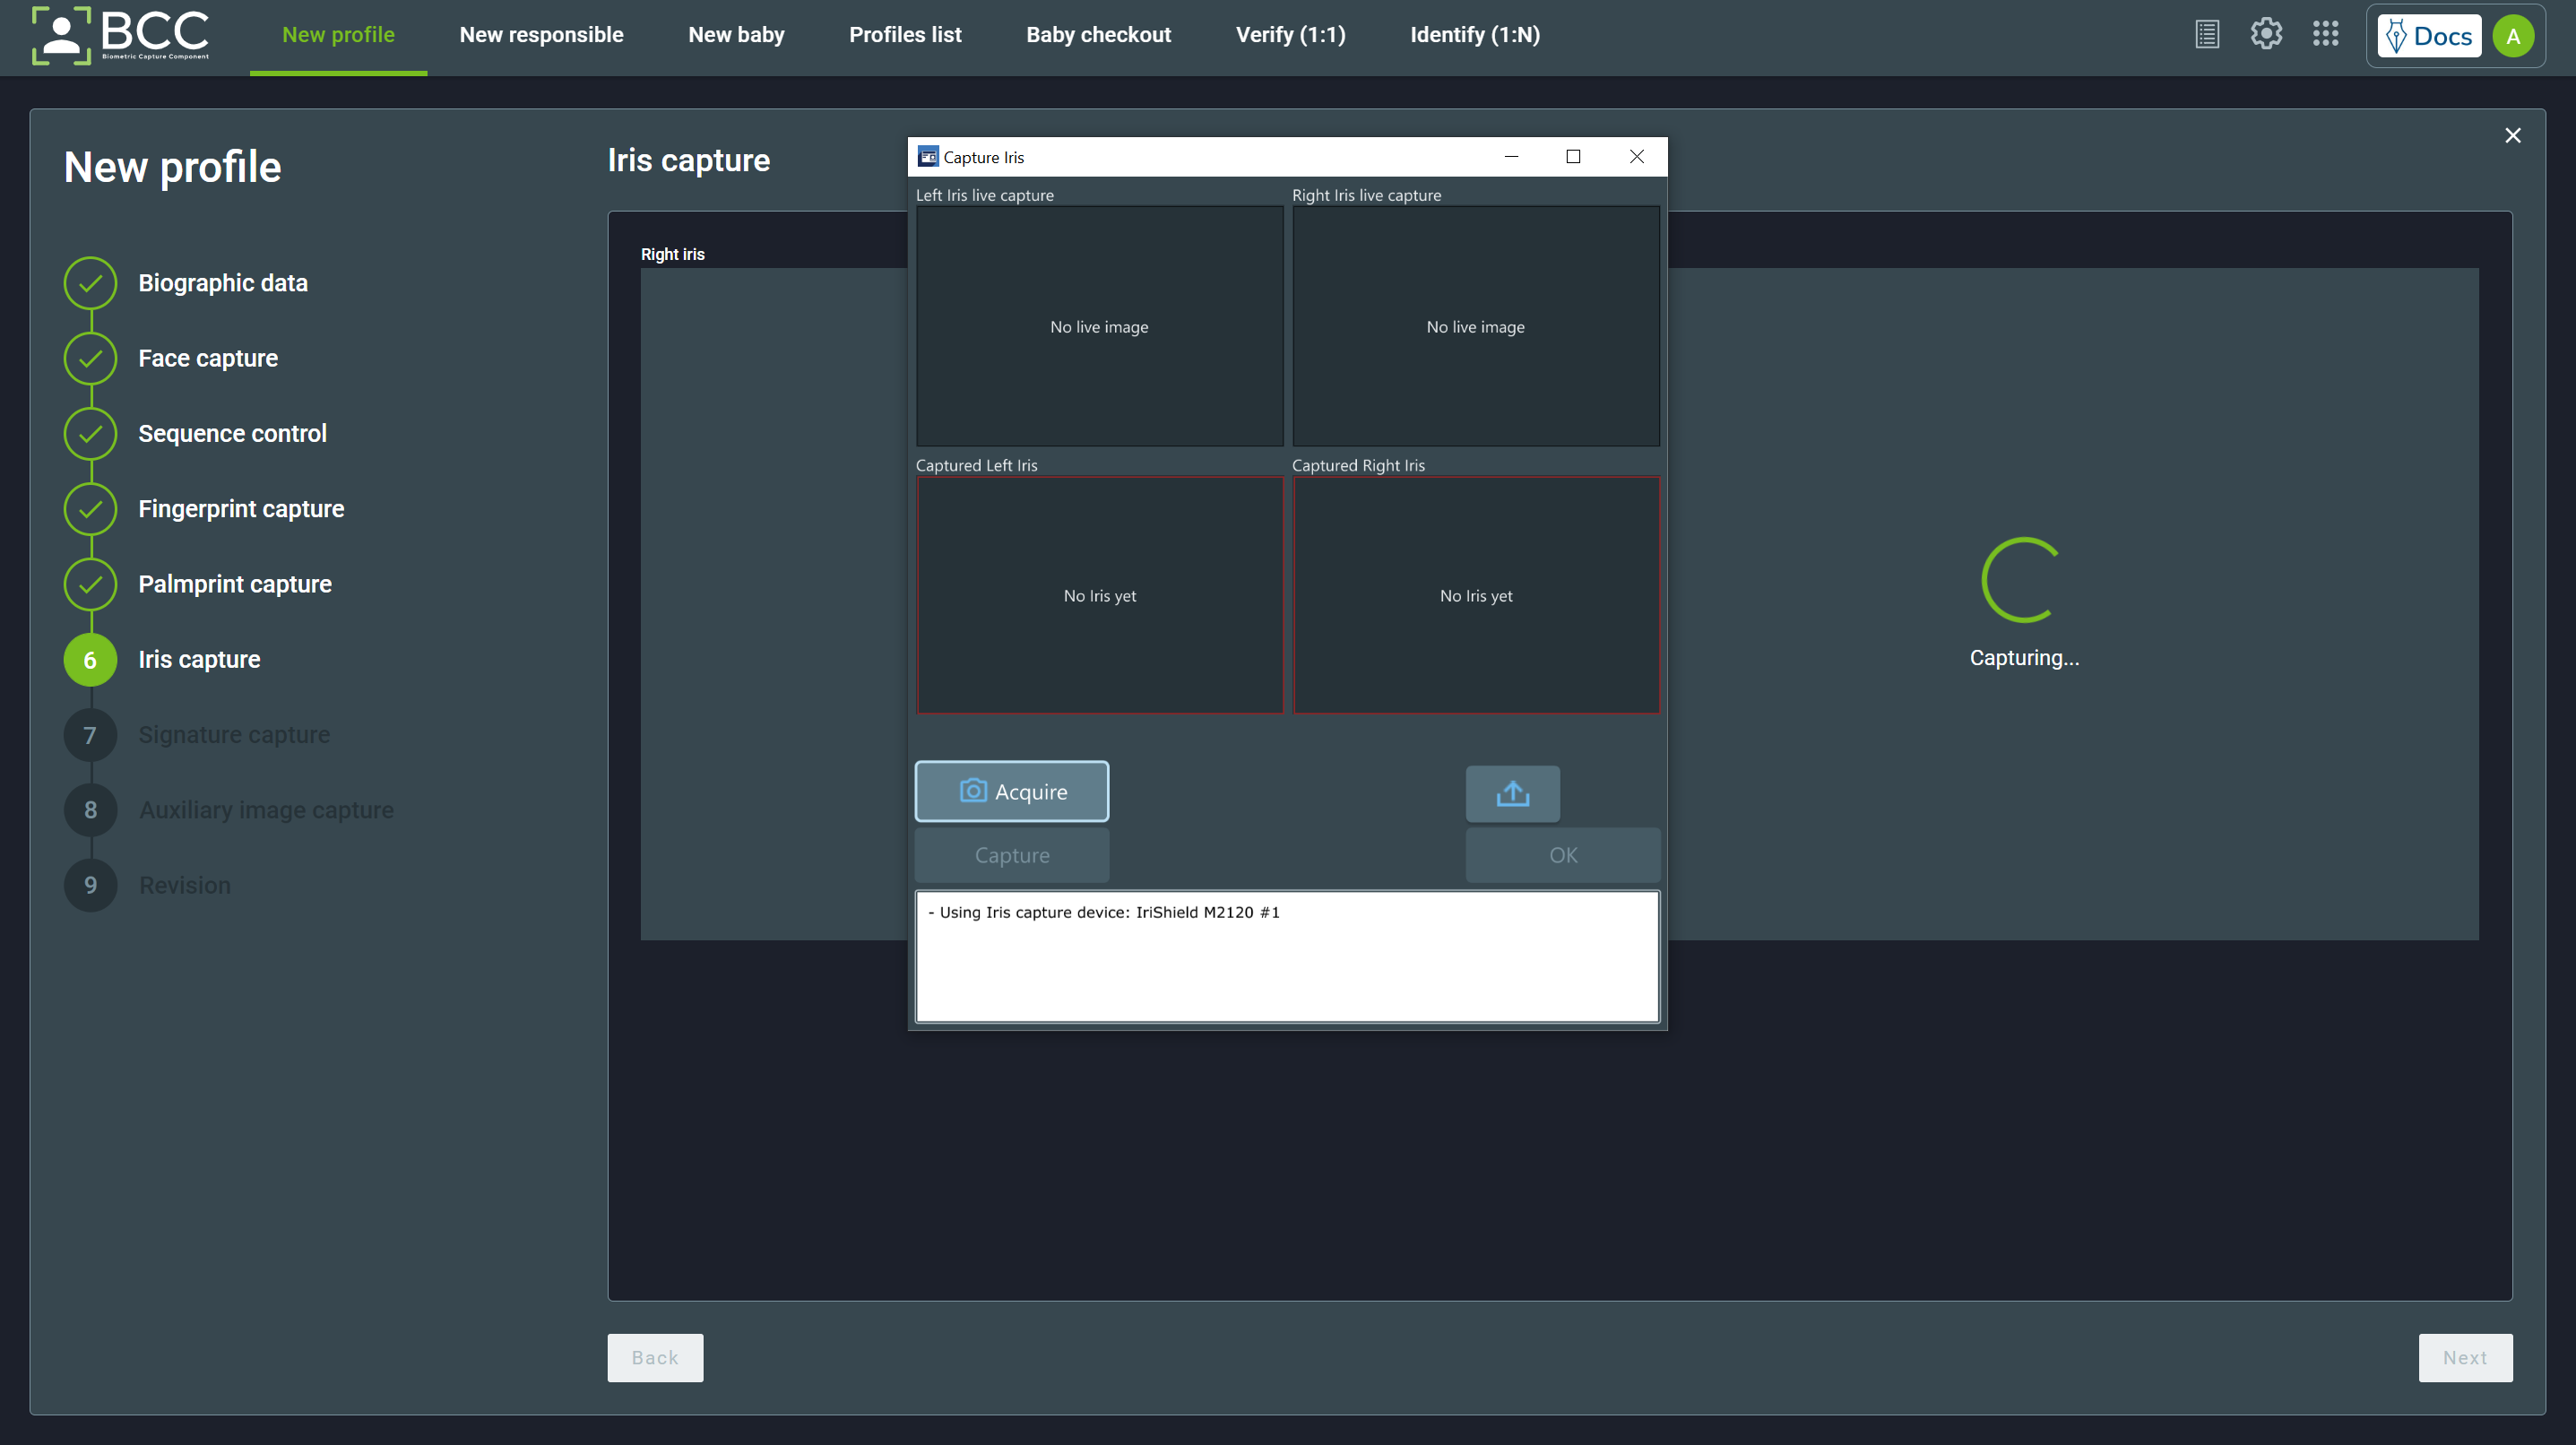
At the window log, click the Acquire button to start the capture. You may also cancel the capture by clicking the Cancel button.
Import an iris image by clicking the import button above the “Ok” button if you have the proper permission. After a successful capture, the quality is shown in the log, as highlighted in the image below.
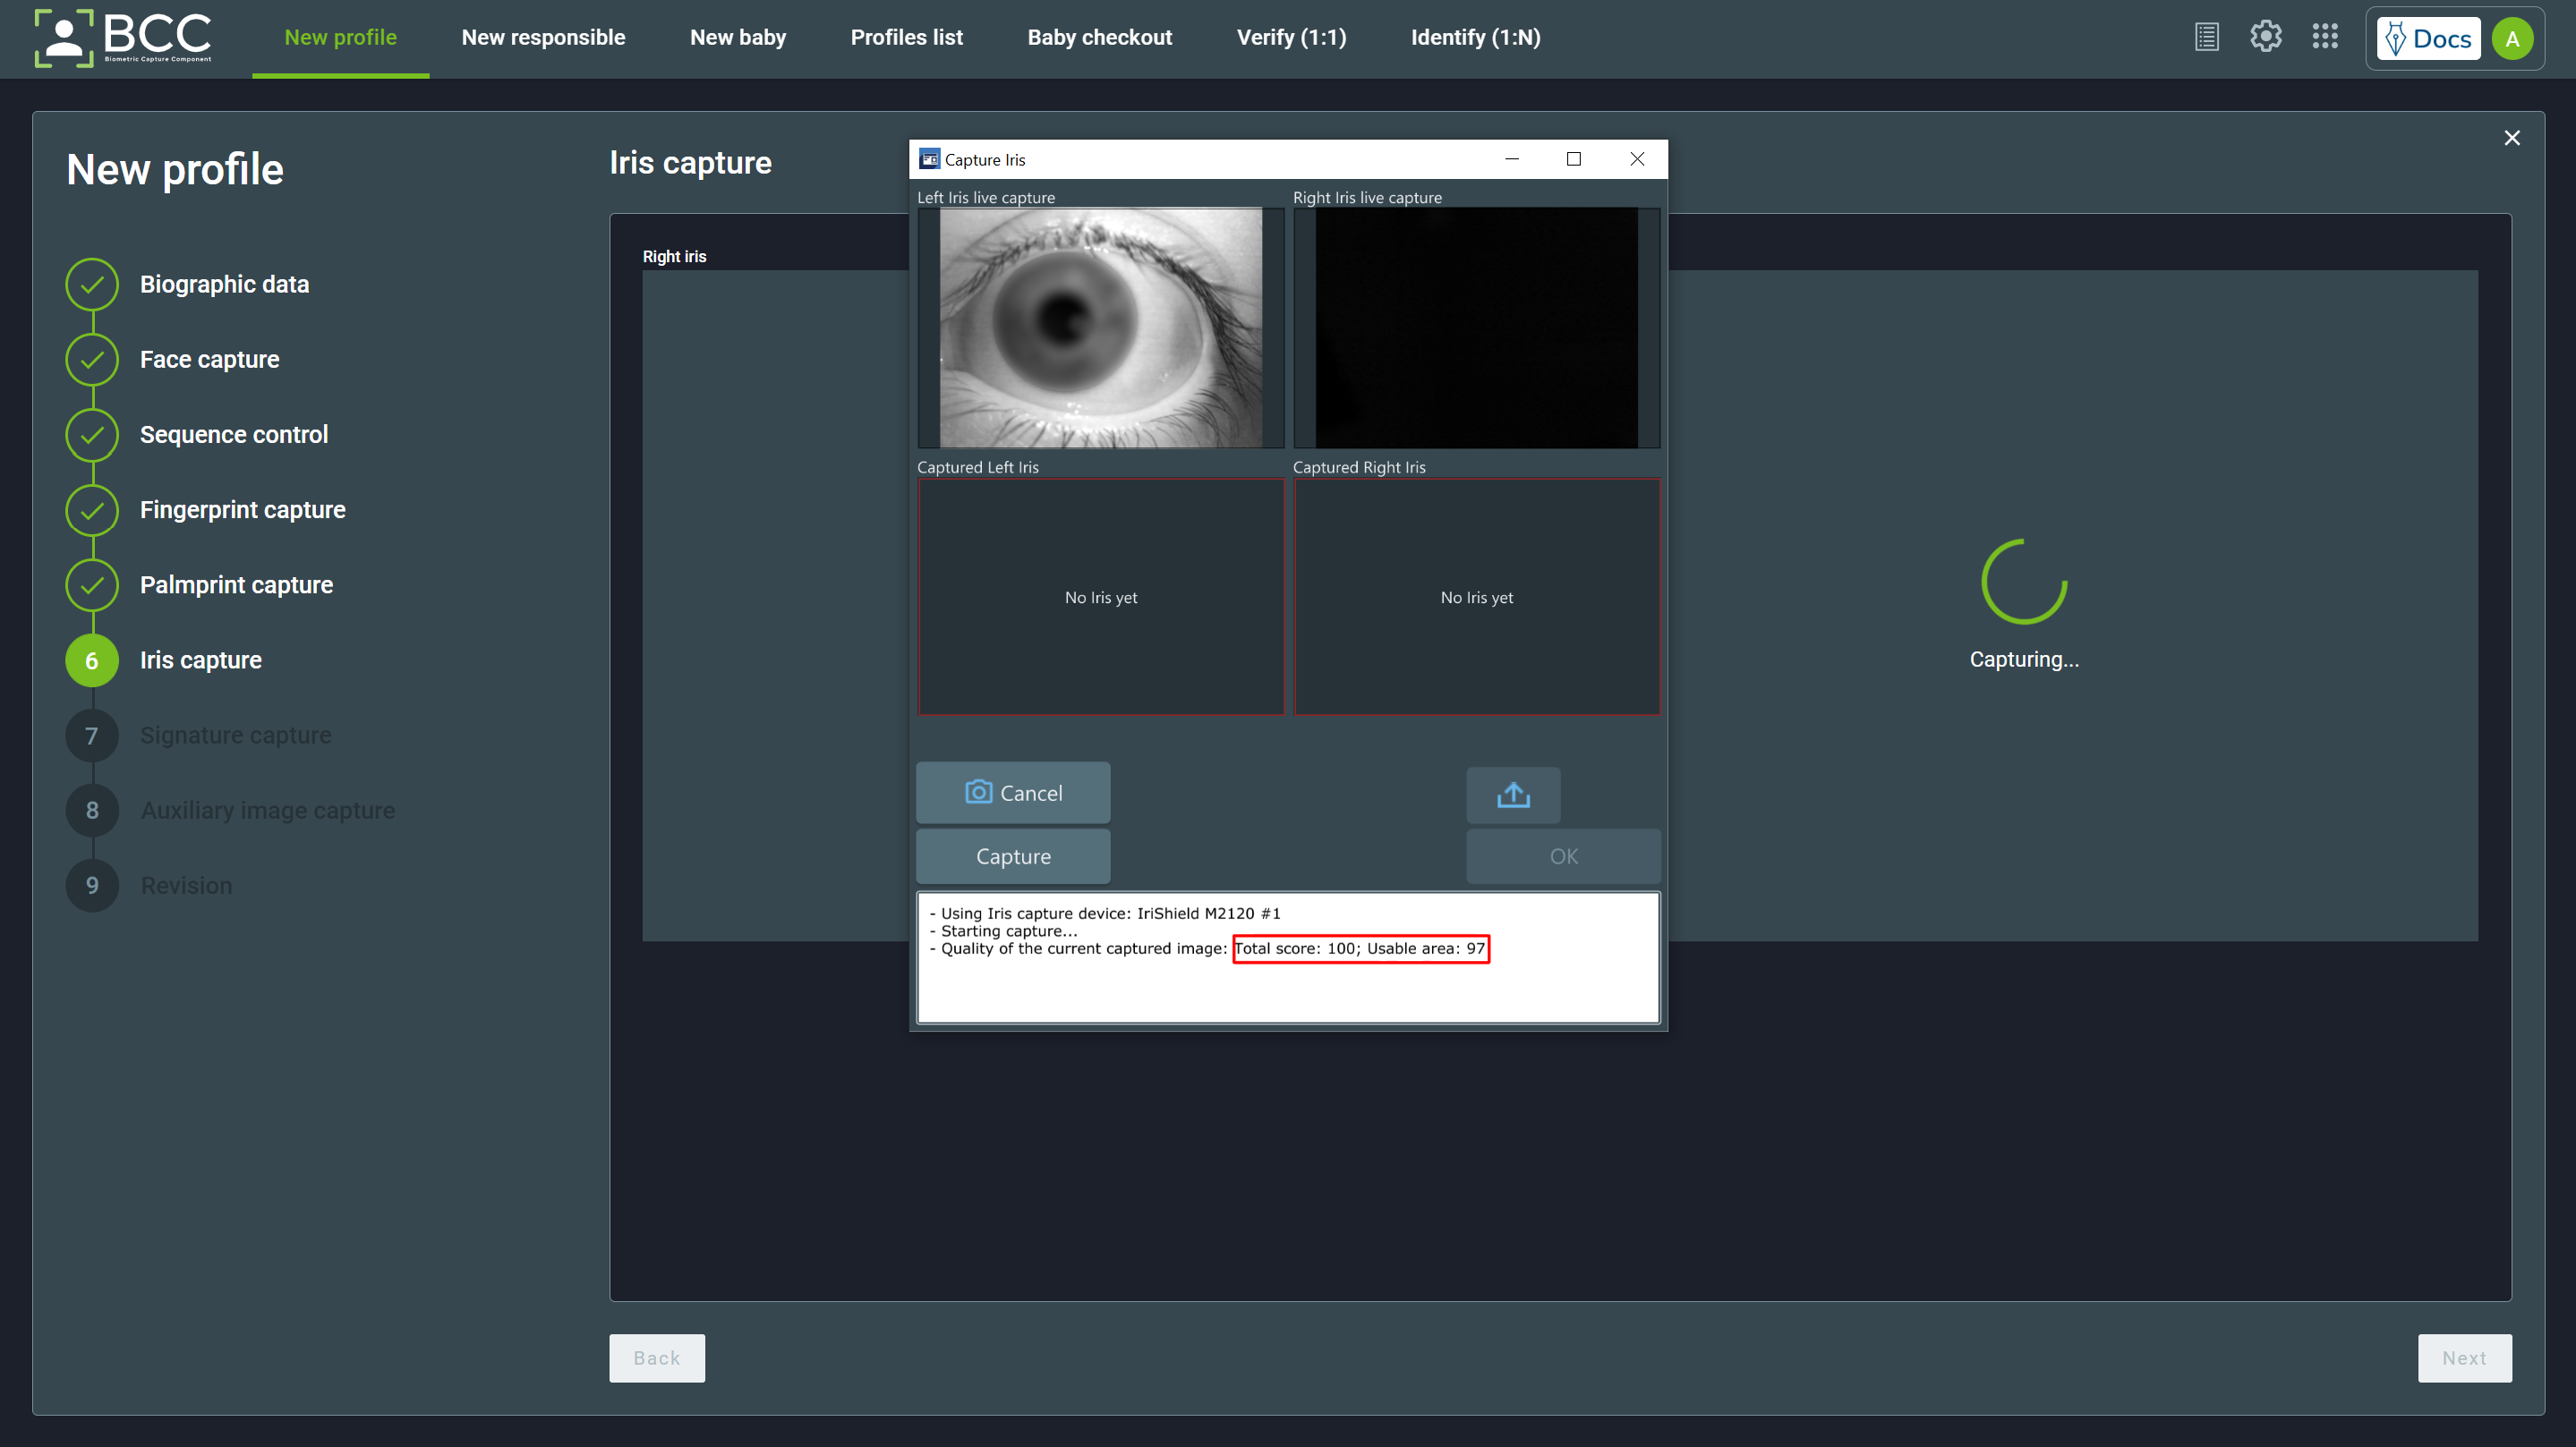
After finishing both captures, click the Ok button. If you want to remove or recollect any irises, hover the mouse over the desired image. The recollect and the remove buttons will appear.
Important
Removing or asking for recollection for ANY irises will lead to the removal or capture of BOTH irises.
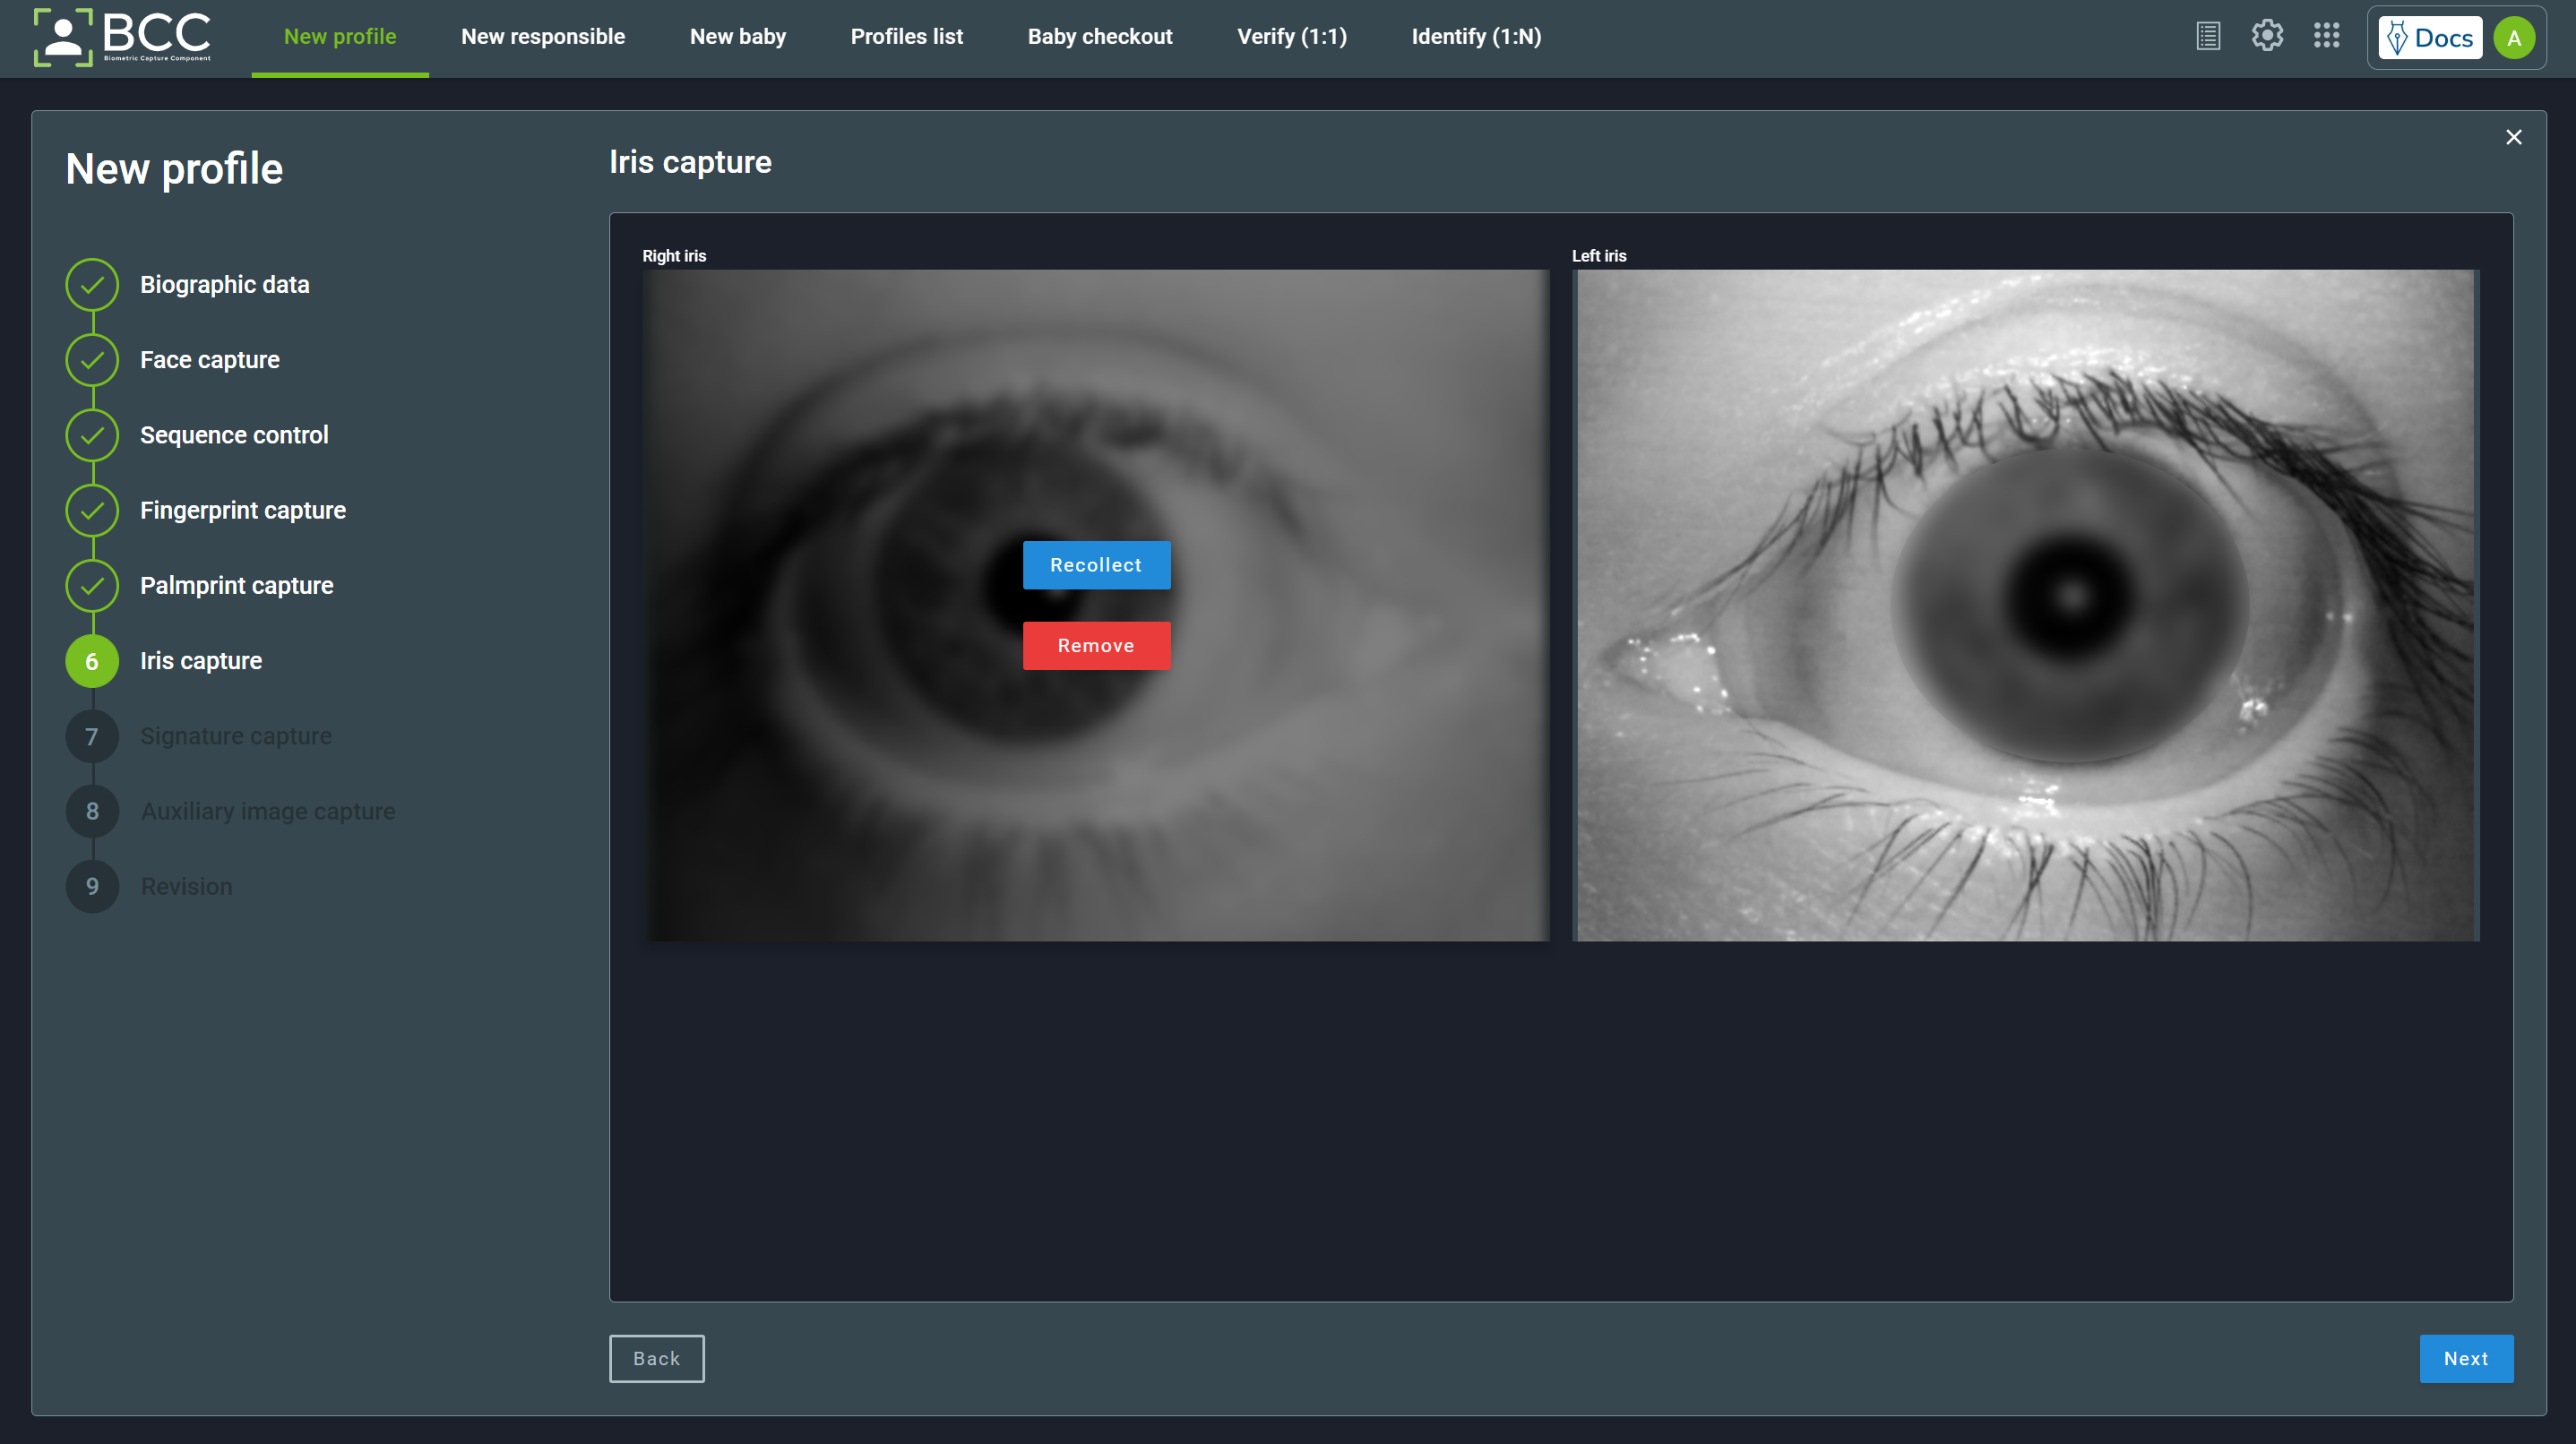
To proceed to the next step after the capture, click the Next button.
5.1.6. Signature Capture
The capture window will automatically open when you get to the Signature capture page. If it does not open, click the Click to capture button.
In the Signature Capture Window, you can see the signature preview, a checkbox for not signable, the Clear button, the import button, and the Ok button.
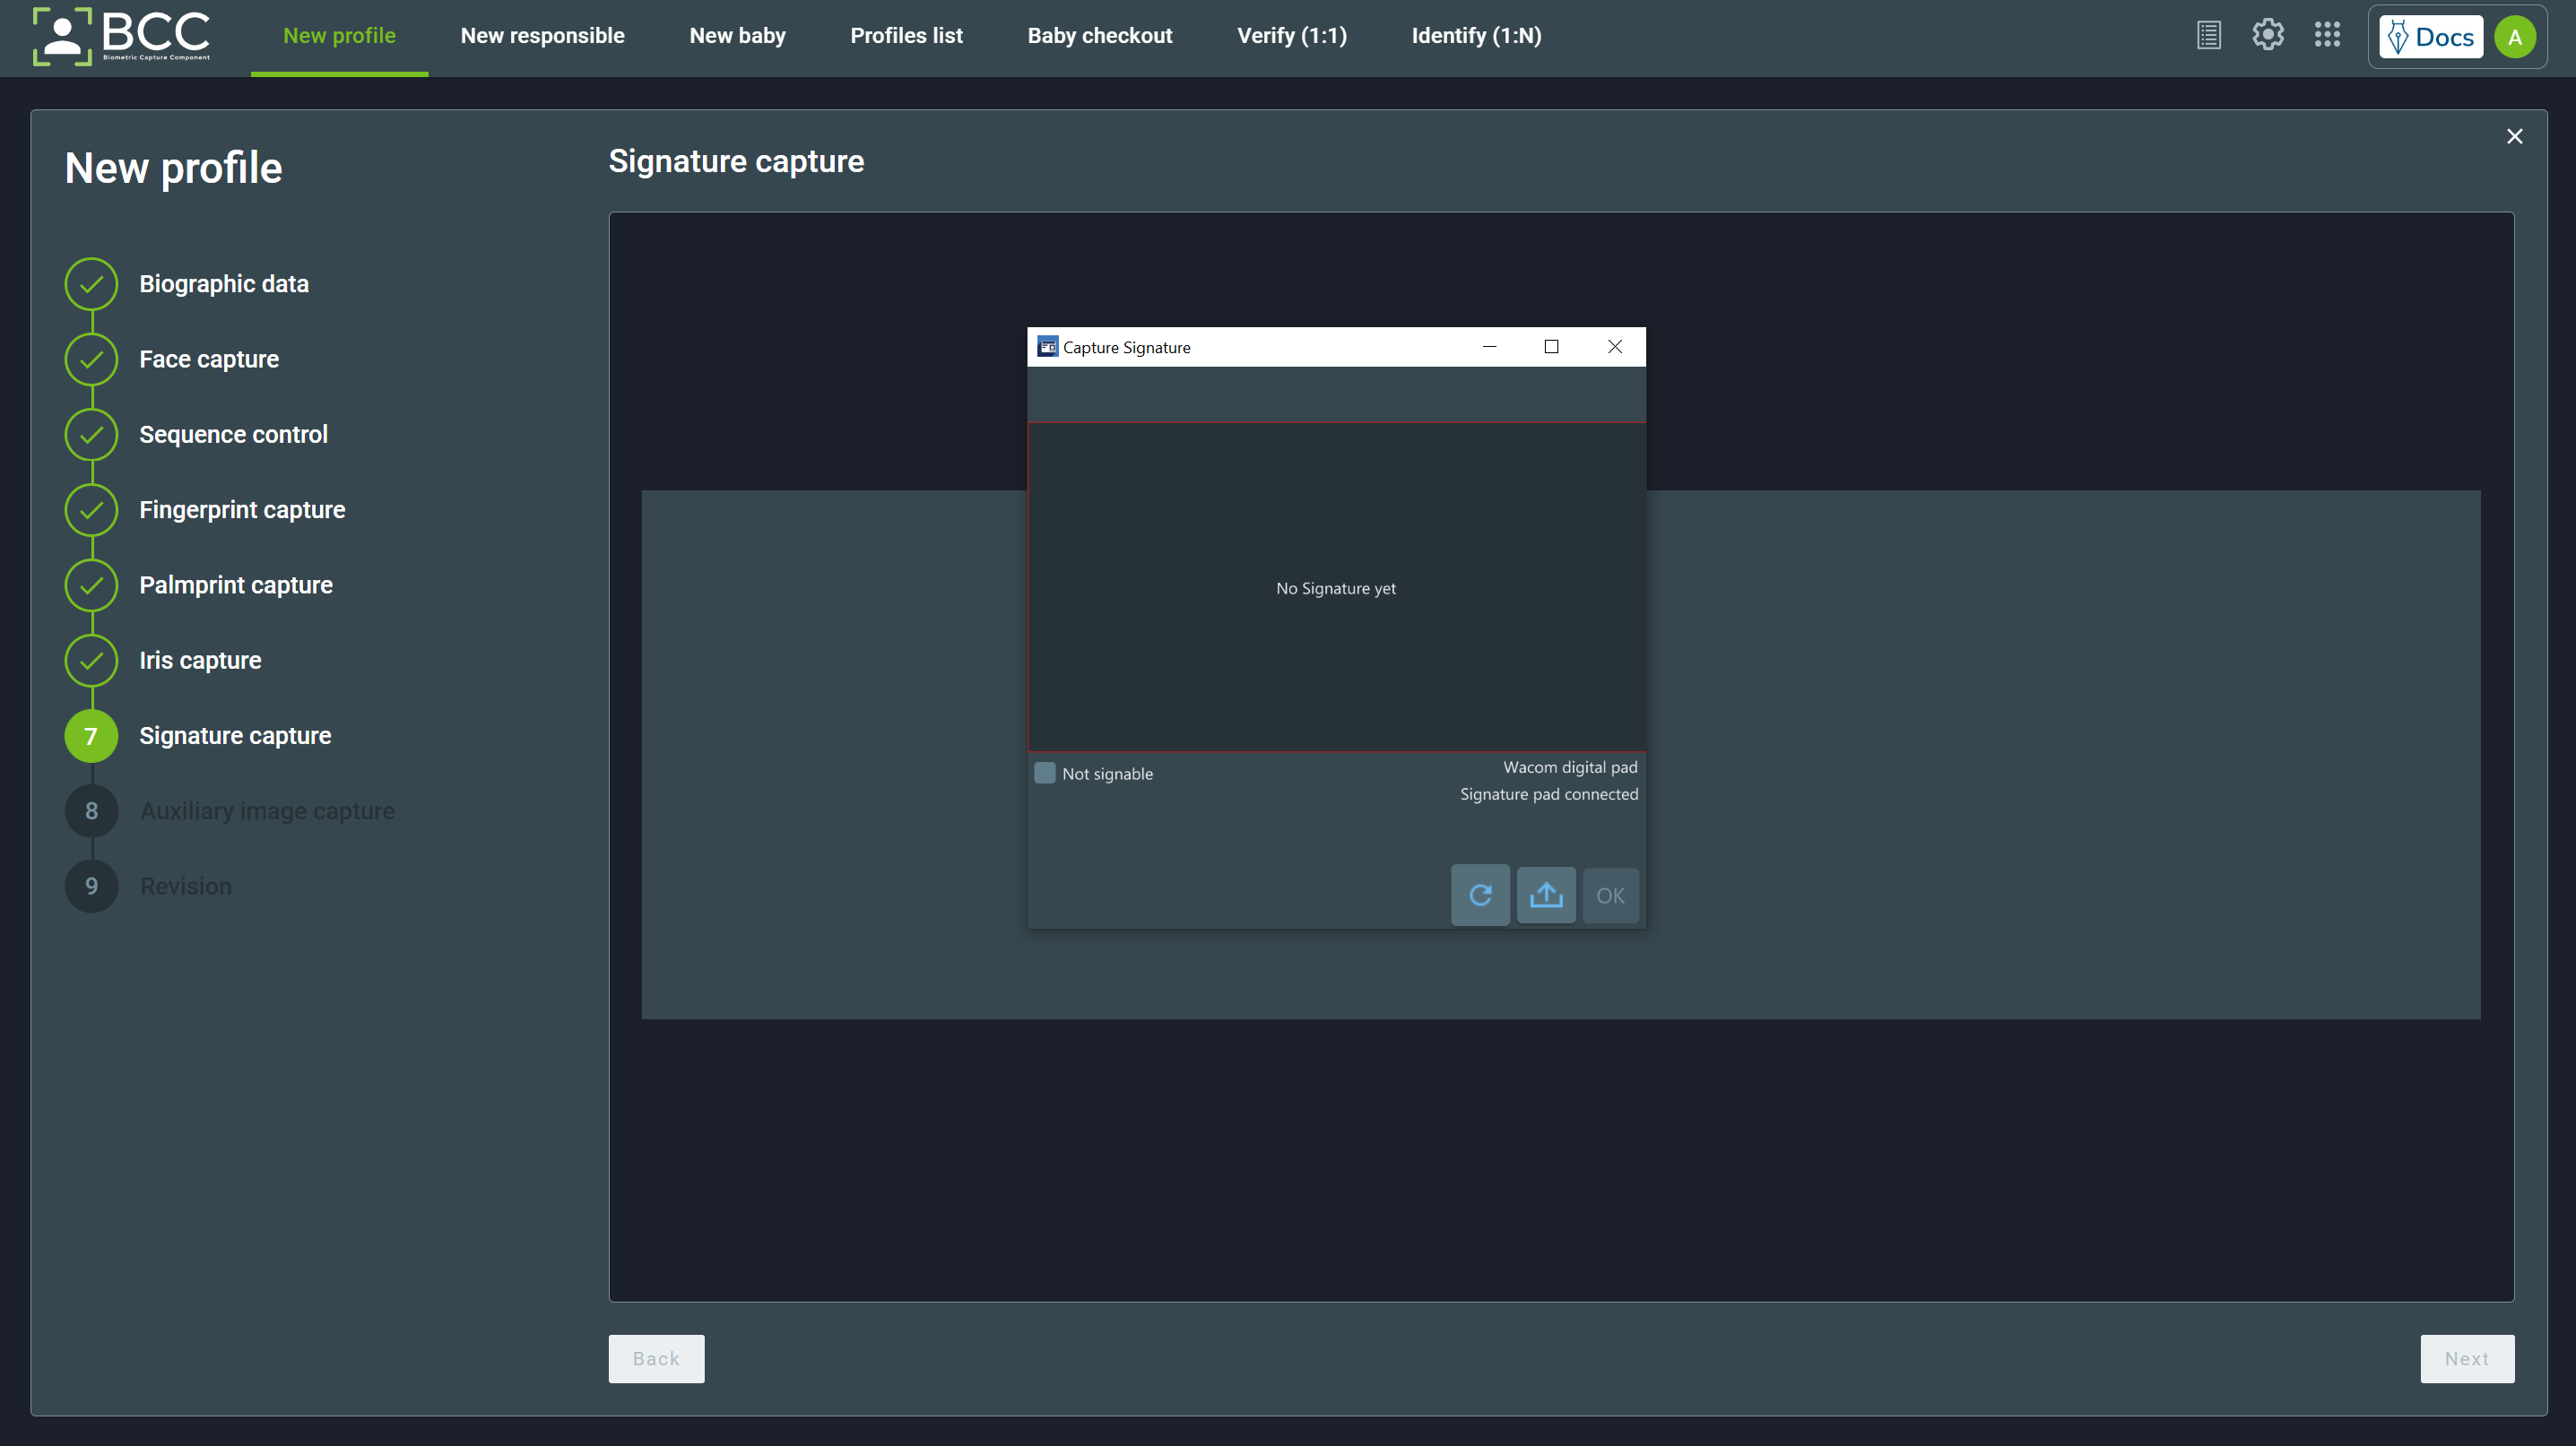
After capturing the signature, the Ok button will be clickable. Whether the signature can’t be obtained, check the “Not Signable” field and click the Ok button.
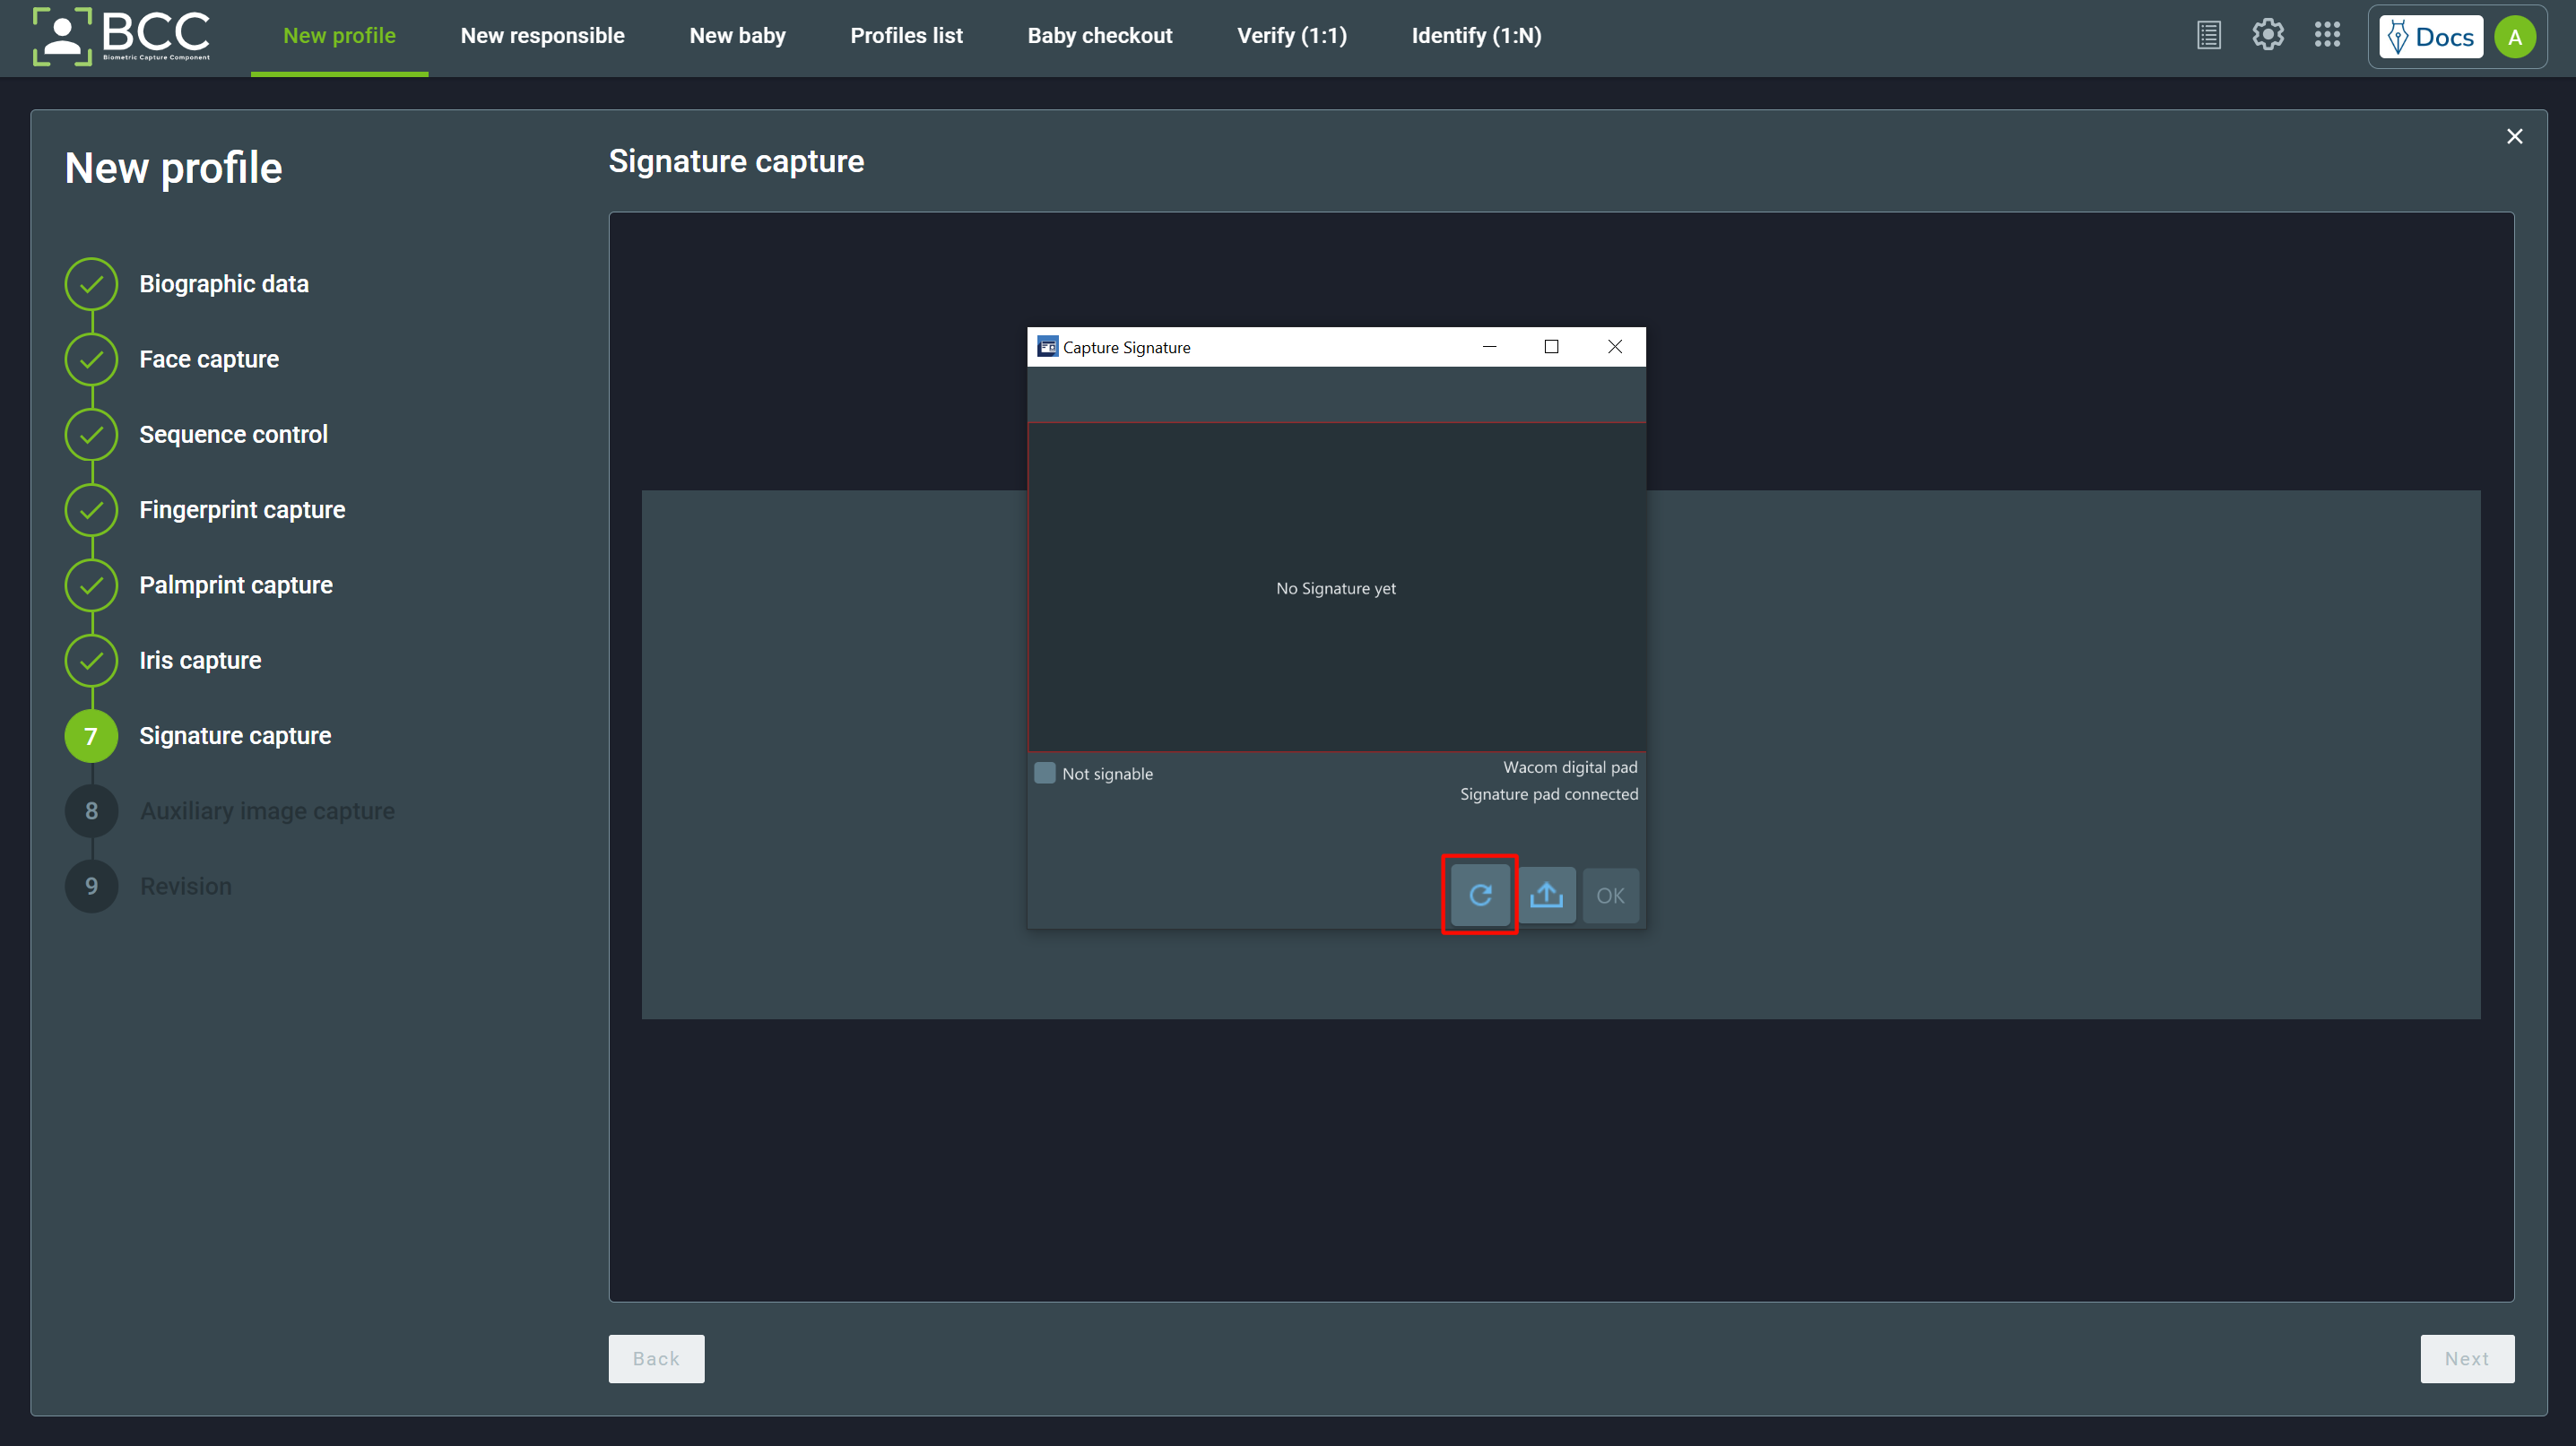
To redo the signature, click the clear button highlighted in the image below.
If you want to remove or recollect the signature, hover the mouse over the image. The recollect and the remove buttons will appear.
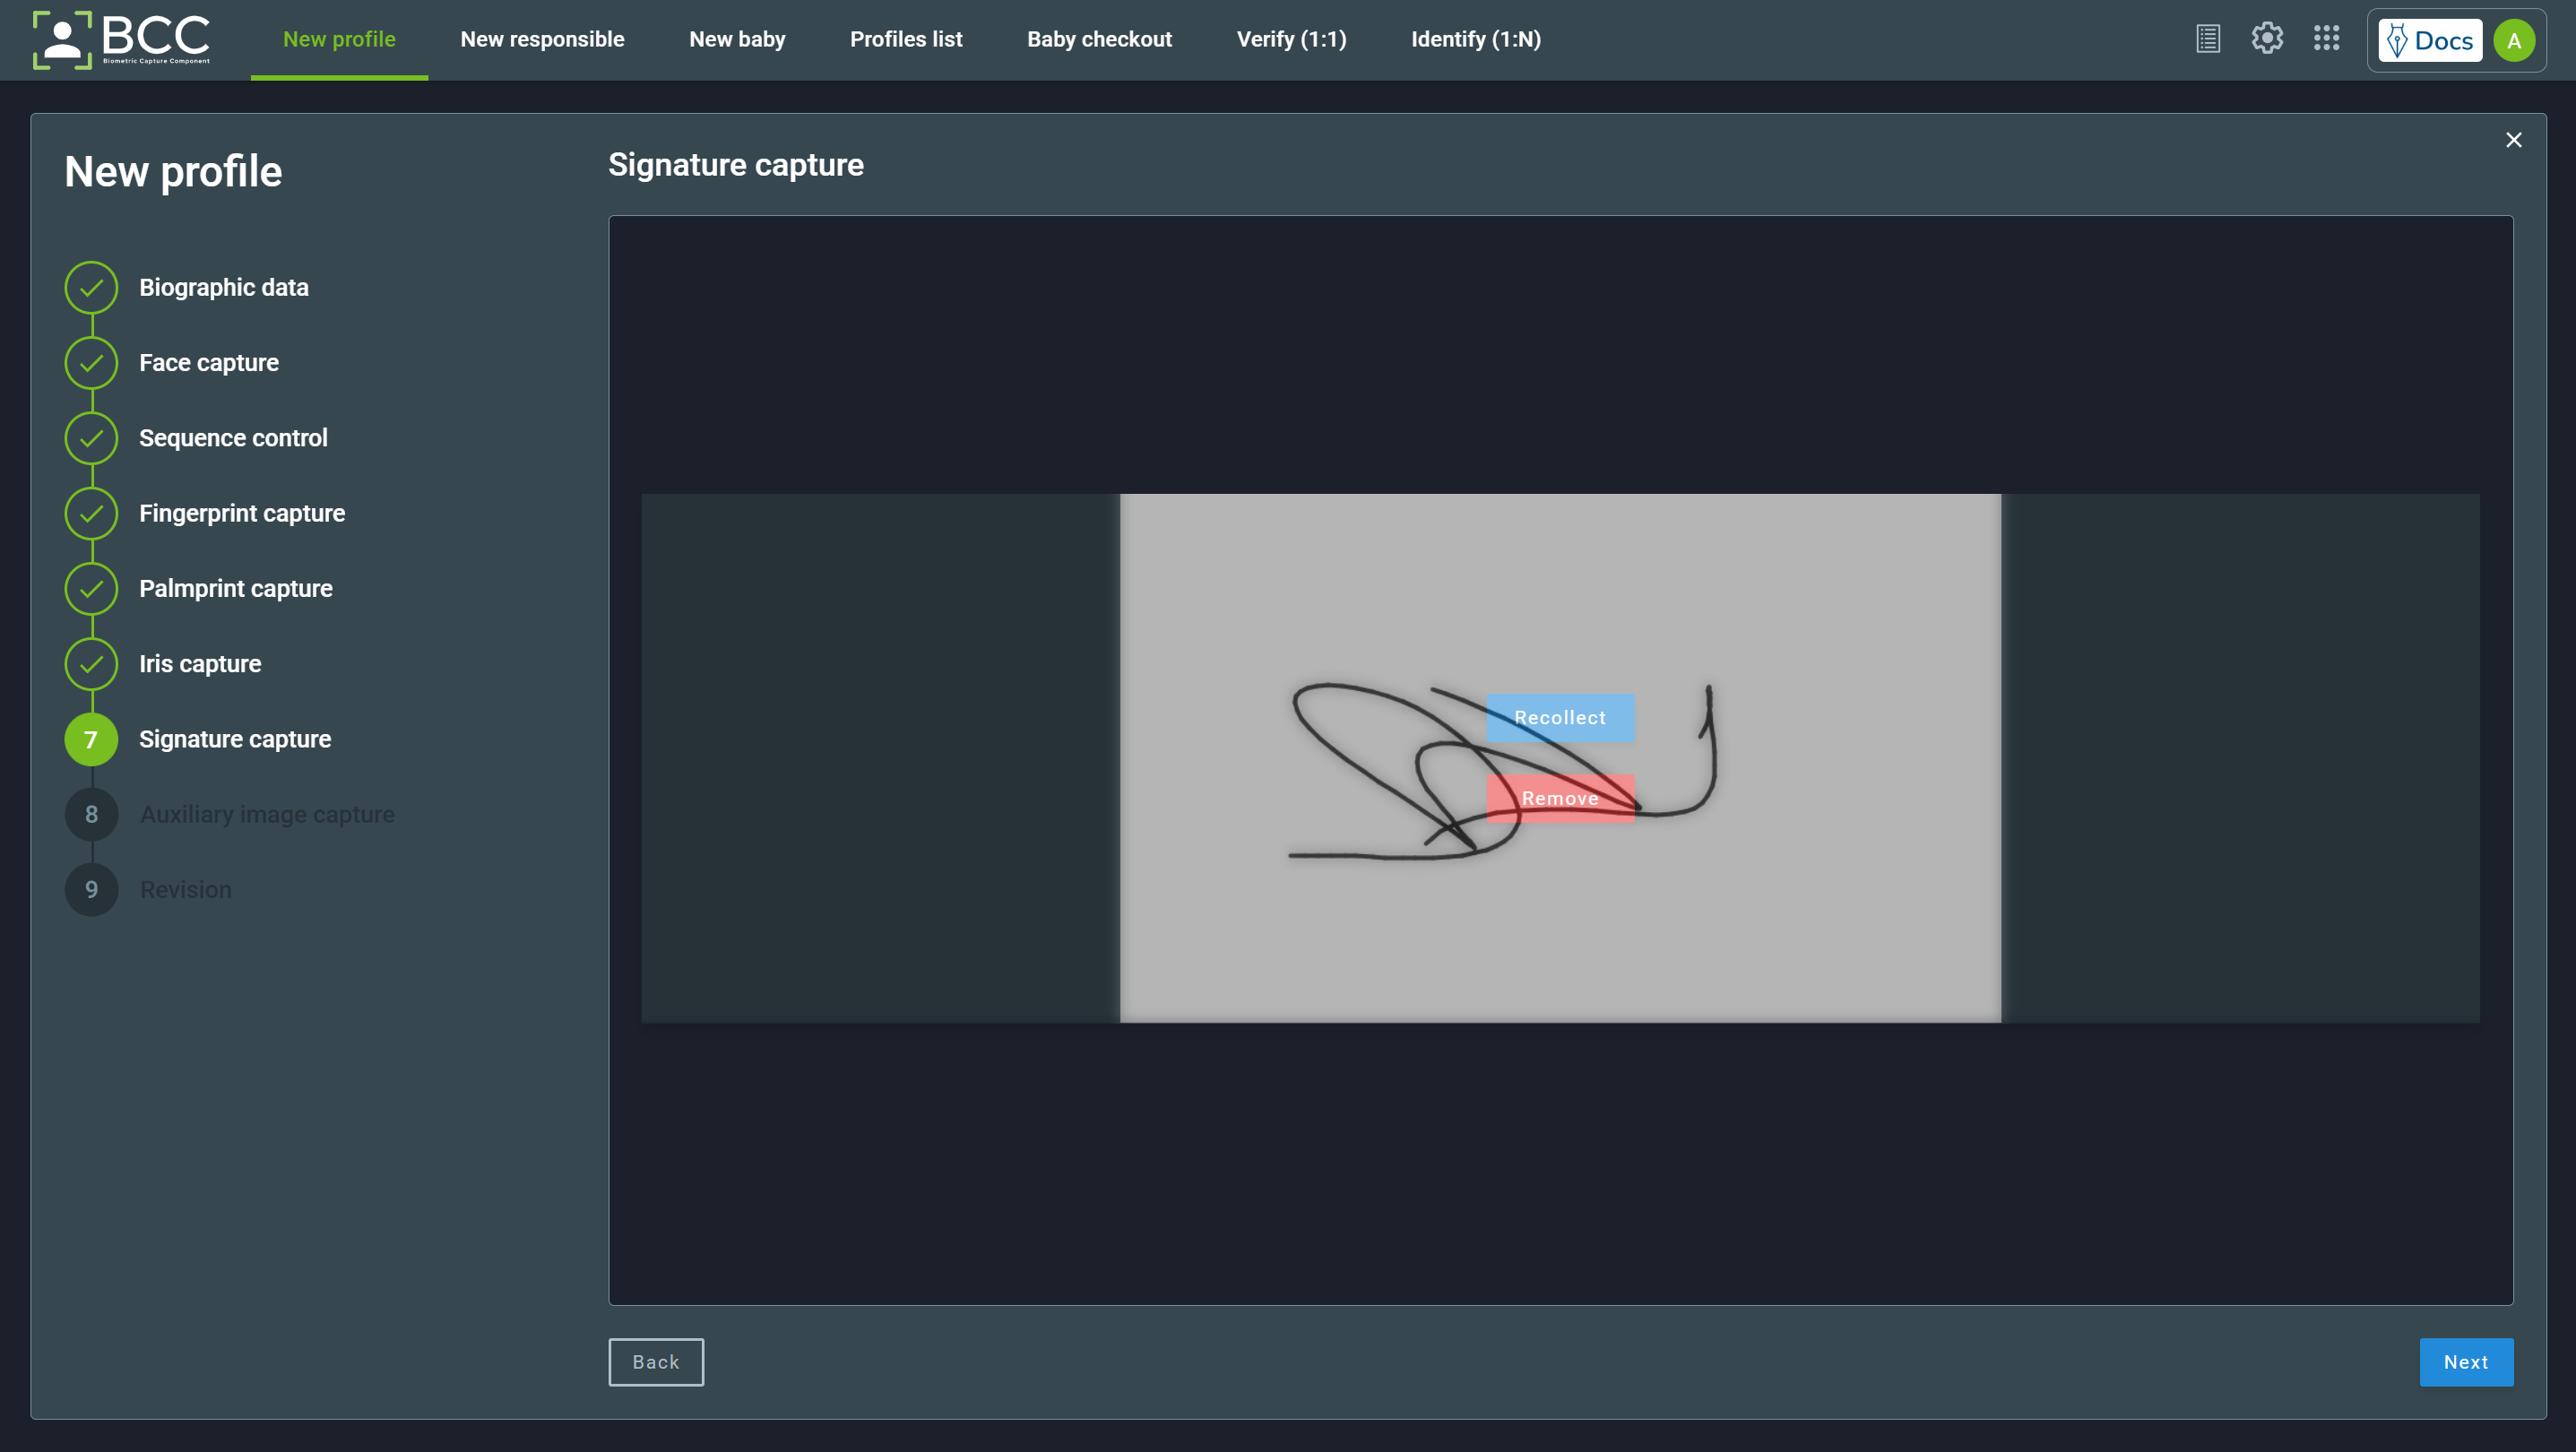
After finishing, click Next to proceed.
5.1.7. Auxiliary Images Capture
The Auxiliary Images Capture is a step where you can capture images of scars, marks, and tattoos. These images are enrolled in the subject’s profile but are not used for automated identification.
If the capture window doesn’t appear automatically, click on Click to capture.
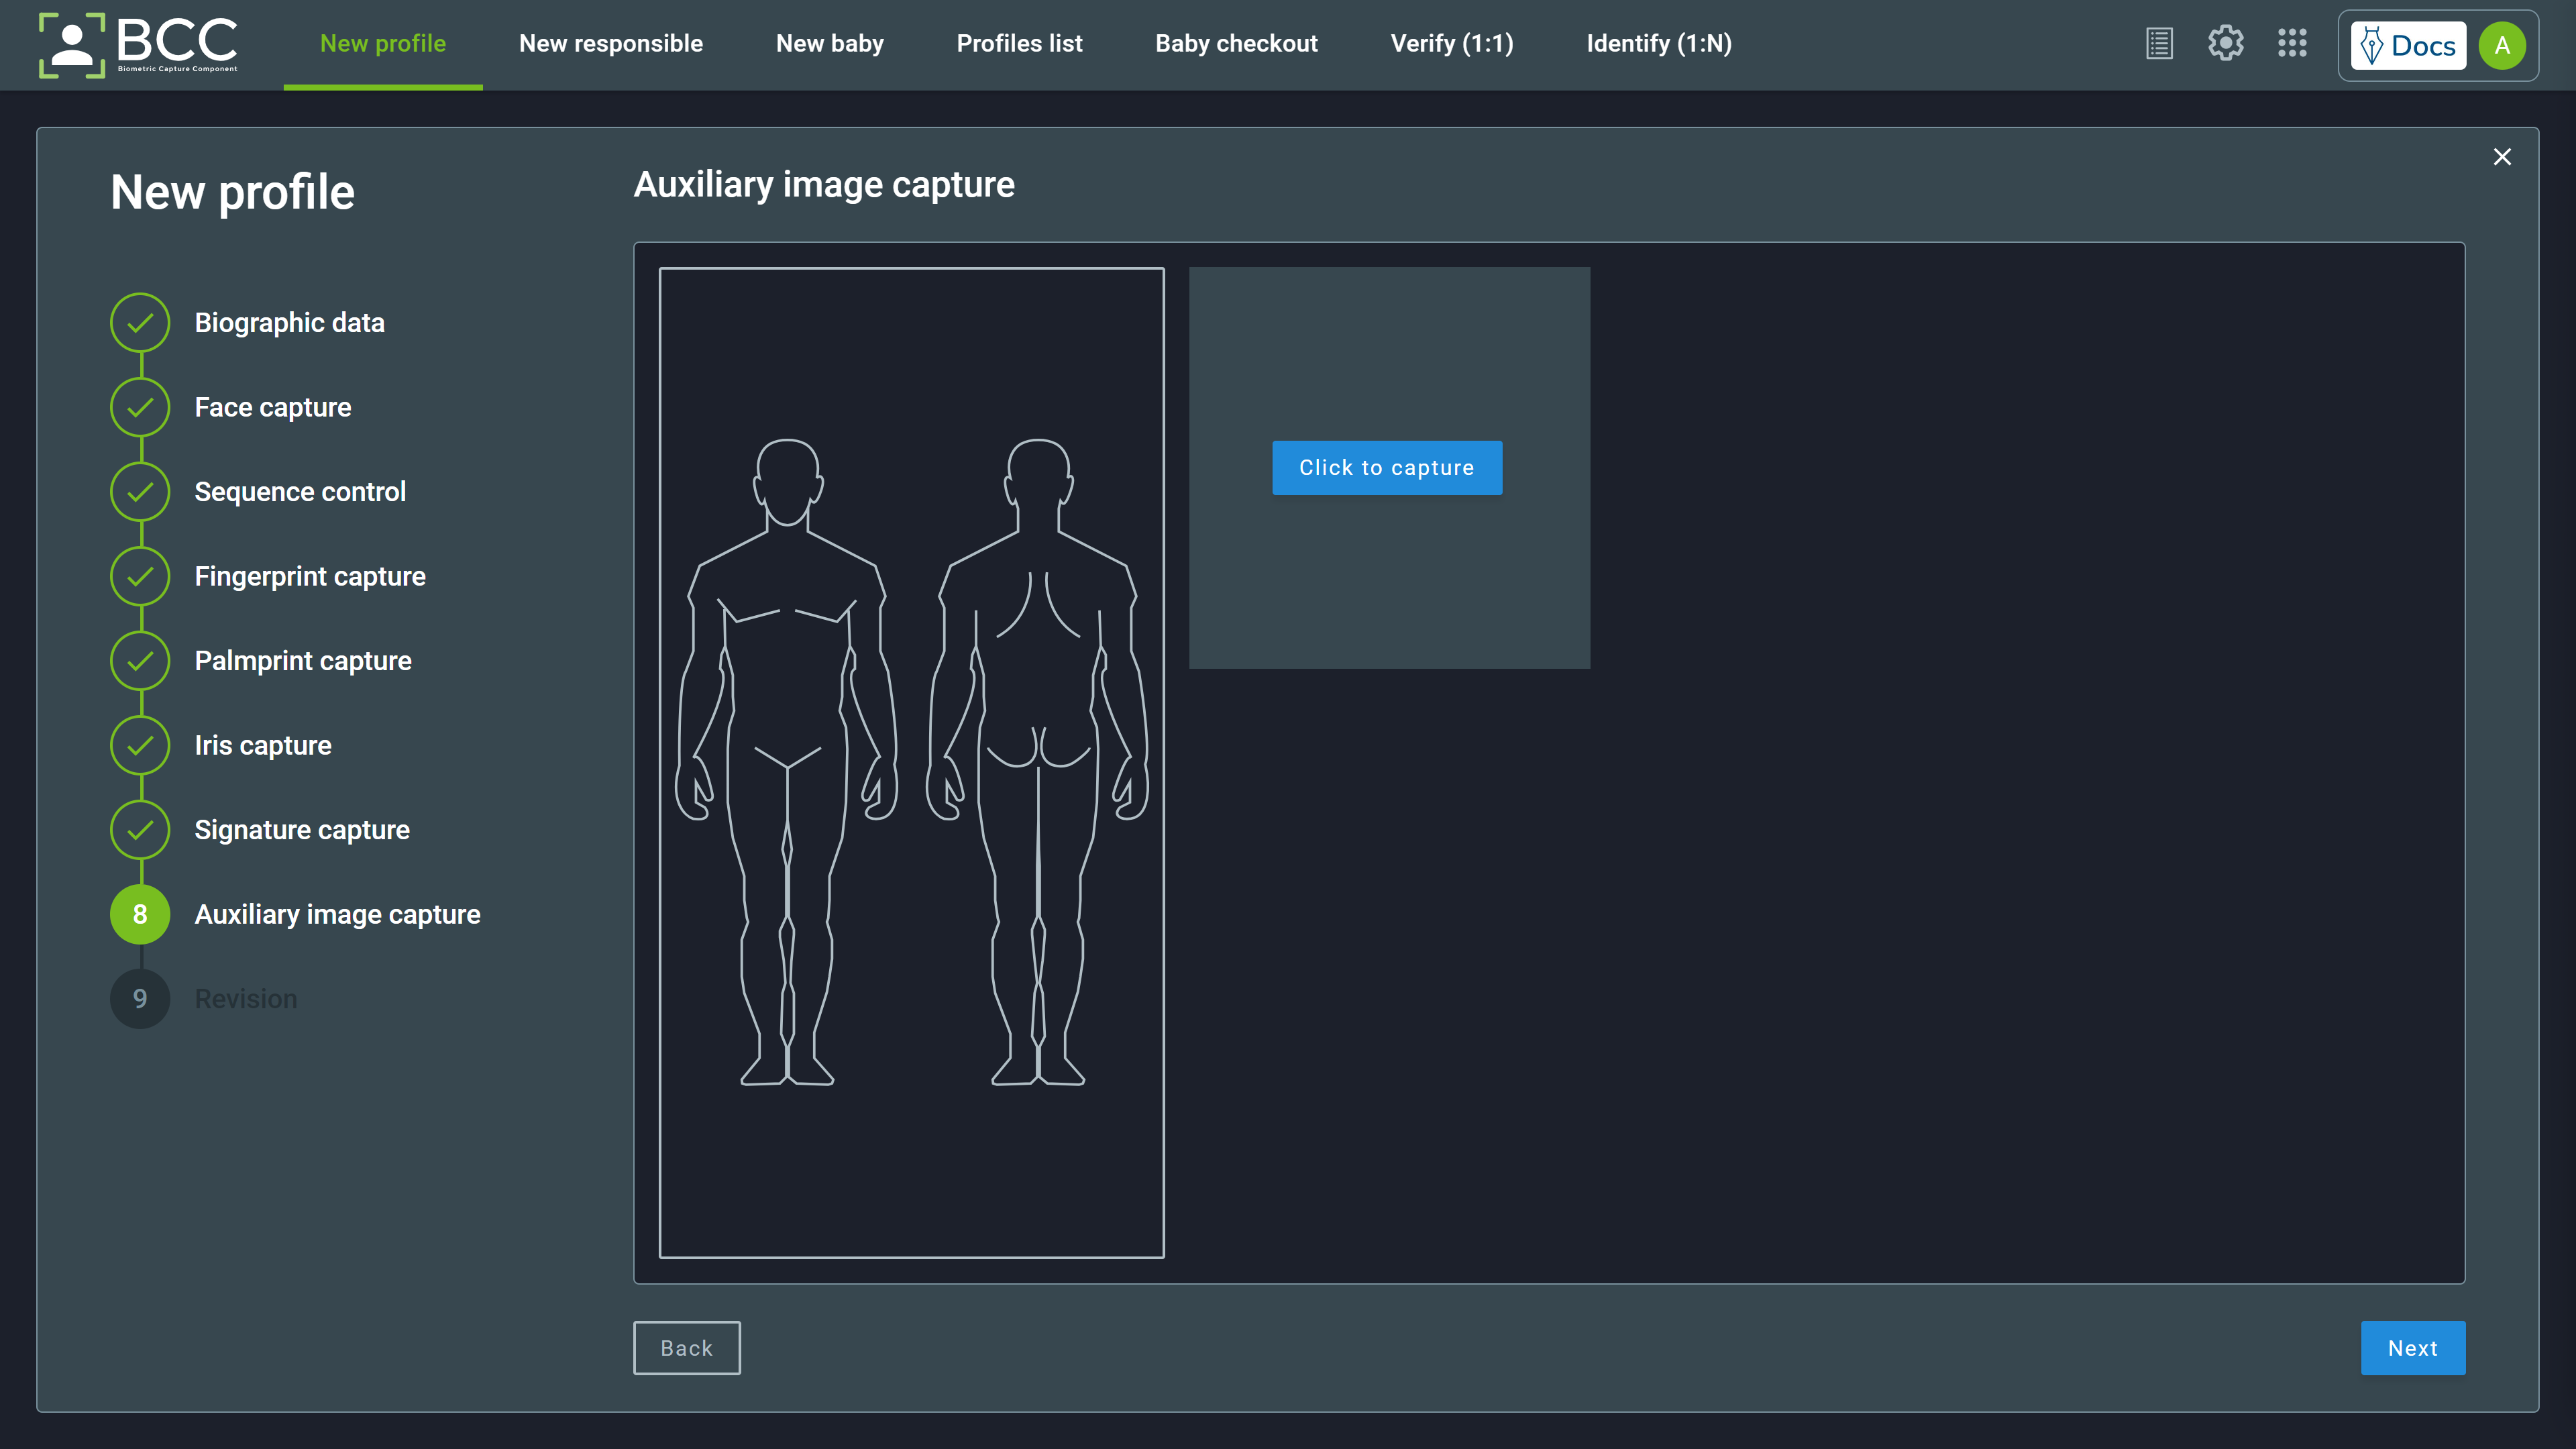
The capture window will open.
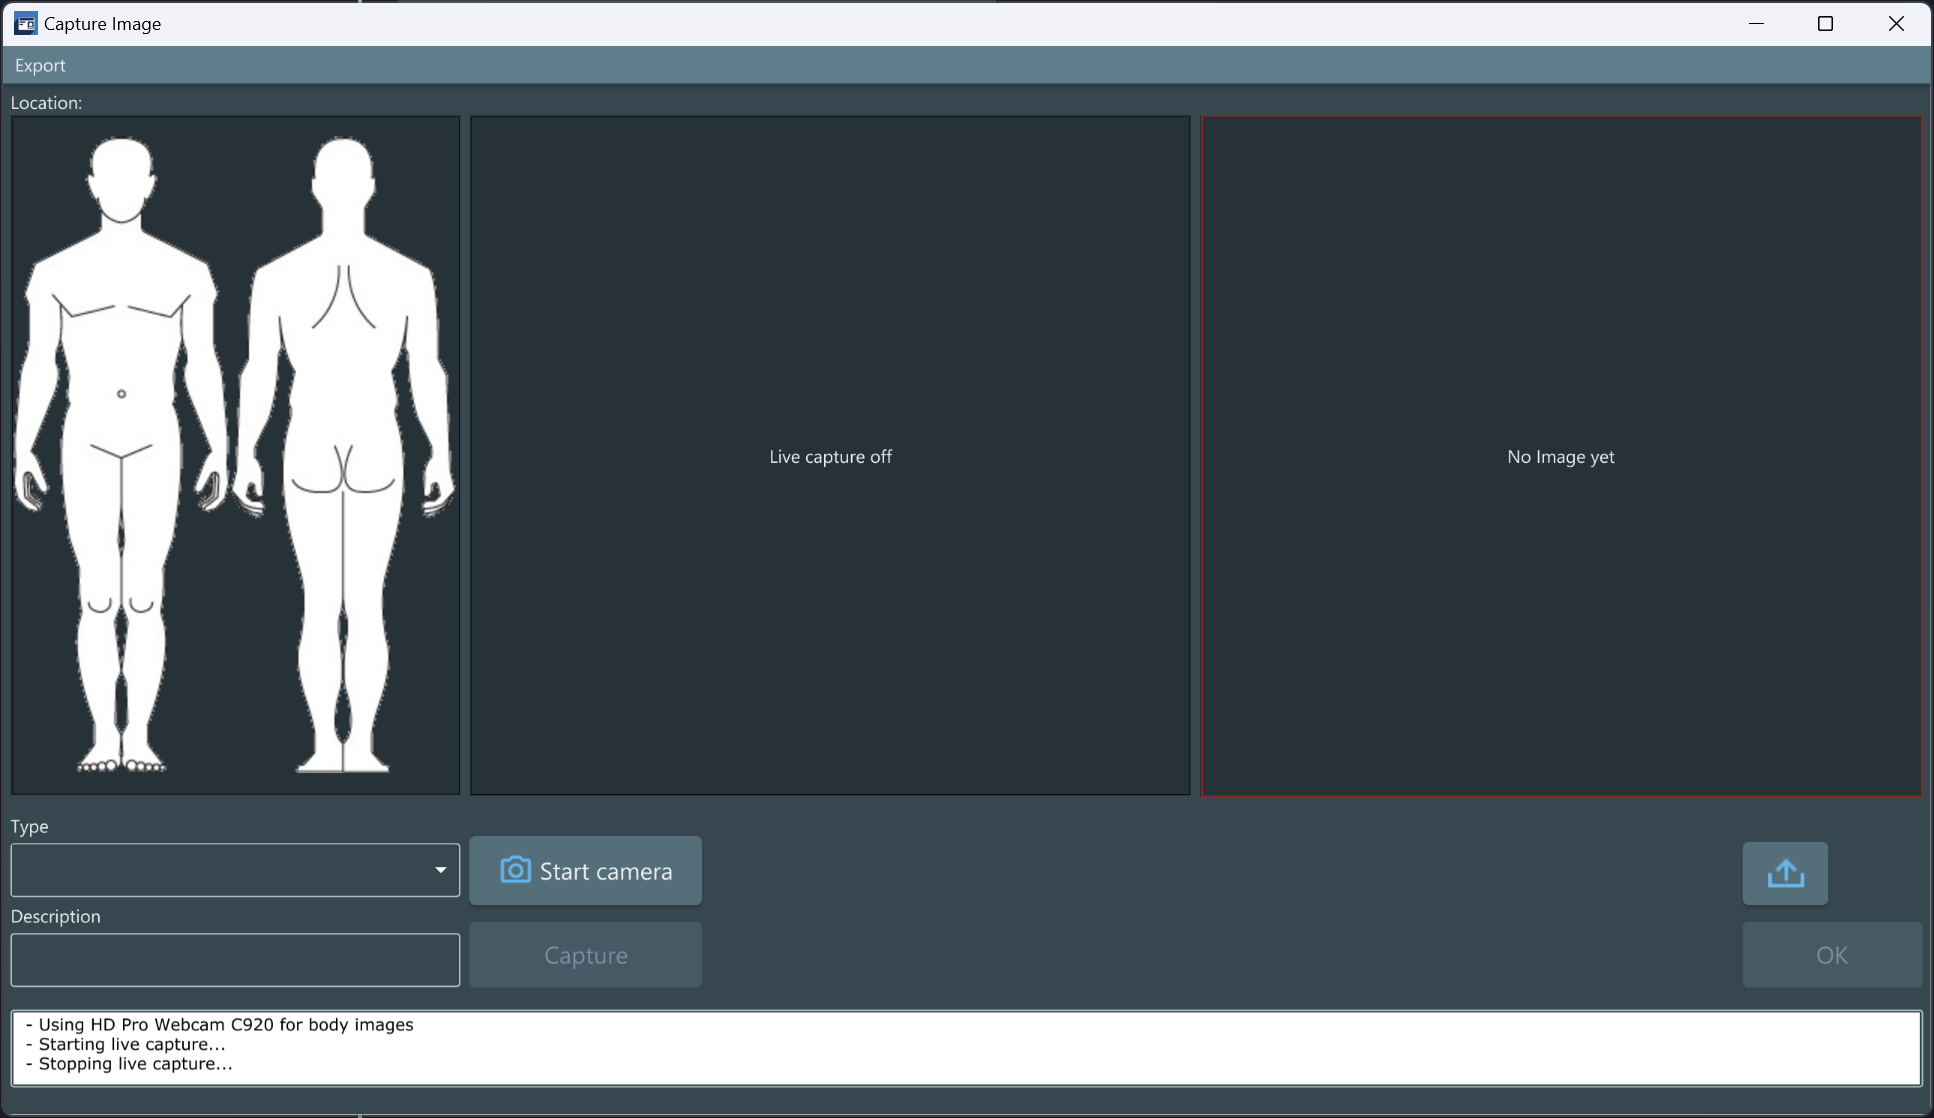
On the left side, choose the location of the feature being captured by clicking on the body part. The selected area will be highlighted in red. Next, select the feature type by opening the dropdown menu under Type and choosing Tattoo, Scar, or Mark. It is also possible to add a description.
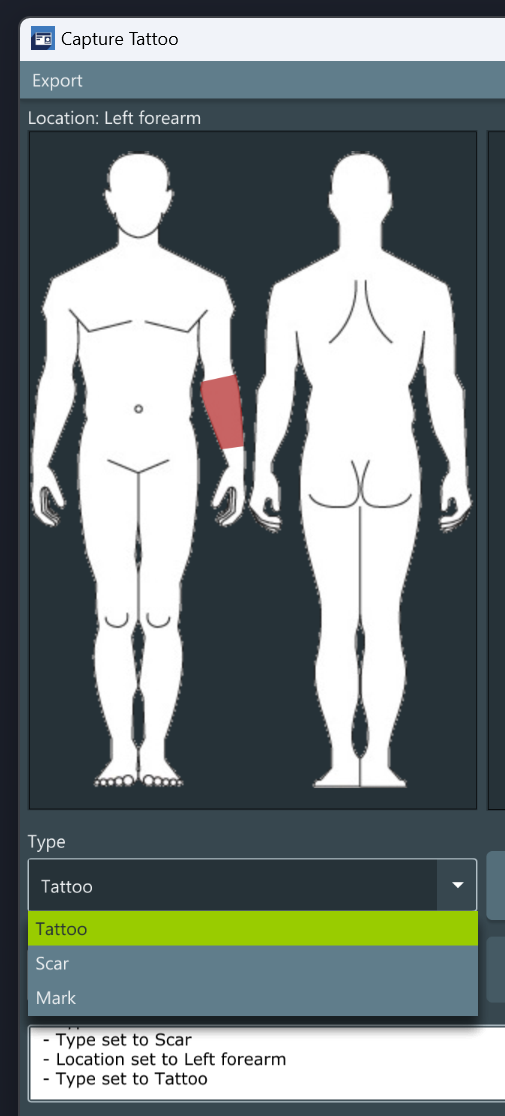
If the camera did not start automatically, click the Start Camera button. Next, adjust brightness, contrast, and/or zoom if desired. Then, when ready, click the Capture button to take the photo.
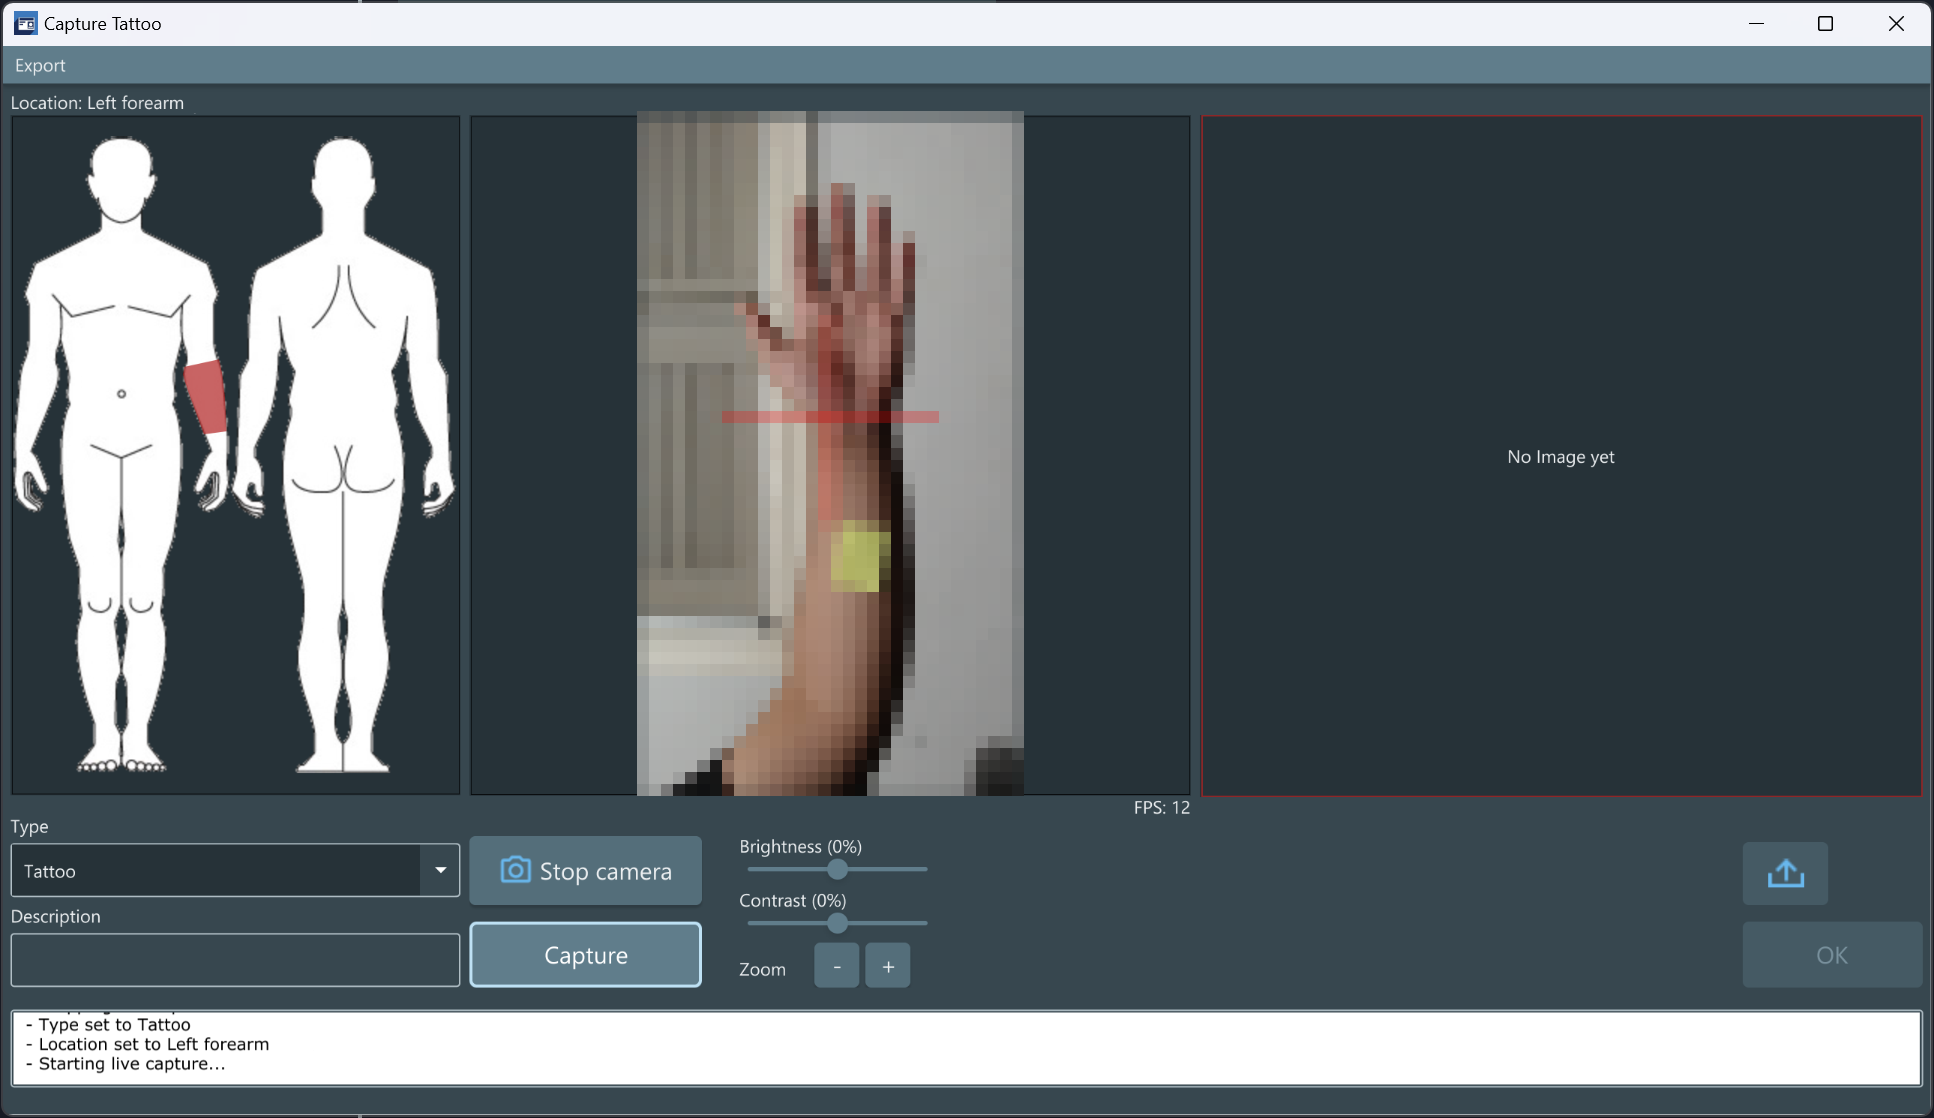
After reviewing the captured image and the added information (location, type, description), click OK.
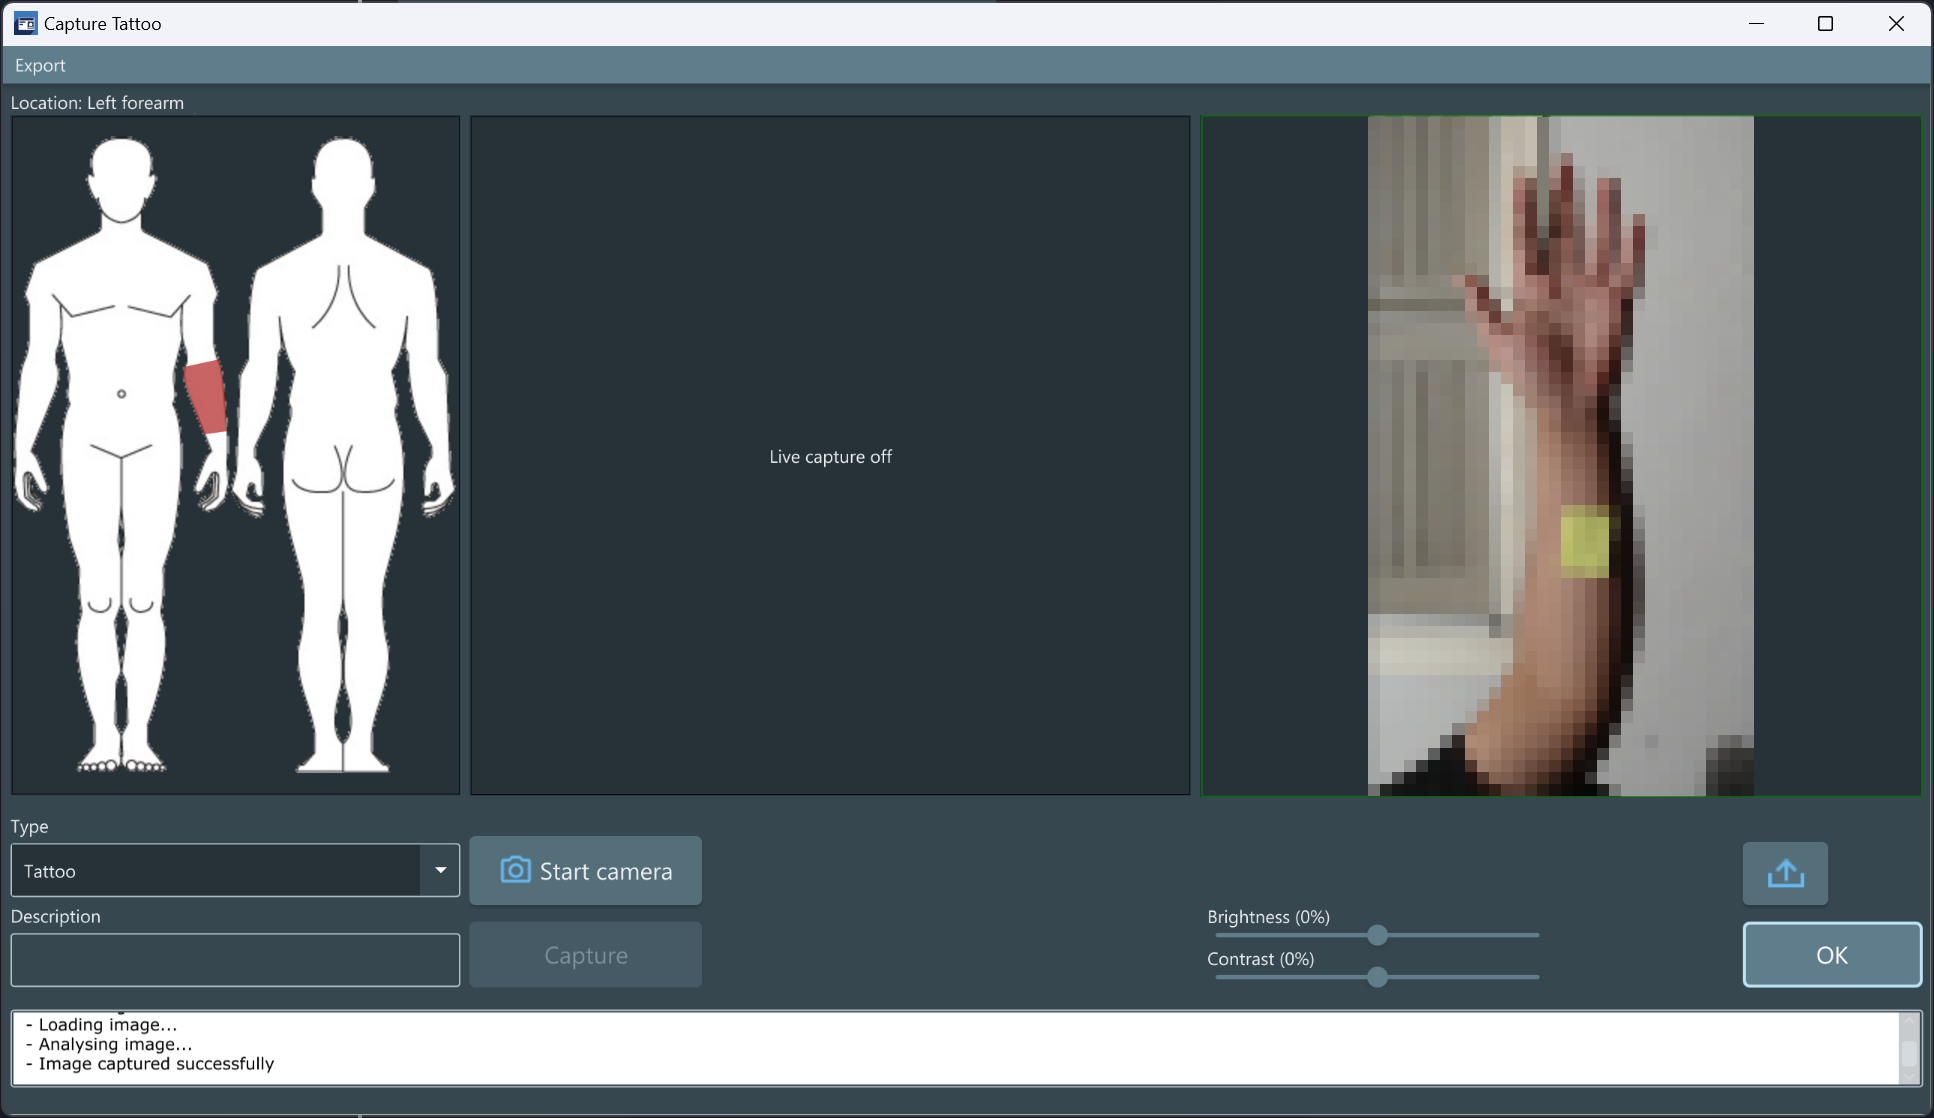
The image will be added to the profile, and its highlighted location on the body will change from red to green.
Finally, the capture window will start a new capture. Repeat the process for all the features to be captured. When finished, close the capture window by clicking on the X in the upper-right corner of the capture window.
To remove a captured image, hover over the desired image. The remove button will appear. Click on Remove.
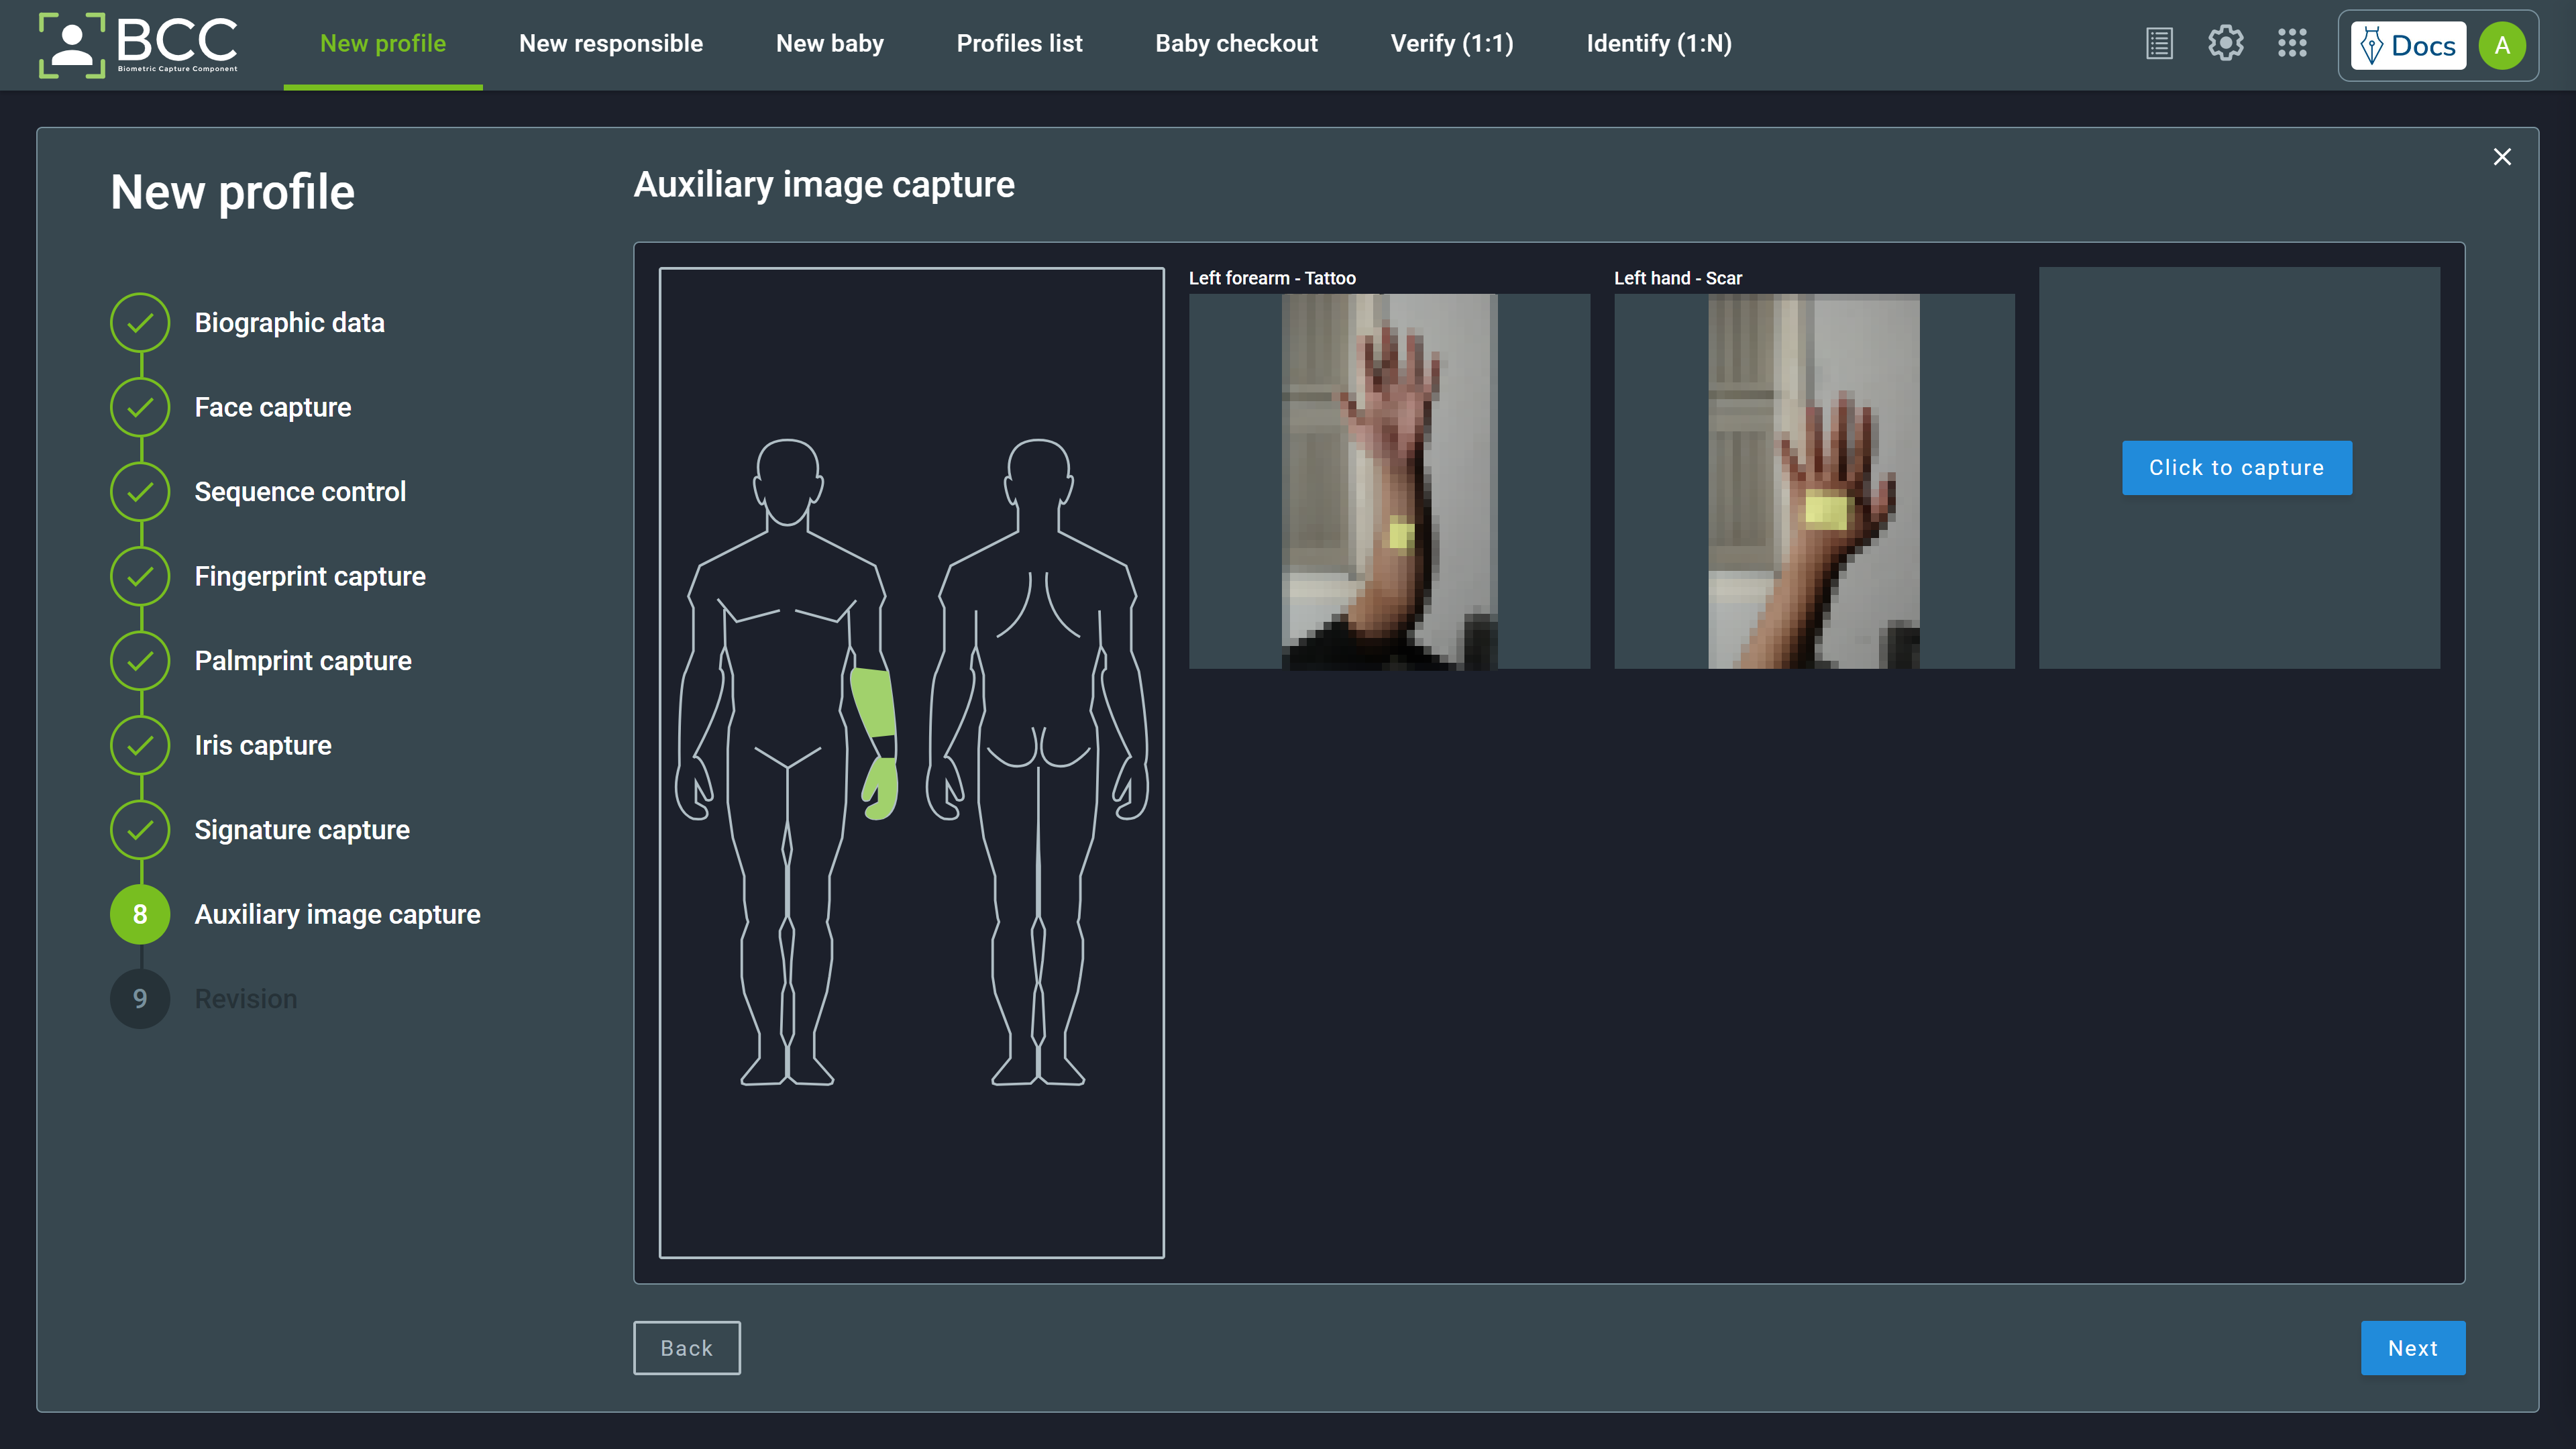
After finishing, click Next to proceed to the revision page.
5.1.8. Revision
Subsequently to all captures, BCC will display the Revision page. This page shows all the biographical and biometric information you are about to submit to the database. After checking the information, conclude the enrollment by clicking the Done button.
Additionally, you can export all the profile information to a .pdf file by clicking the Export PDF button.
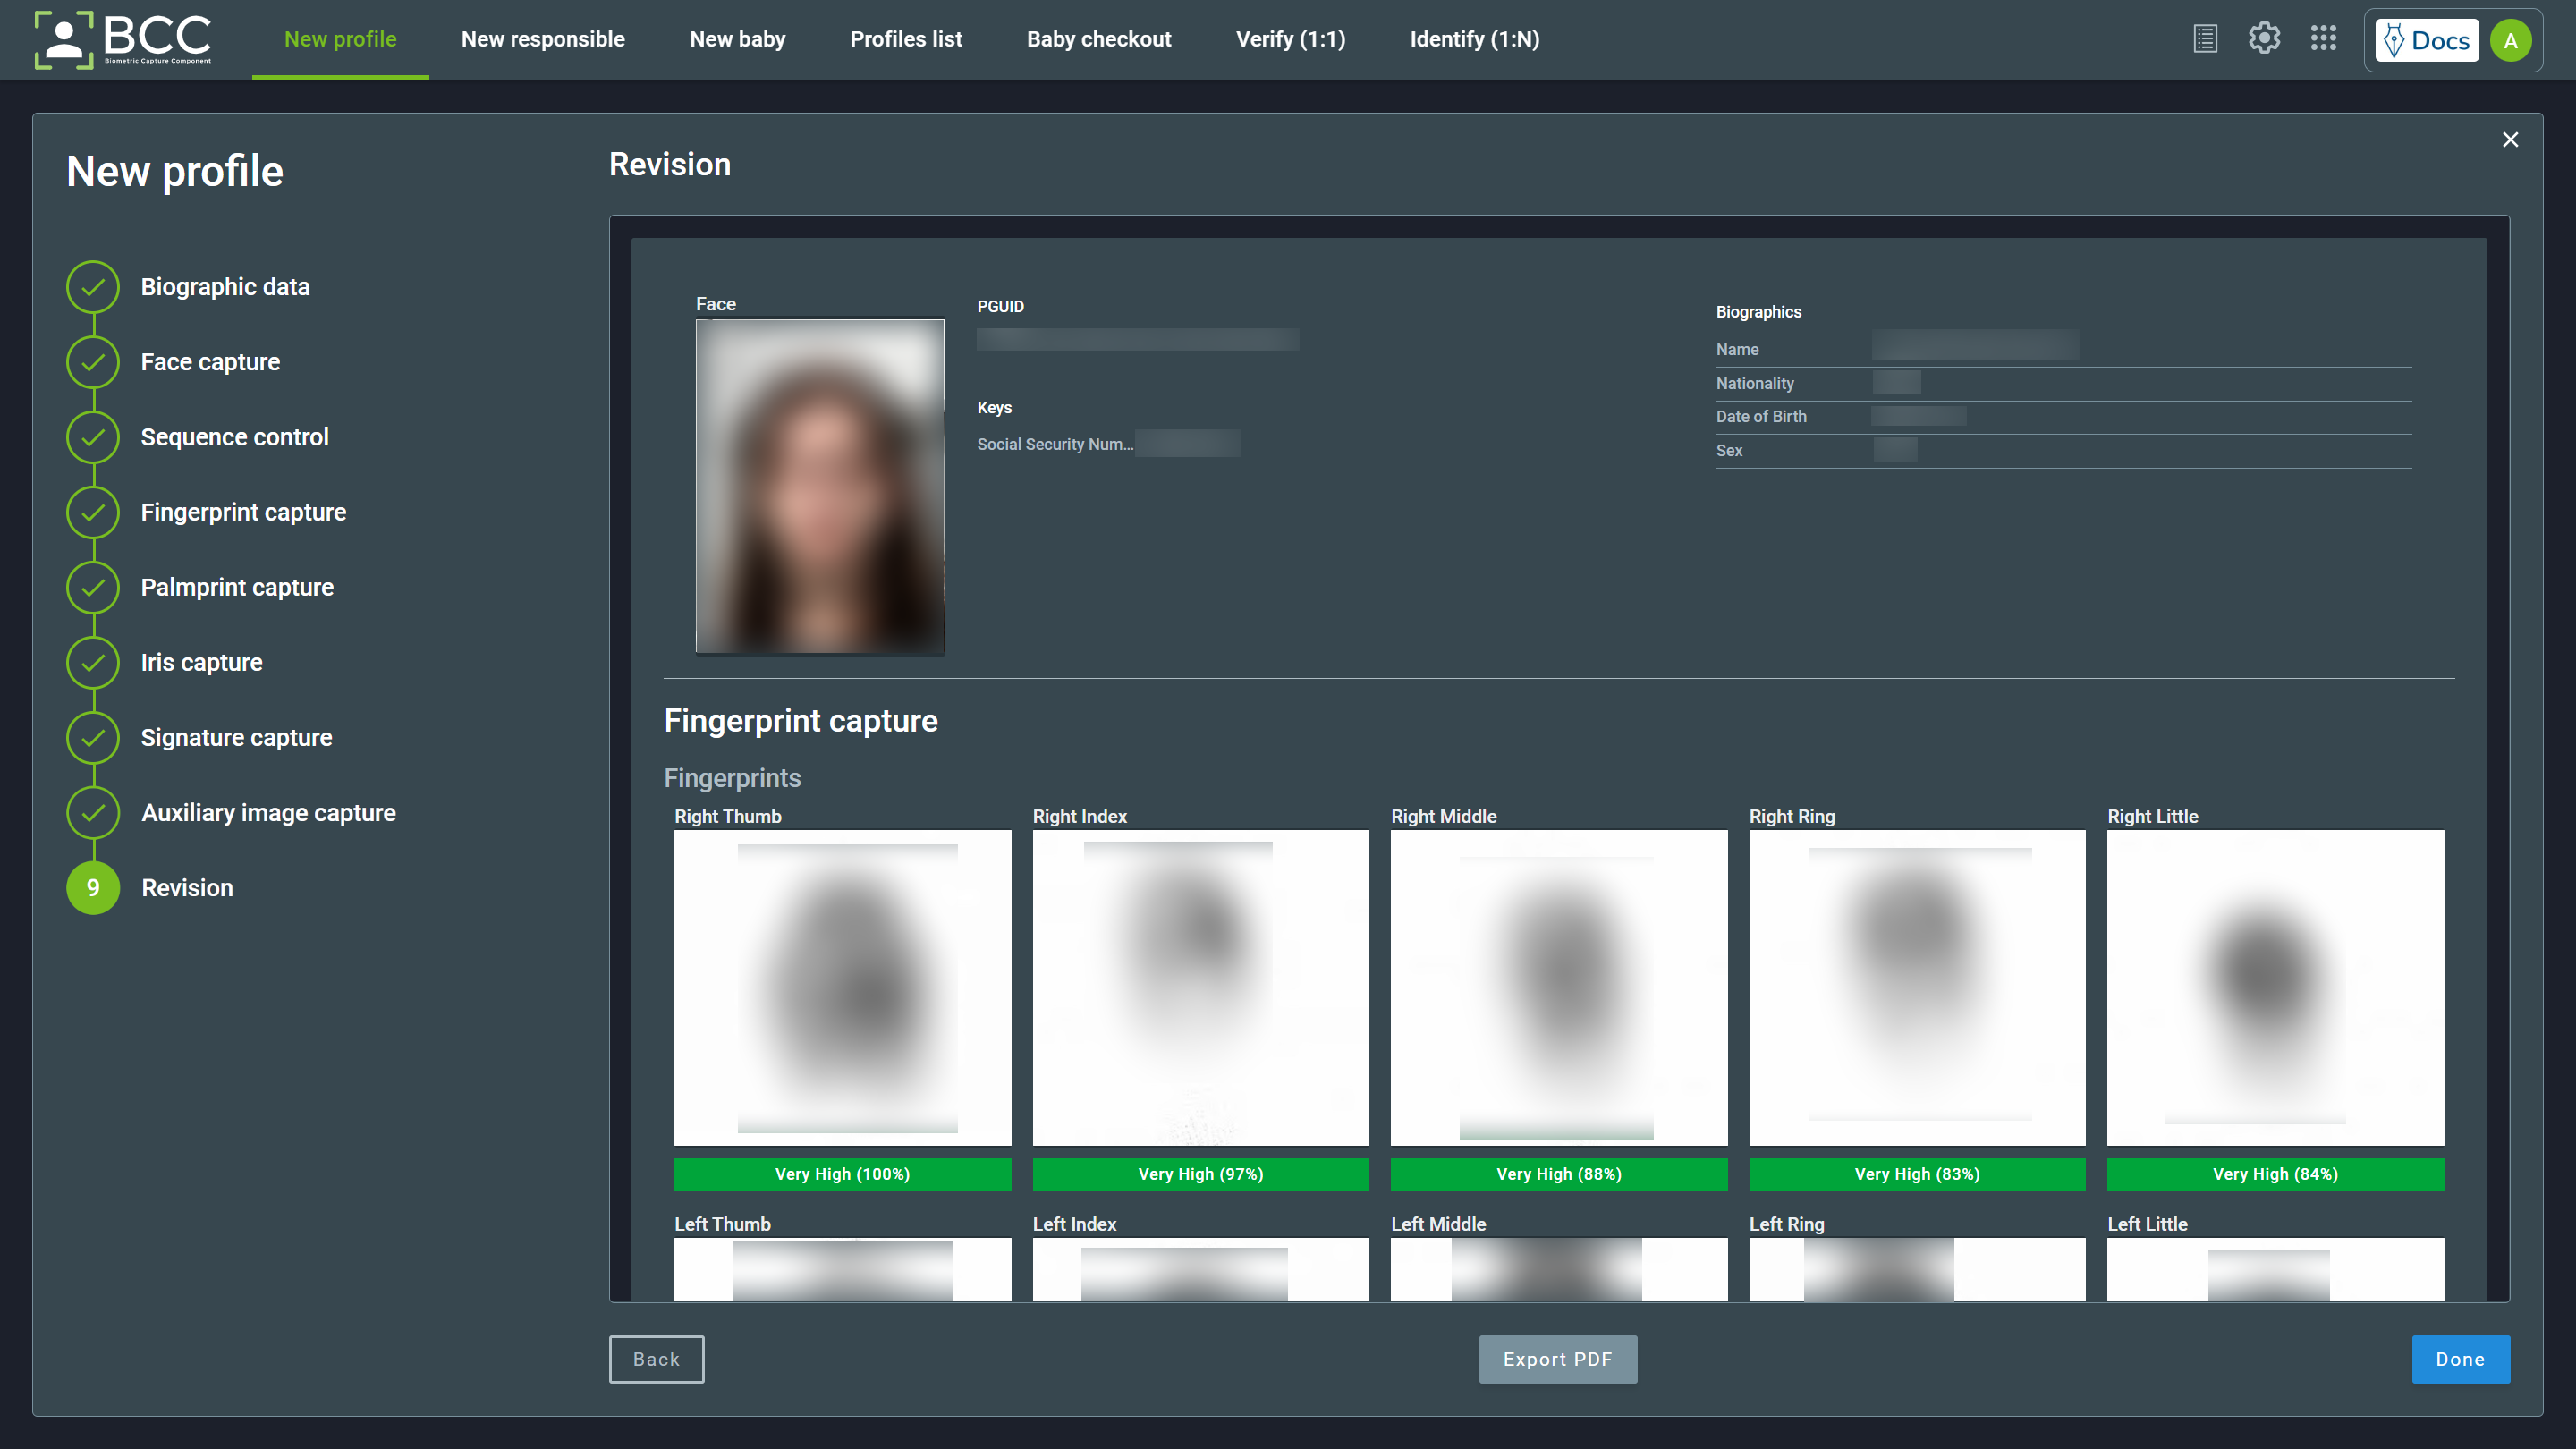
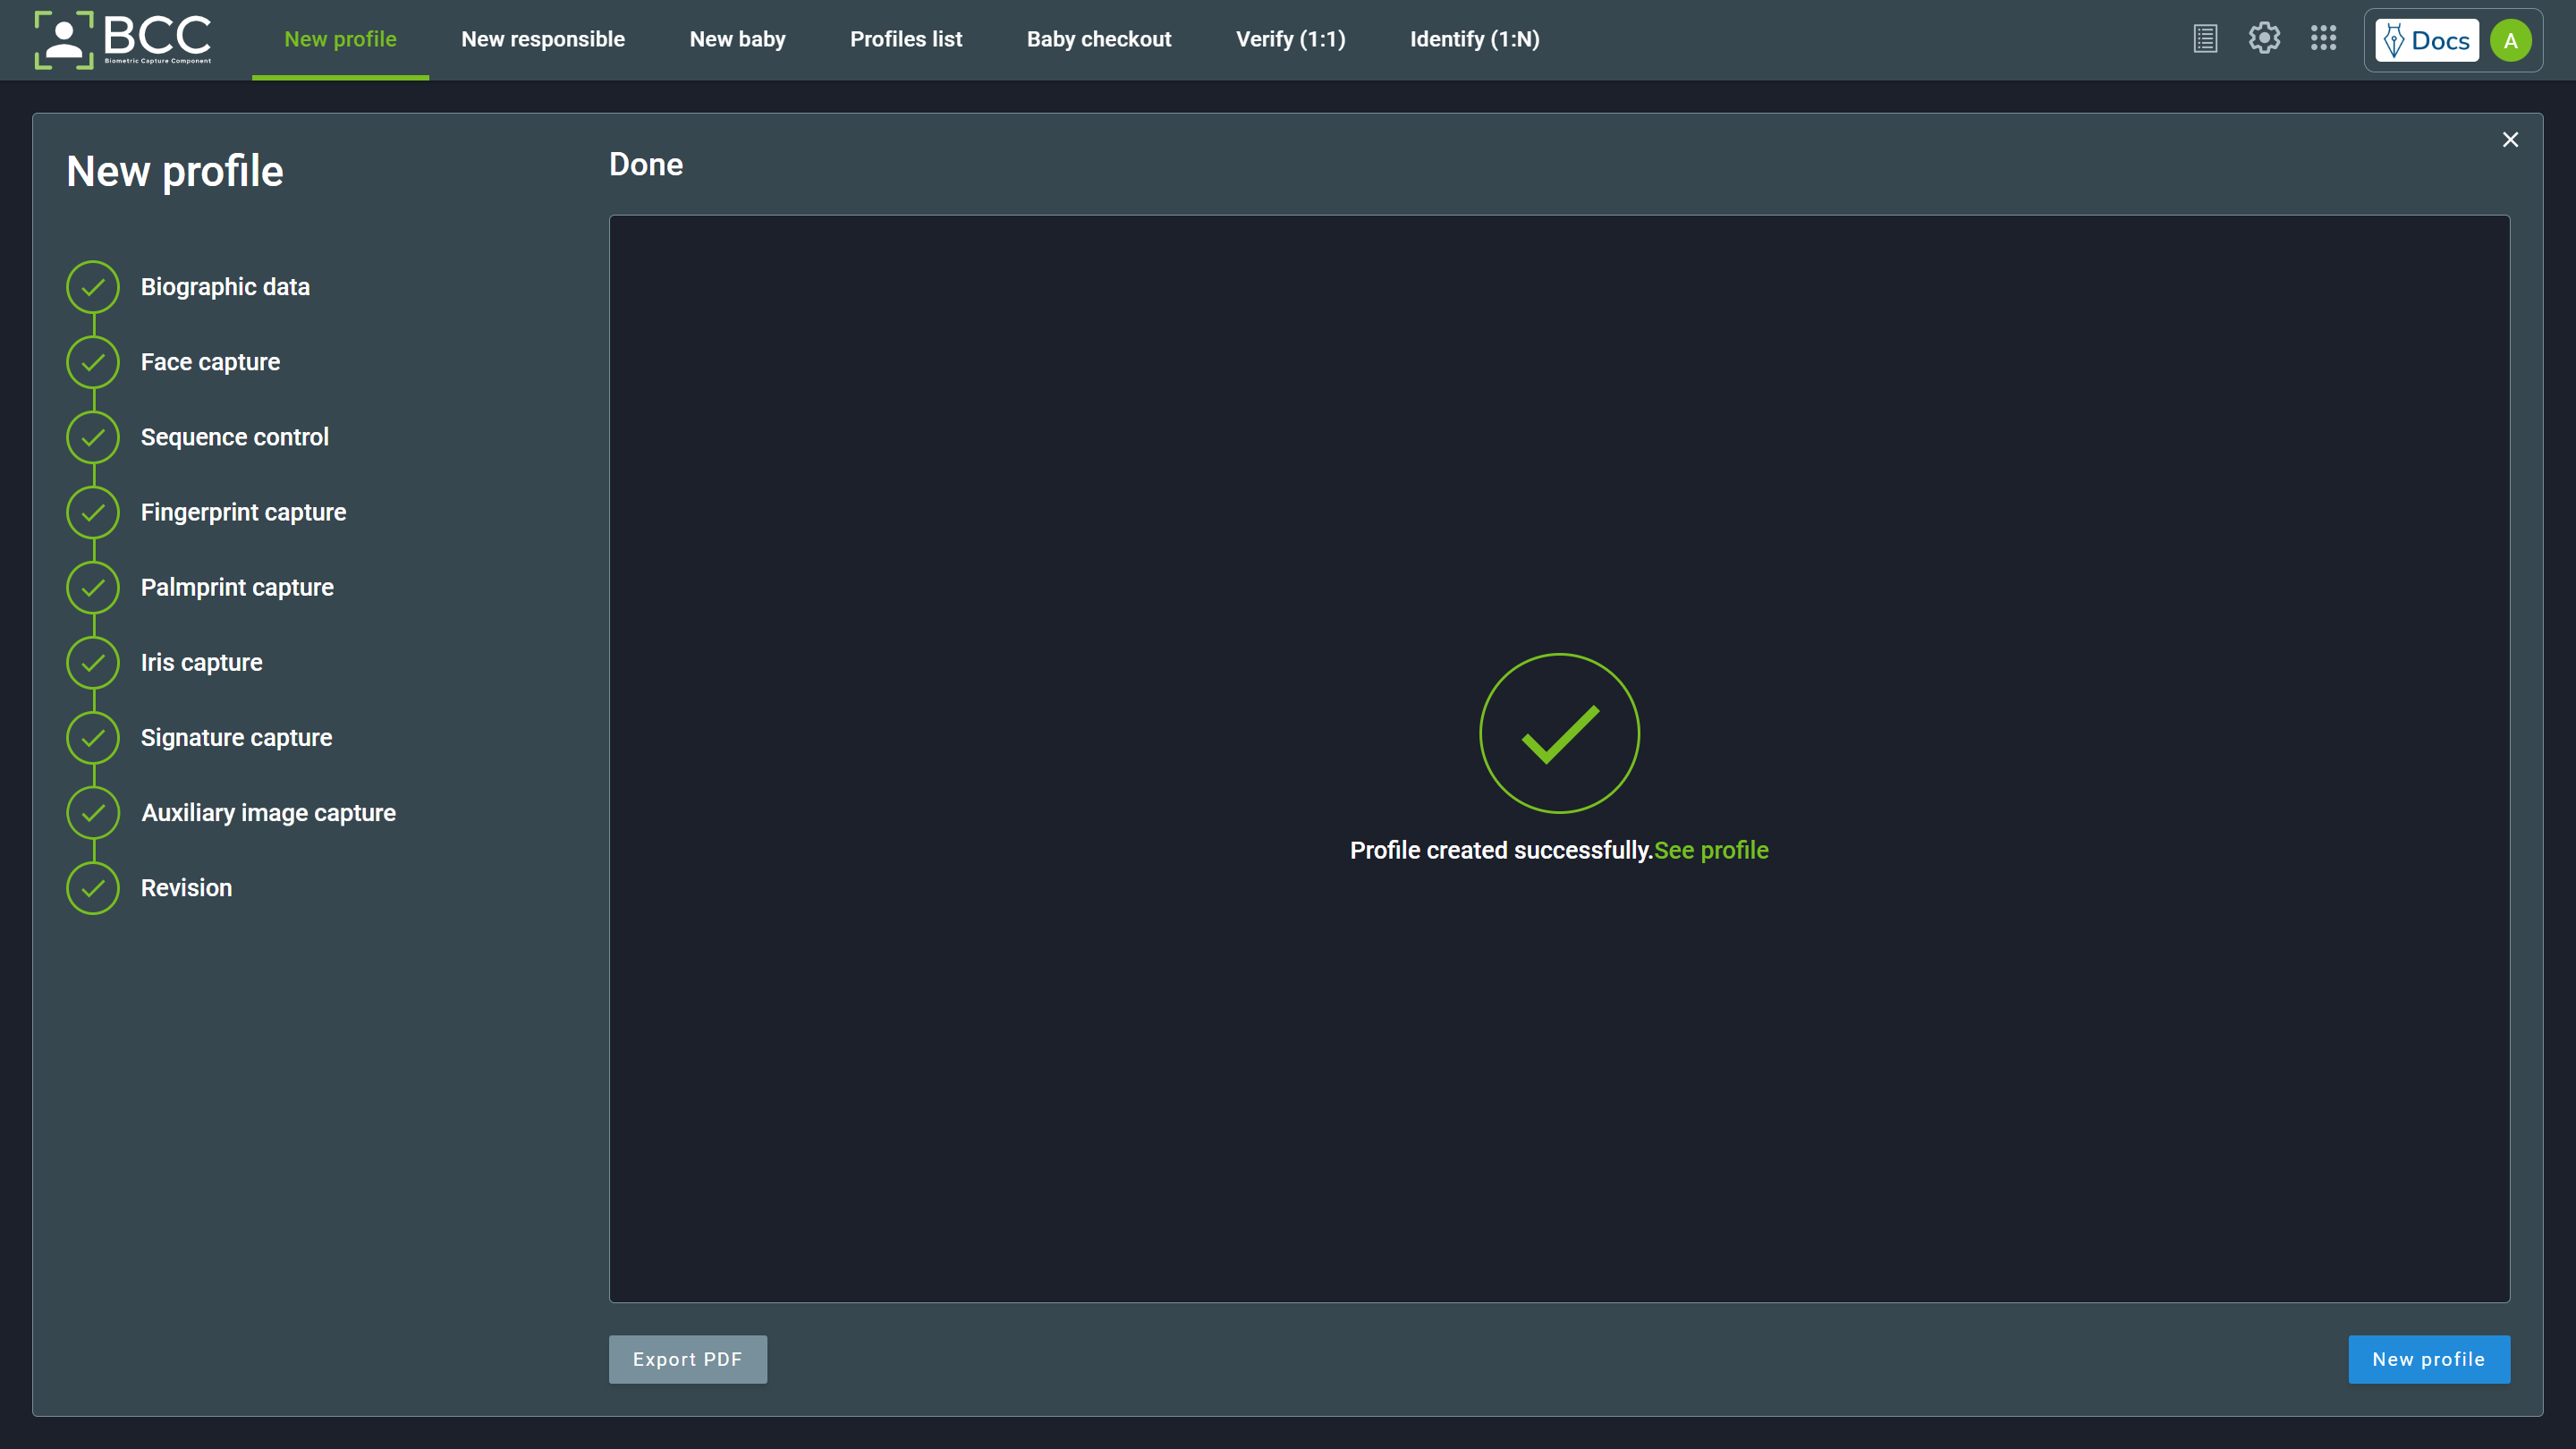
When you click the Done button, the following page will be displayed. You can start a new enrollment by clicking the New Profile button, export the profile to a .pdf file by clicking the Export PDF button, or visualize the profile in the Profile list by clicking the See profile text in the middle of the screen.
5.1.9. Fingerprint and Palmprint Exceptions
Some conditions may cause a finger or a palm extraction to not be possible at the capture time. To handle those situations, you may mark the capture as an exception. BCC offers two exception modules, the “simplified” and the “technical.” Note that only one of those modules will be available at a time in your environment.
The simplified module offers the following exceptions:
- Damaged
- Bandaged
- Ignored
- Amputated
- Low quality
While the technical module offer those exceptions:
- Adactyly
- Ankylosis
- Ectrodactyly
- Hyperphalangya
- Polydactyly
- Microdactyly
- Macrodactyly
- Sindactyly
When handling an exception, select the desired one from the dropdown menu, then click “Ok.” Remember that choosing an exception for the sequence control capture will set the exception to ALL fingers that would be captured in that capture step.
5.2. Verify
The verify tool is used to verify one’s identity through one of its biometrics. This process consists of a 1:1 verification where a key (e.g., SSN or Passport Number) is provided alongside a biometric capture to match the enrolled profile with the same key.
To perform a verification, click the Verify box on the main page or click on Verify on the top bar menu. Clicking will bring you to the Verify page. You will have buttons to select the desired biometric that you want to be captured on this page. The biometrics that can be captured are:
- Face
- Fingerprint
- Palmprint
- Iris
- The entire or parts of the person’s profile
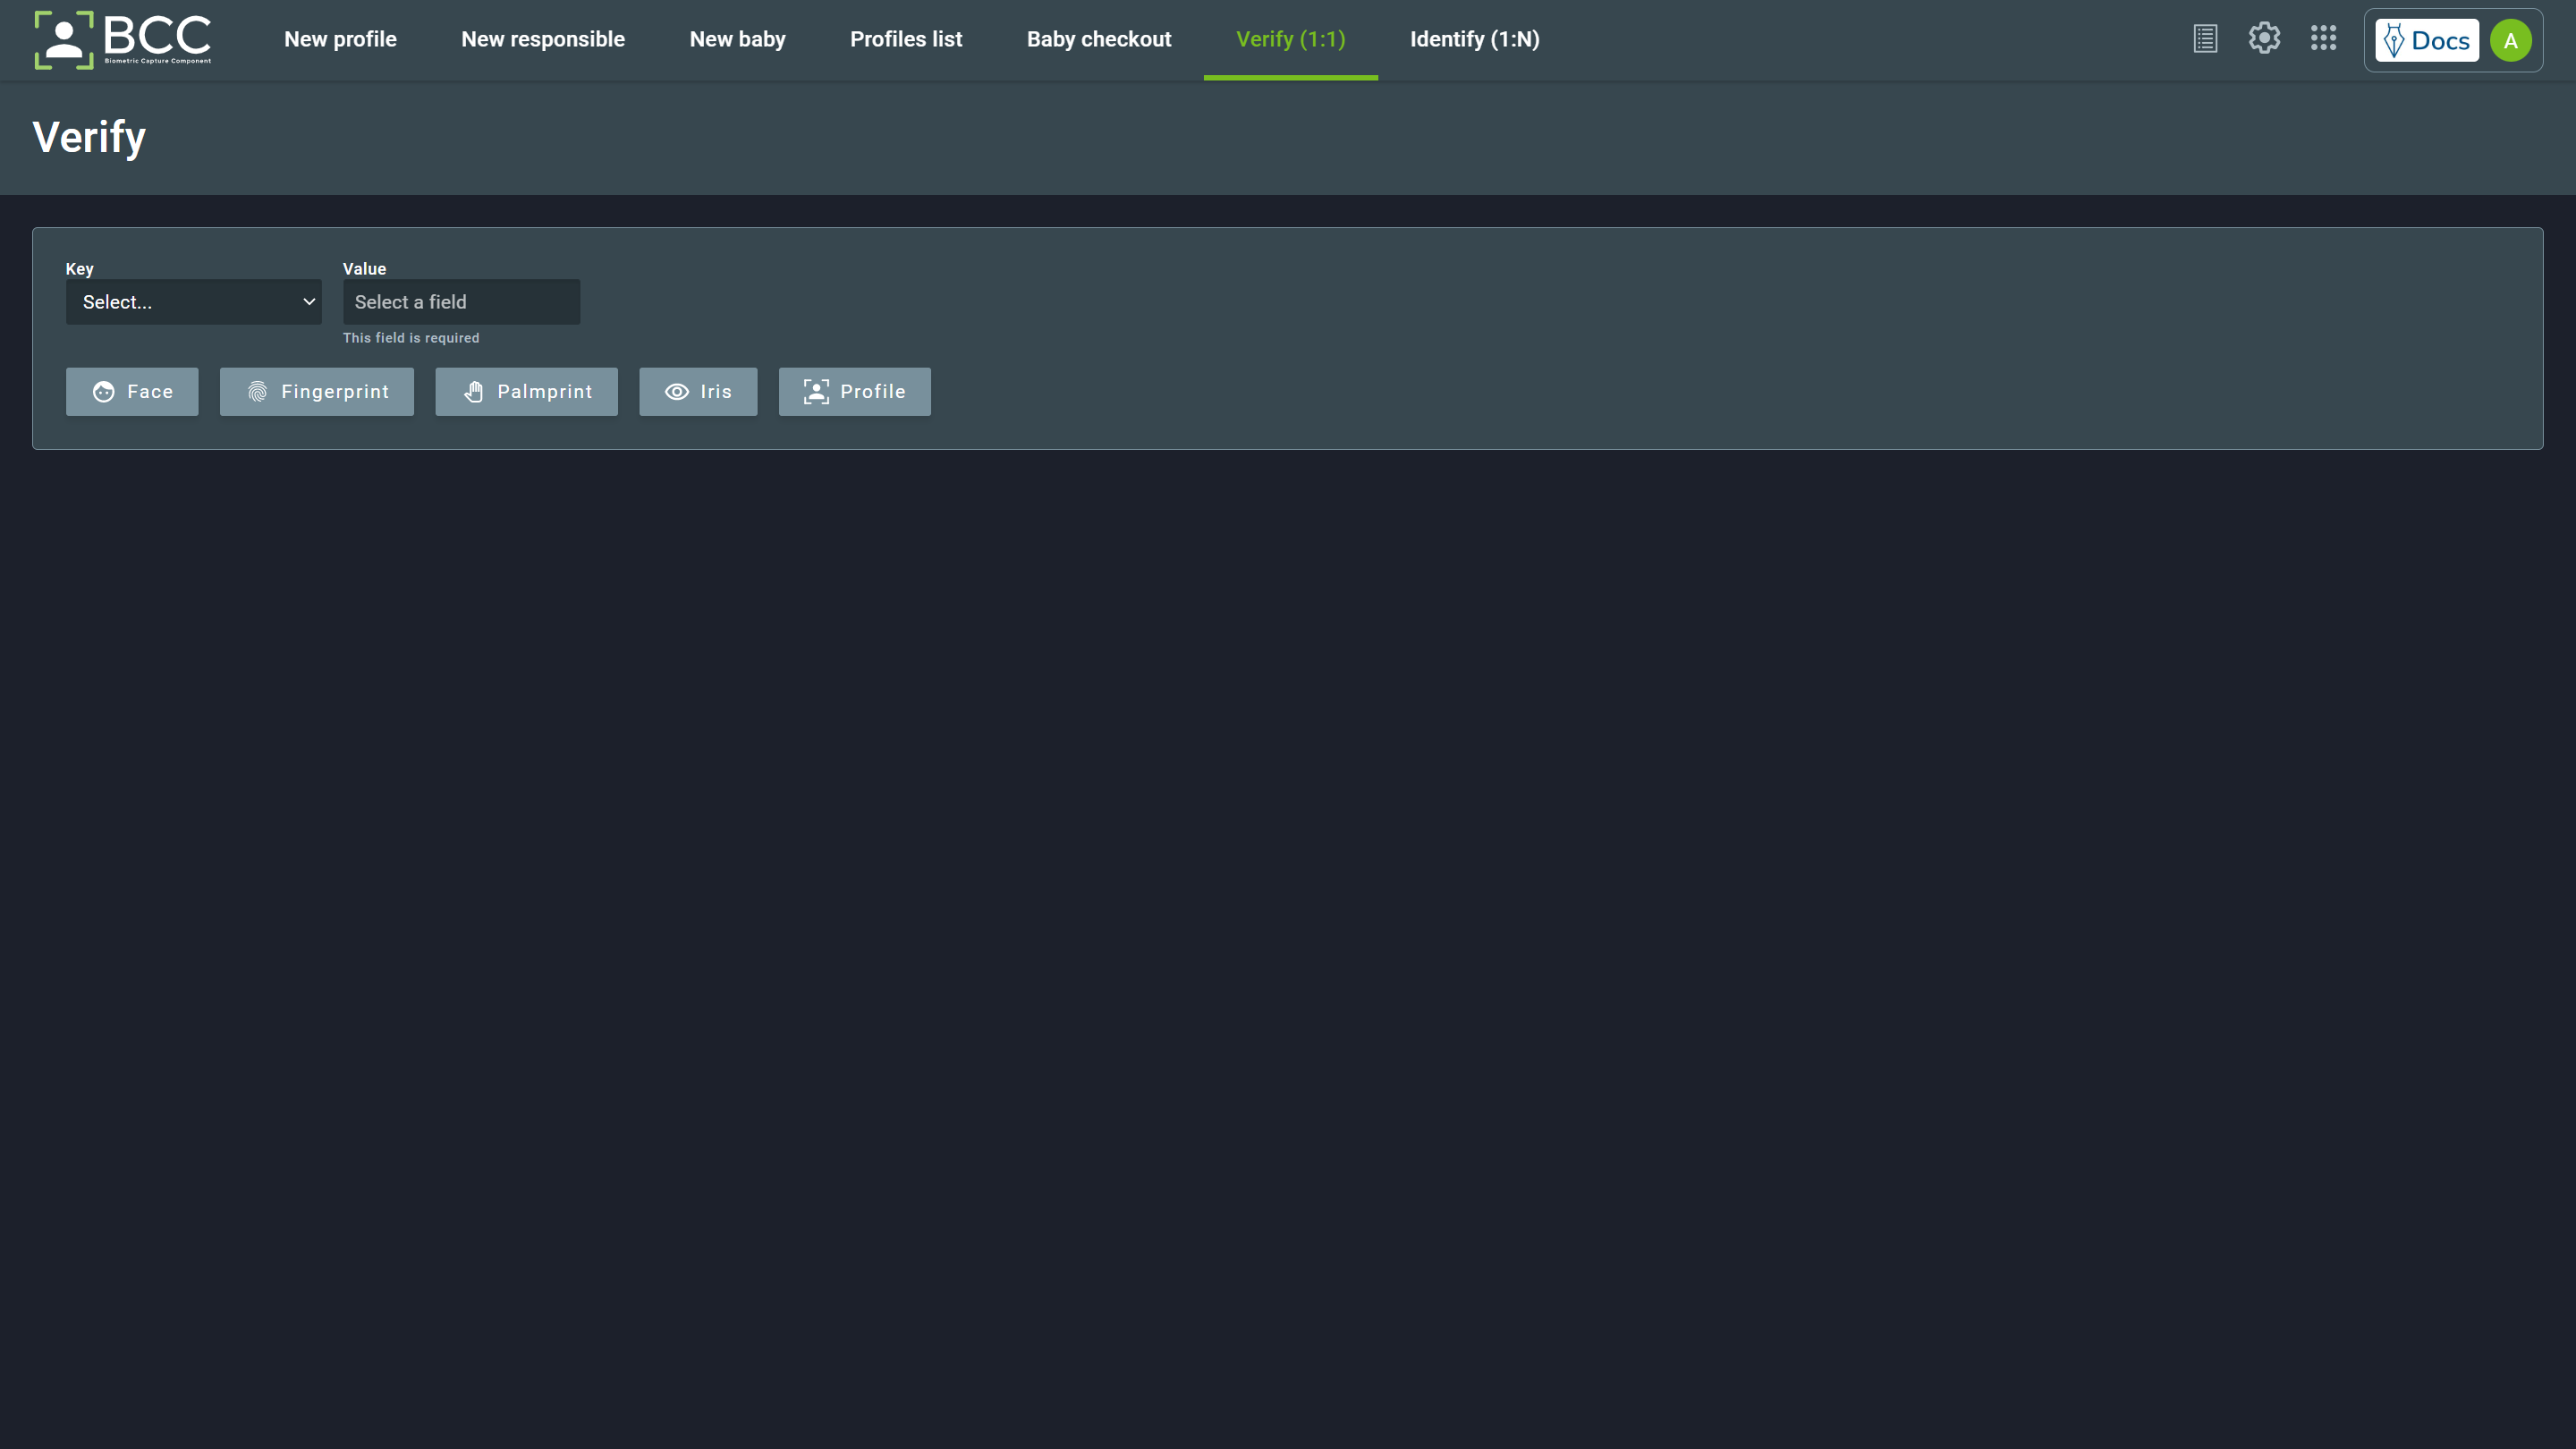
Selecting one of those options will open the capture window for its respective biometric. The only exception is the profile option, where you may choose which and how many biometric traits should be captured to be matched in the verify operation. The profile capture is explained in the Profile Verify section.
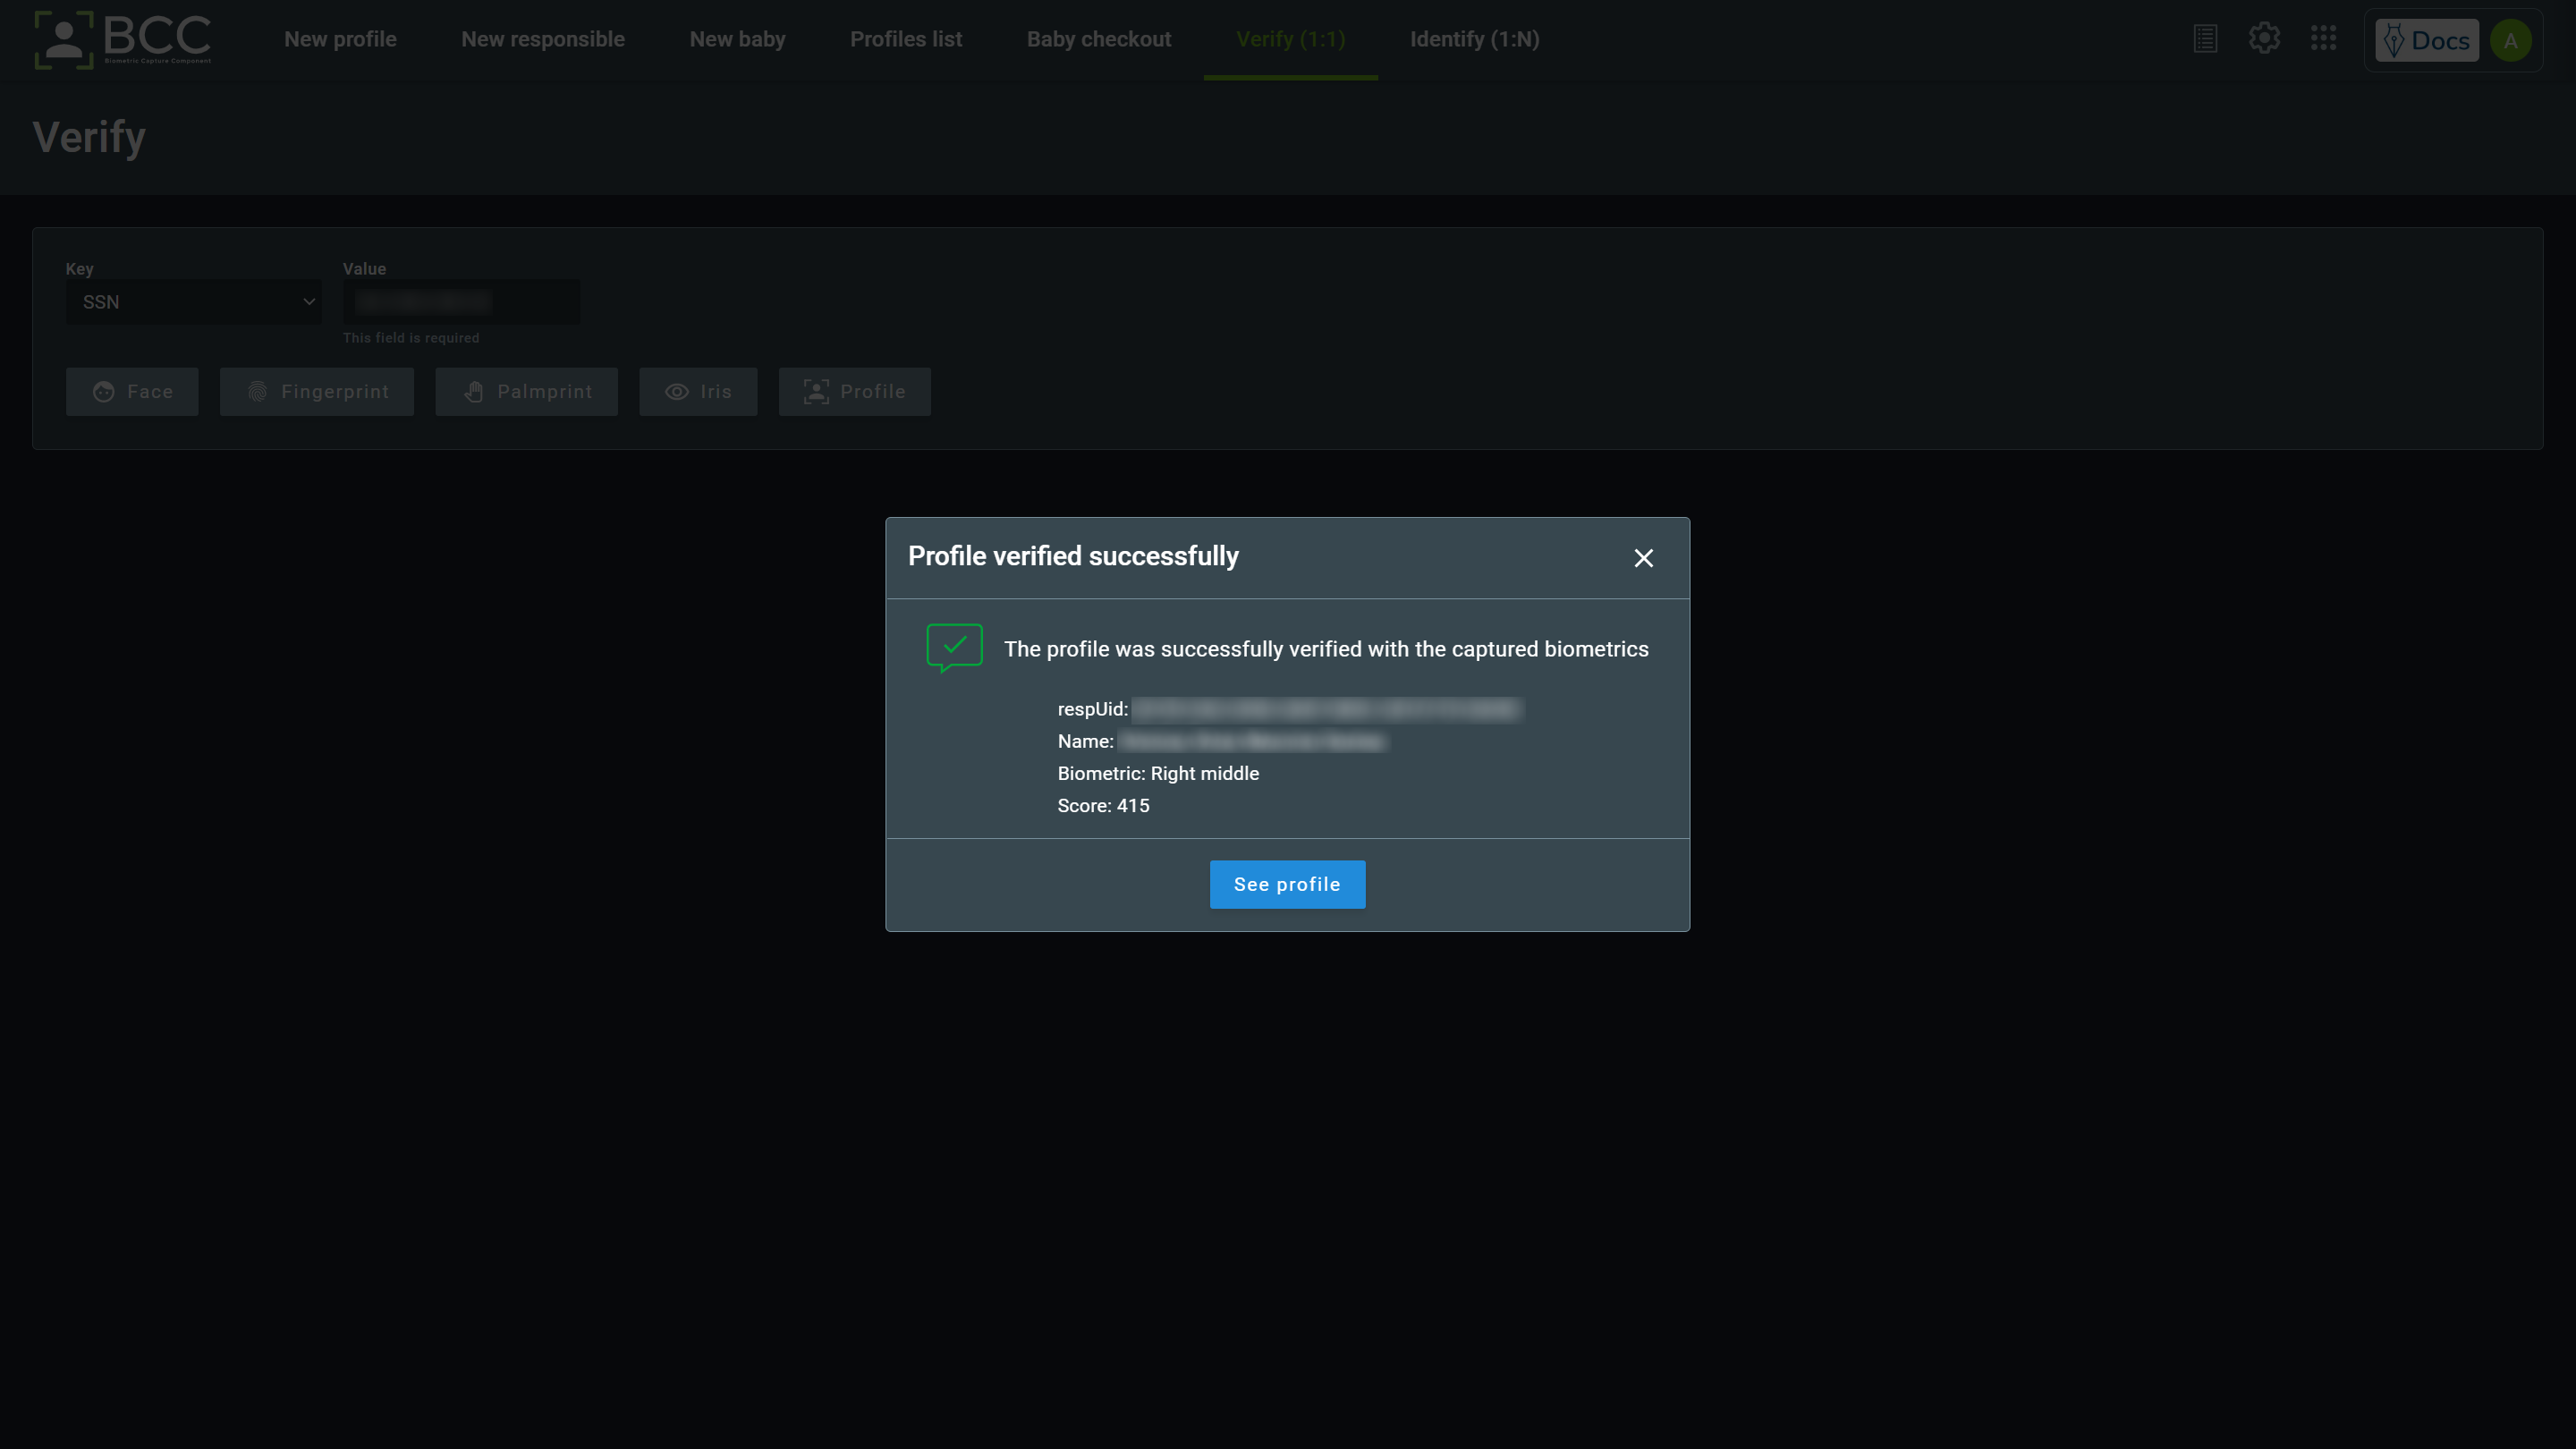
If the verification returns a match, the profile page will return the following message with the information of the matched profile. Clicking the See profile button will open the matched profile.
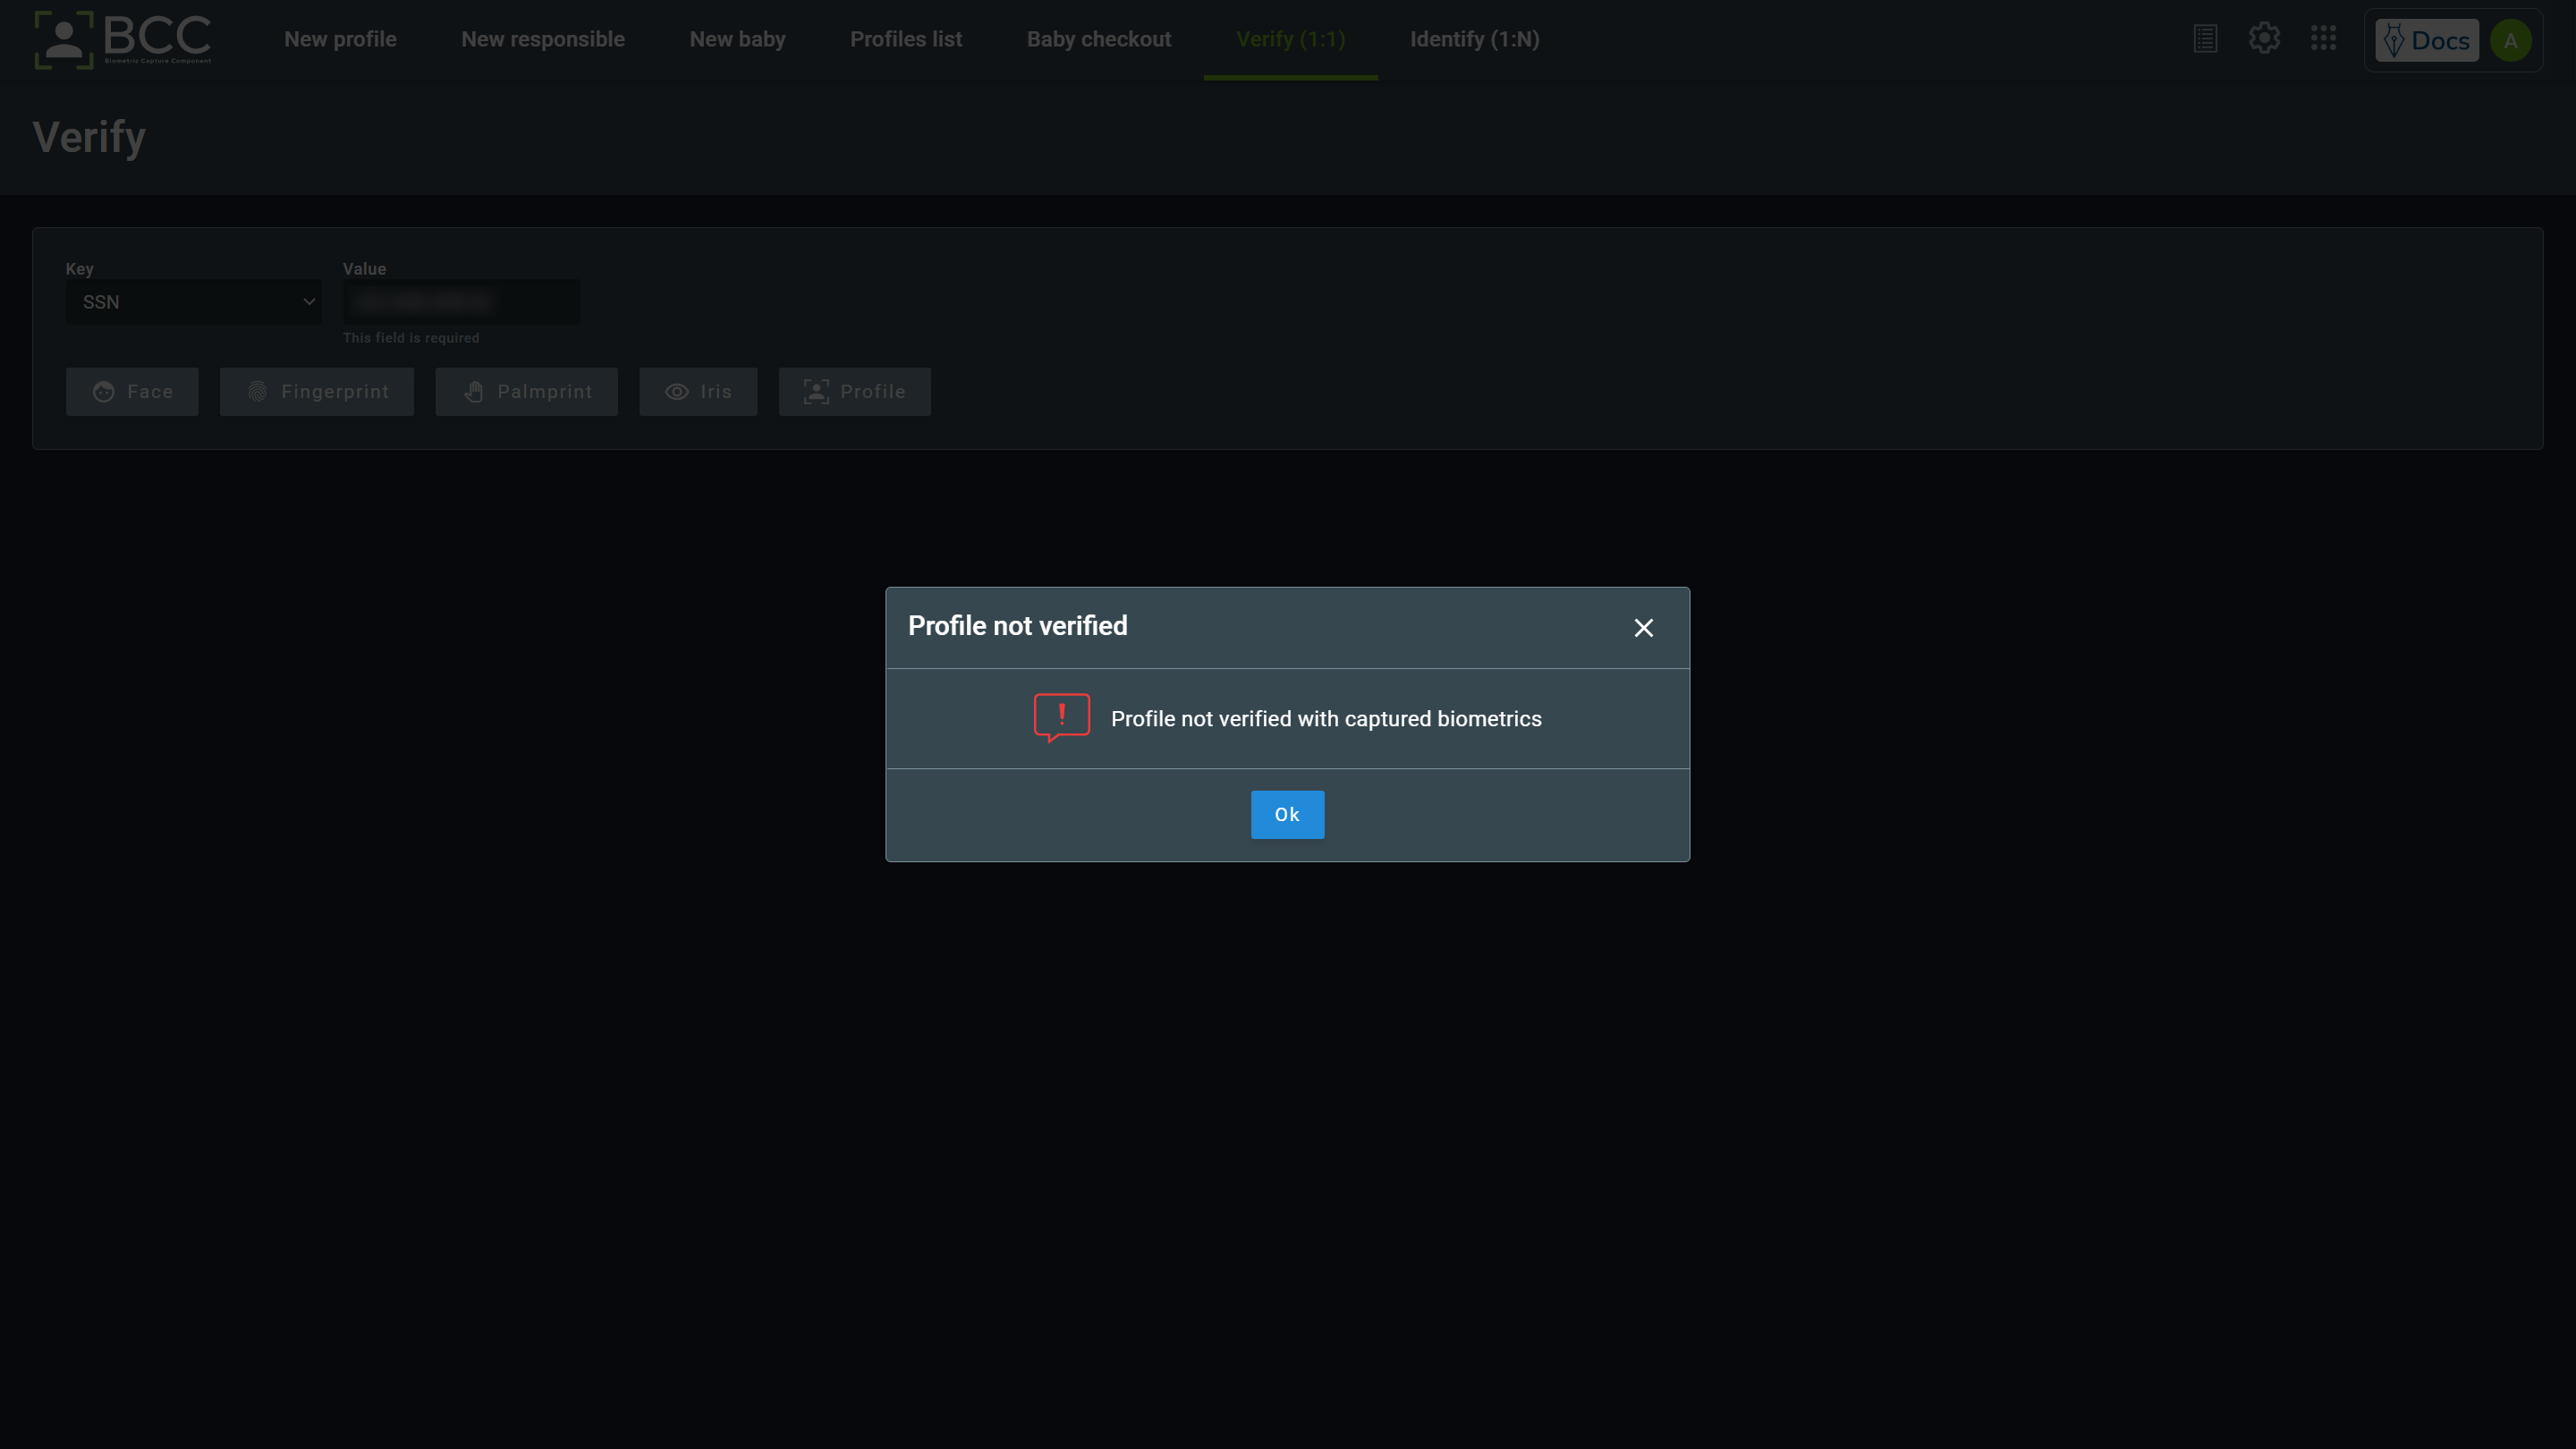
If the return is not a match, the following message will appear.
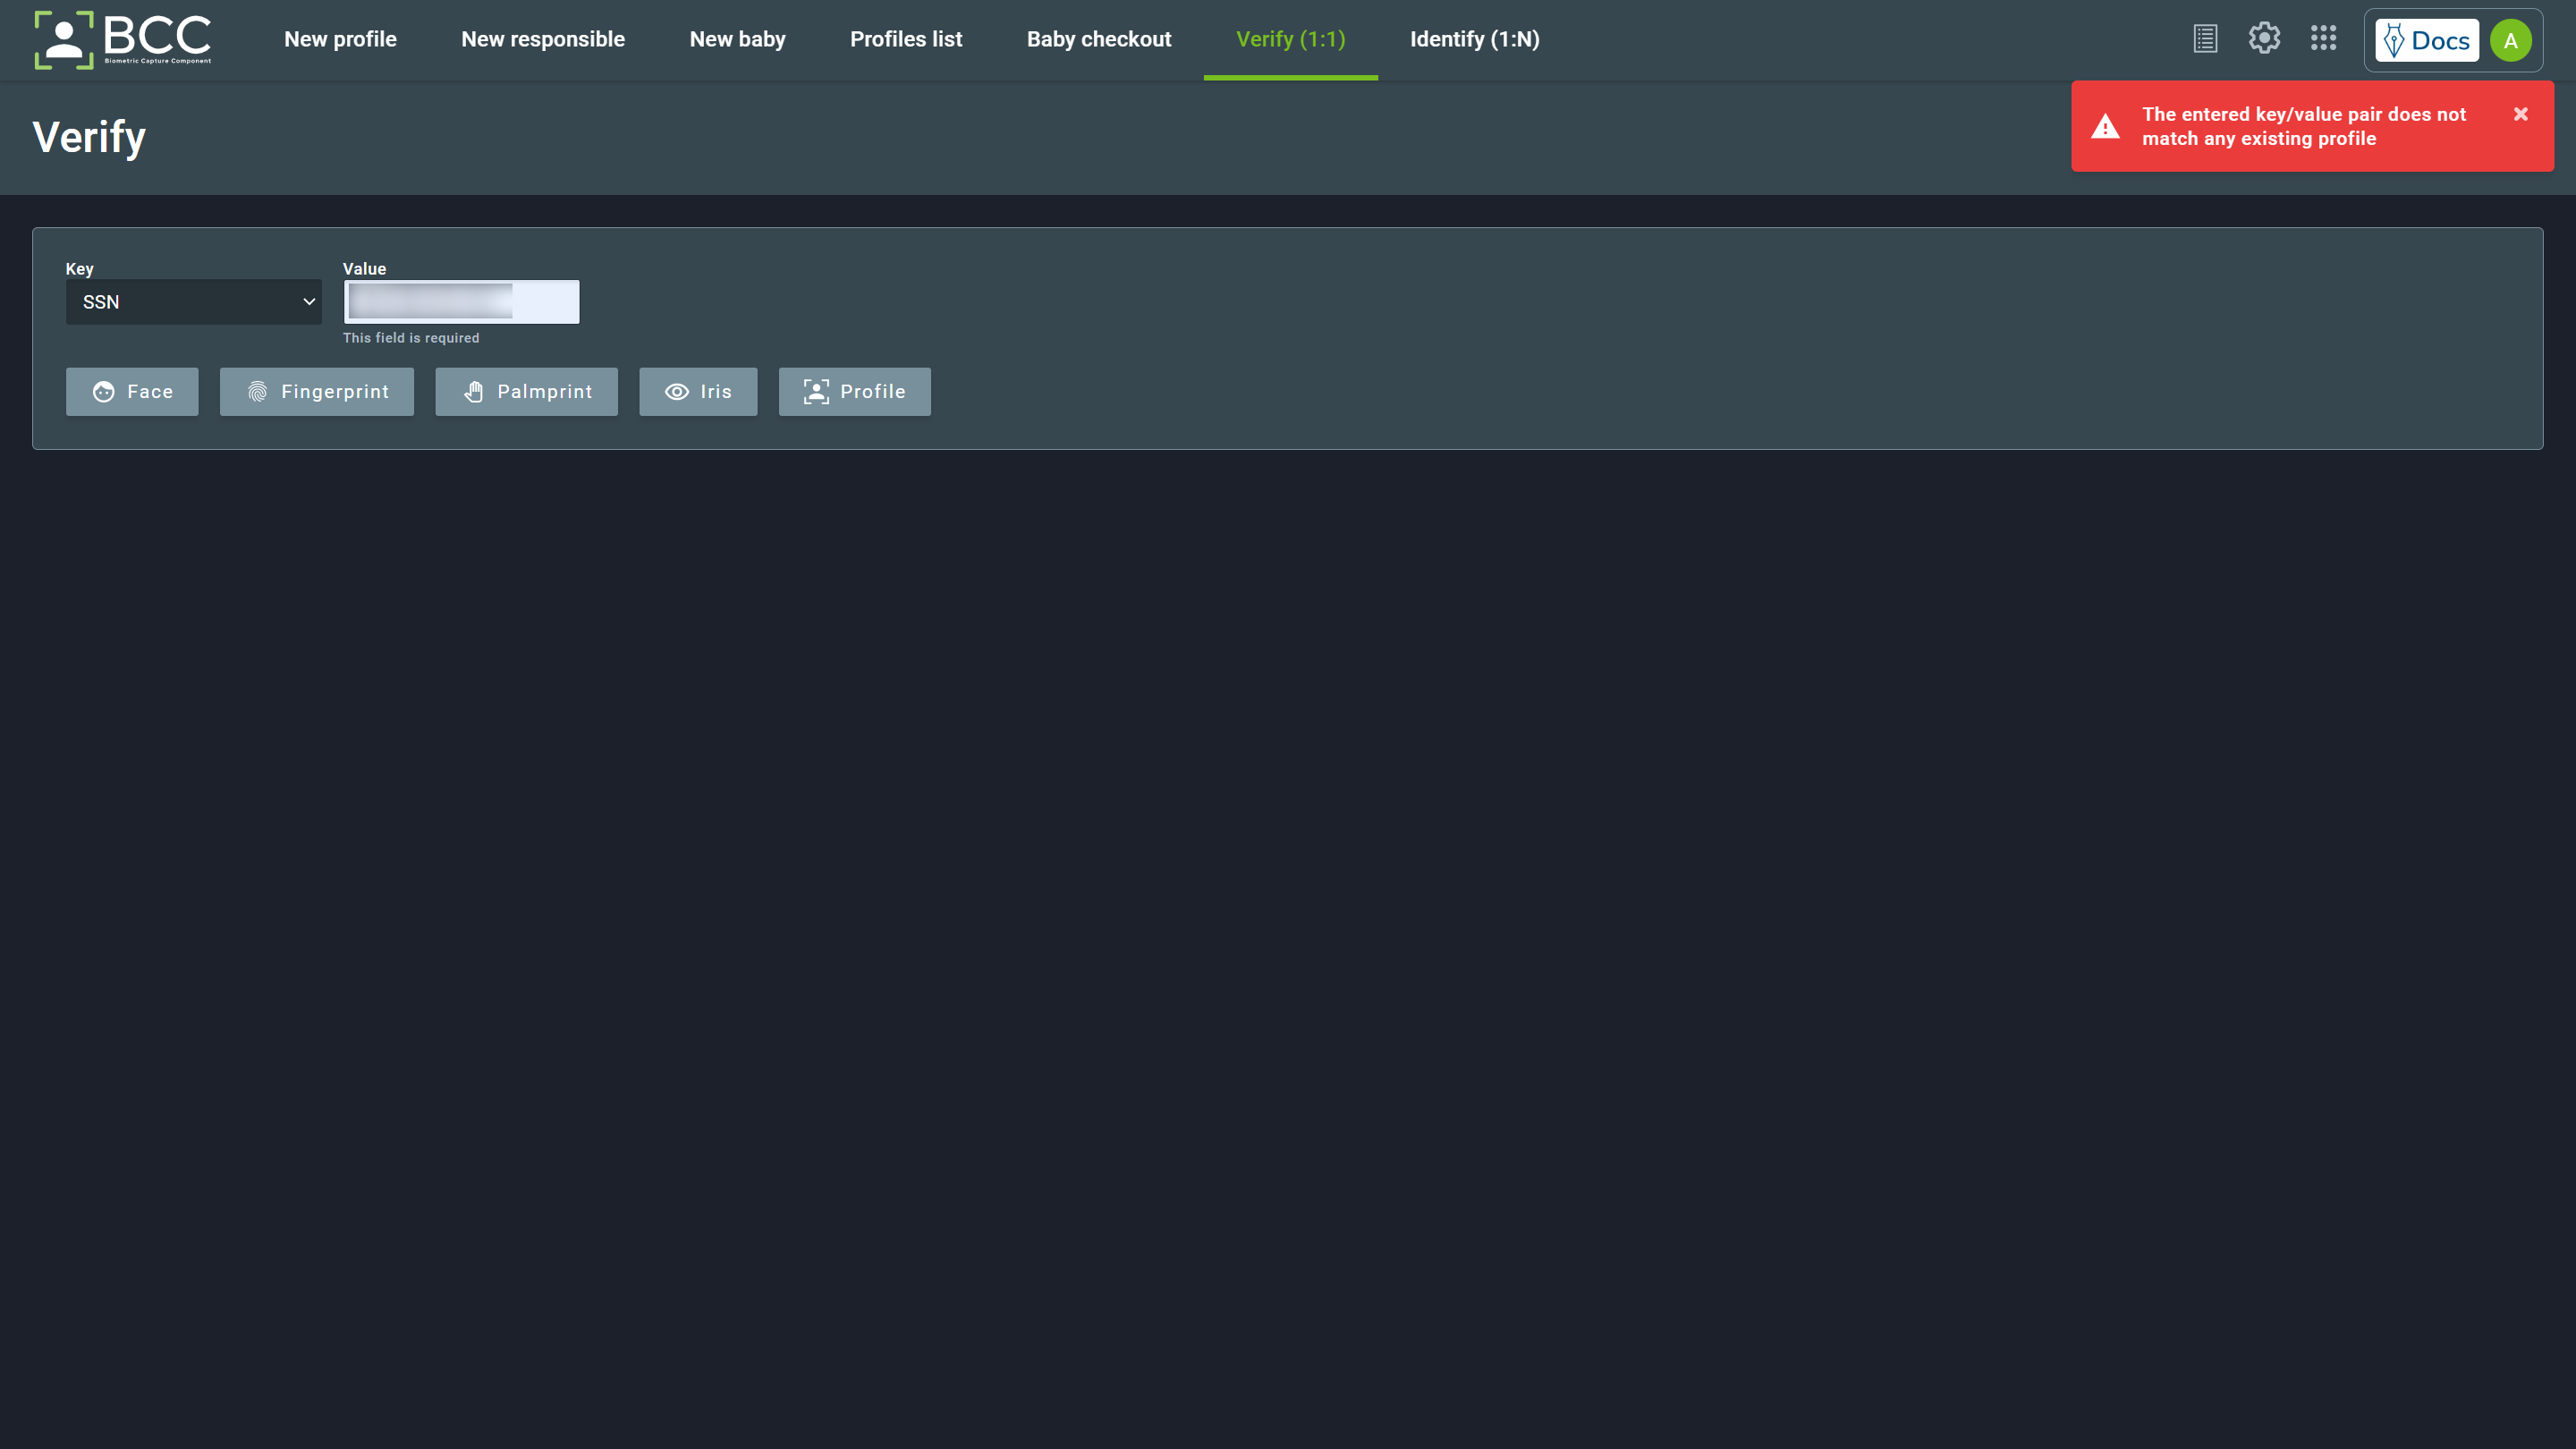
There is a possibility that the key searched is not present in the database. In this case, an error will appear.
5.2.1. Profile Verify
The verification via profile is an operation where you can collect more than one biometric to be matched against the desired person. When you click the profile option, a new window will open.
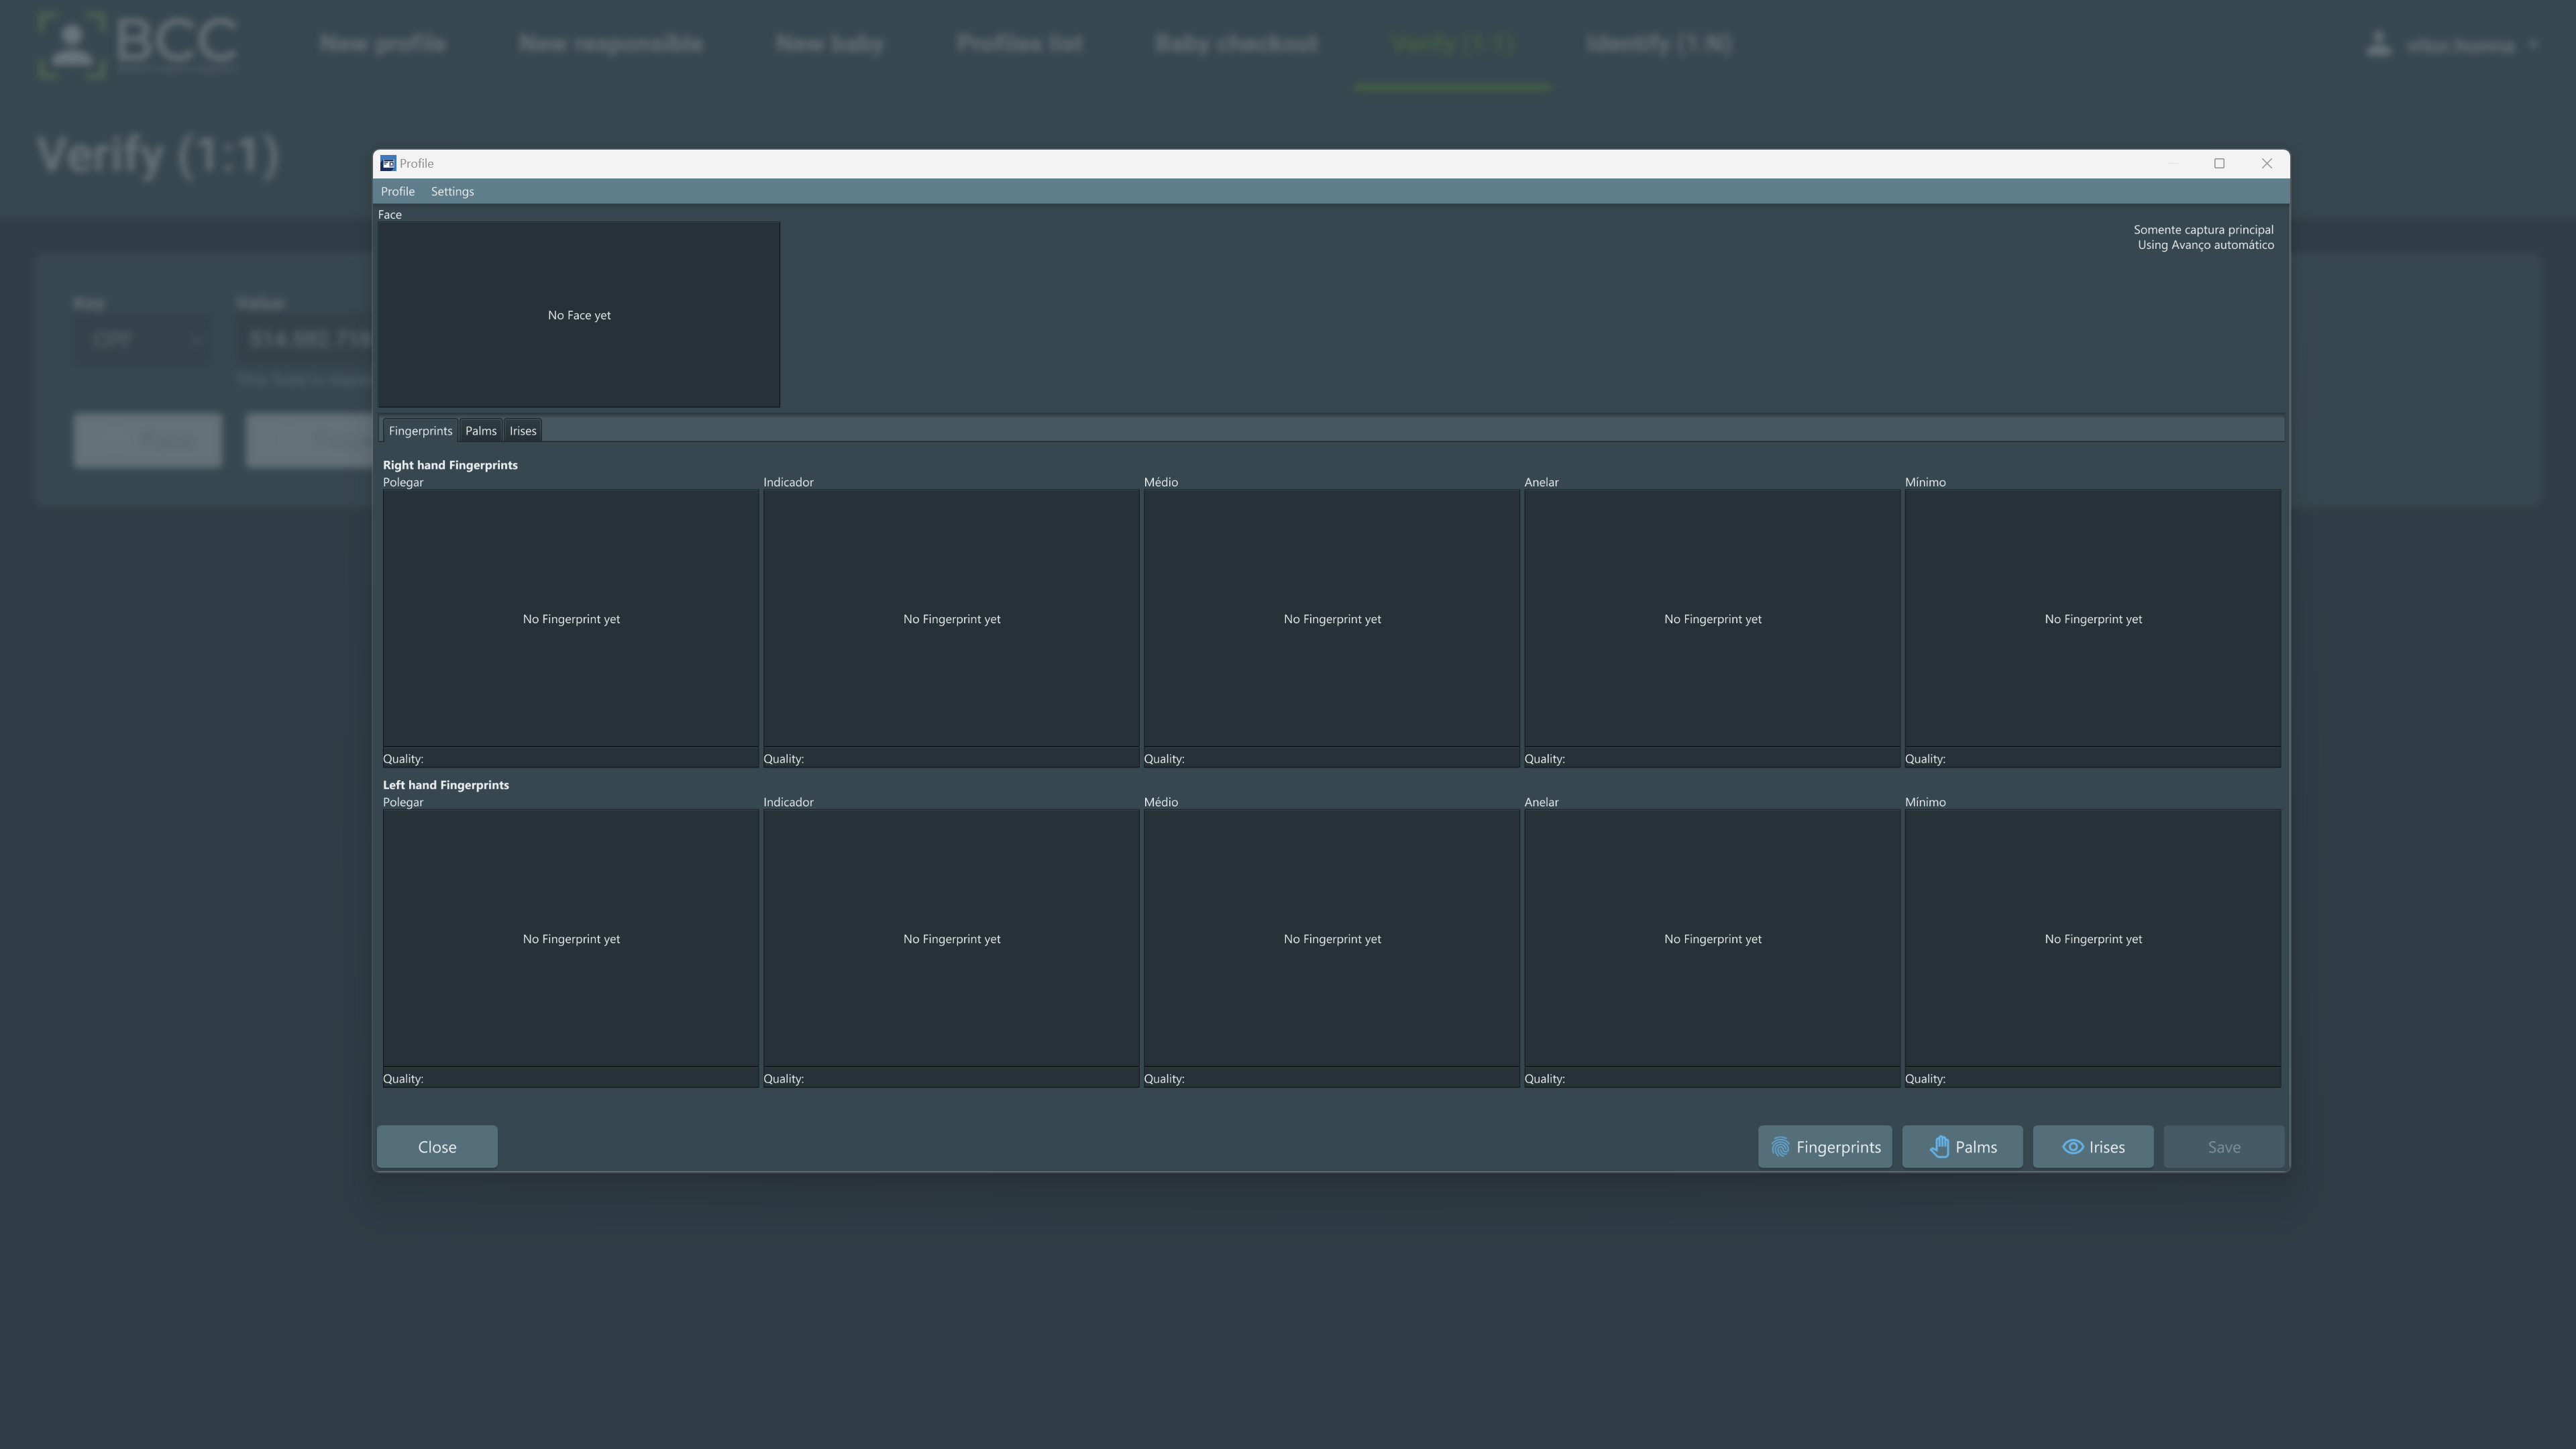
There will be options to collect all biometrics in this mode, except the sequence control and signature capture. The profile window offers some possibilities to capture biometrics. Those are:
- Click the buttons at the bottom-right of the window
- Right-click the biometric you want to capture and click the Capture button.
- Access the Profile > Capture option at the top menu bar, as shown below
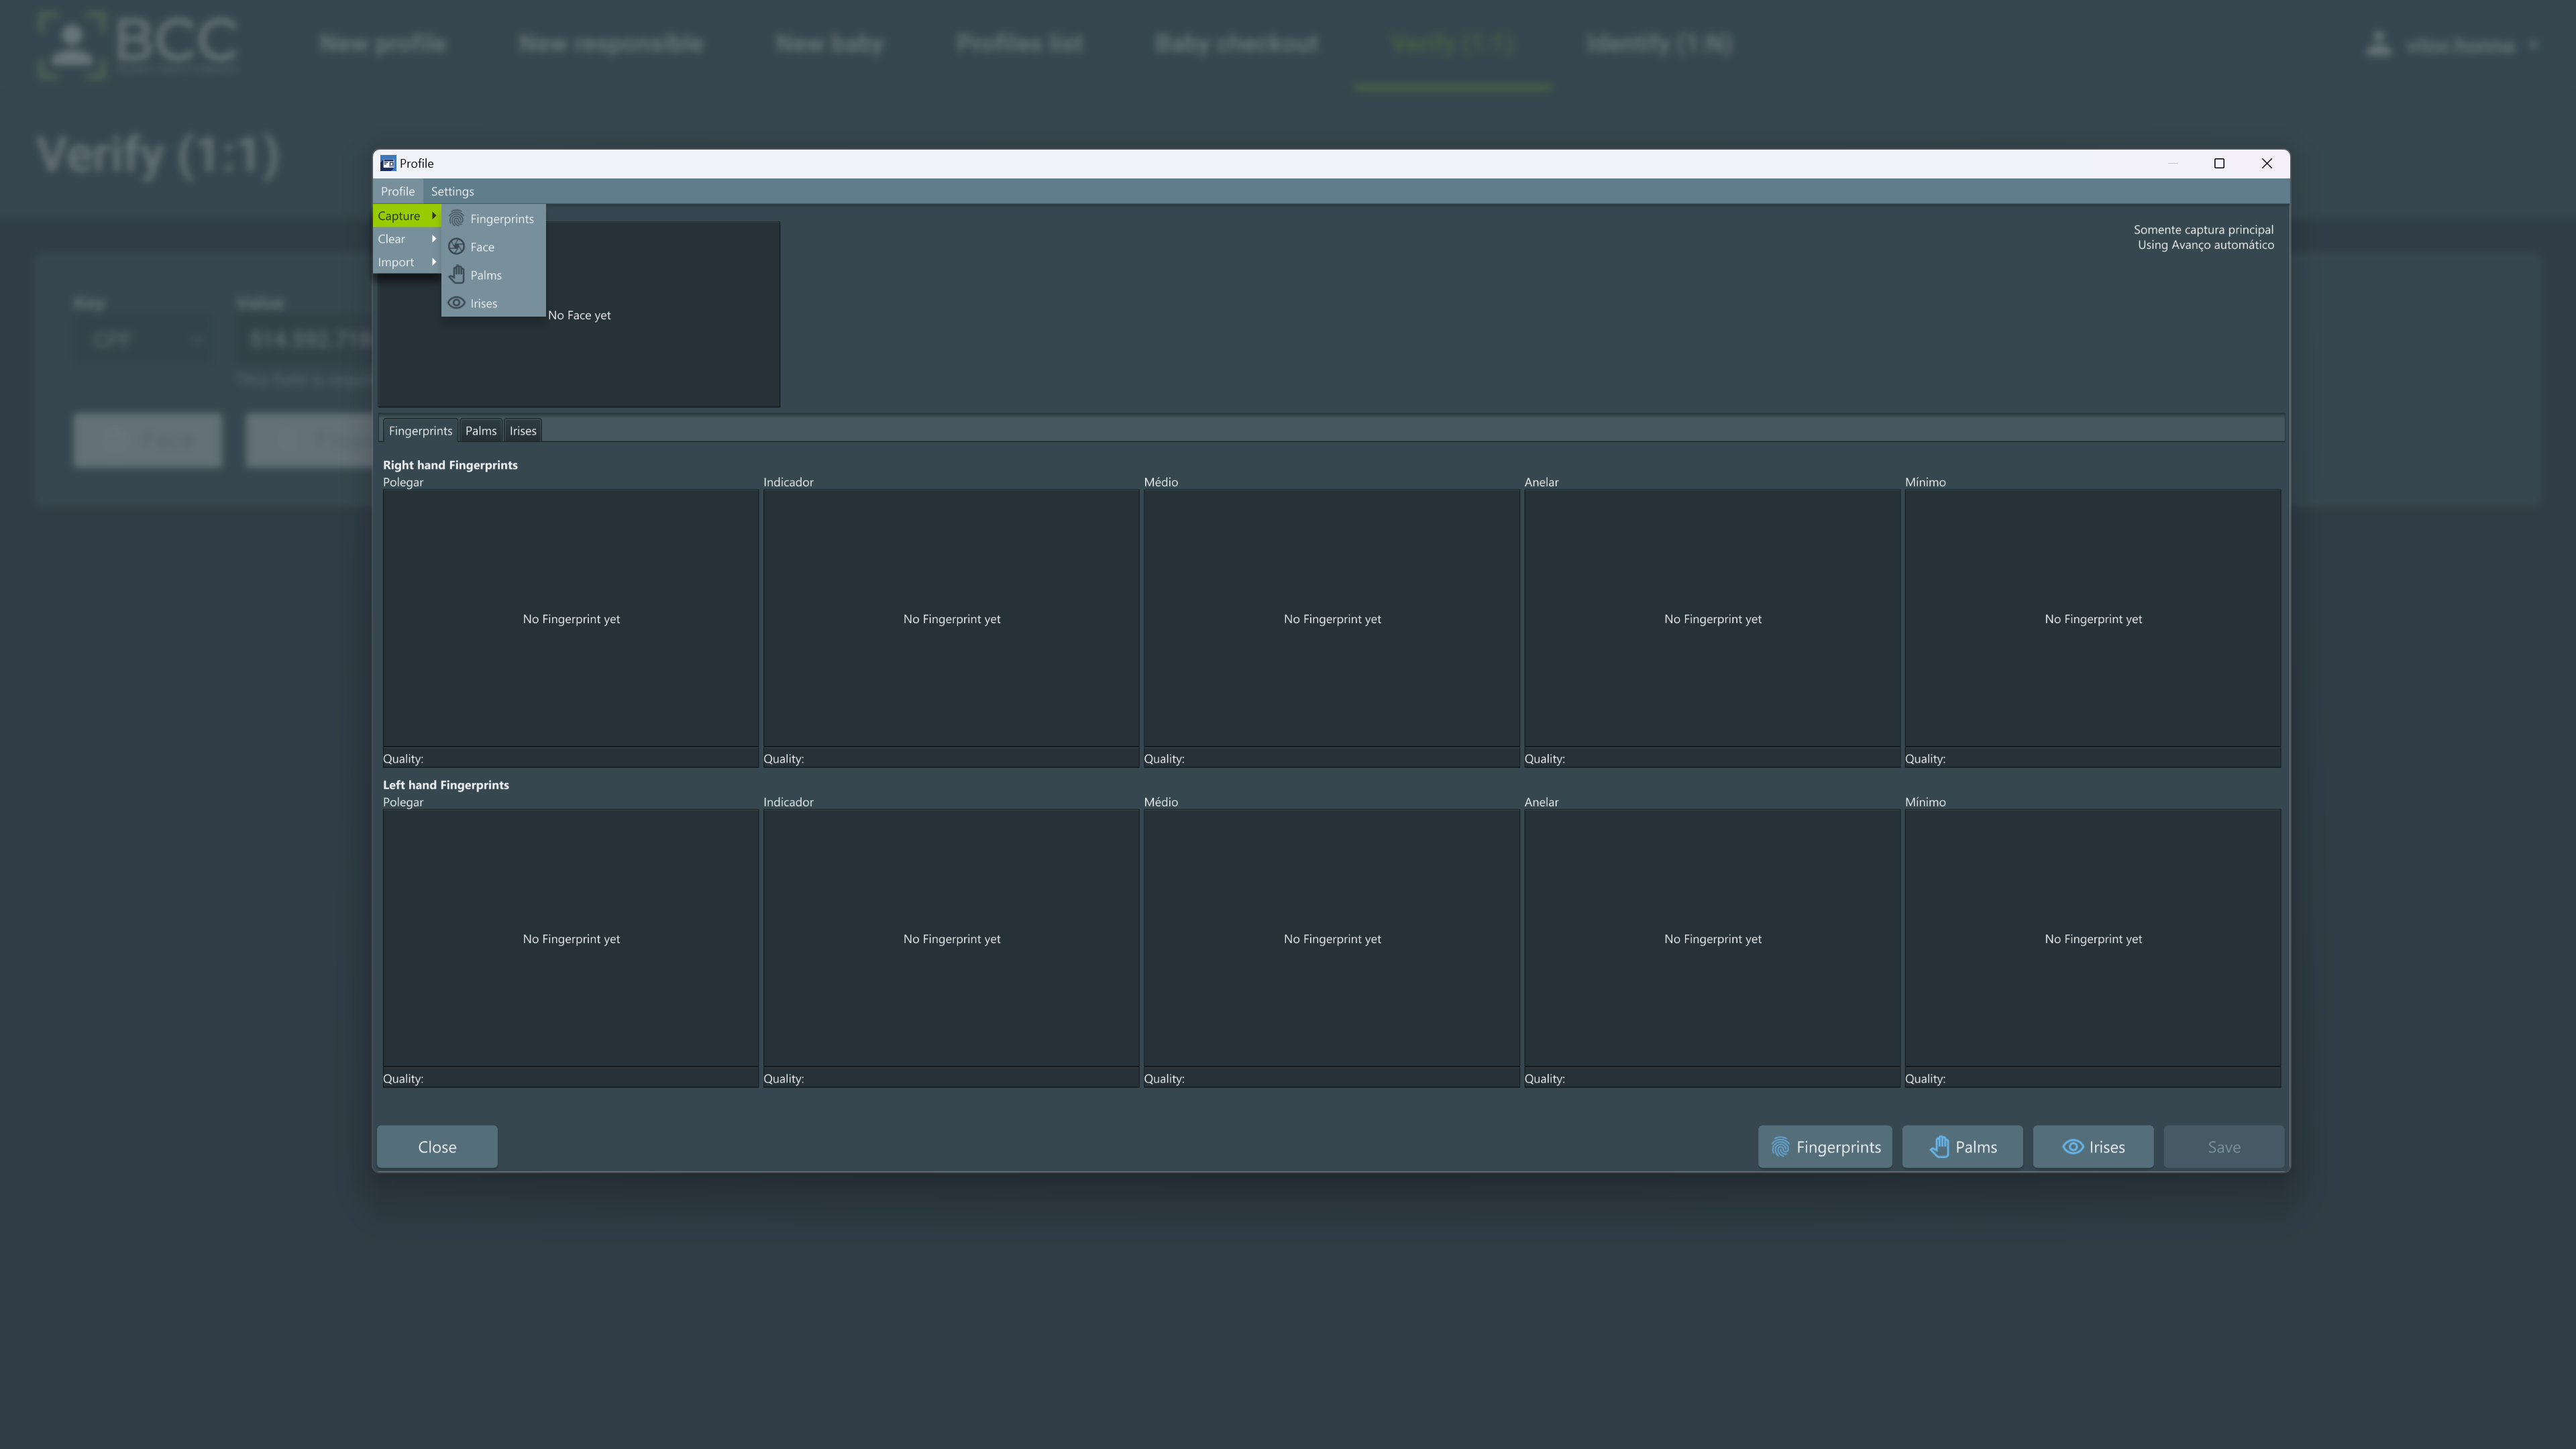
There is a minimum requirement of biometrics that you should capture to perform a profile verification. Those are different in every environment and can be configured individually. After capturing the necessary and wanted biometrics, click the Save button to perform the verification.
Important
If ANY of the biometrics matches the profile, it will be considered a match.
To remove a biometric already collected, right-click it and click the Clear button. You may also access the Profile > Clear menu and select one of the options to clear all the biometrics of the desired type at once.
You may also import the profile biometrics if you have the proper permissions. To do so, click Profile > Import > Import Option. Two options are available:
Import from folder
All your files in the folder must be named correctly according to the pattern:
index_BIOMETRIC-Type
example:
0-LEFT_INDEX-ROLLED.tpt
1-LEFT_RING-FLAT.wsq
(...)
10-FACE-FRONTAL.jpg
13-FACE-LEFT_IRIS.png
Import from EBTS or ANSI/NIST-ITL 2000 file
To cancel the verification, click the Cancel or the x close button.
5.3. Identify
The identify tool is used to search for one’s identity through one of its biometrics. This process consists of a 1:N search where no key is provided. The collected biometric will be compared against every profile in the database and return a scored list with the matches.
To perform an identify, click the Identify box on the main page or click on Identify in the top bar menu. Clicking will bring you to the Identify page. This page will have buttons to select the desired biometric that you want to be captured. The biometrics that can be captured are:
- Face
- Fingerprint
- Palmprint
- Iris
- The entire or parts of the person’s profile
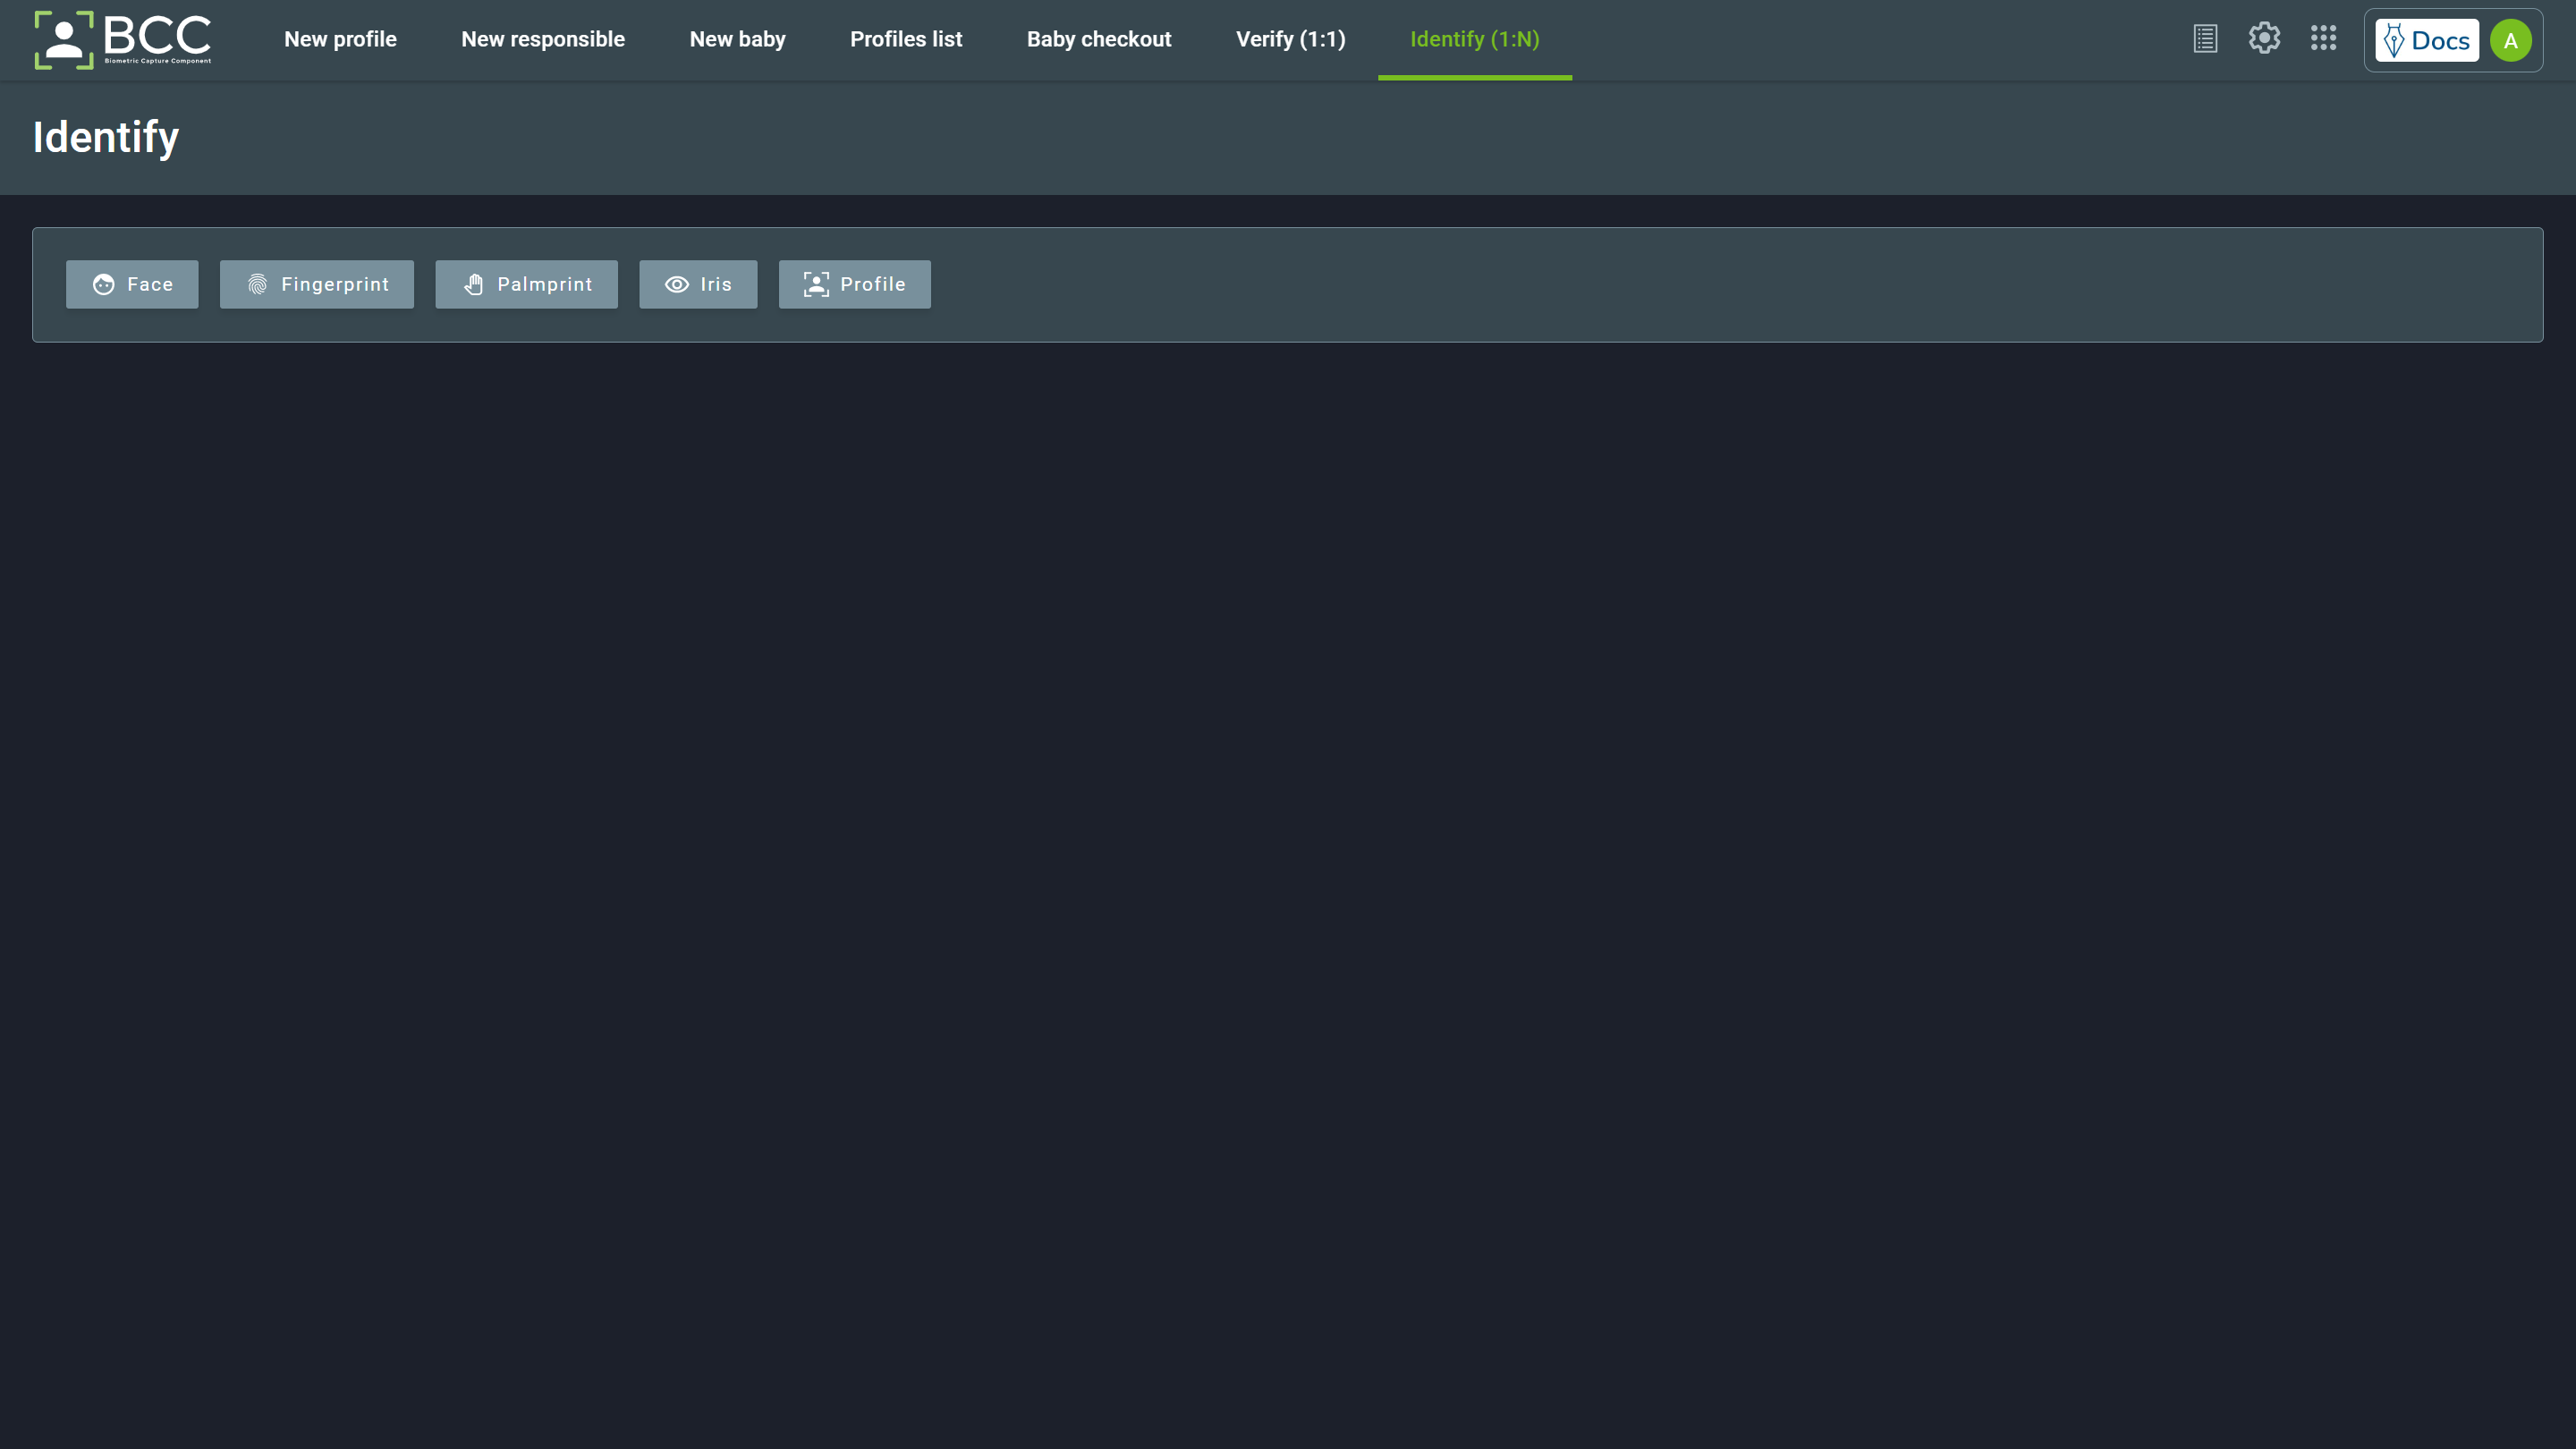
Selecting one of those options will open the capture window for its respective biometric. The only exception is the profile option, where you may choose which and how many biometric traits should be captured to be matched in the identify operation. The profile capture is explained in the Profile Identify section.
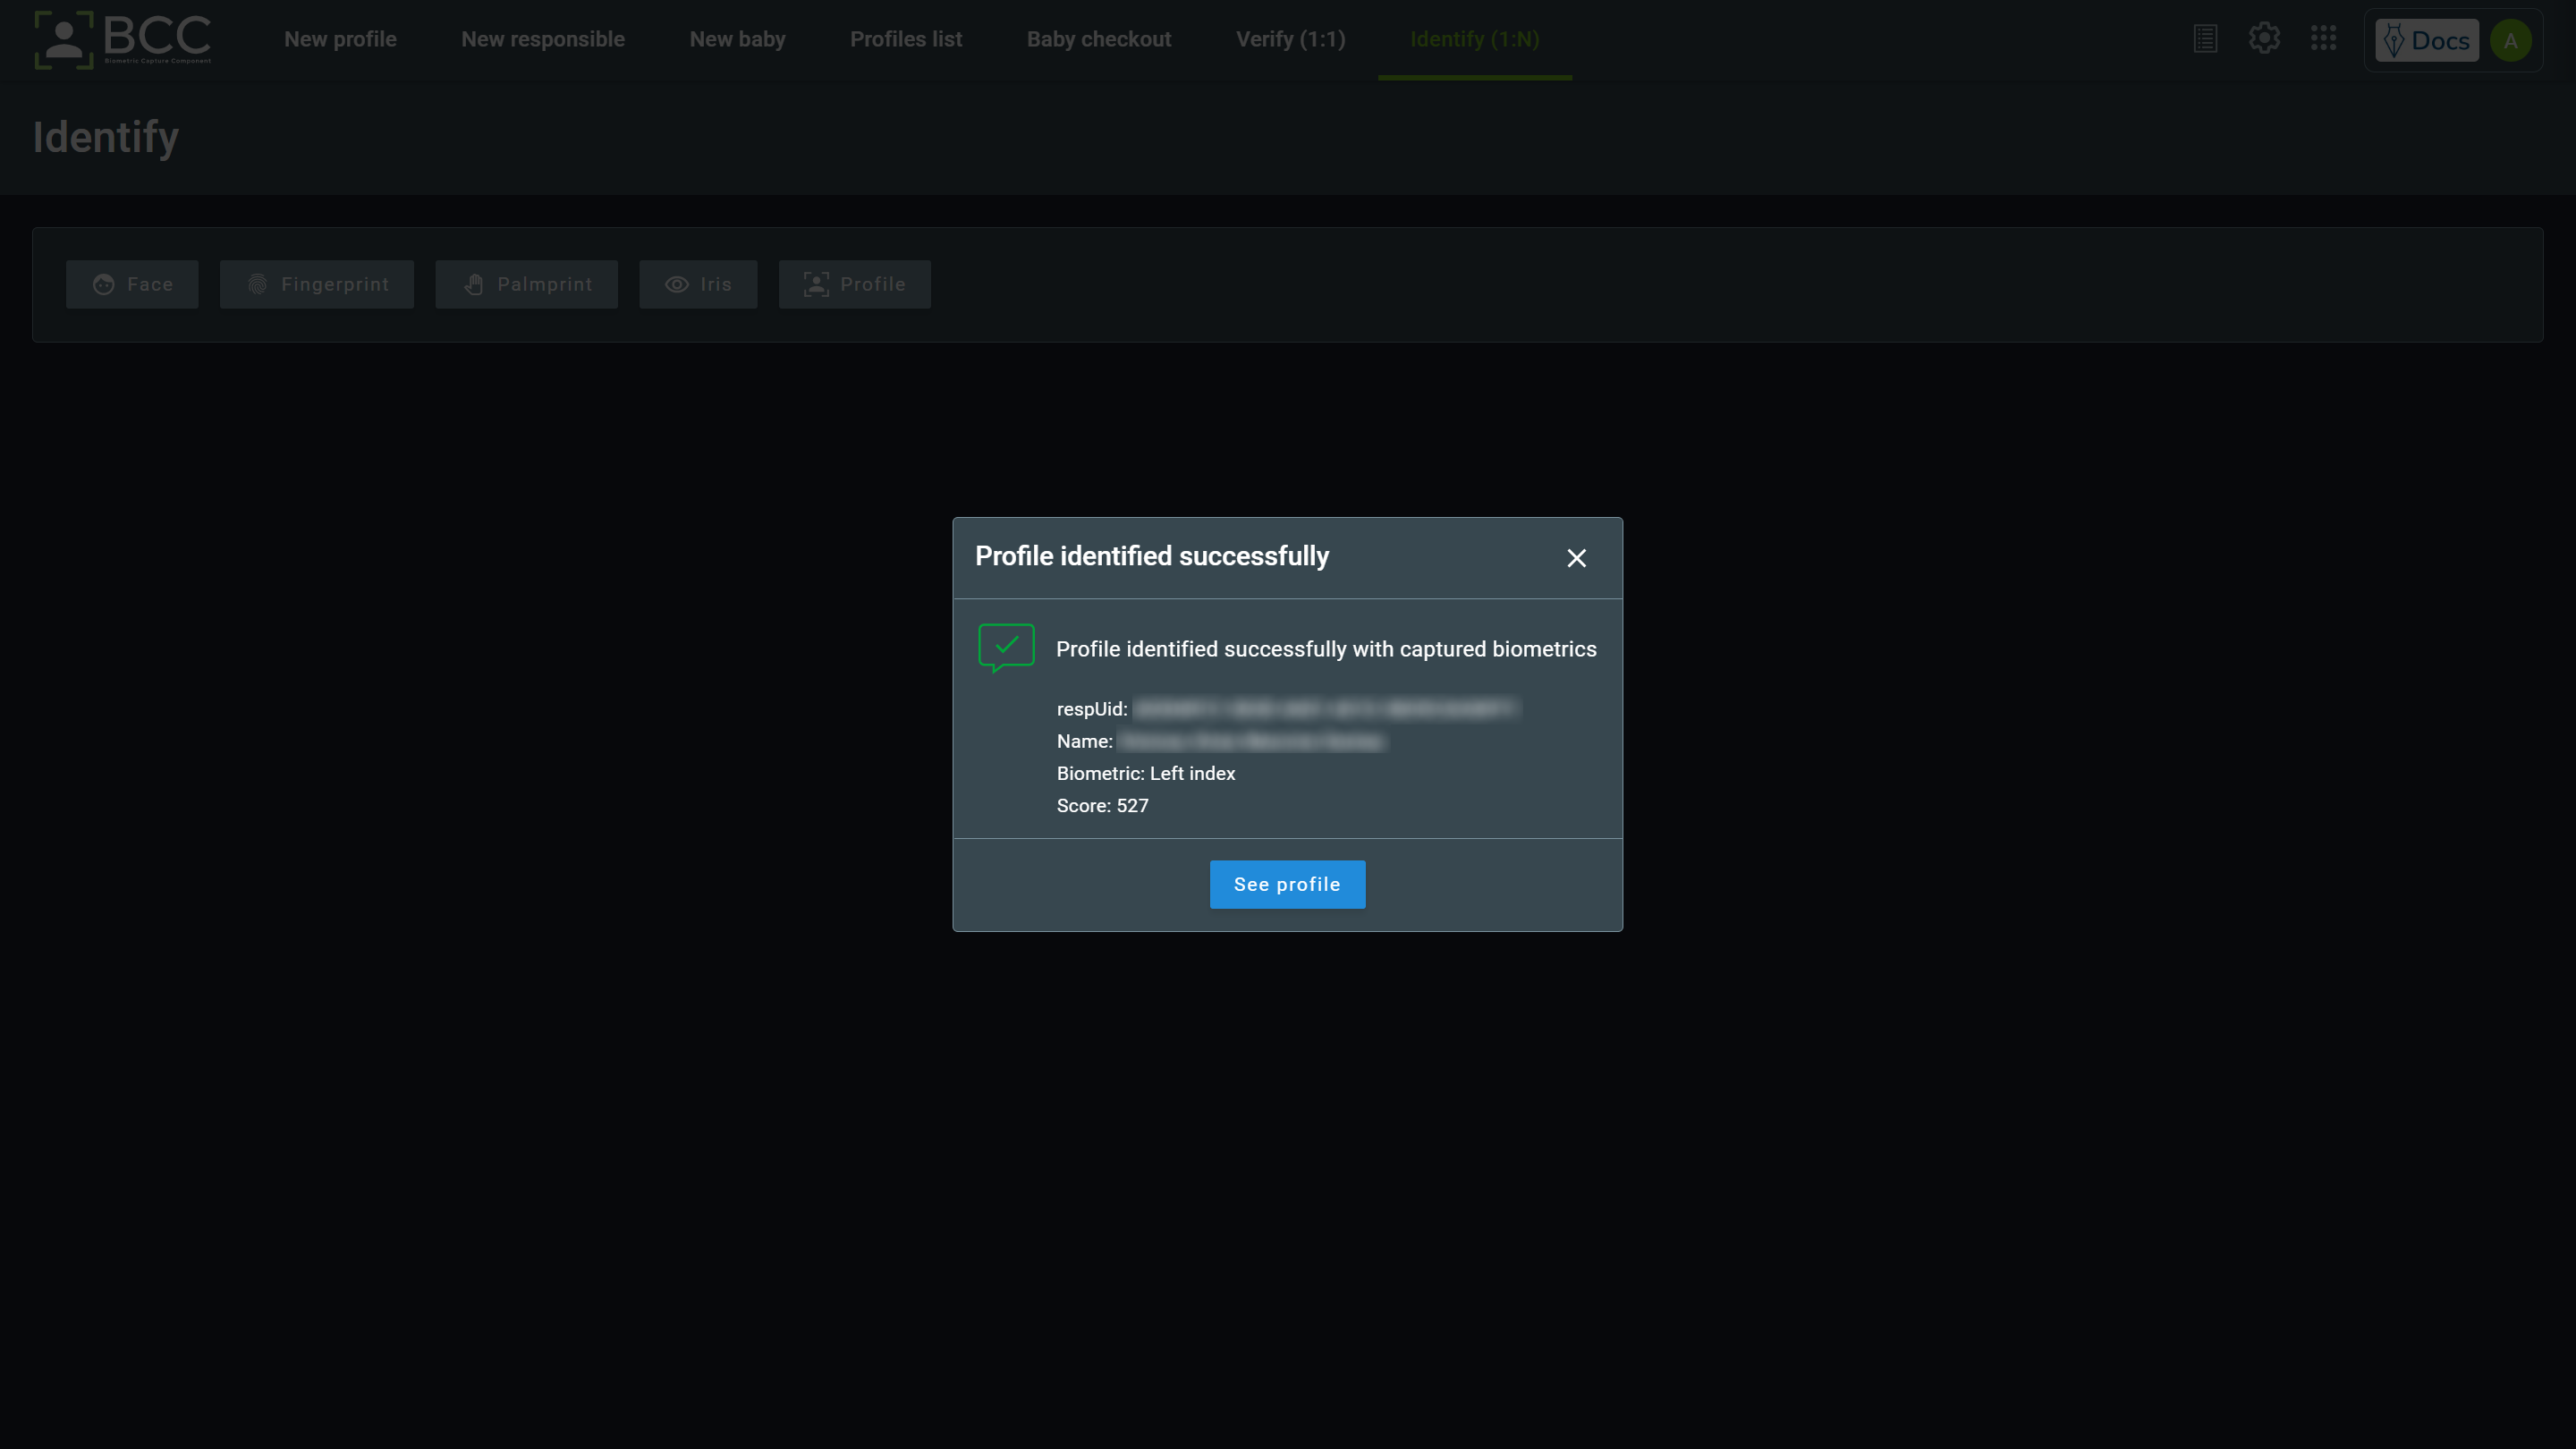
If the identify returns a match, the profile page will return the following message with the data of the matched profile. Clicking the See profile button will open the matched profile.
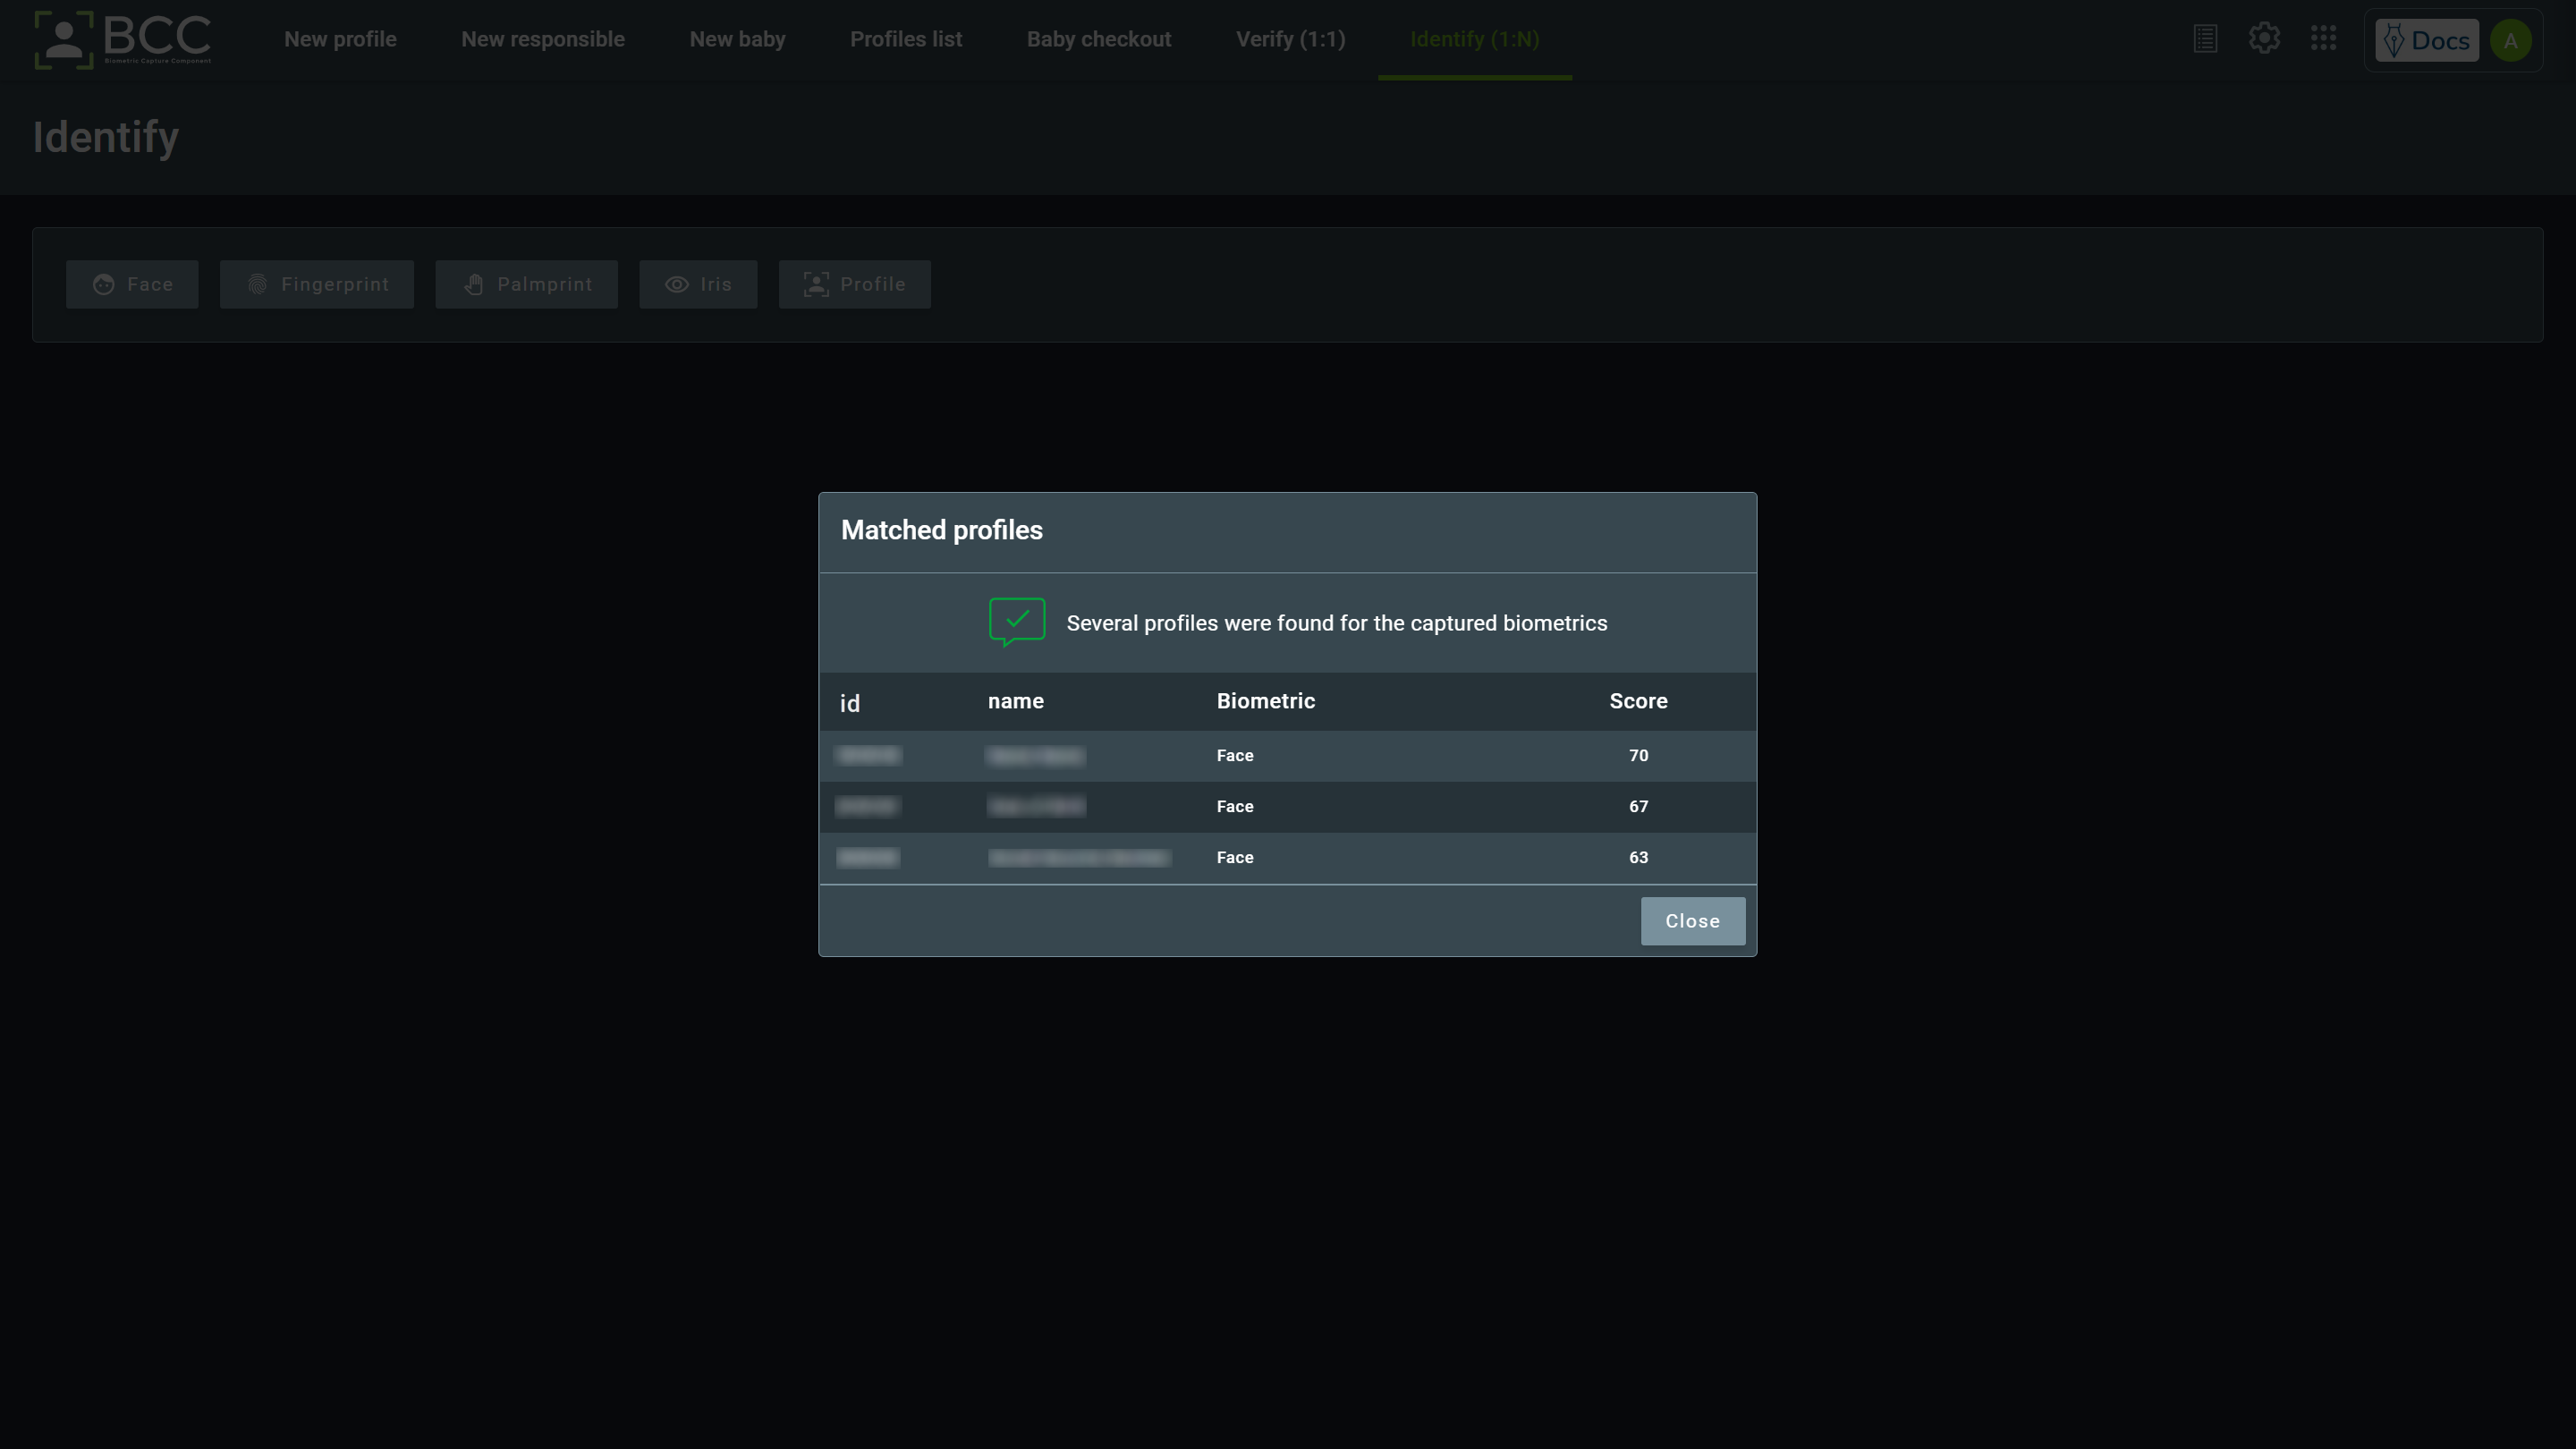
If it returns more than one match, a list with the matches with the score will be displayed. Clicking one of the matches will open the profile.
If the return is not a match, the following message will appear.
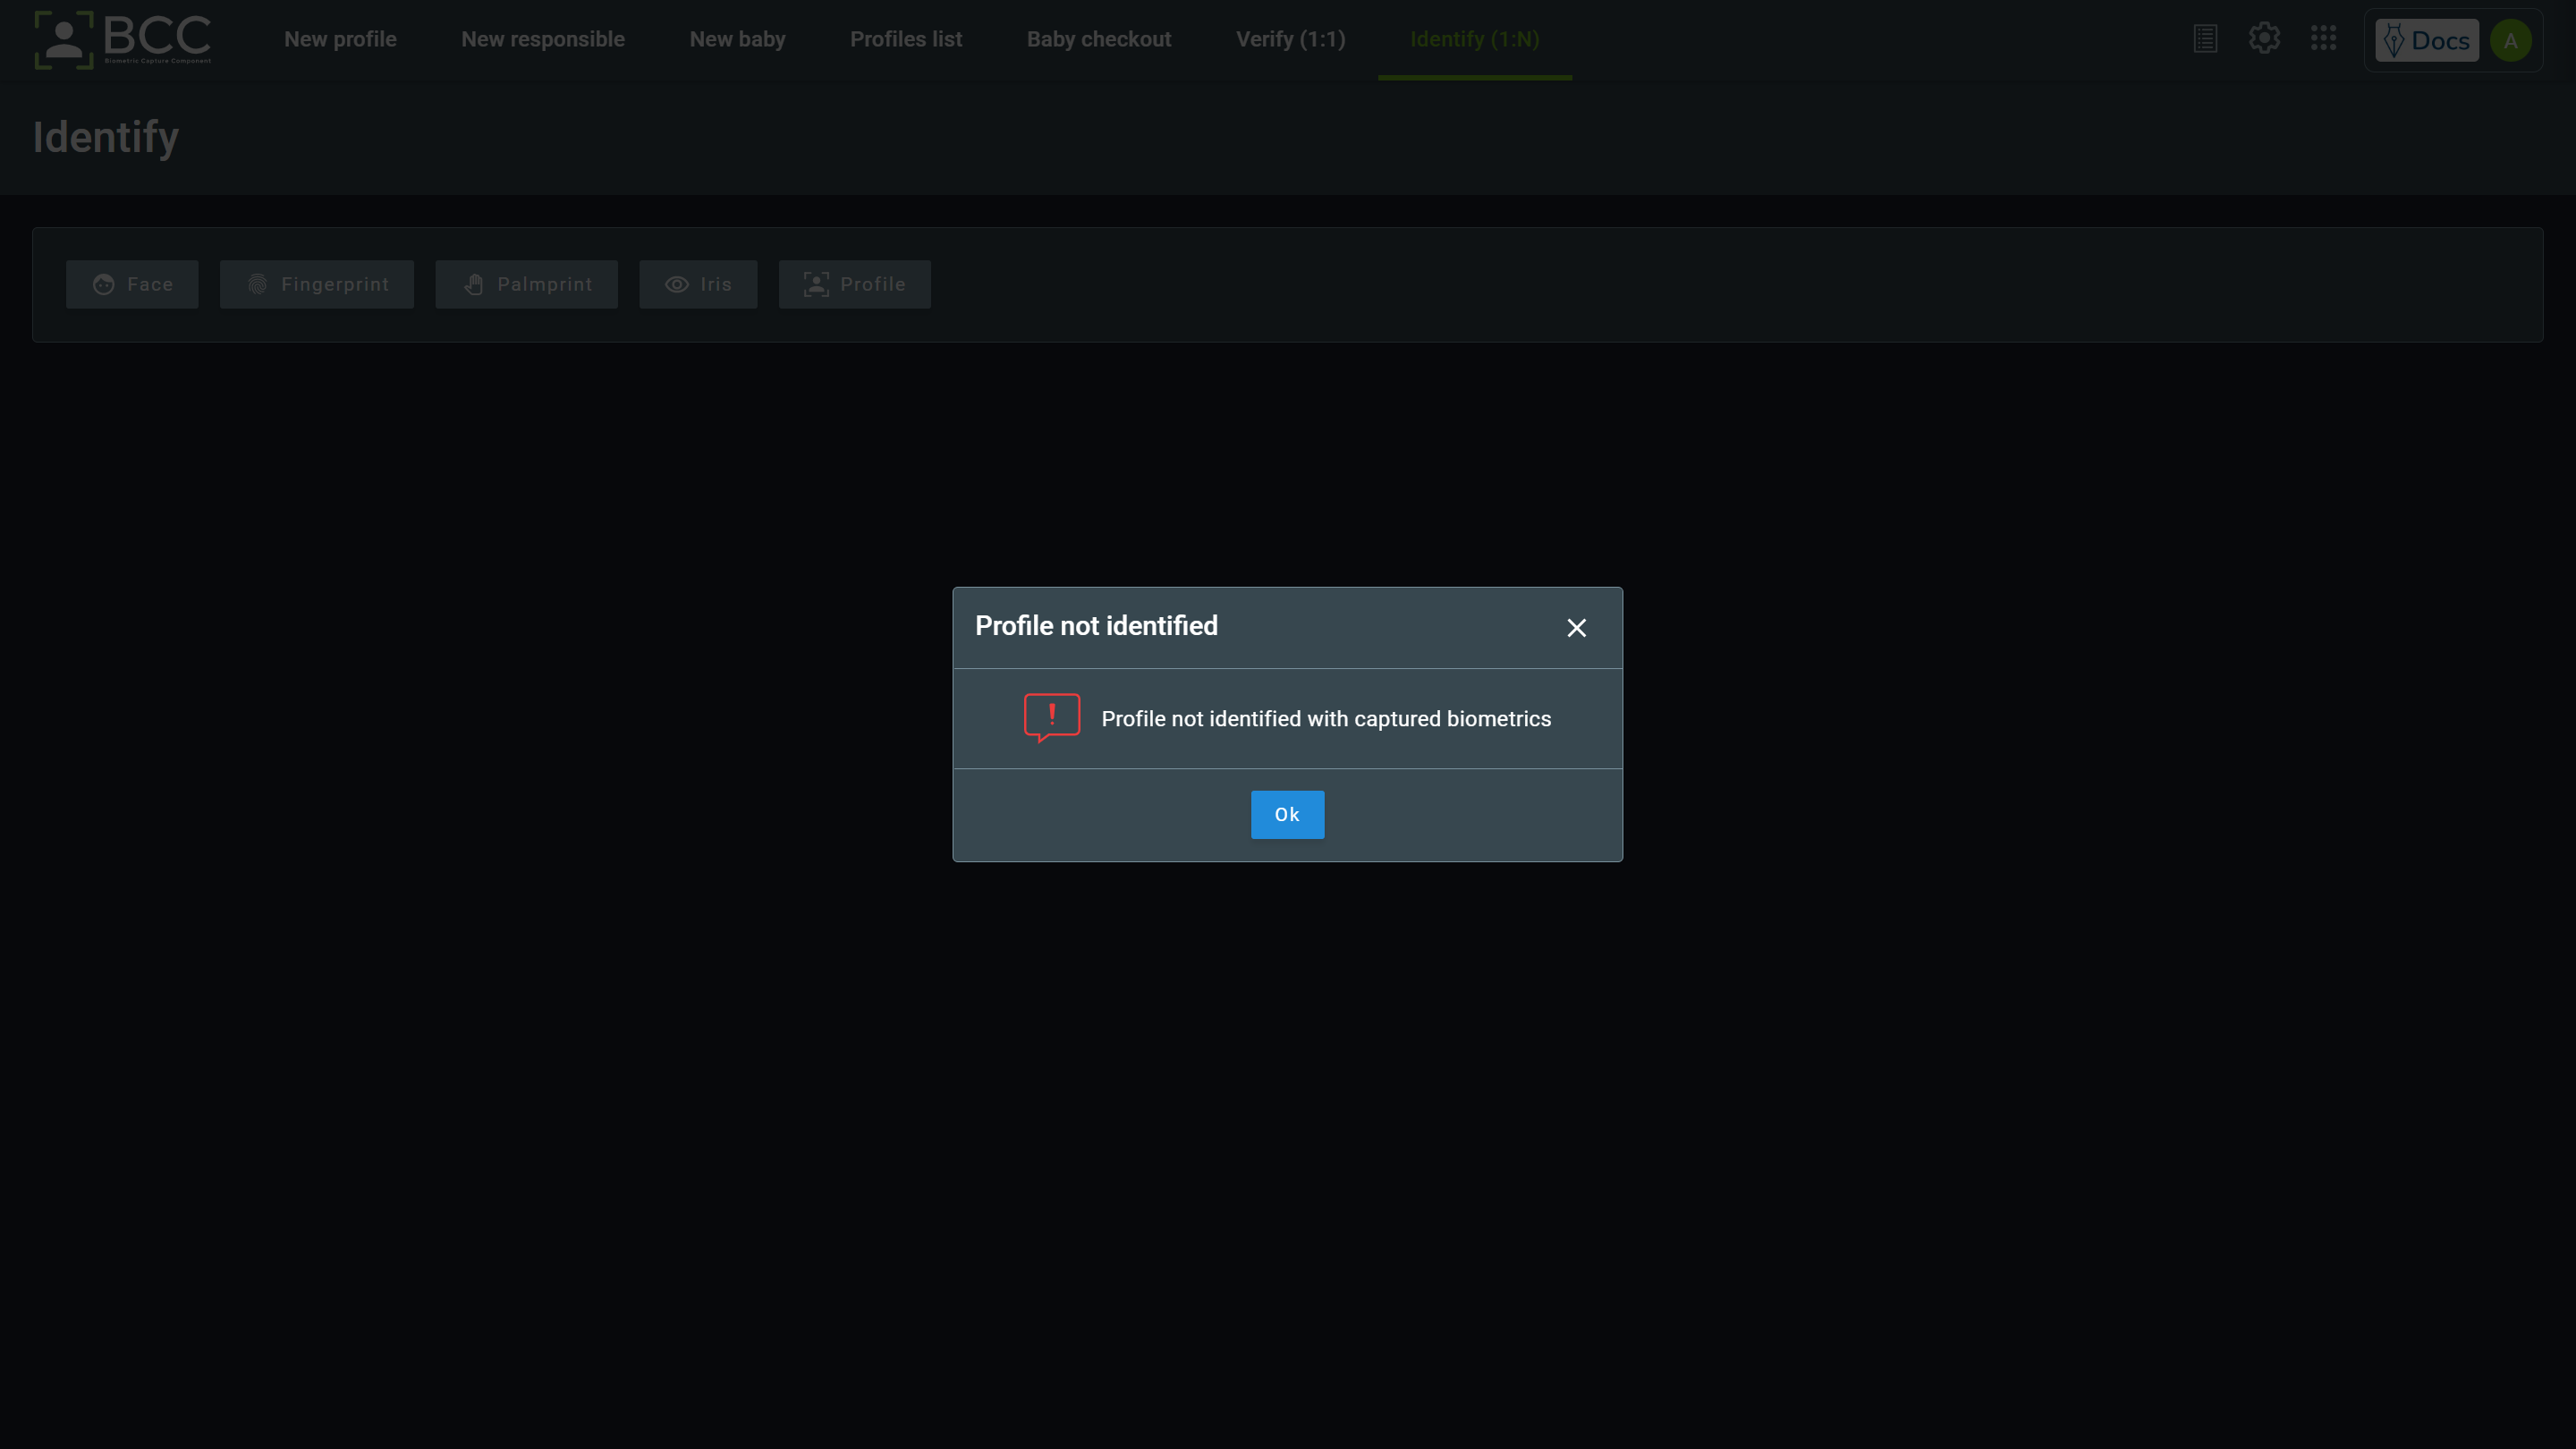
5.3.1. Profile Identify
The identification via profile is an operation where you can collect more than one biometric to be matched against the desired person. When you click the profile option, a new window will open.
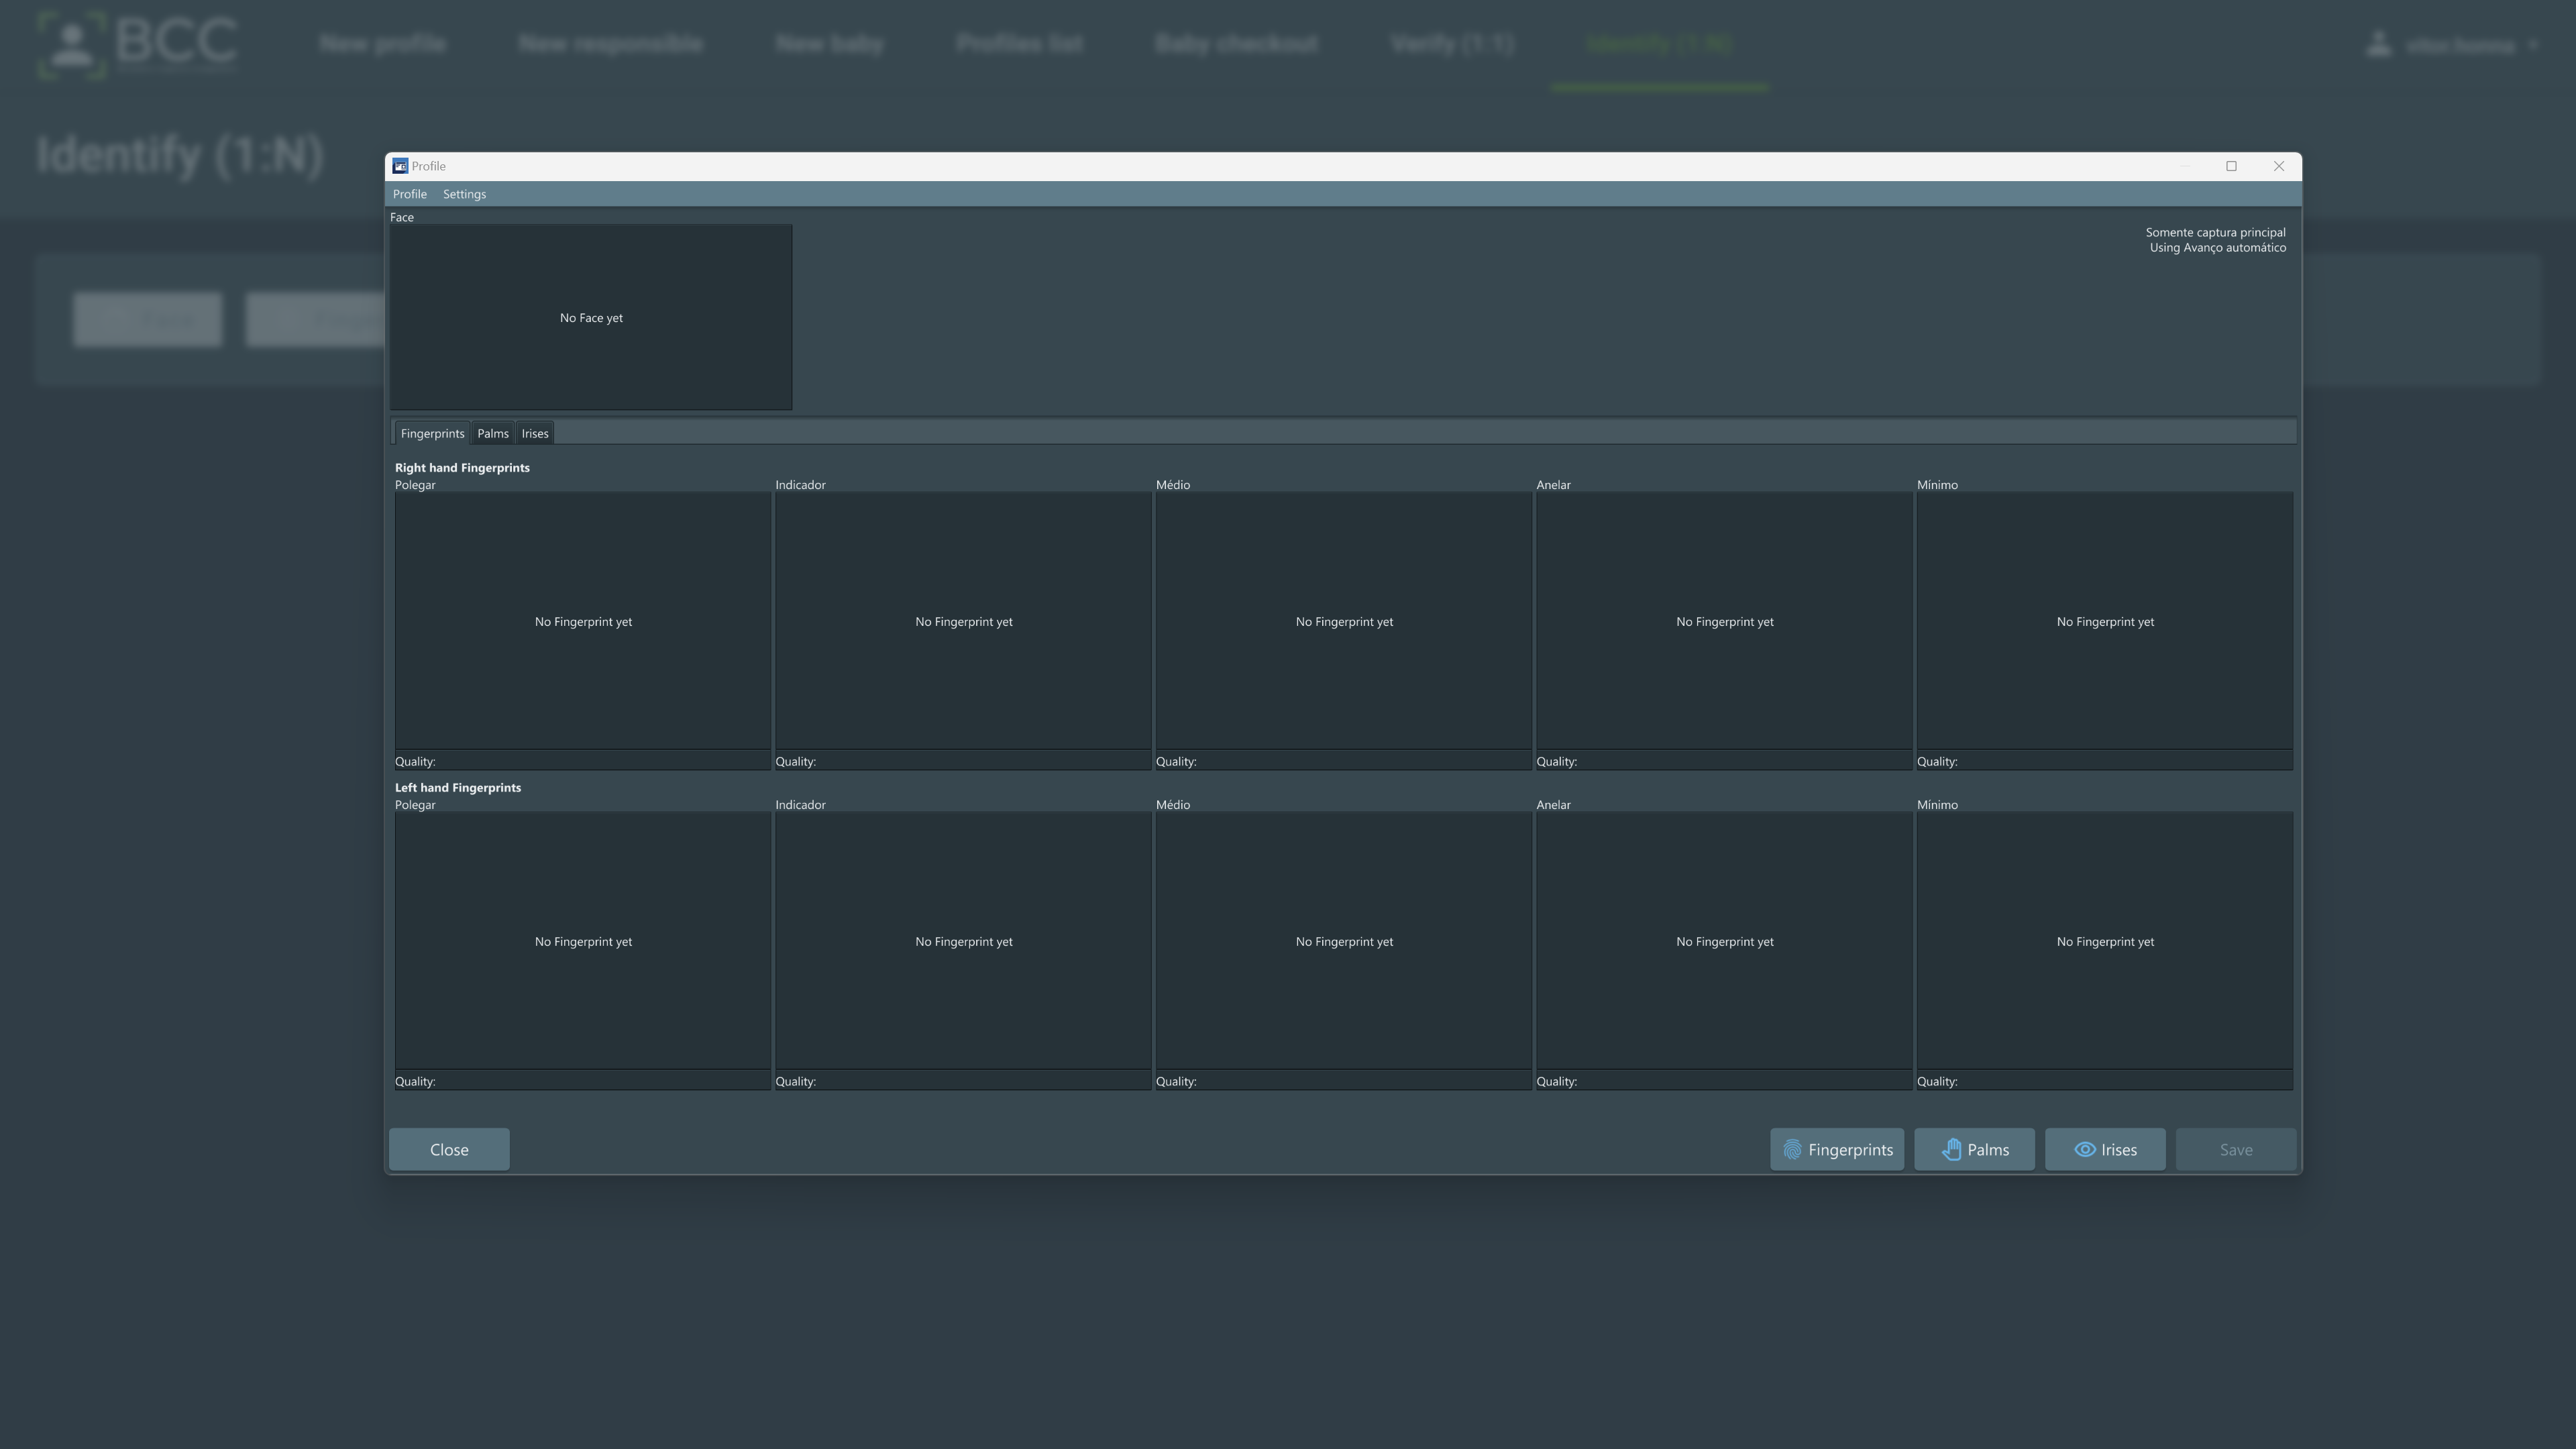
There will be options to collect all biometrics in this mode, except the sequence control and signature capture. The profile window offers some possibilities to capture biometrics. Those are:
- Clicking the buttons at the bottom-right of the window
- Right-clicking the biometric you want to capture and clicking the Capture button.
- Accessing the Profile > Capture option at the top menu bar, as shown below
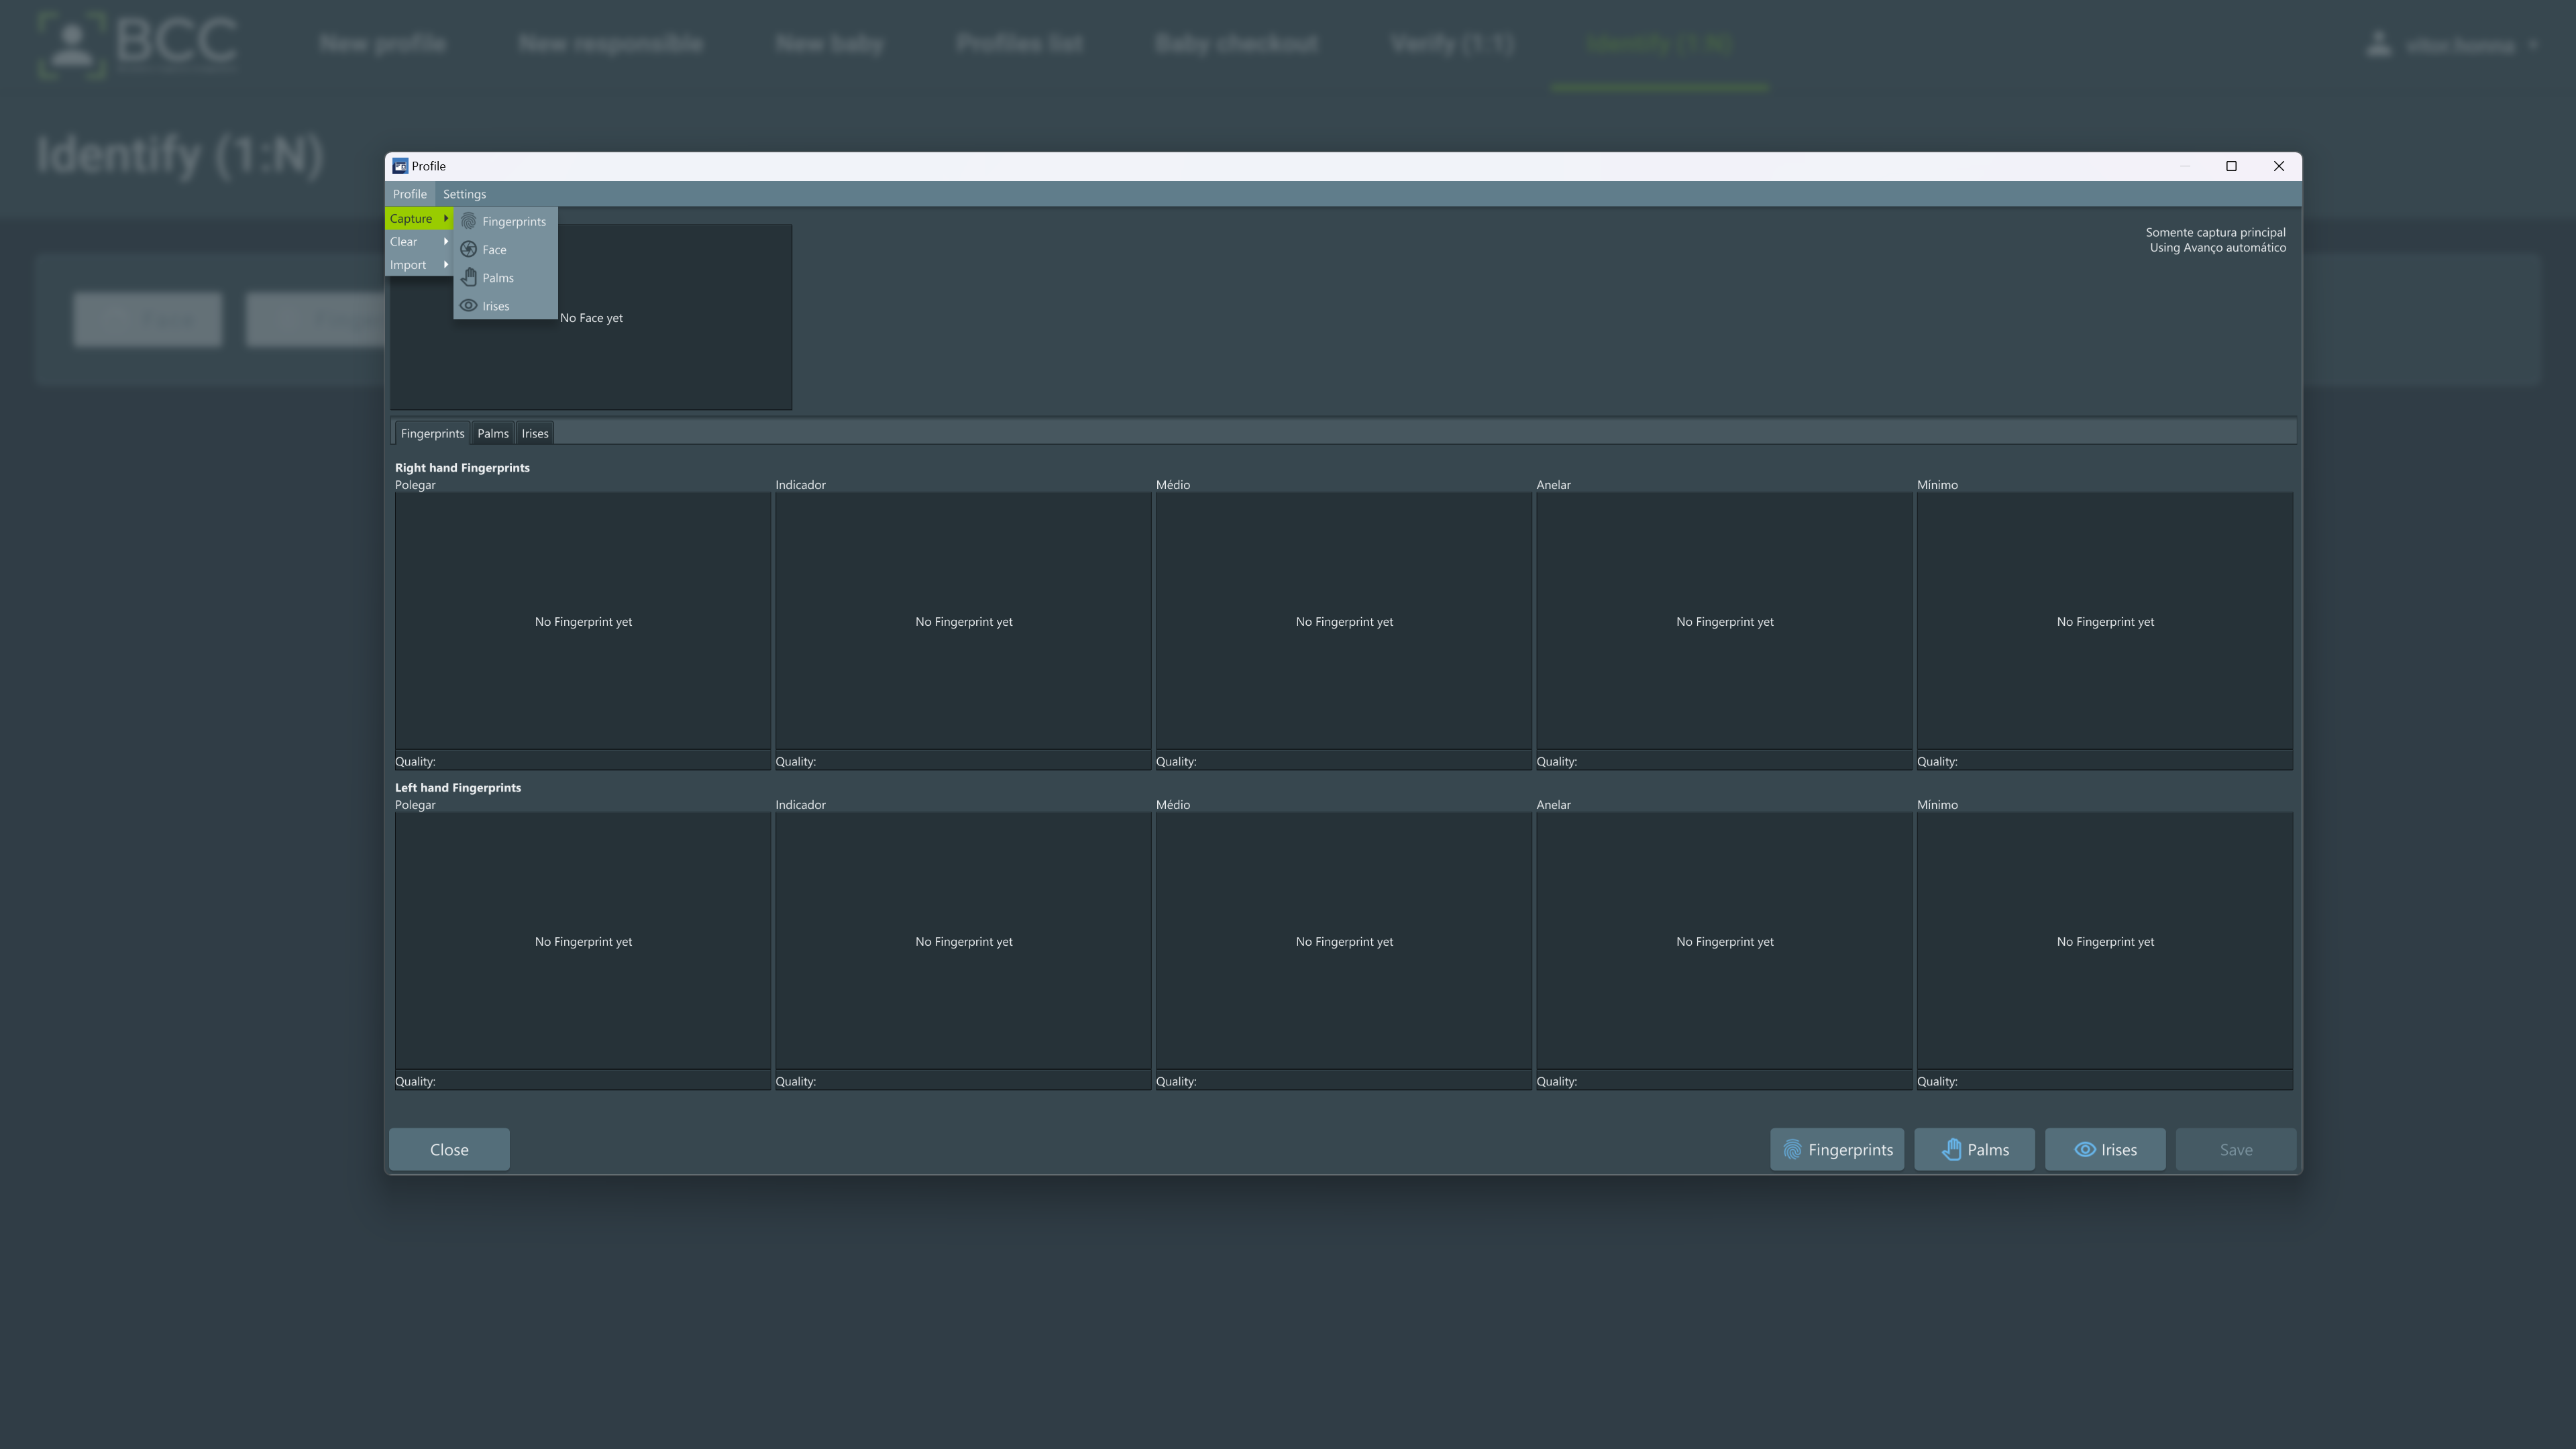
There is a minimum requirement of biometrics that you should capture to perform a profile identification. Those are different in every environment and can be configured individually. After capturing the necessary and wanted biometrics, click the Save button to perform the identification.
Important
Whether ANY biometric matches ANY profile, the operation will consider it a match and return the profile.
To remove a biometric already collected, right-click it and click the Clear button. You may also access the Profile > Clear menu and select one of the options to clear all the biometrics of the desired type at once.
You may also import the profile biometrics if you have the proper permissions. To do so, click Profile > Import > Import Option. Two options are available:
Import from folder
All your files in the folder must be named correctly according to the pattern:
index_BIOMETRIC-Type
example:
0-LEFT_INDEX-ROLLED.tpt
1-LEFT_RING-FLAT.wsq
(...)
10-FACE-FRONTAL.jpg
13-FACE-LEFT_IRIS.png
Import from EBTS or ANSI/NIST-ITL 2000 file
To cancel the identification, click the Cancel or the x close button.
6. Baby Capture
A baby capture is a process of enrolling a newborn in the database by obtaining their biometric and biographic information. To perform a baby capture, click the “New baby” box on the main page or the “New Baby” option in the top menu. As a result, this page will be displayed.
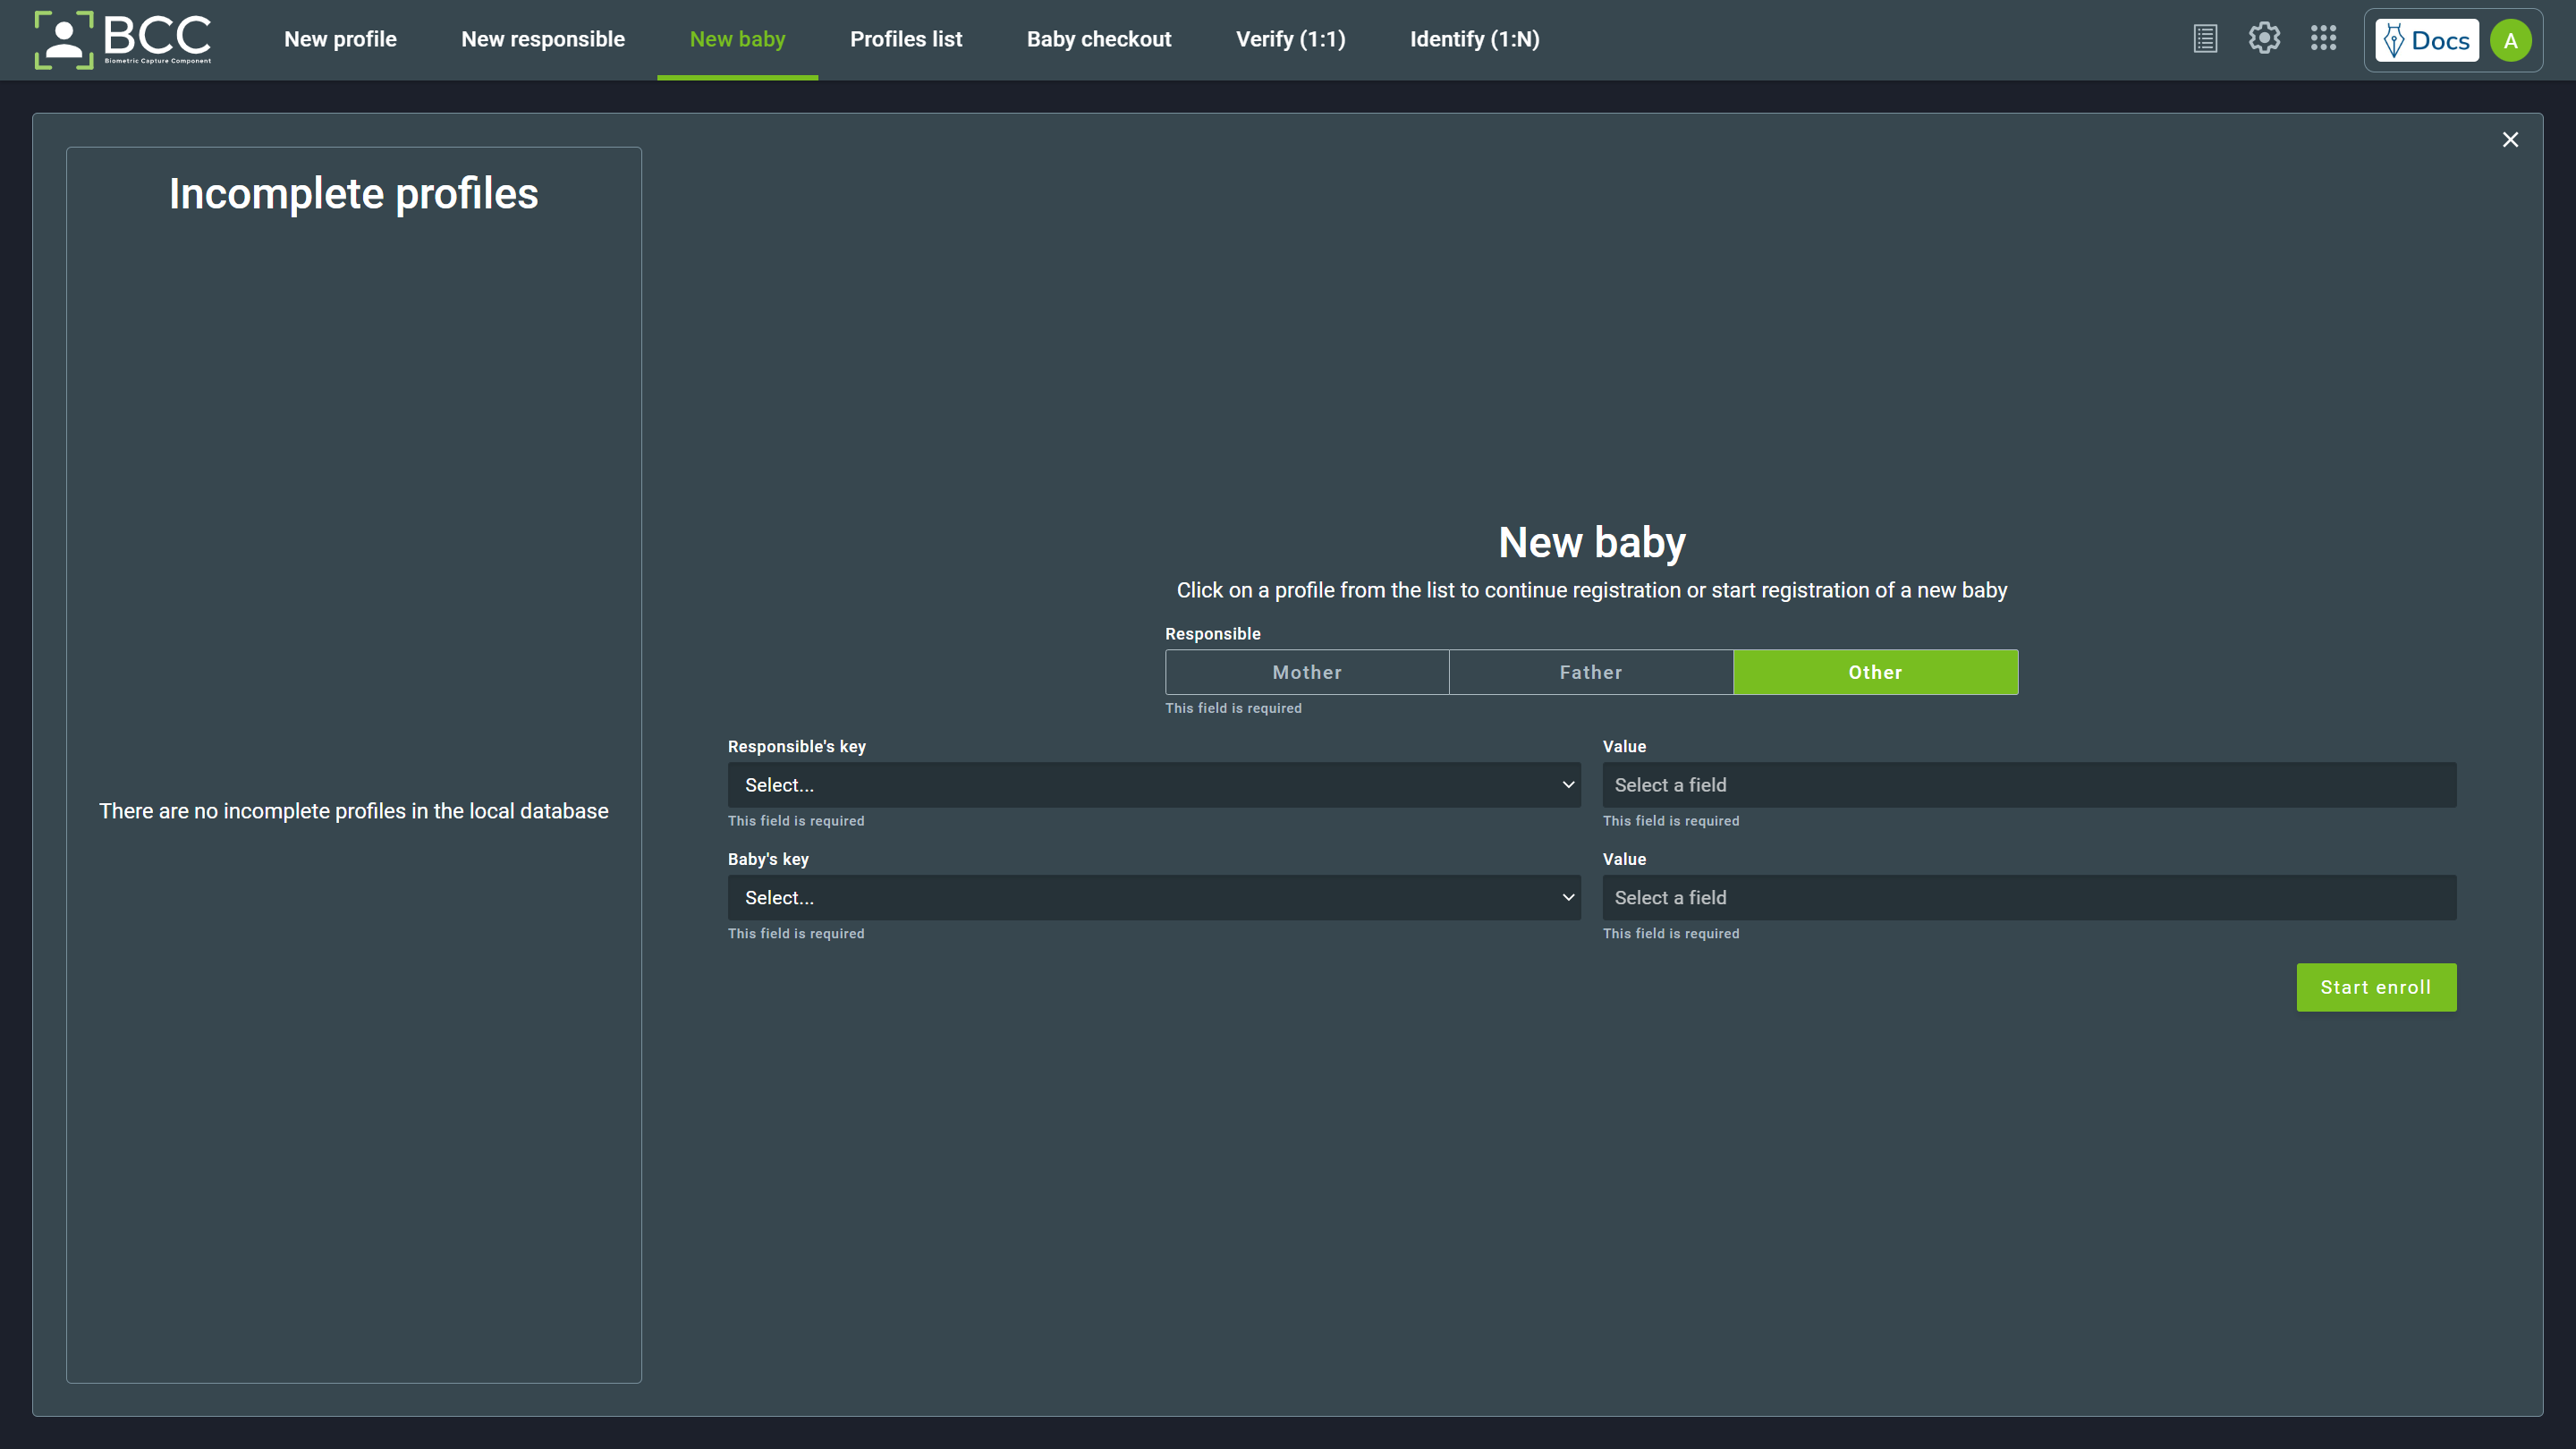
Incomplete baby profiles will be listed in the lateral menu. On the same page, you can see the fields necessary to start enrolling a newborn:
- A selection box to pick the responsible, where the selected one is highlighted in green.
- A field to input the responsible’s key
- A field to input the baby’s key
After filling in the information, click the Start enroll button. Some different possibilities can happen from now on:
- The responsible is not enrolled in the database, leading to the responsible’s enrollment first.
- The responsible is enrolled, and the baby is not enrolled, leading to the baby’s enrollment.
- The baby is already enrolled and linked with a responsible, stopping the operation.
Those possibilities will be explained below.
6.1. Responsible not enrolled
If the responsible is not enrolled, a message will appear advertising you that the responsible was not found. An option to start the responsible enrollment will be displayed. To start the enroll, click the Enroll responsible.
Enrolling a responsible follows the same process as described in the civil capture New Profile enrollment, where the biographics may differ depending on your Fields.
There is only one difference in this enrollment from the civil enrollment. The revision screen will have one more button, leading to the responsible revision of the Baby not enrolled flow, skipping the responsible’s identify operation.
6.2. Baby already enrolled
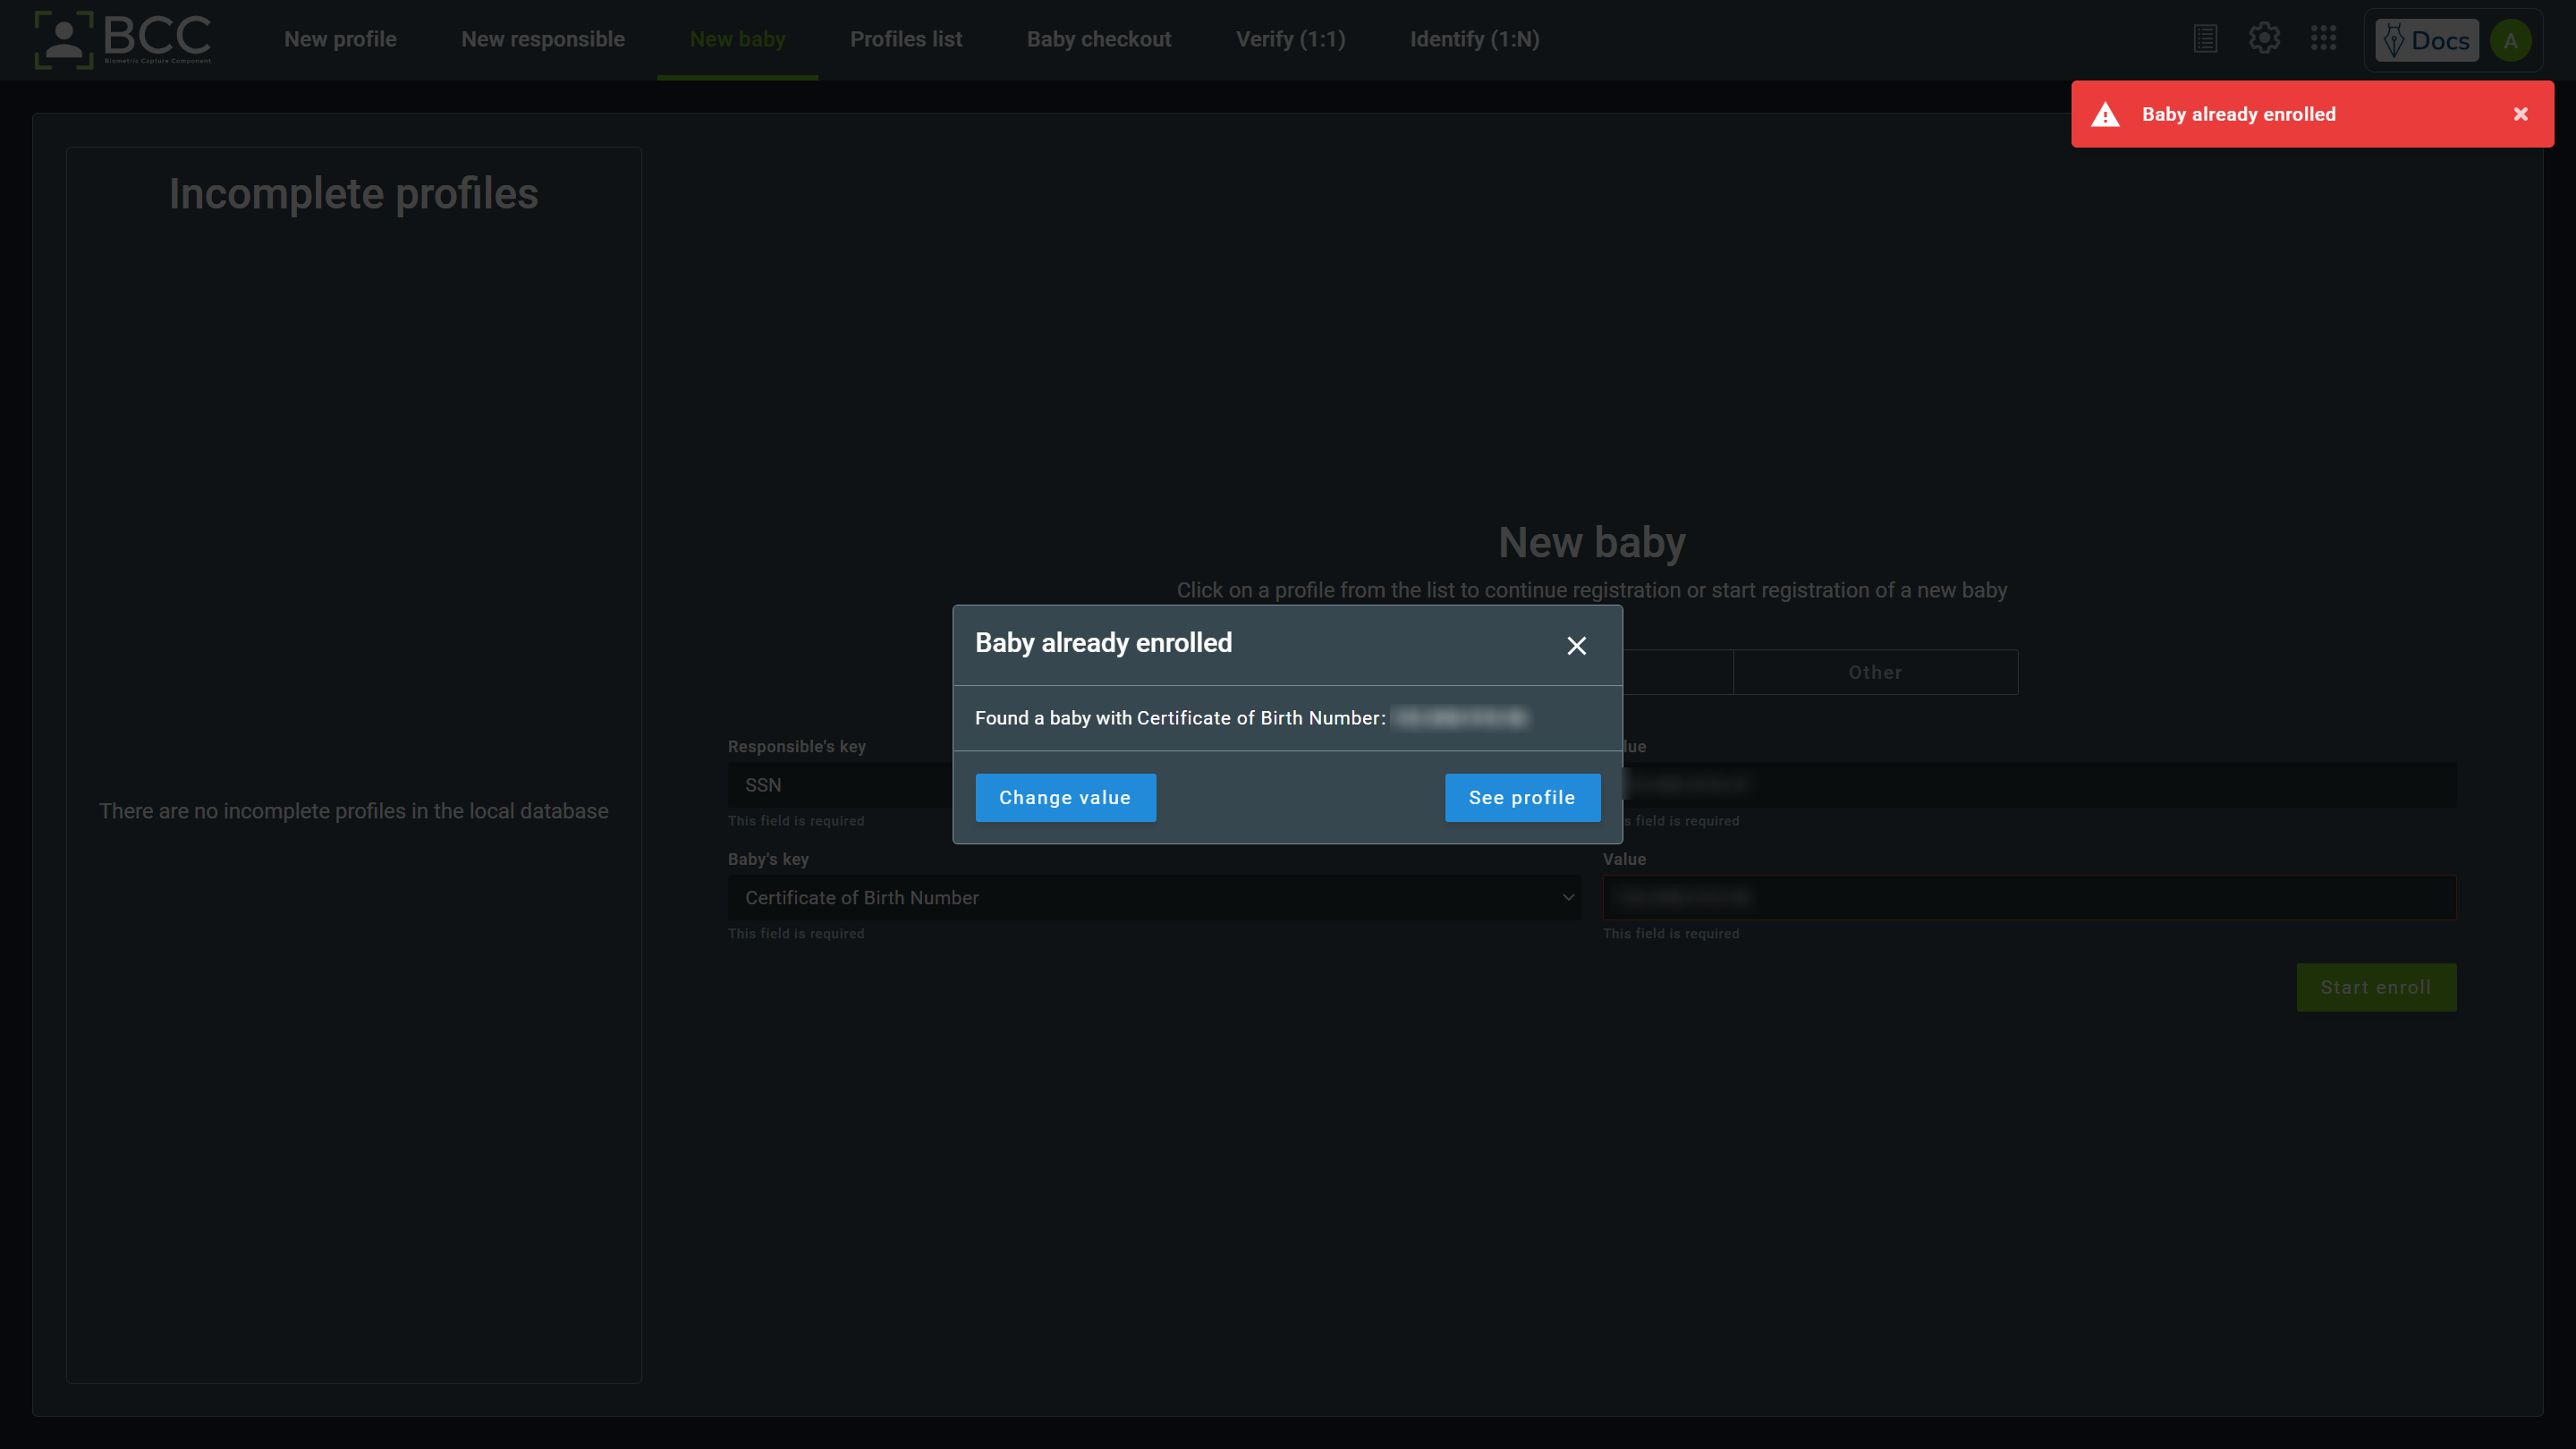
If the baby is already enrolled, it does not matter if the responsible is enrolled or not. A notification will display that a baby was found with the key. You can see the baby’s profile by clicking the See profile button or close the notification by clicking the Change value button.
6.3. Baby not enrolled
If the responsible is already enrolled and the baby is not, clicking the Start enroll will display a notification with a button to Verify responsible. You need to verify the responsible with the capture of any finger to start. After that, the responsible revision page will be displayed.
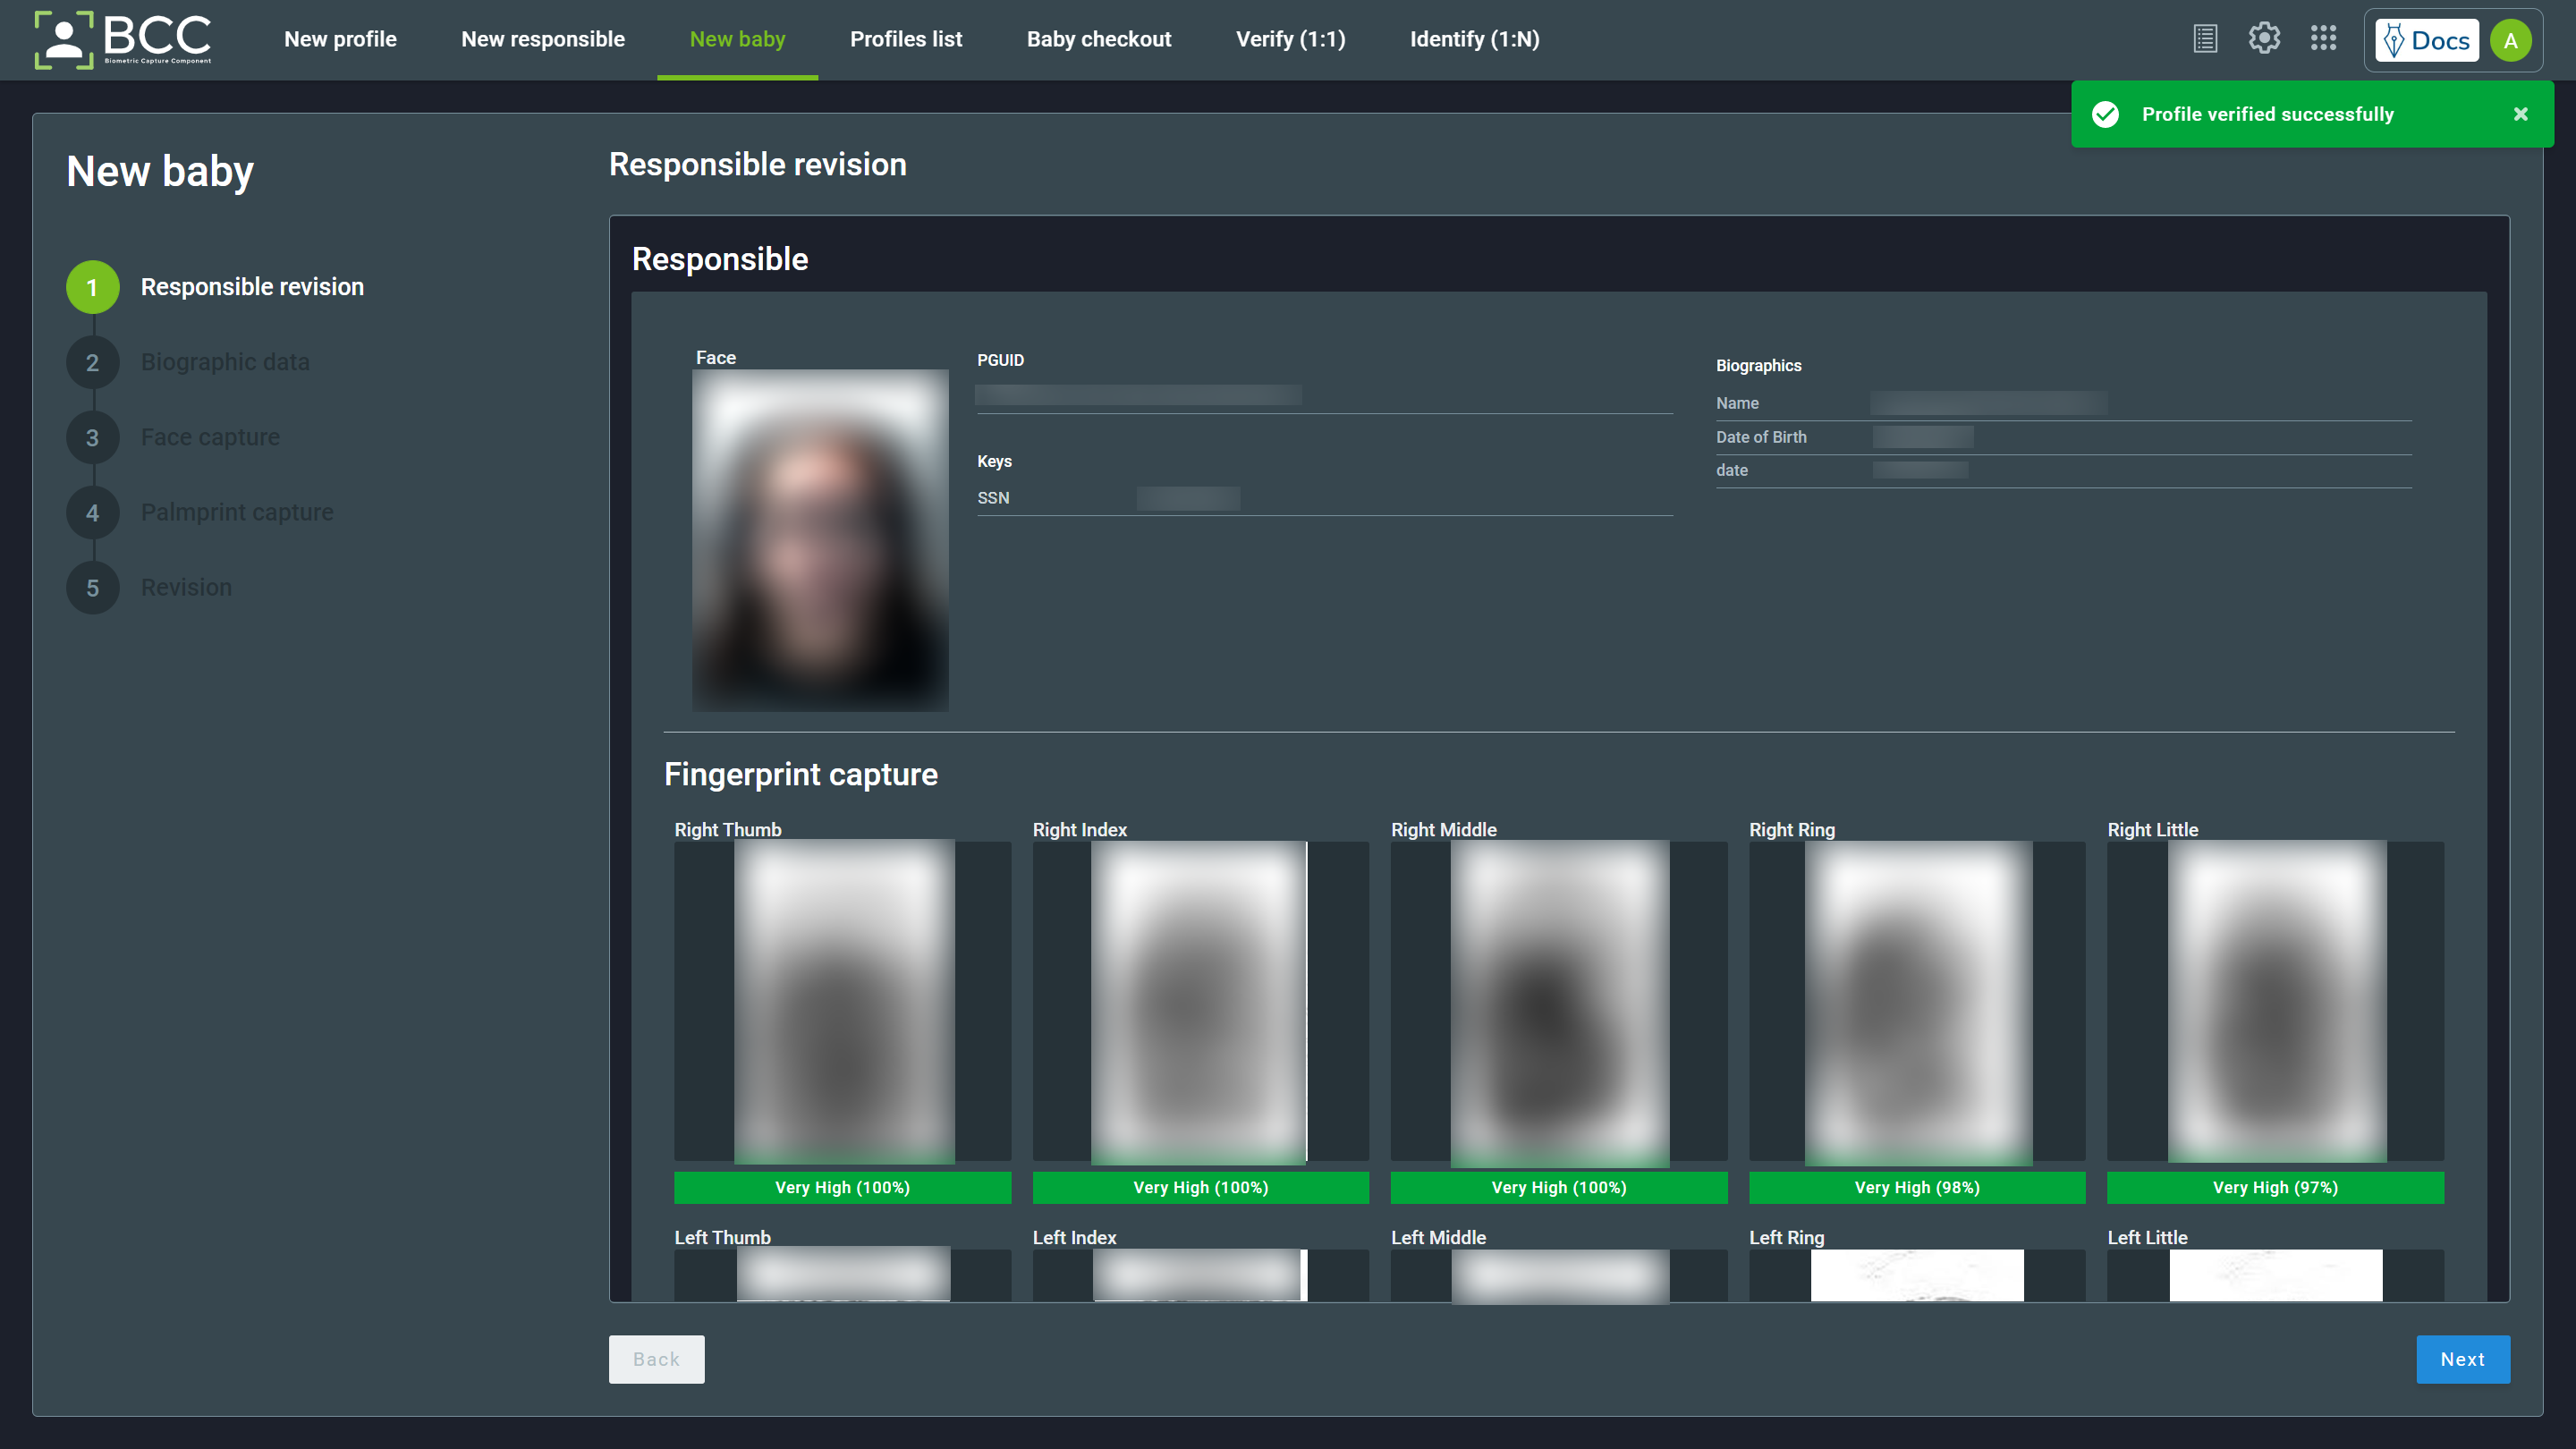
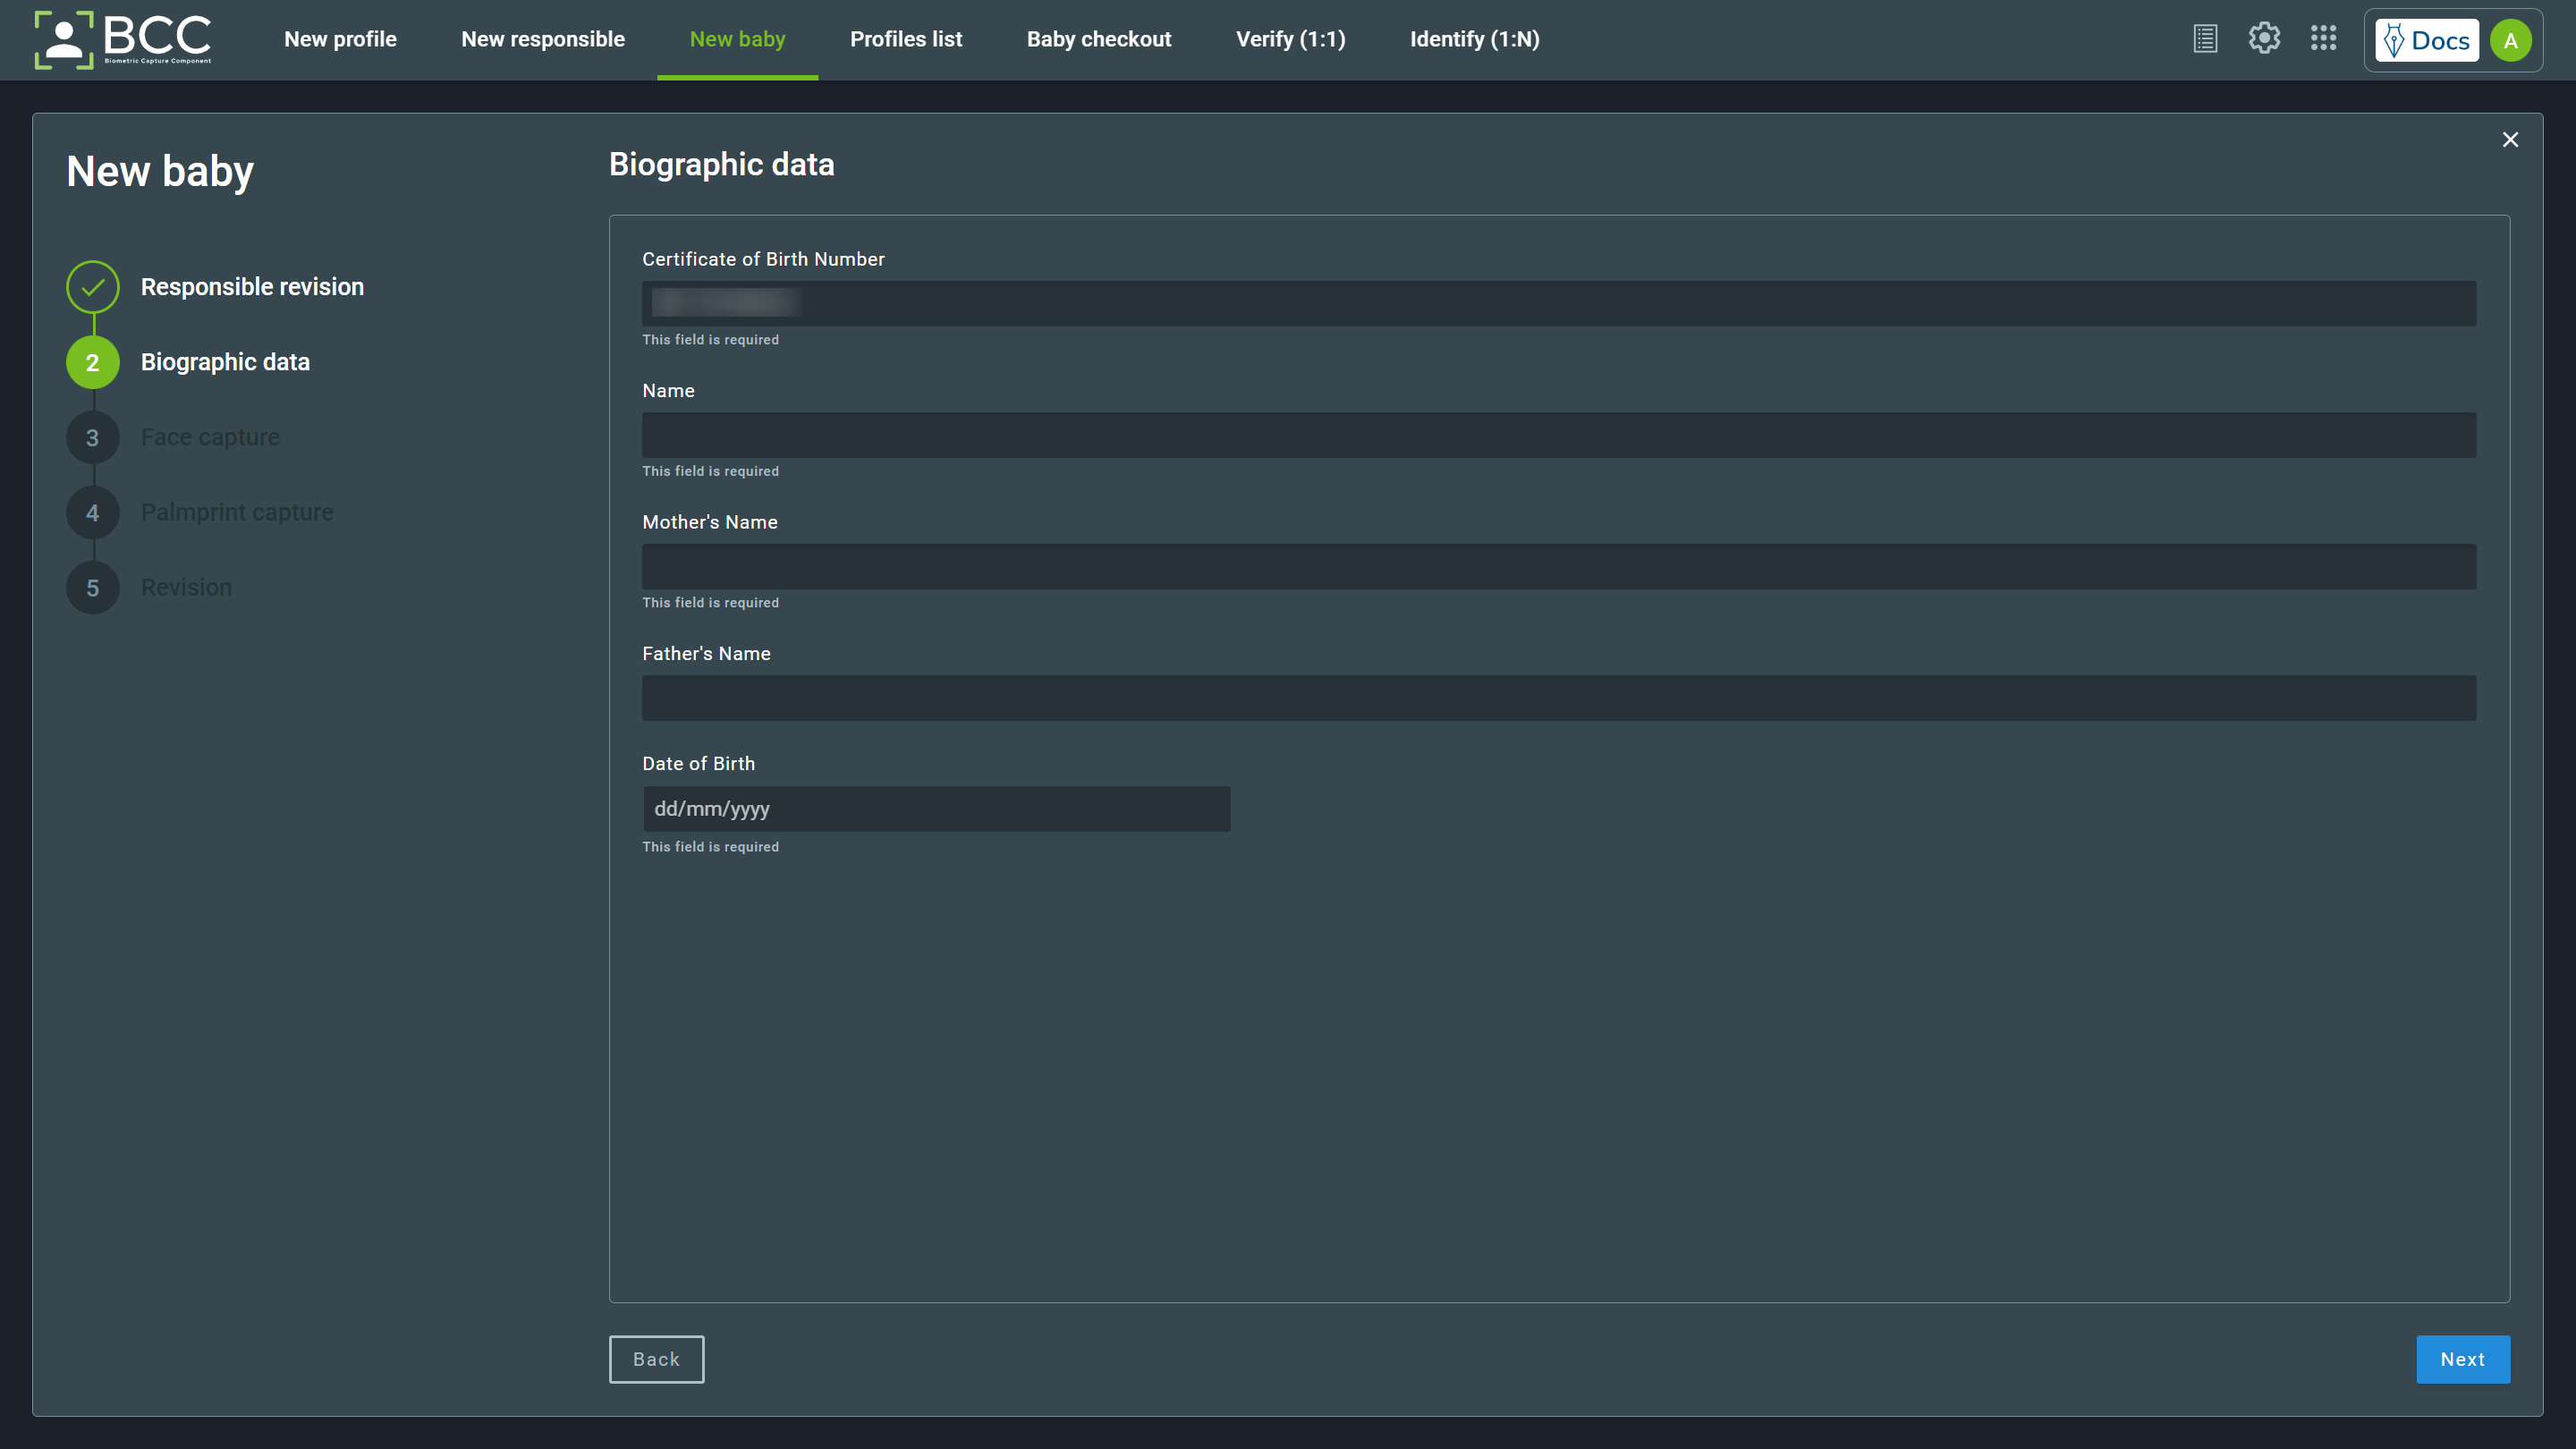
If all information is correct, you can proceed by clicking the Next button. It will lead to the baby’s biographic data. Fill in all necessary biographic data and click the Next button.
Note
Note that the baby’s key provided before starting the enrollment will be filled.
The next step is face capture. The Capture Face window will start automatically. Capture the baby’s face or upload an image if you have the proper permissions, then click OK.
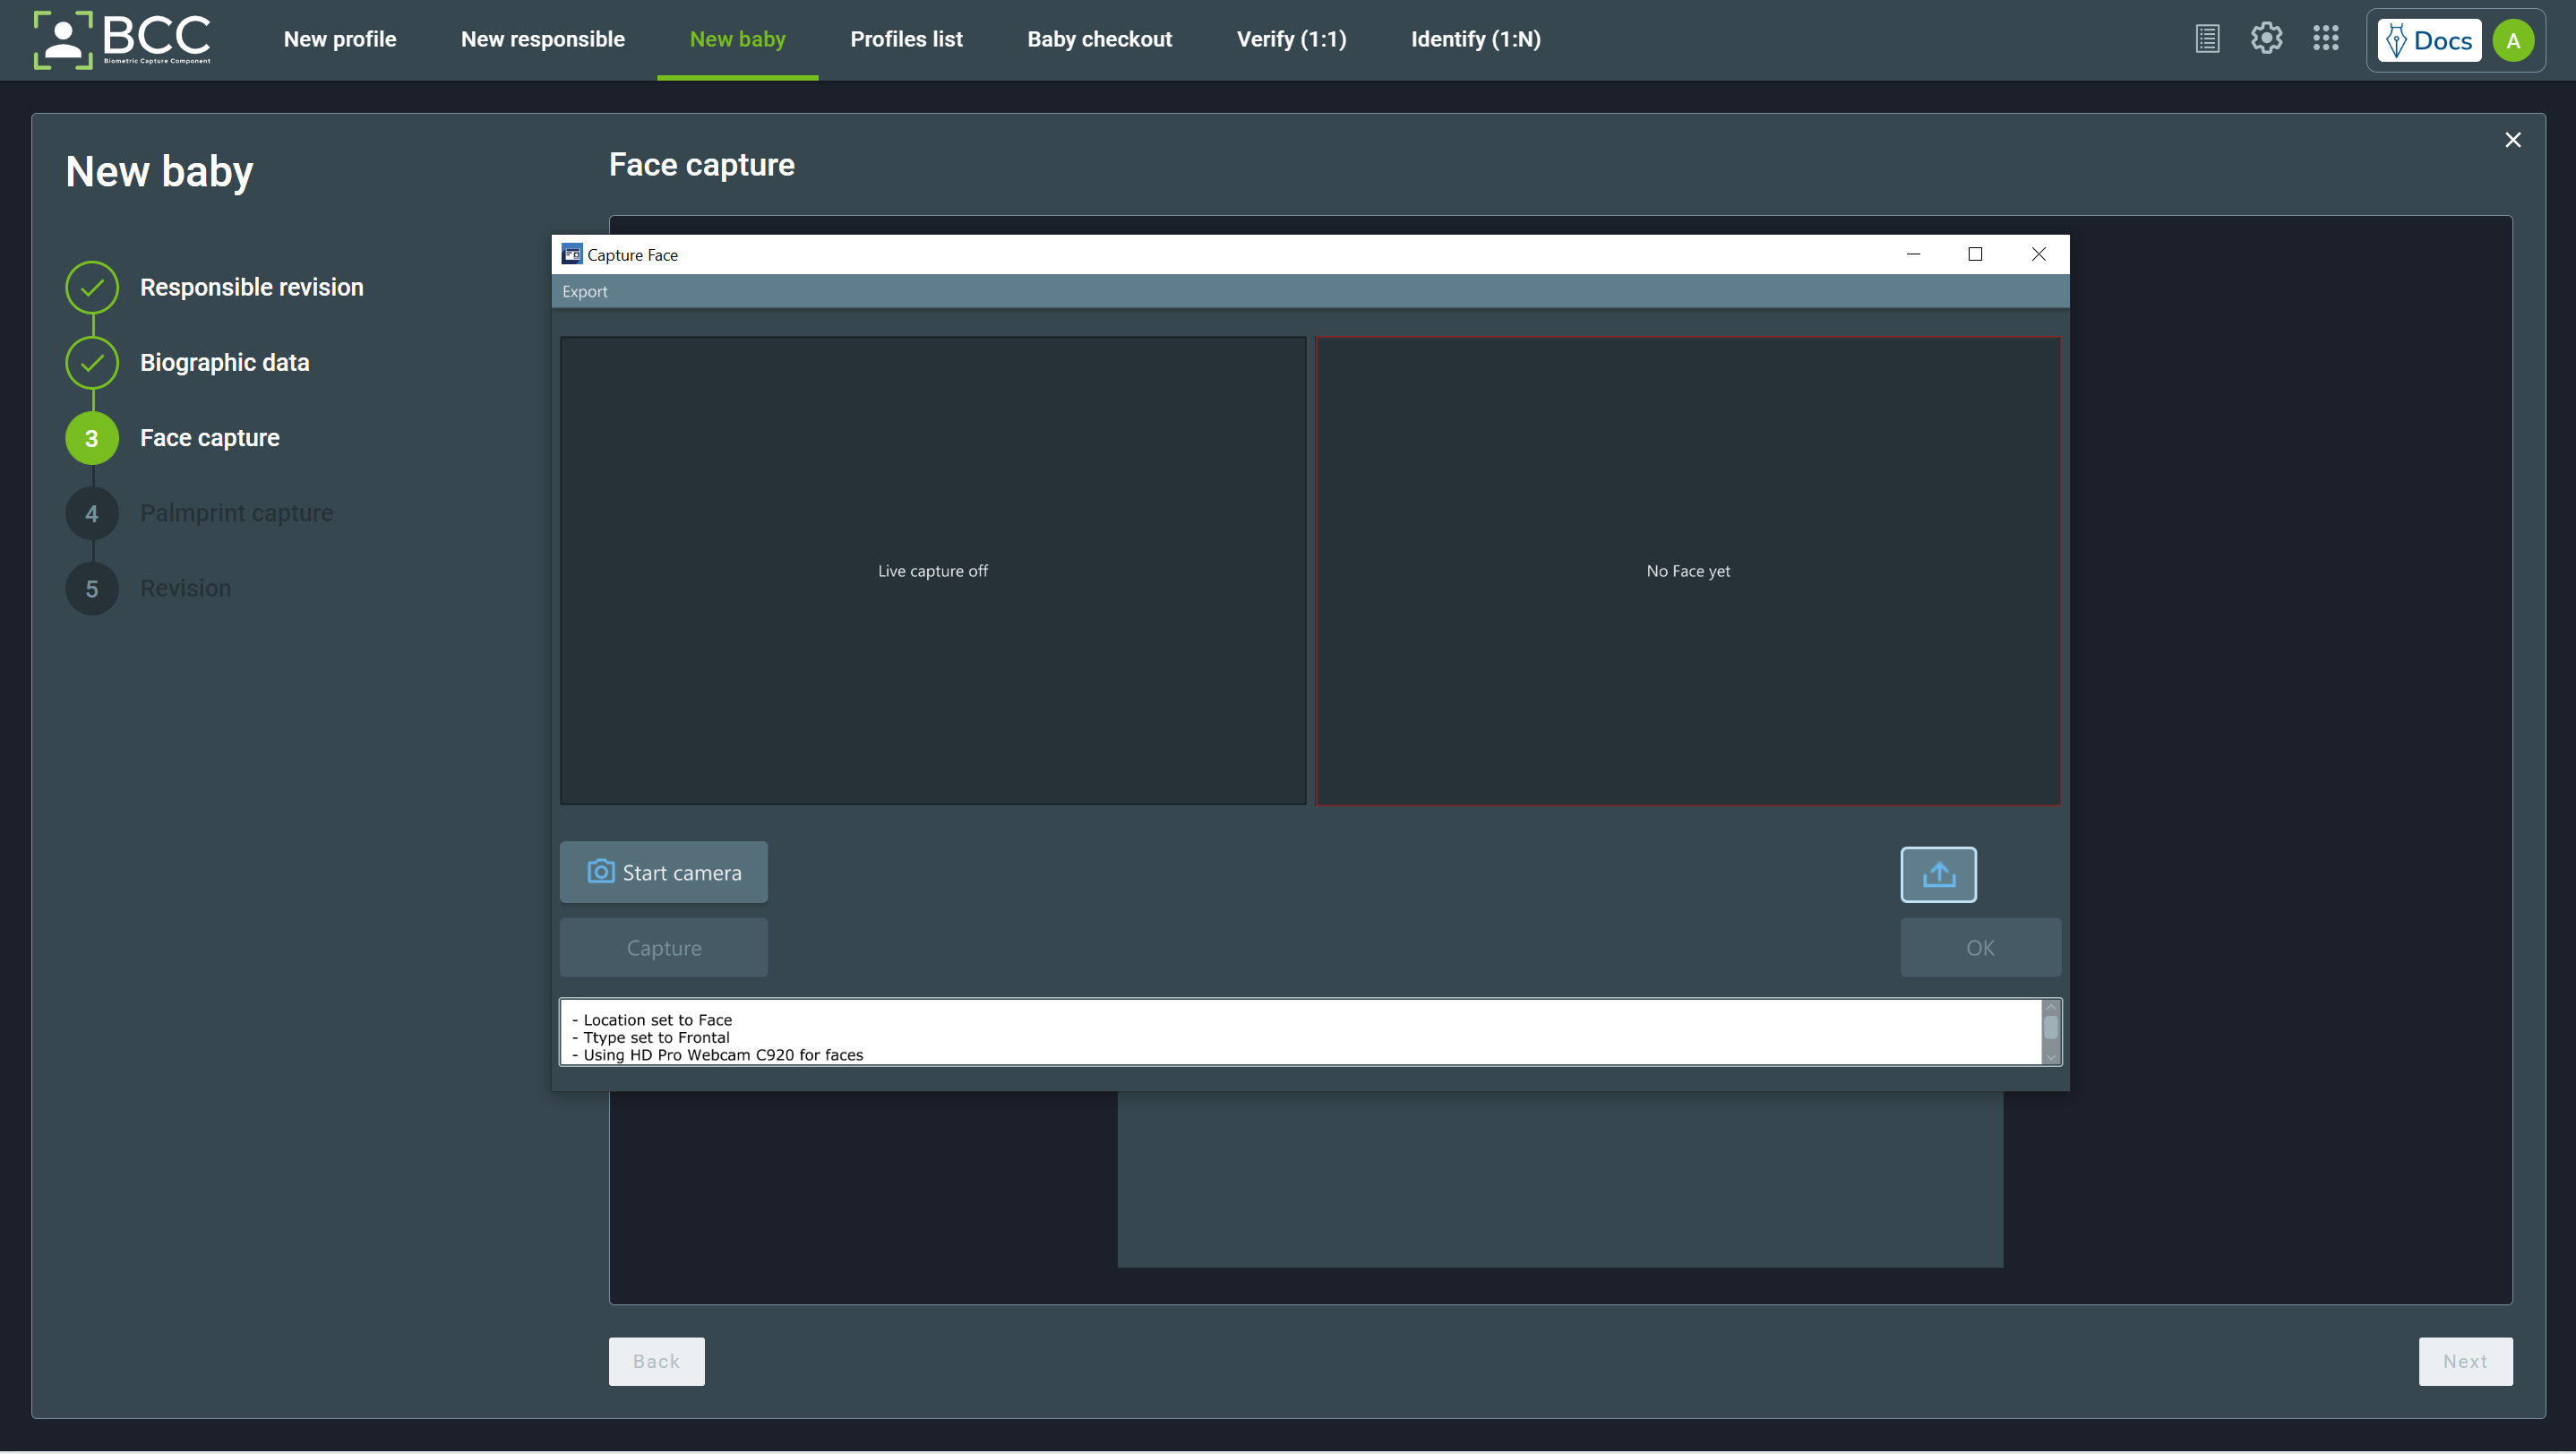
You may remove or recollect the image by hovering over it and clicking the desired button.
After proceeding, you will get to the baby’s palmprint capture. It will automatically open the capture windows.
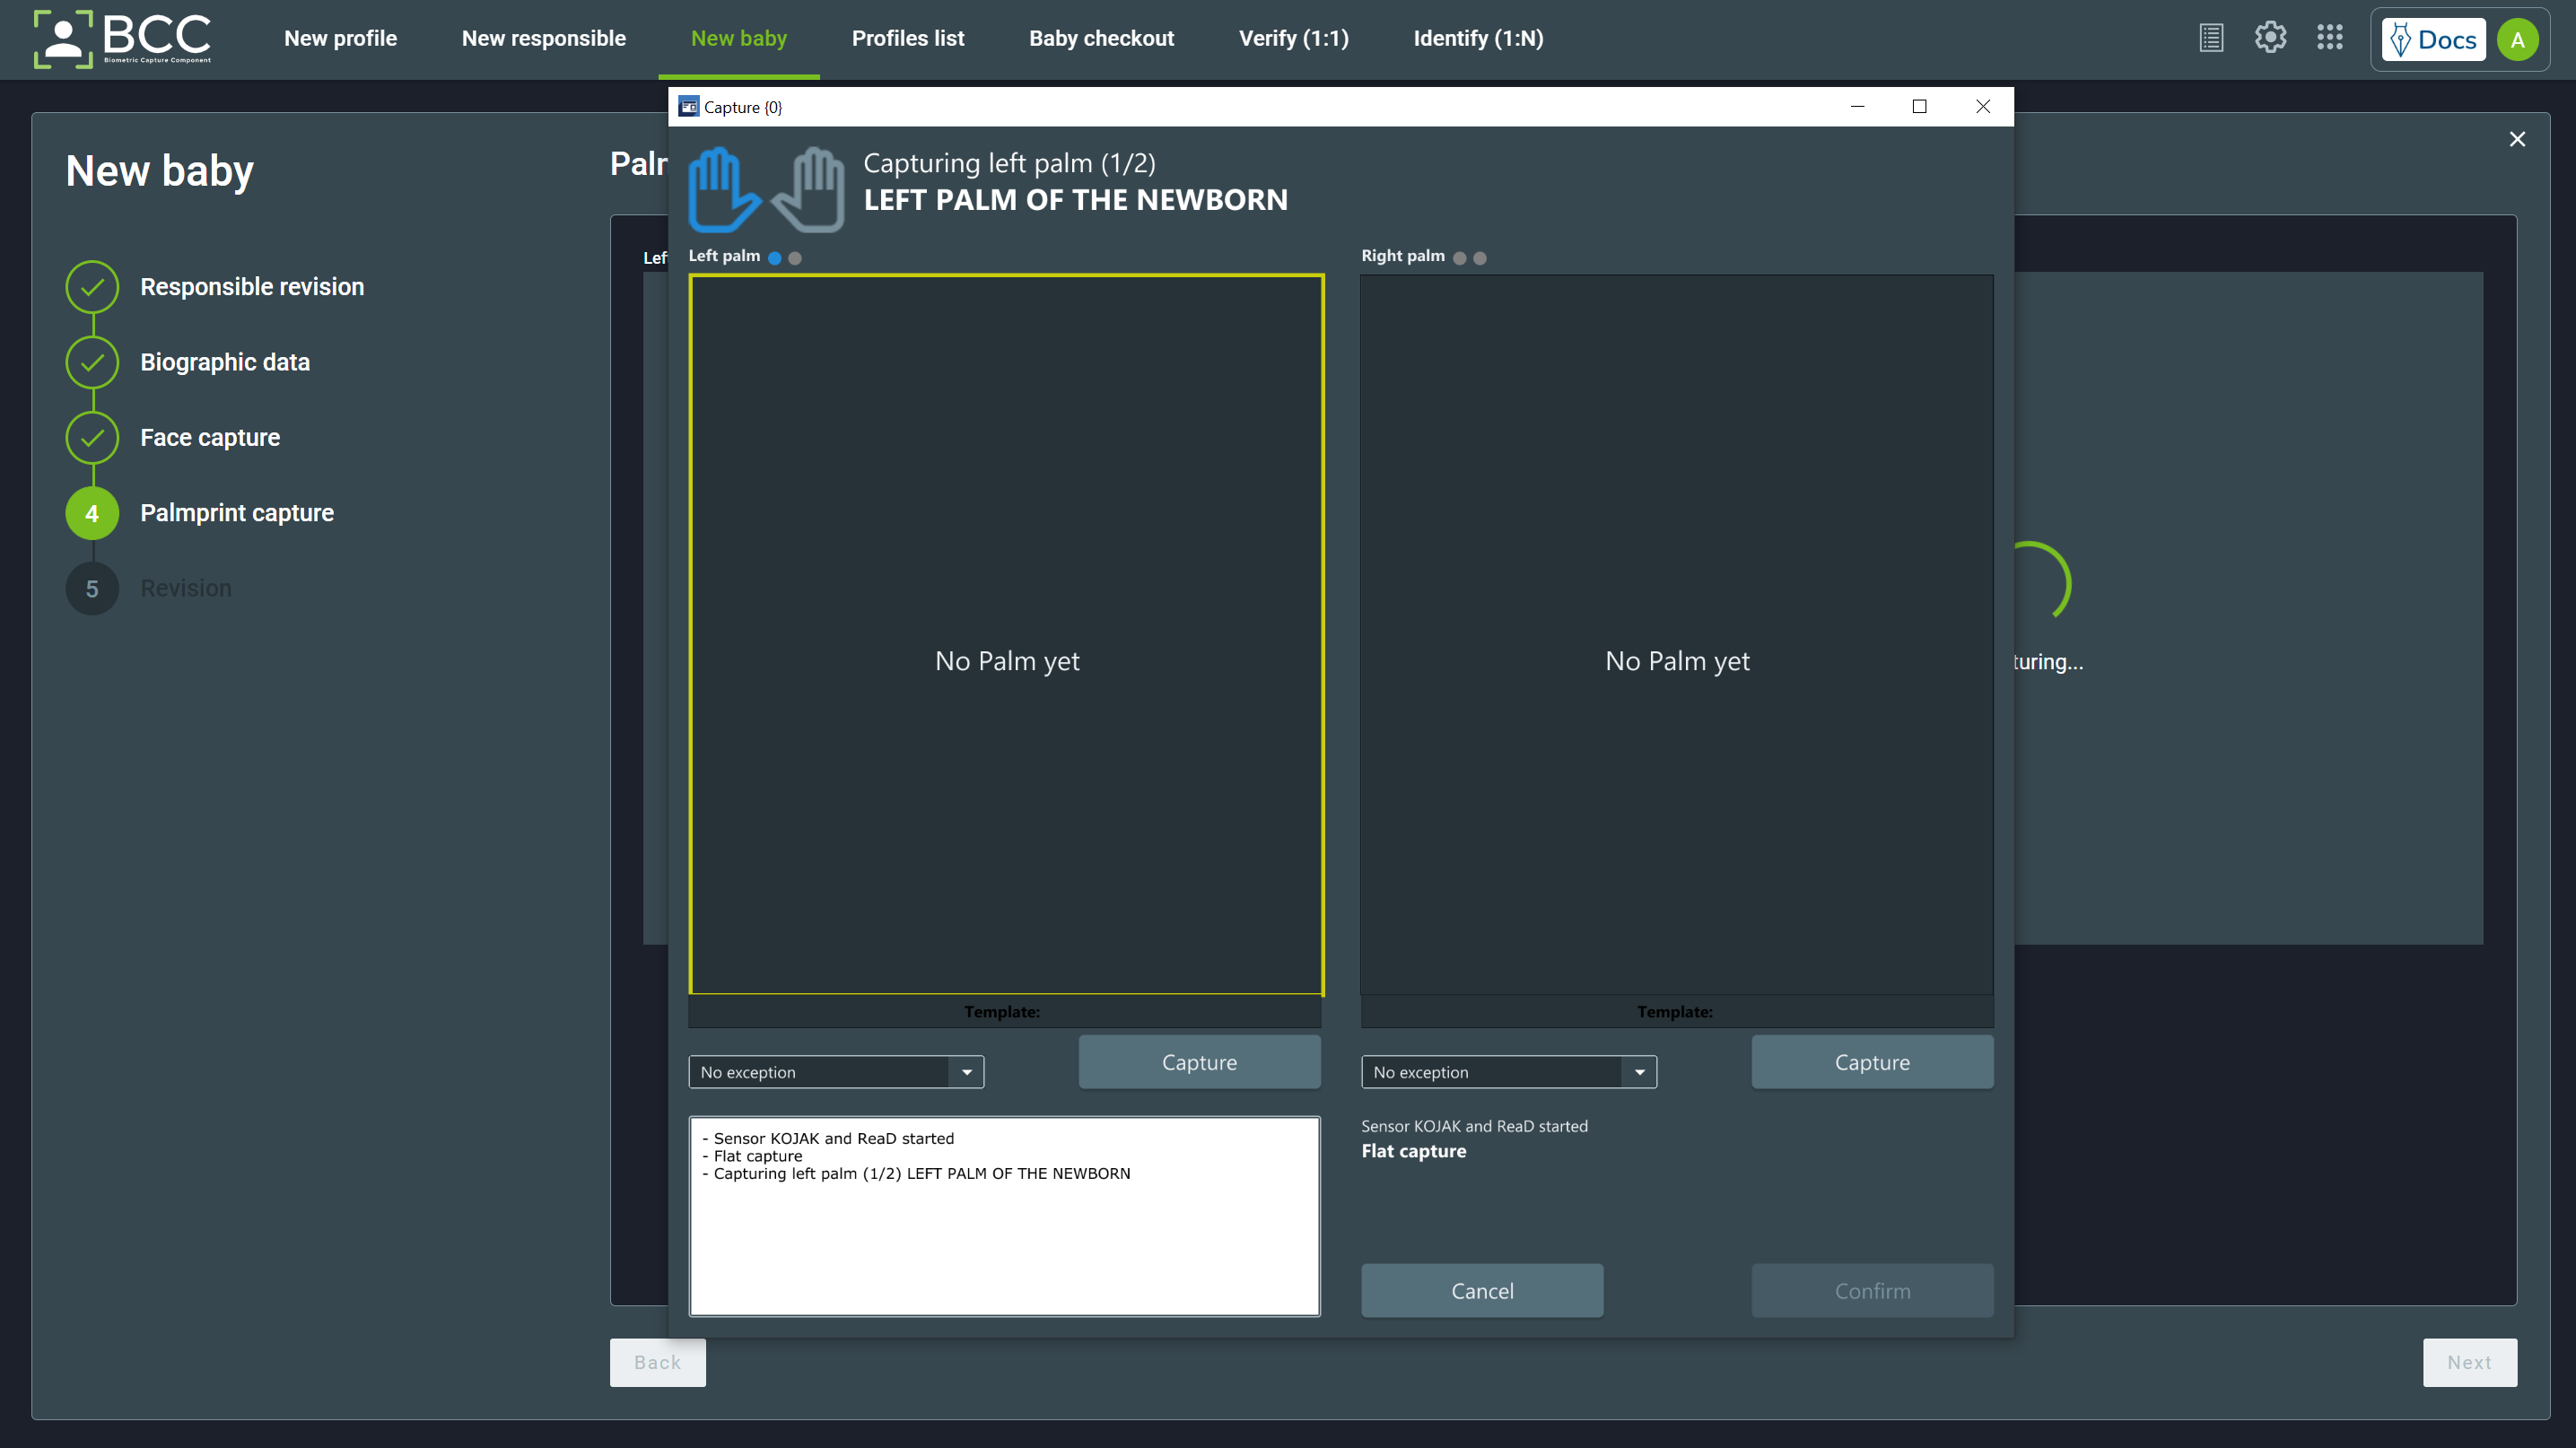
In the capture window, you can see:
- The palm needed to be captured, highlighted in blue and also in the text at the top
- The capture number, as each baby palms need to be captured TWO times.
- The exception selection dropdown menu. The exception list can be seen at Fingerprint and Palmprint Exceptions
- A Capture button to force-capture the baby palm and do not wait for the automatic capture.
- A Cancel button to close the window and cancel the capture
- A Confirm button to approve the captures after both captures of both palmprints have been taken.
As mentioned, the baby’s palmprints need to be captured two times. There are some indications in the capture screen of what capture you are:
- In the capture title (1/2) or (2/2)
- The dots above the palmprint (green for captured, blue for in capture)
The image below shows those examples:
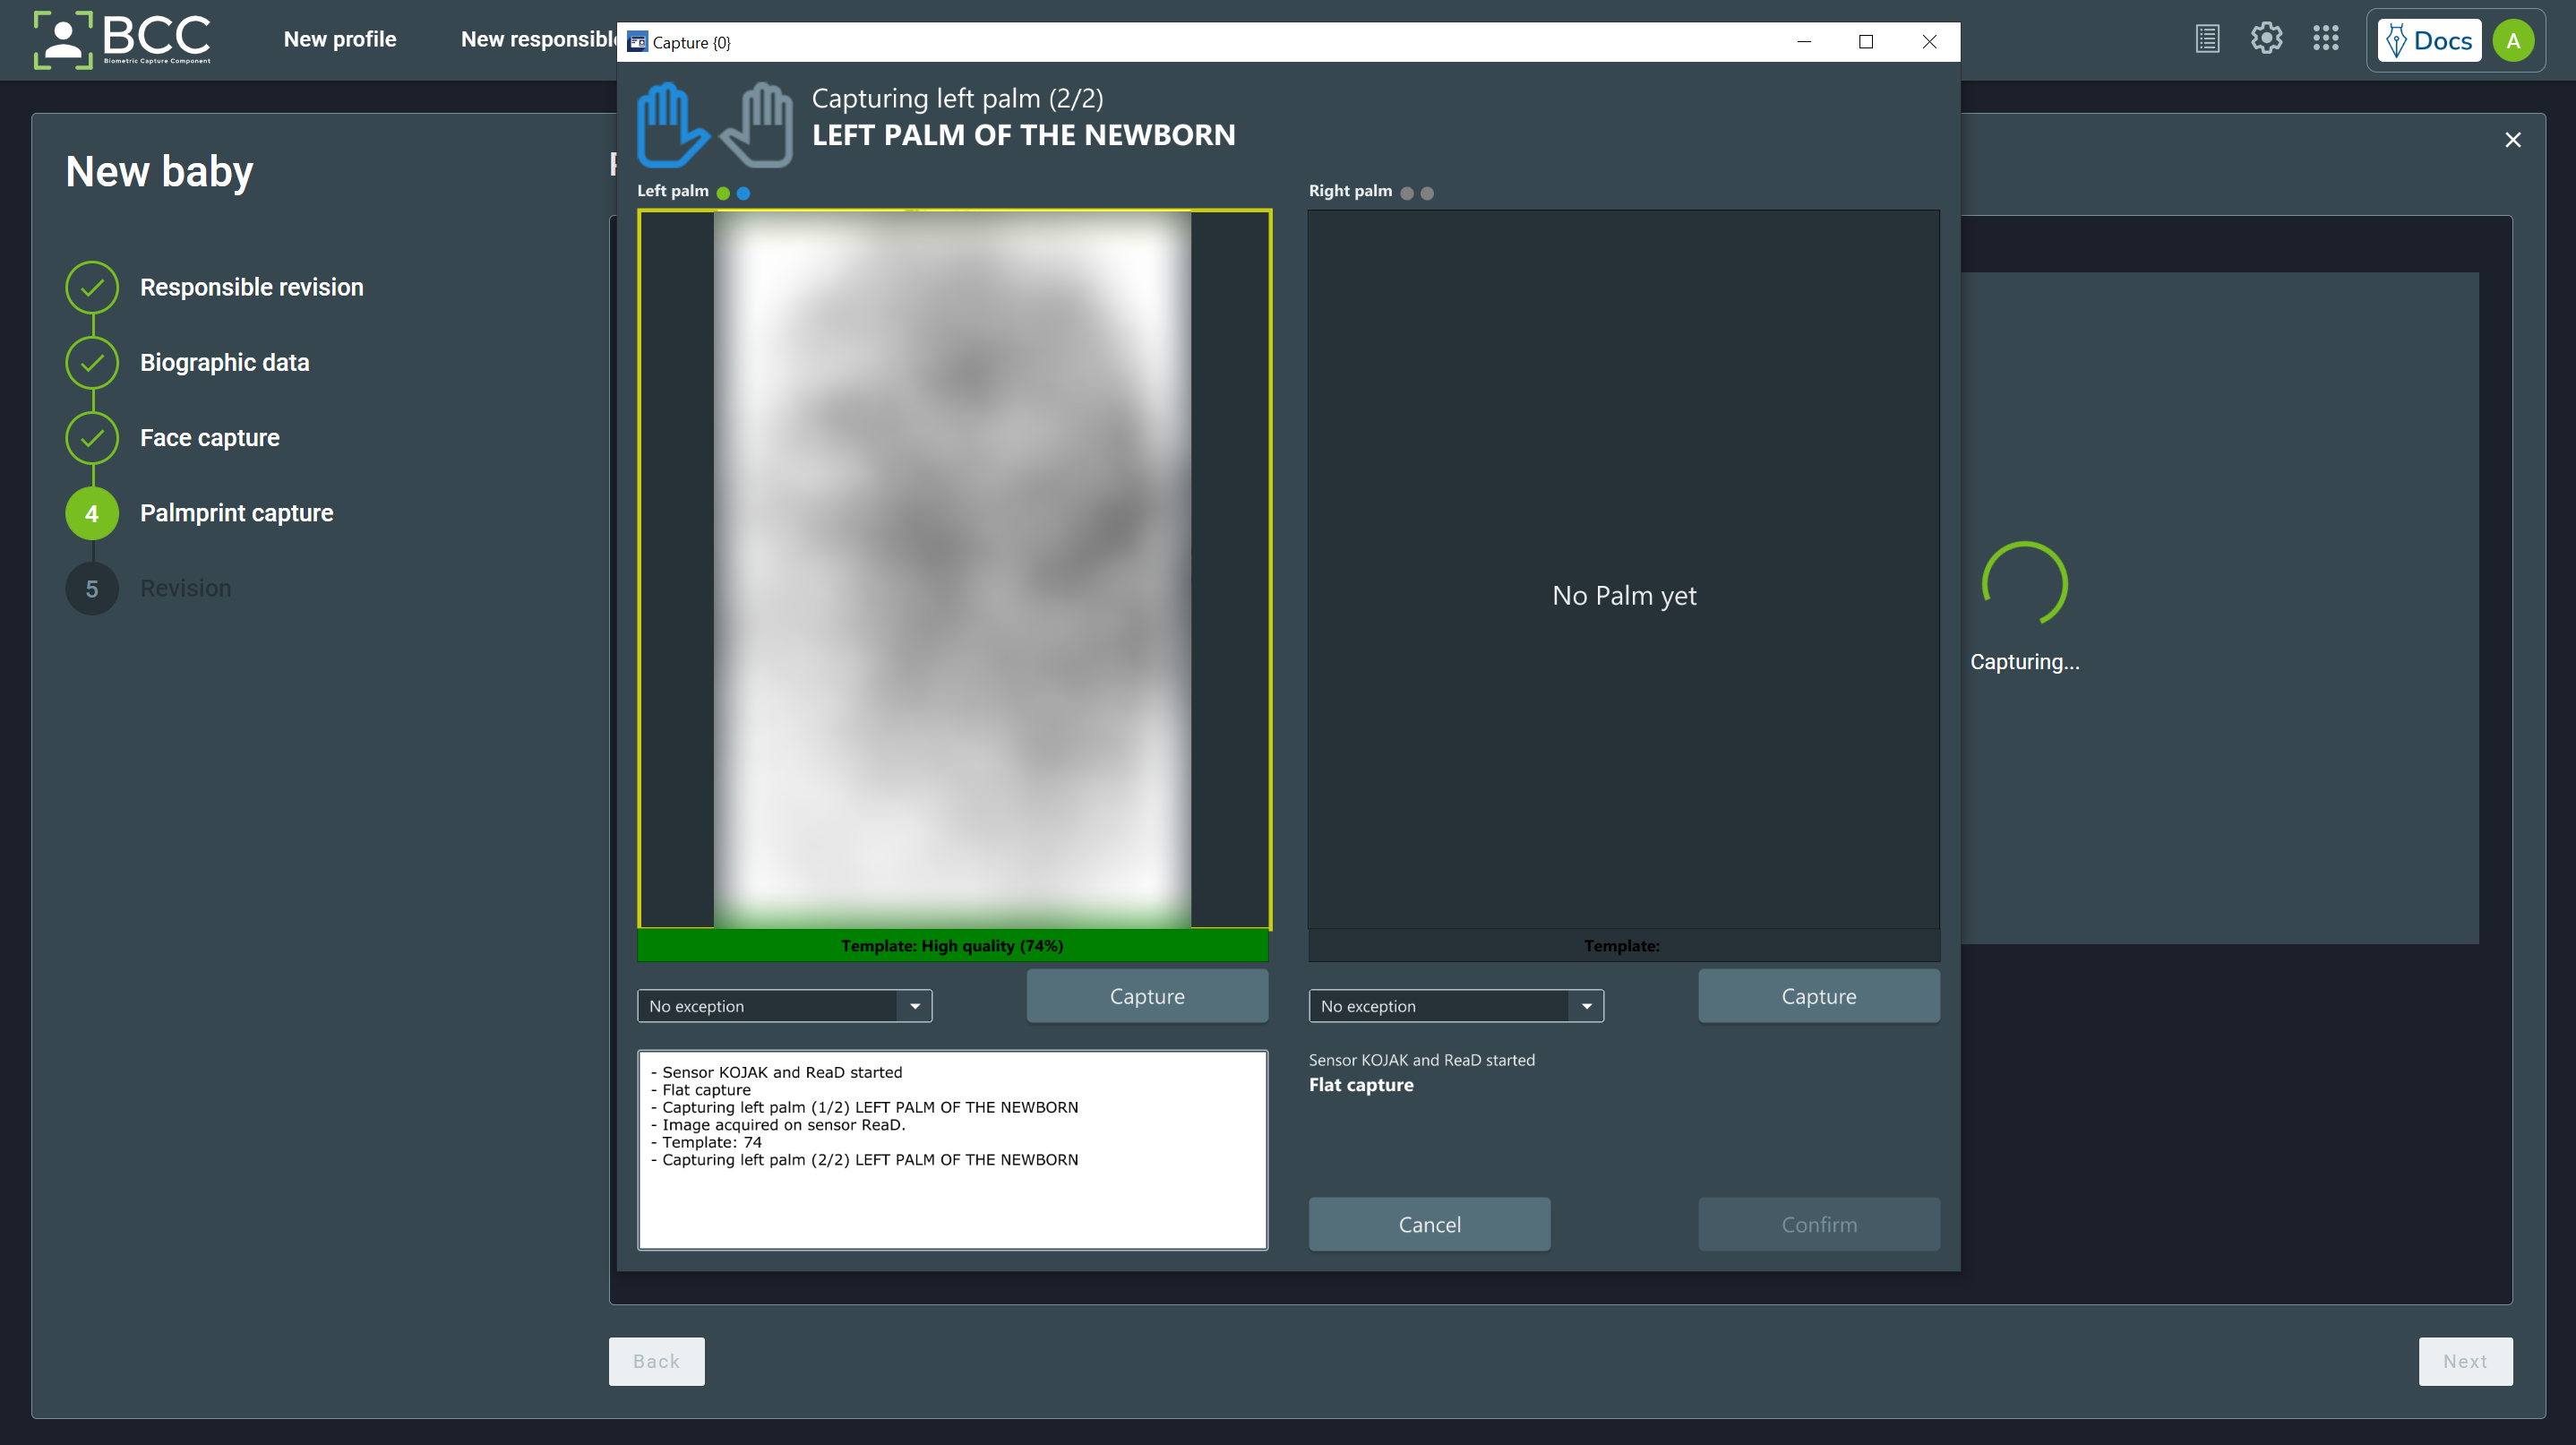
After the captures are taken, click Confirm to close the windows. If any capture needs to be recollected, hover over the palmprint image and select one of the Remove or Recollect options. To proceed to the revision, click Next.
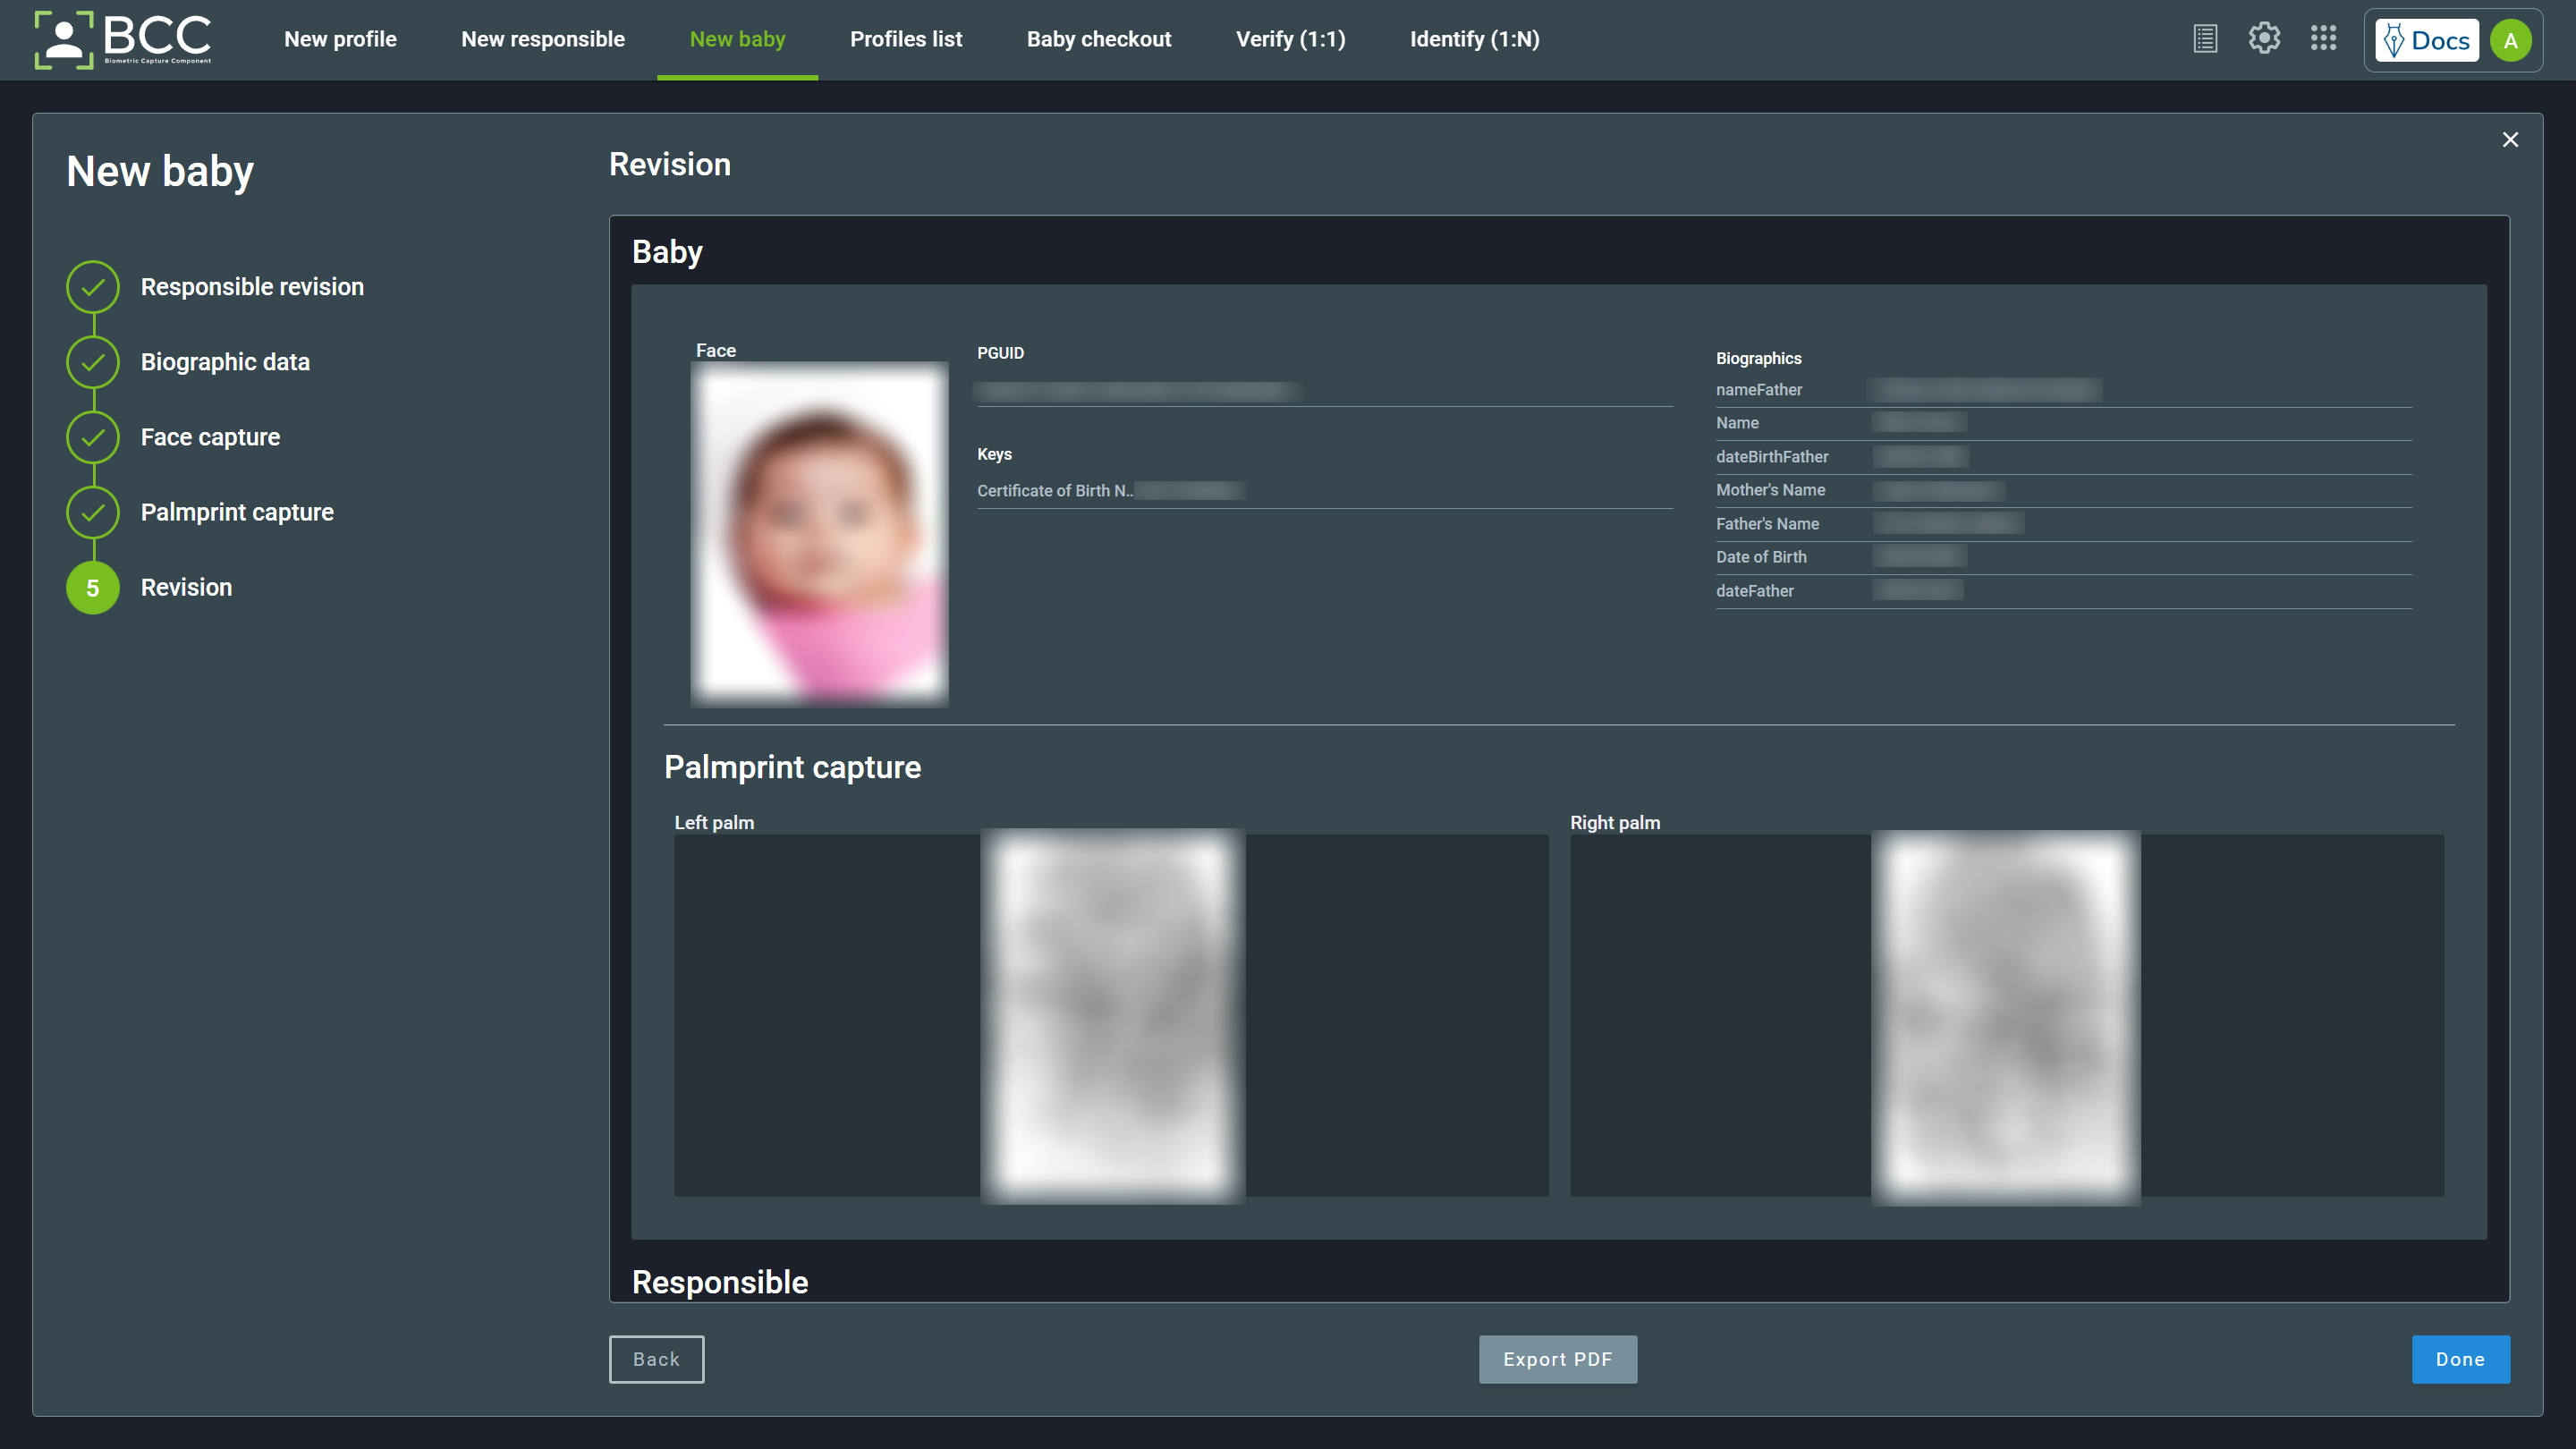
When in revision, you can revisit the baby’s and the responsible’s information and biometrics. Check out the correctness of the displayed information. On this screen, you can conclude the enrollment by clicking on Done and export all the baby’s and responsible’s information to a .pdf file by clicking on Export PDF.
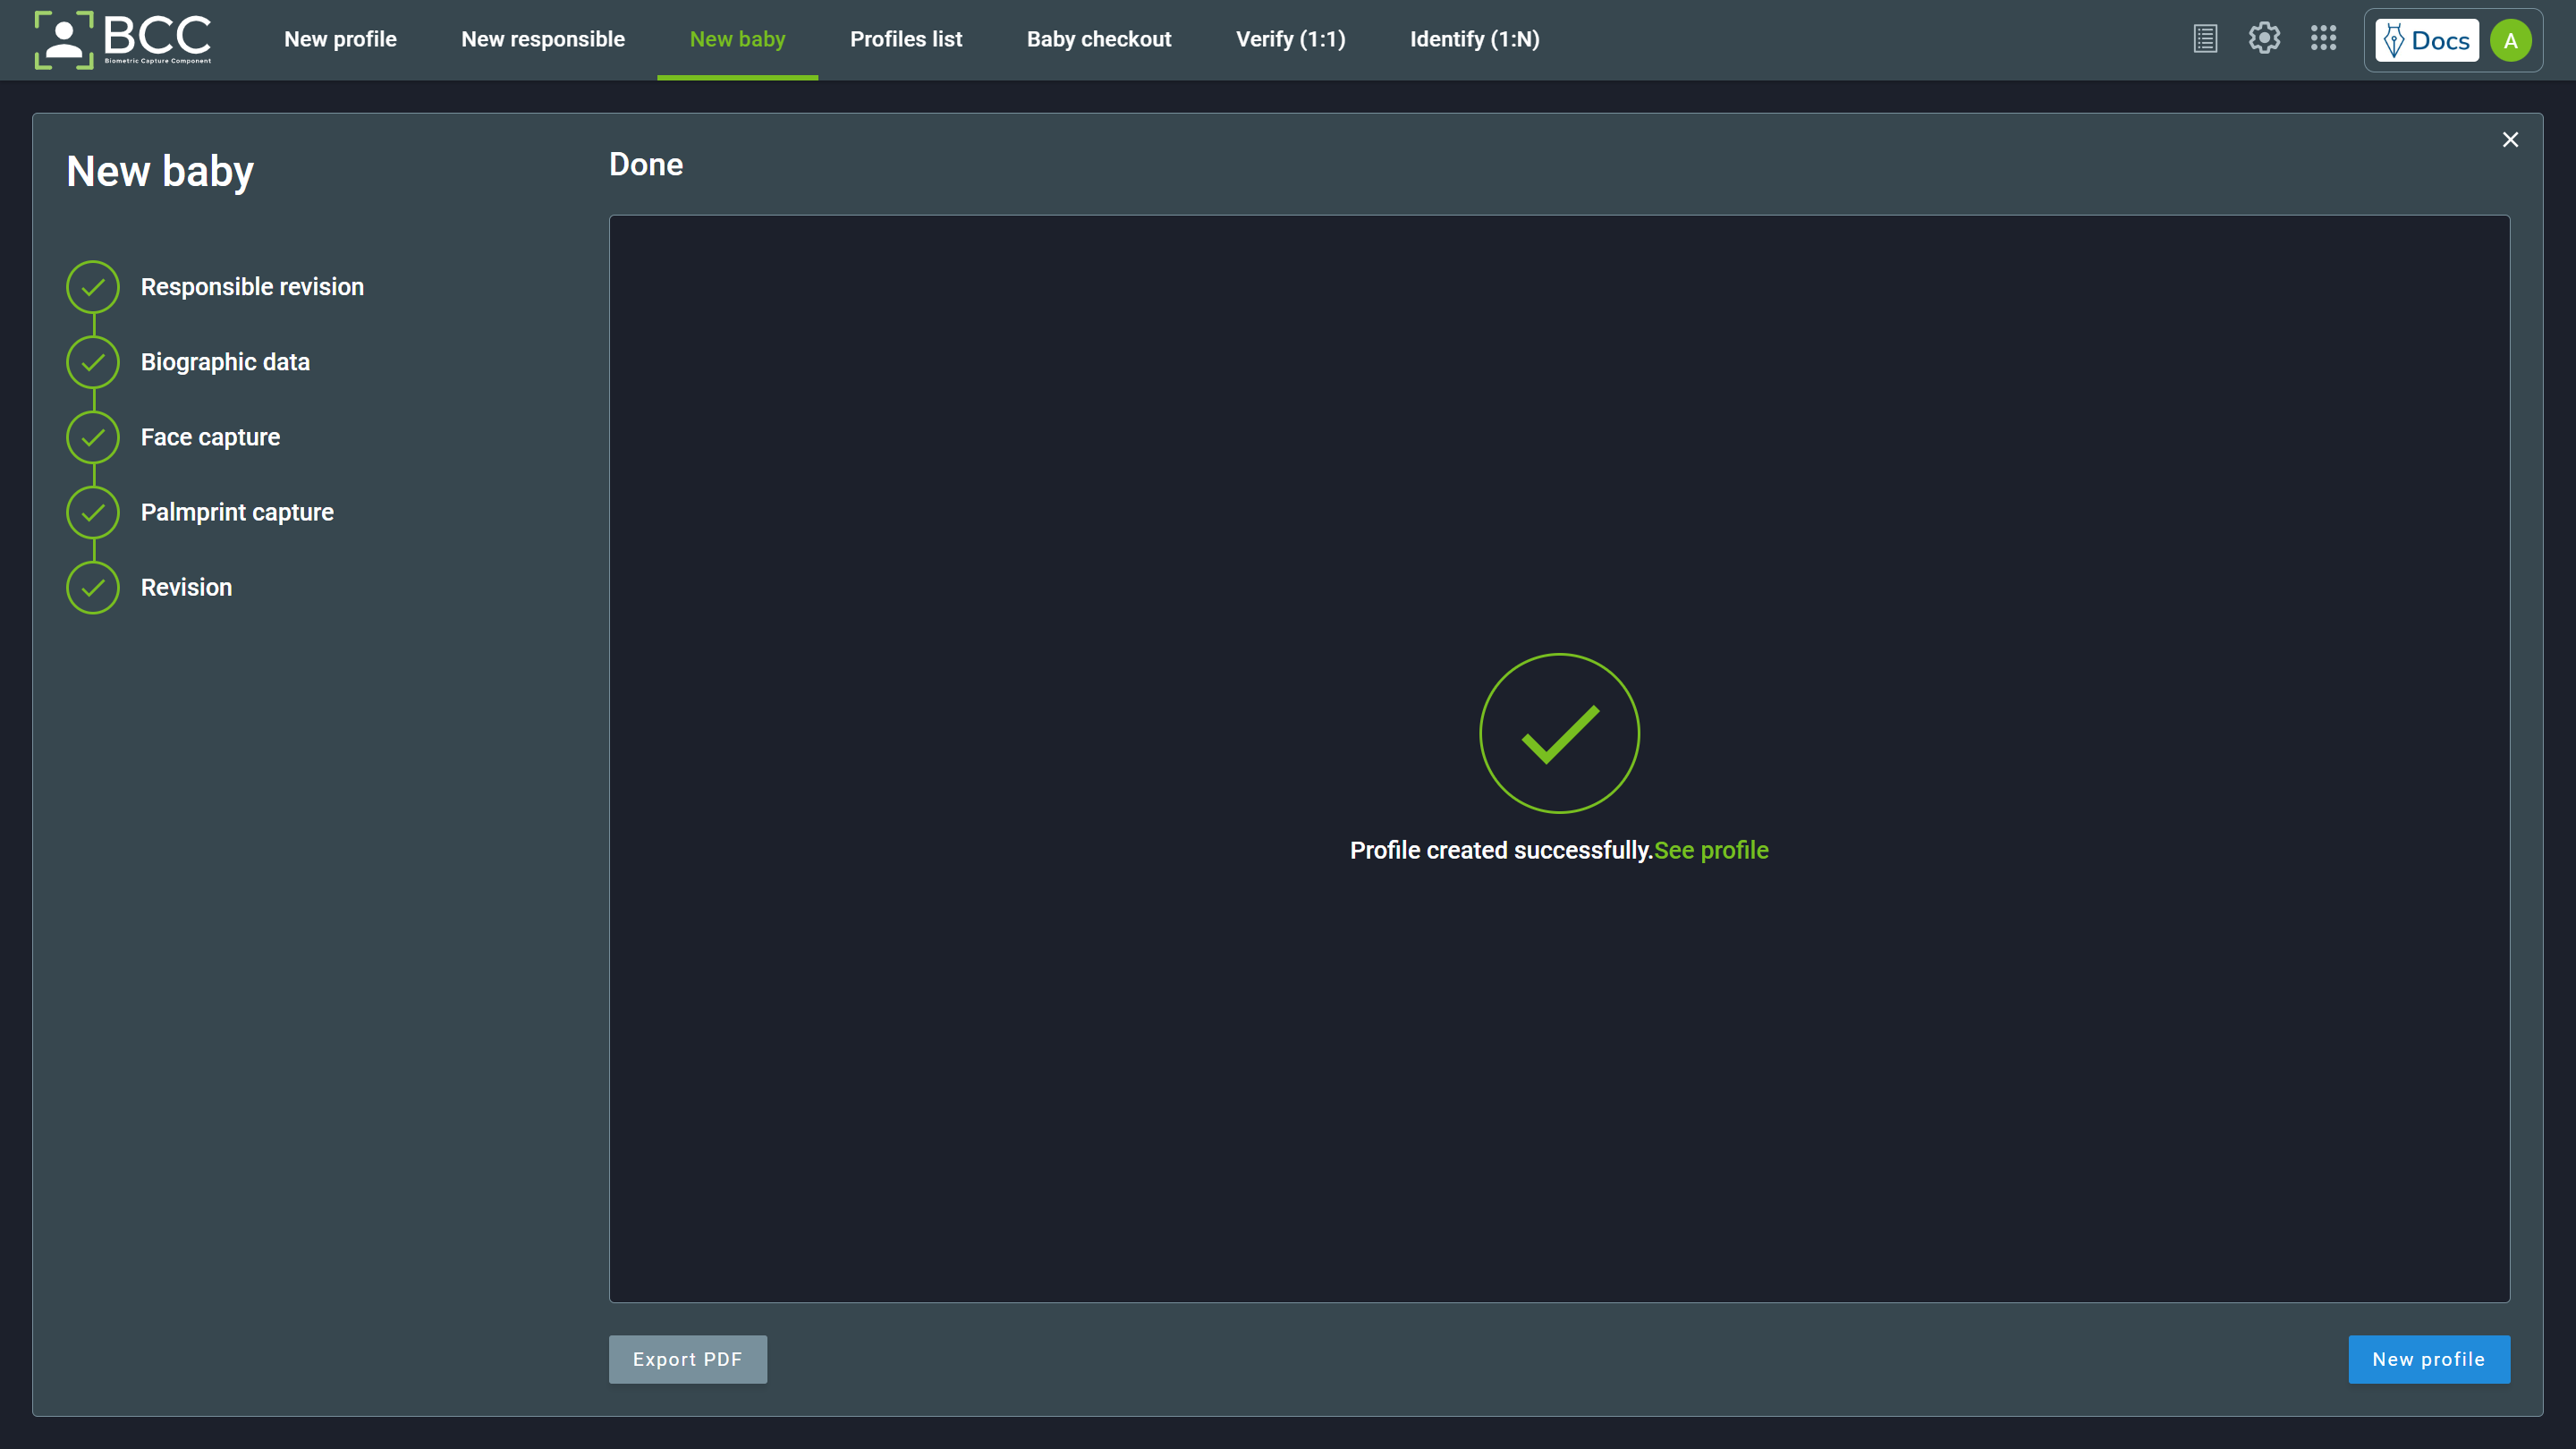
After clicking Done, a page displaying the “Profile created Successfully” message will be shown. On this page, you can Export PDF of the profile, see the baby’s profile by clicking on See profile in the middle of the page or create a New profile of a baby.
7. Baby Checkout
The baby checkout is a double-verify operation. The baby profile is linked to the responsible profile and the baby checkout operation guarantee that the baby is accompanied by its responsible.
Note
This operation does not change any profiles in the database: neither baby nor responsible profile.
To perform the baby checkout operation, click the “Baby checkout” box on the main page or click “Baby checkout” at the top menu bar.
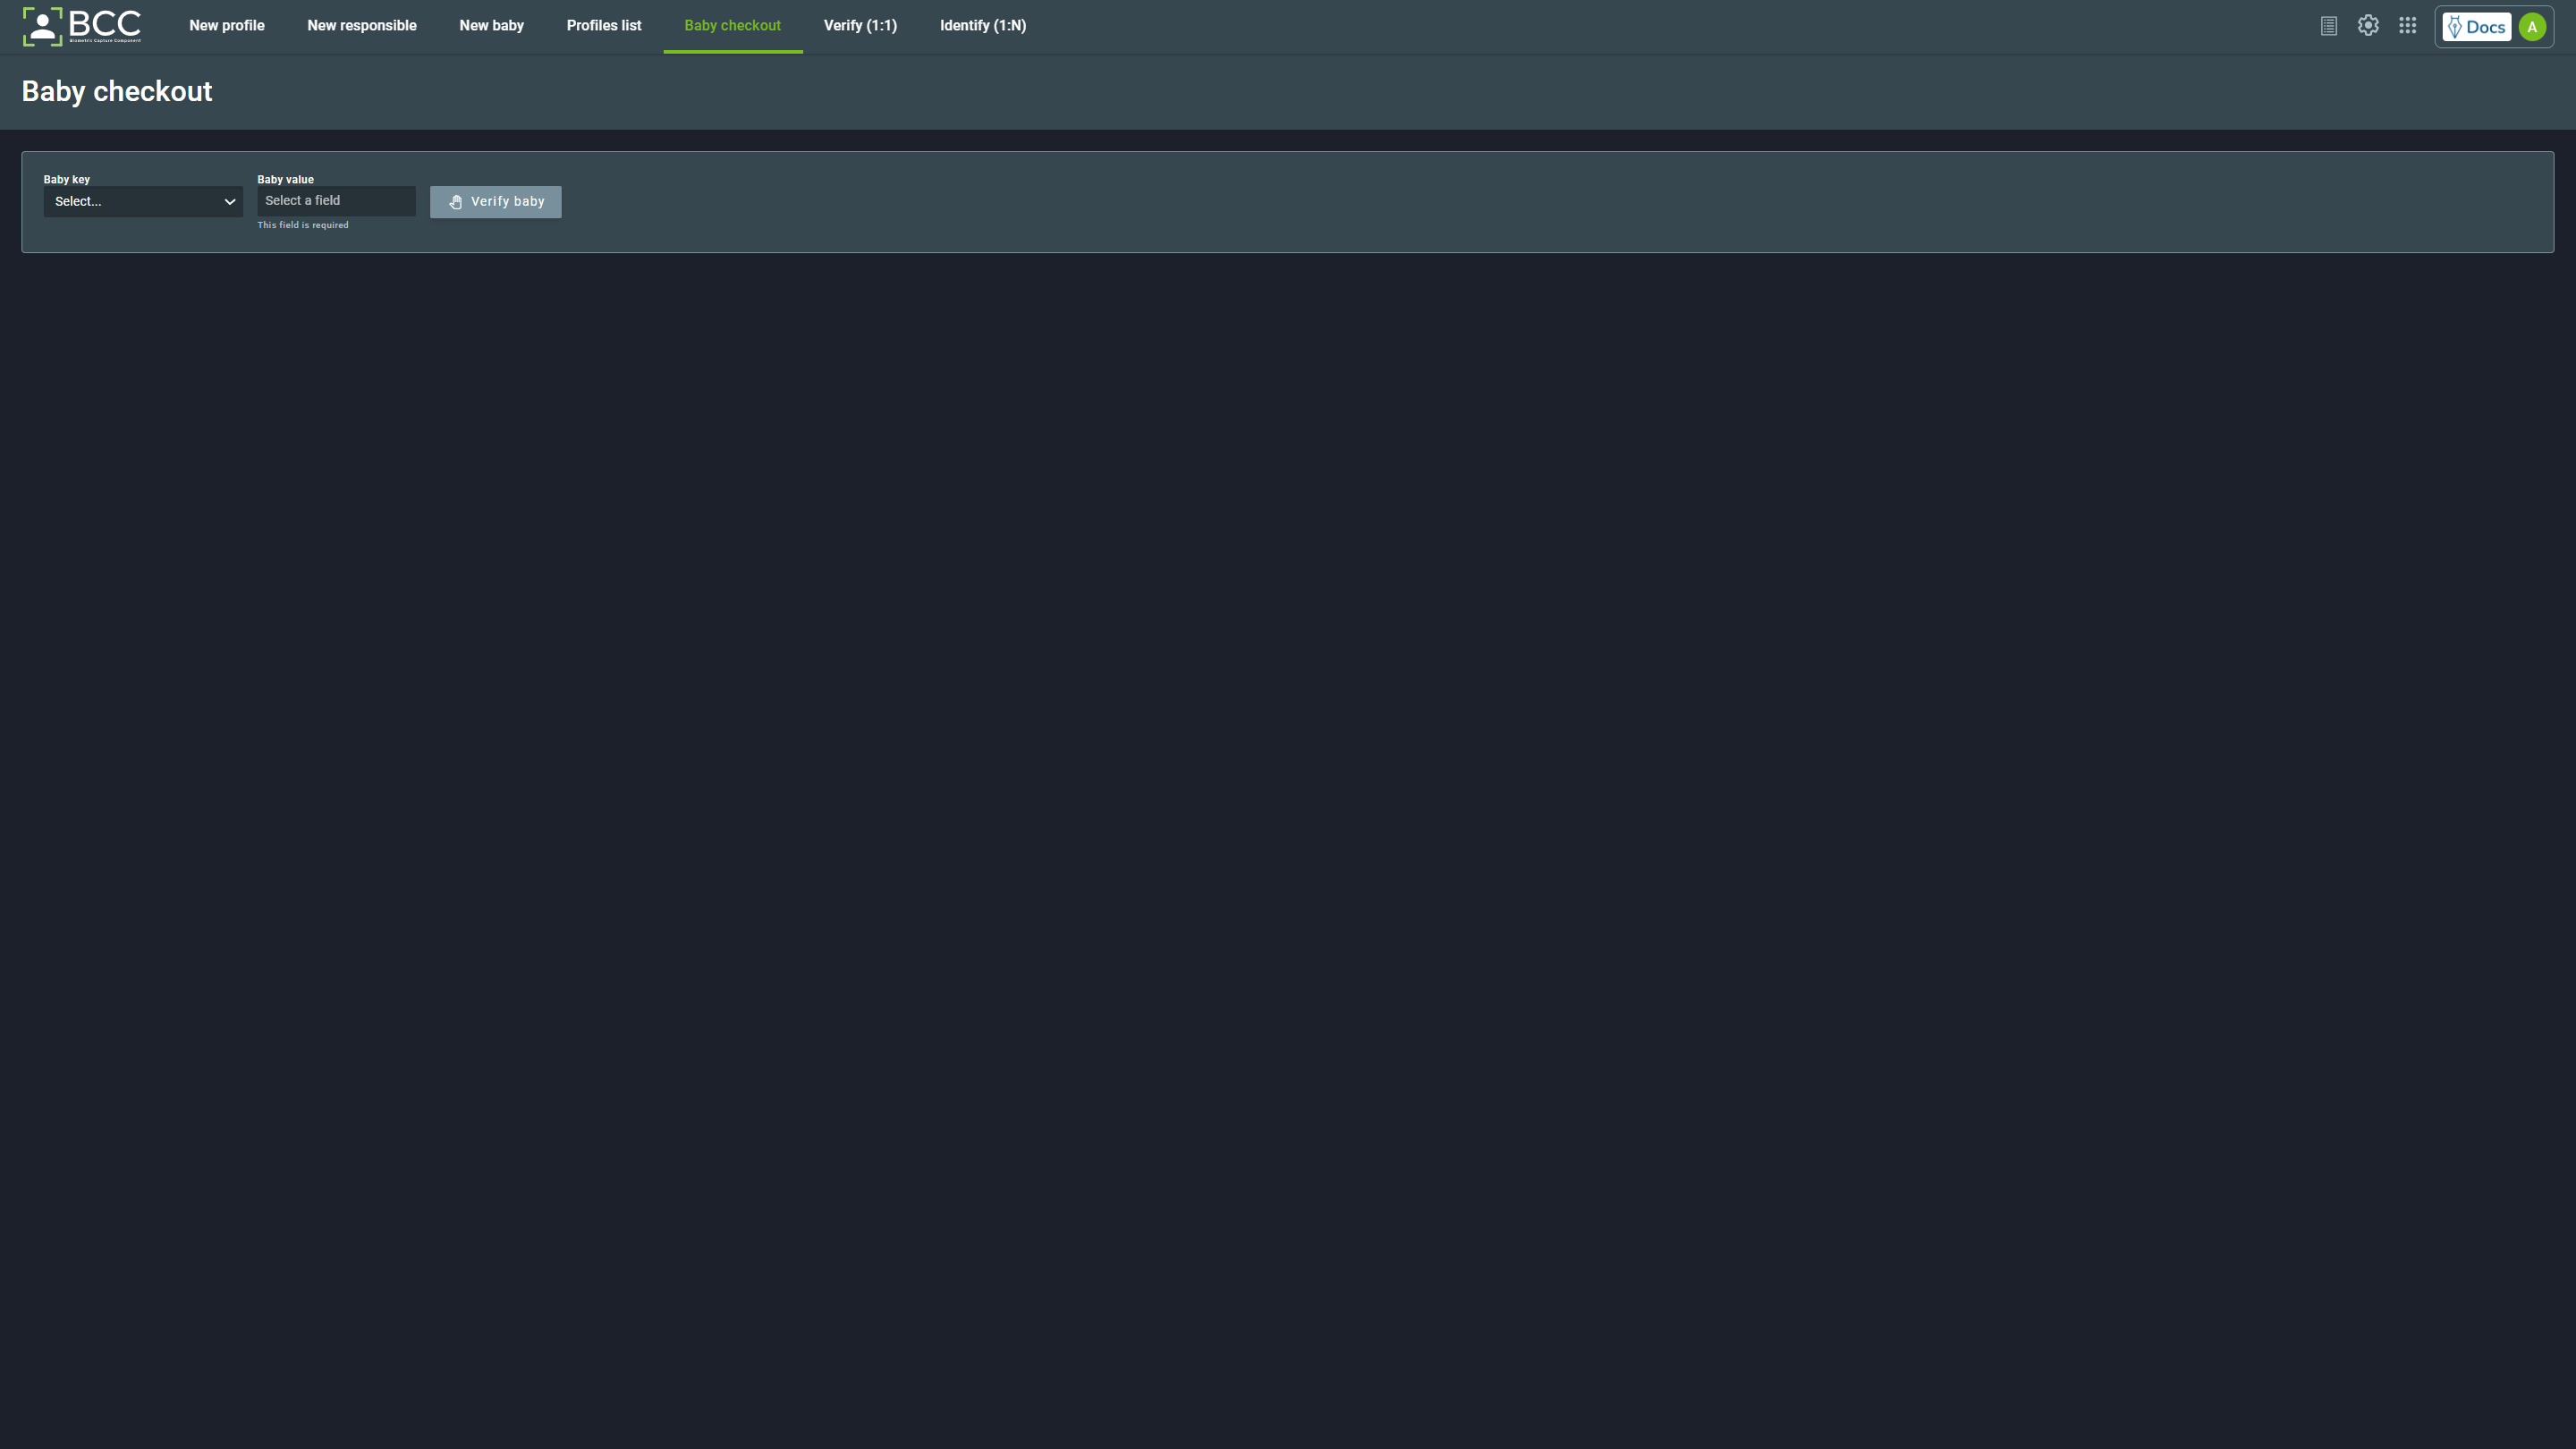
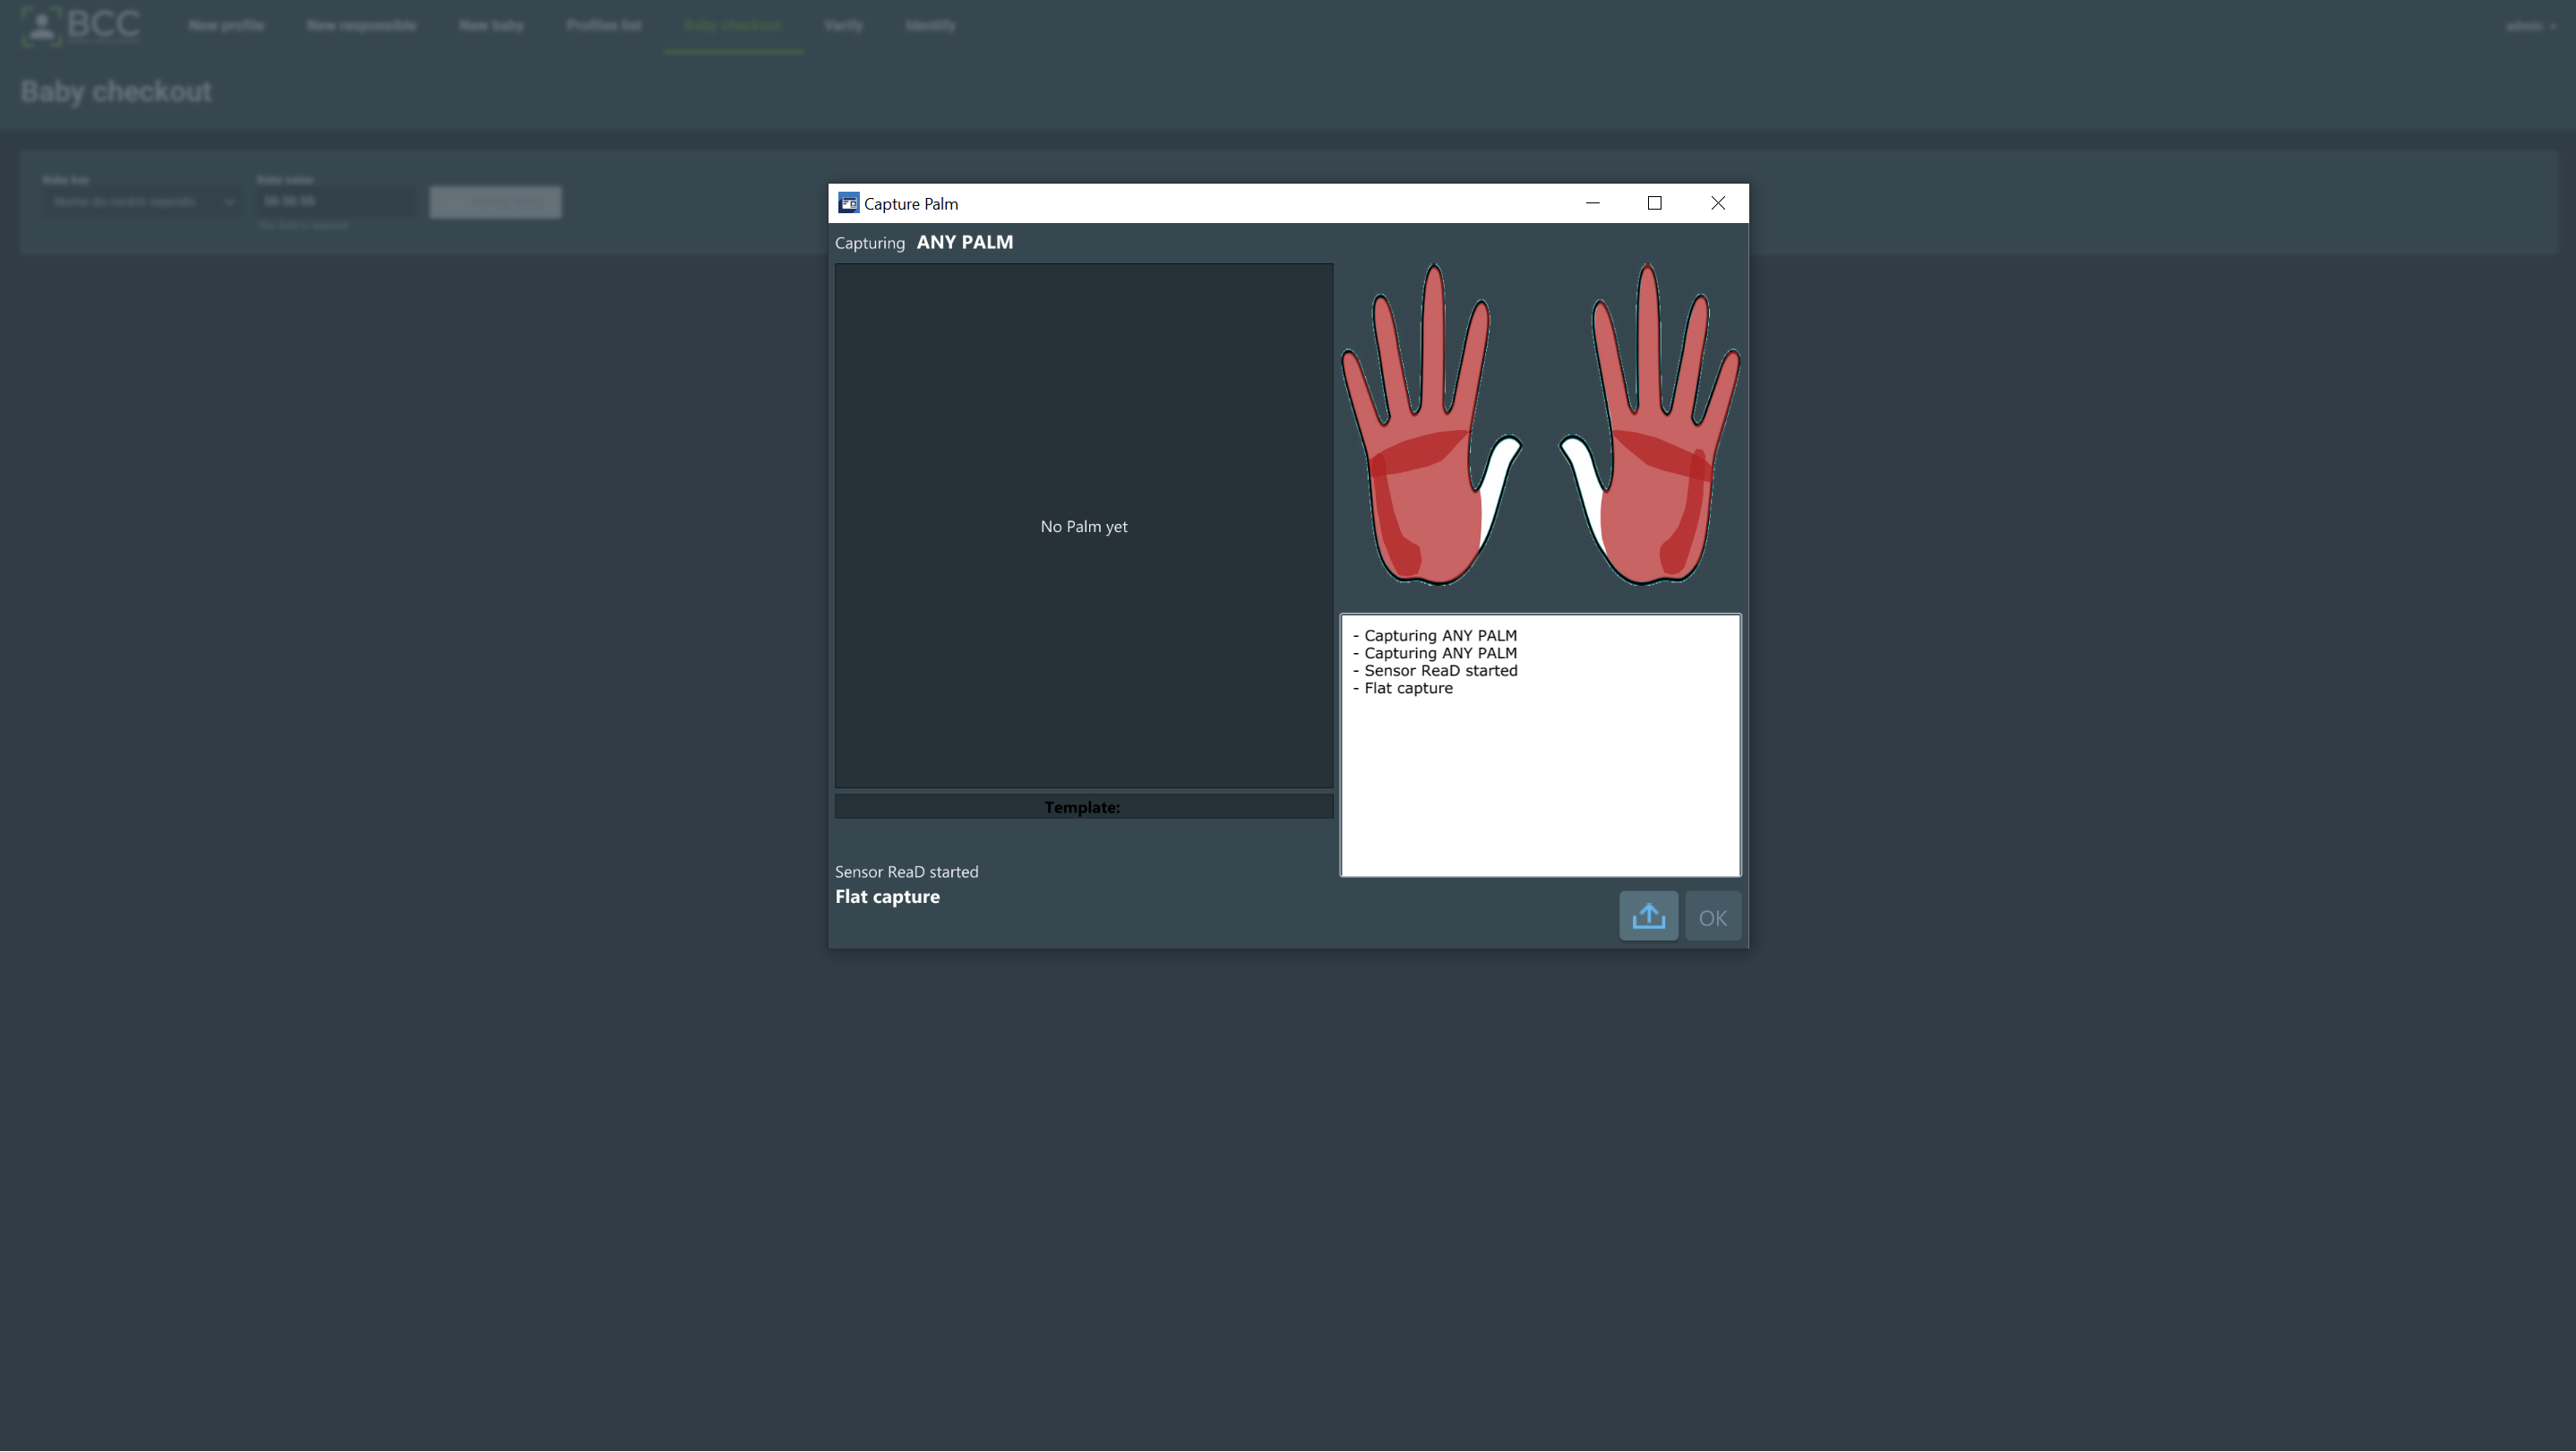
Choose the baby key and insert the baby value. Entering a key that does not exist in the database will return an error. After inserting the correct value, click Verify baby button. It will open the baby palmprint capture.
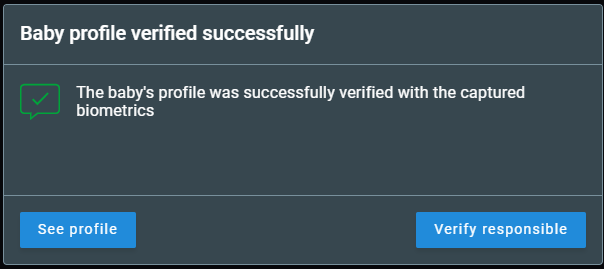
After the palmprint capture returns a success, a message will be displayed. Click the Verify responsible button to continue the checkout.
This will open the fingerprint capture page. Capture a responsible finger to proceed.
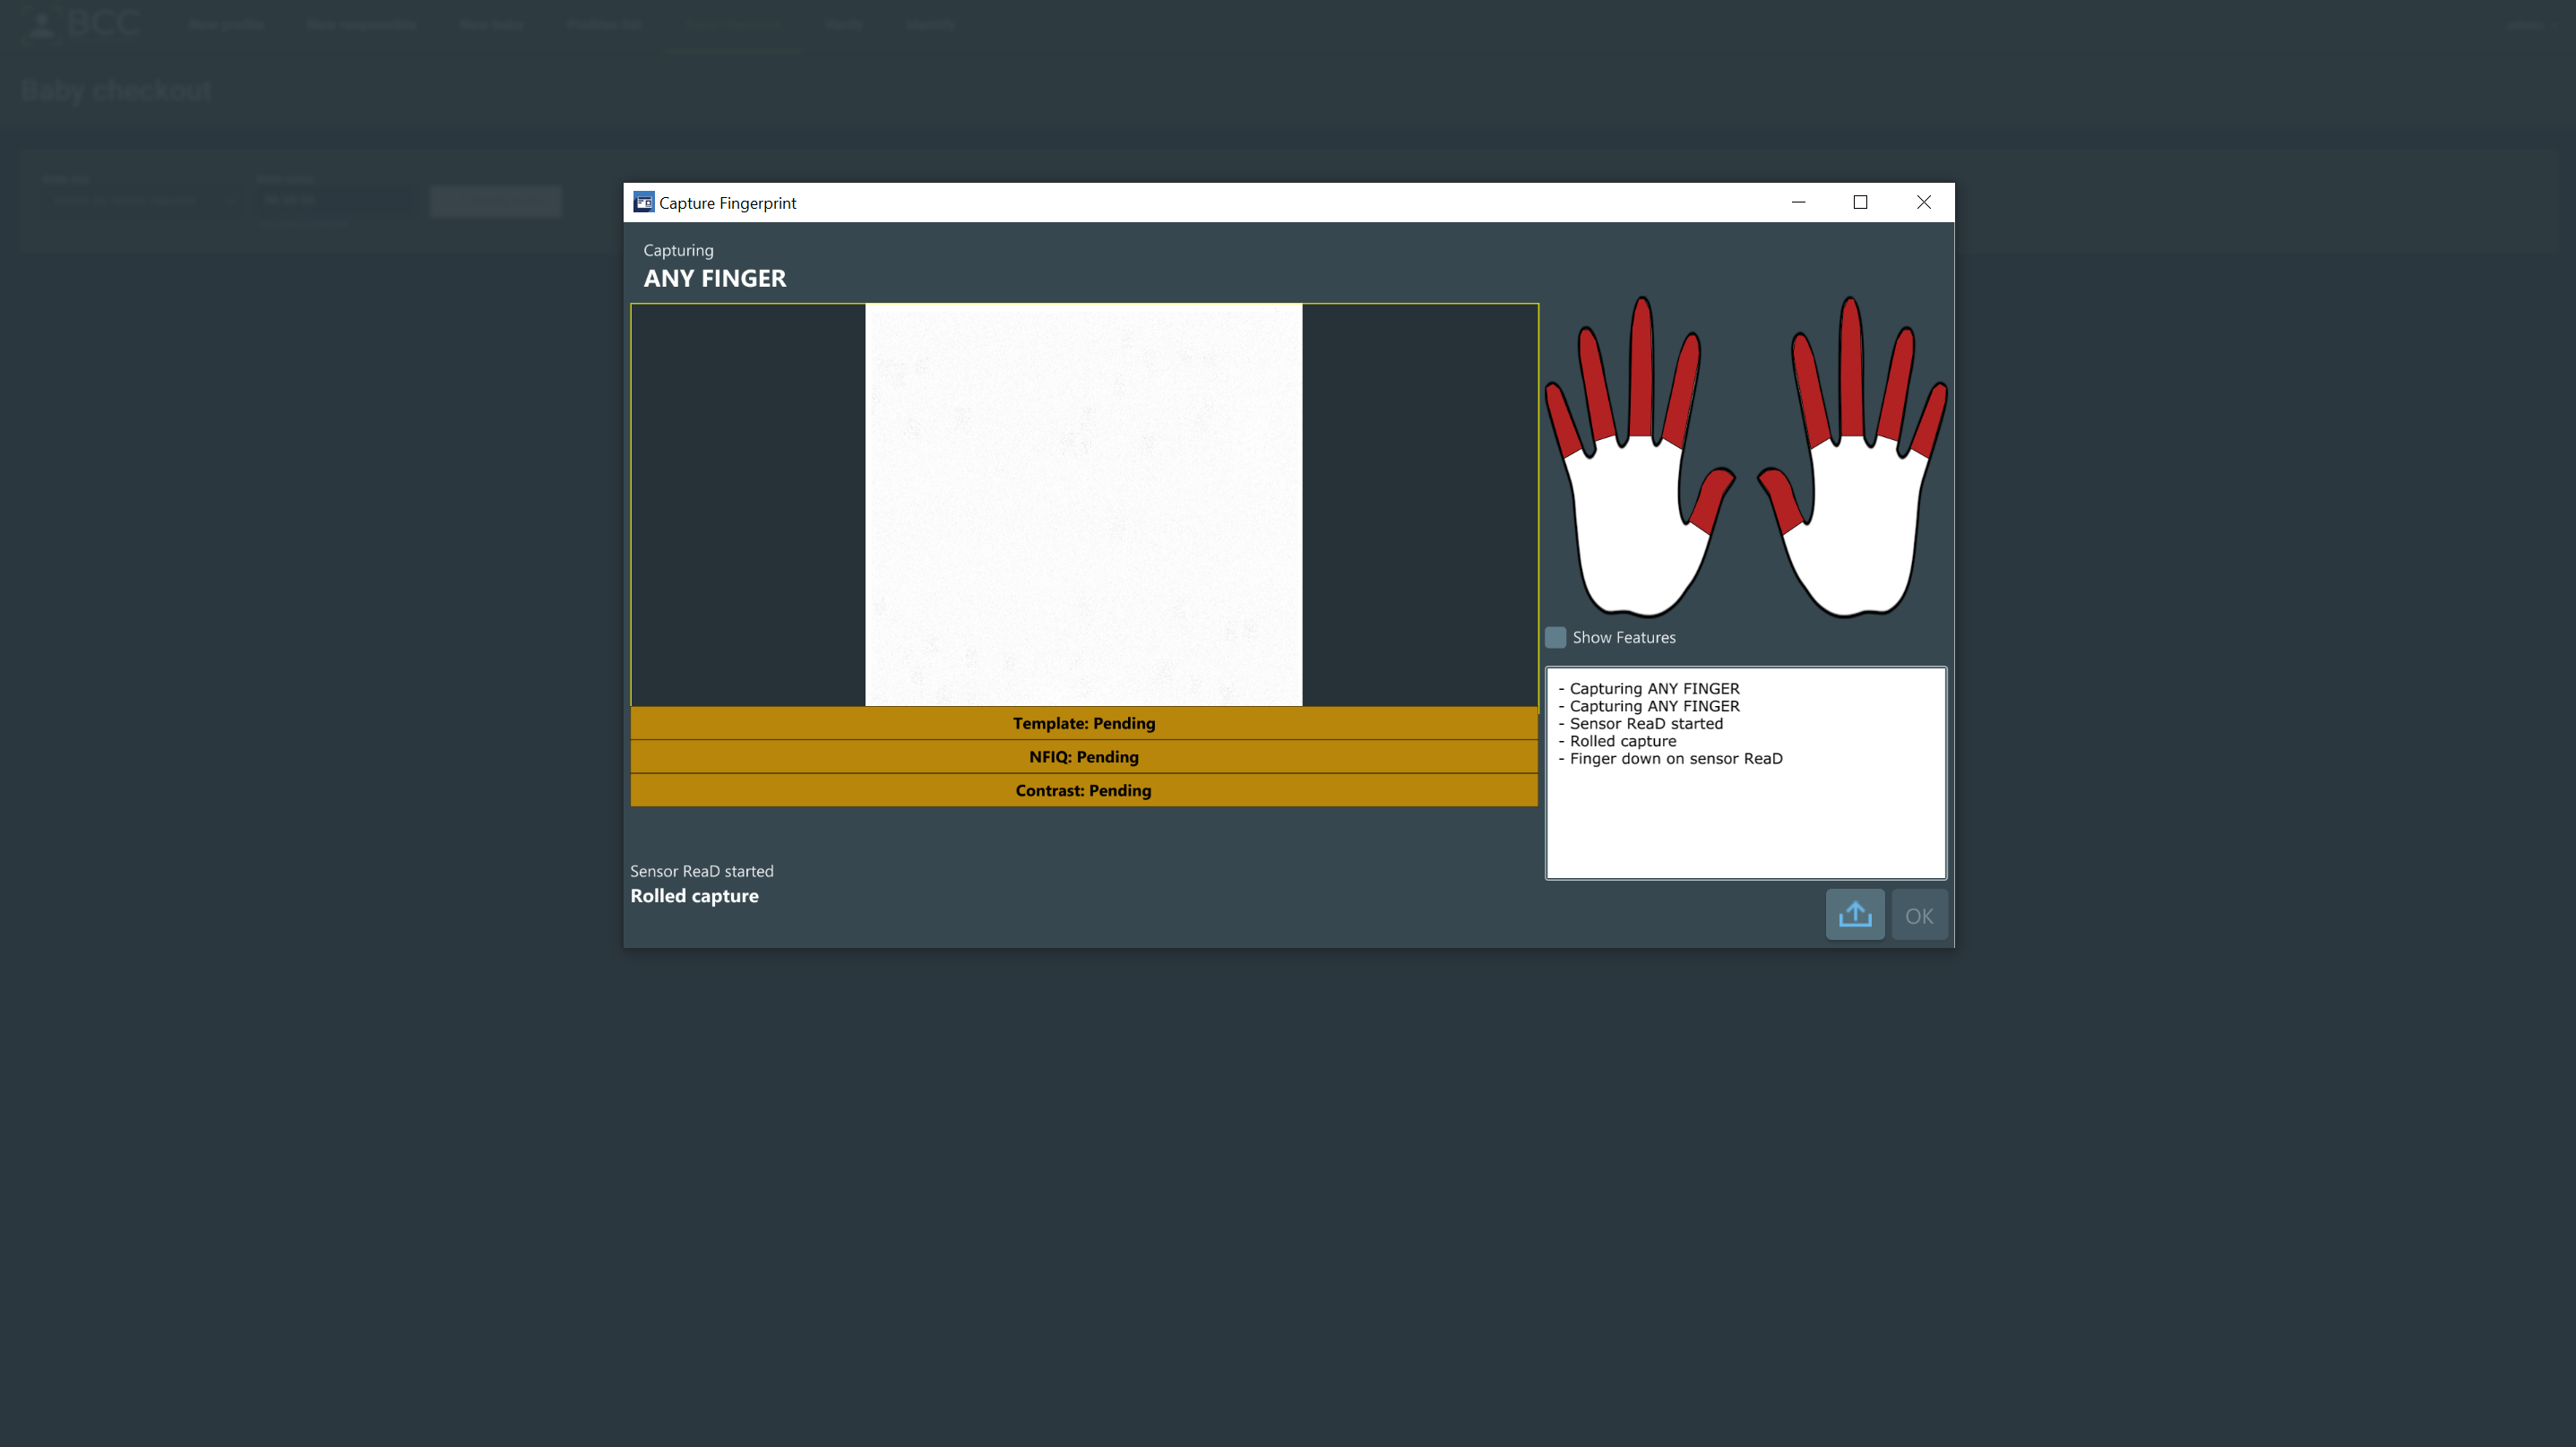
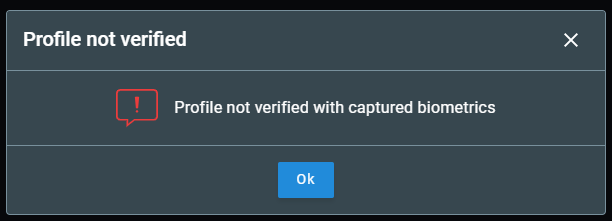
After capturing, click Ok. If it is a not match, a message will be displayed, and you will need to restart the checkout process. If it is a match, a message showing the success and the responsible profile information will be shown.
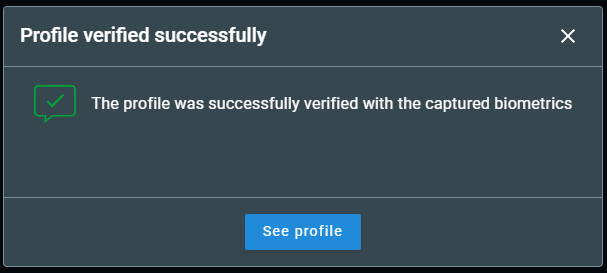
After verifying the responsible, the checkout process is done. You can click See profile to go to the responsible’s profile.
8. Profiles
To access the profile page, click the “Profiles” box on the main page or click the Profiles list button at the top menu bar. Accessing by the profiles box located at the baby capture area will filter for babies only.
The profile list page is a page where you can view and search by profiles present in the GBDS and the local database. You will see the profile listing, count, a key and biographic identifying the profile, a menu to select filters, the applied filters area, and the transaction status. Clicking a profile will lead you to the profile page.
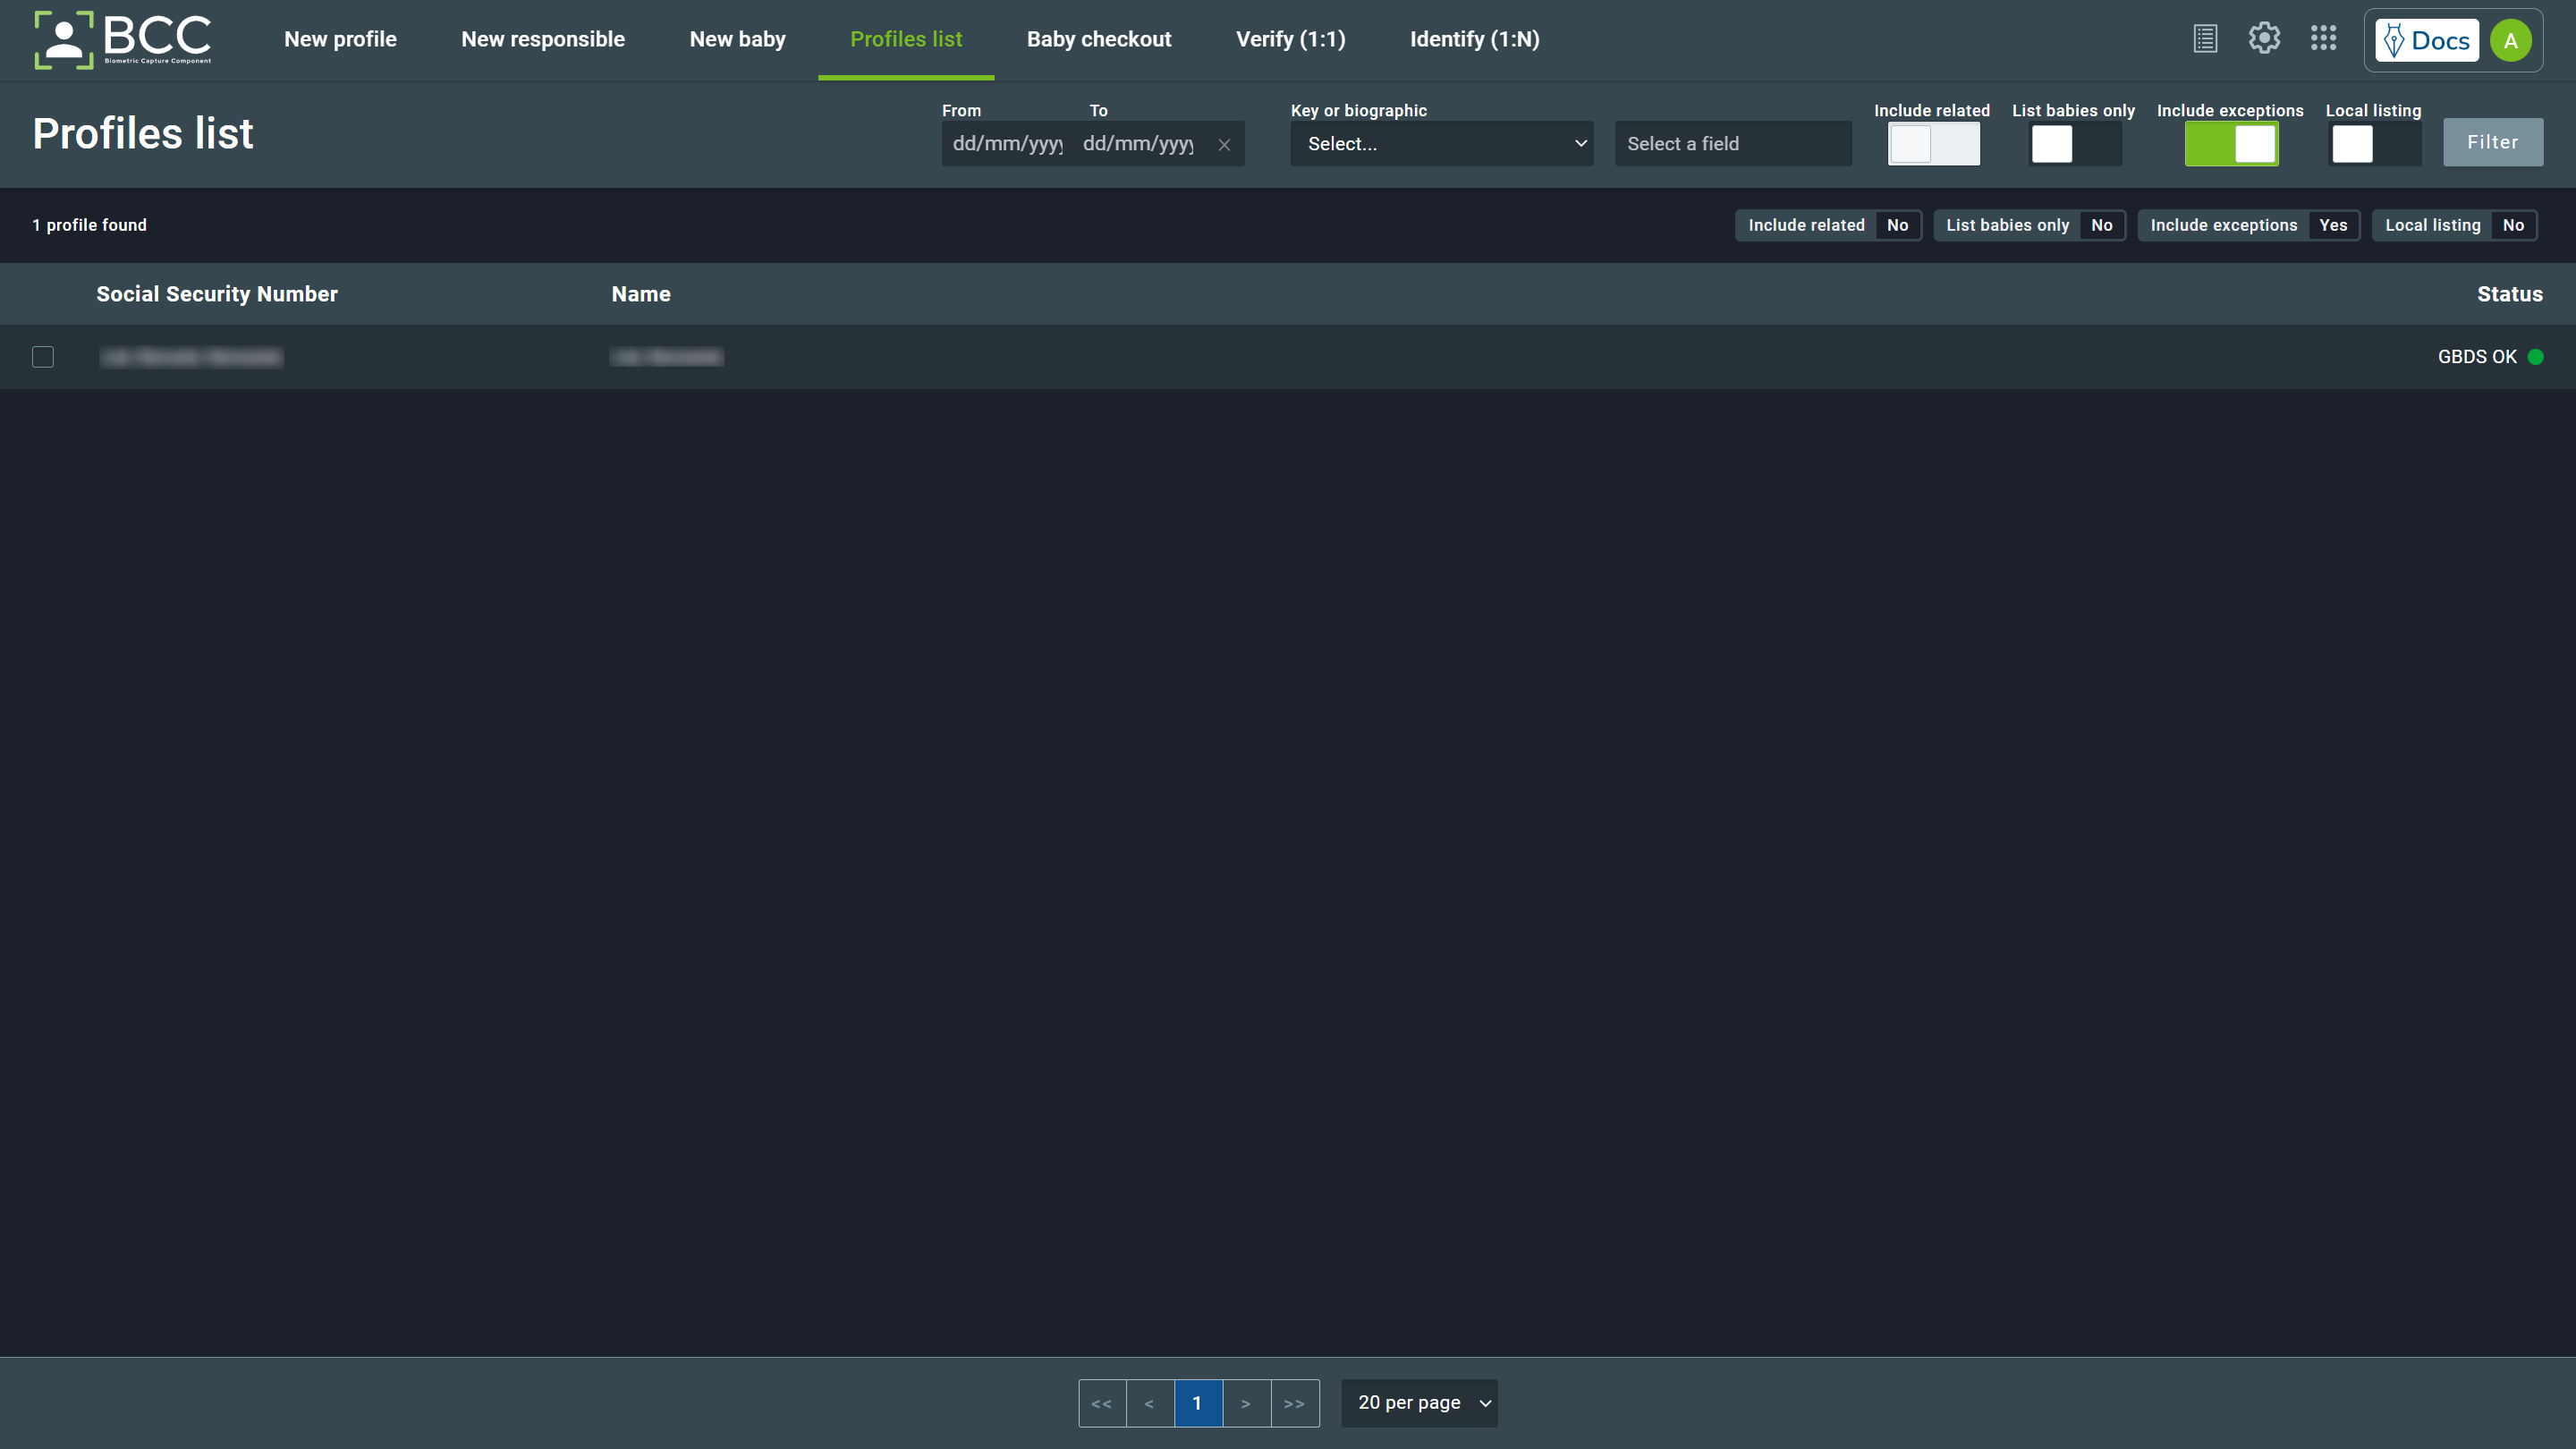
The profiles you see on this page can have five possible statuses:
- GBDS OK, marked with a green dot.
- Analysis in ETR, marked with an orange dot. This happens when a profile has any non-treated exception.
- Ready to GBDS, marked with a blue dot.
- Sent to GBDS, marked with a green dot. This transitional status happens after a profile is sent and still not removed from the local listing.
- GBDS Failed, marked with a red dot. This happens when there is some error sending a profile to GBDS.
To restrict your search, you can filter the profiles. The options to filter the profiles are:
- Date - Restricts the list to a date interval. There are also shortcuts for one day (today), last week, and last month.
- Key or biographic - Restrict the list to one of the pre-configured profile fields that you can select by the dropdown menu.
- Include related - This one is only available when filtering by key or biographic. When toggled, it will bring the profile filtered by the key or biographic and all babies that this profile is responsible for.
- List babies only - Restricts the list to the profiles enrolled as babies.
- Include exceptions - Include the profiles that are in exception in ETR to the listing.
- Local listing - Change the list from the GBDS list to the local database list.
After clicking a profile in the list, you will enter the profile page.
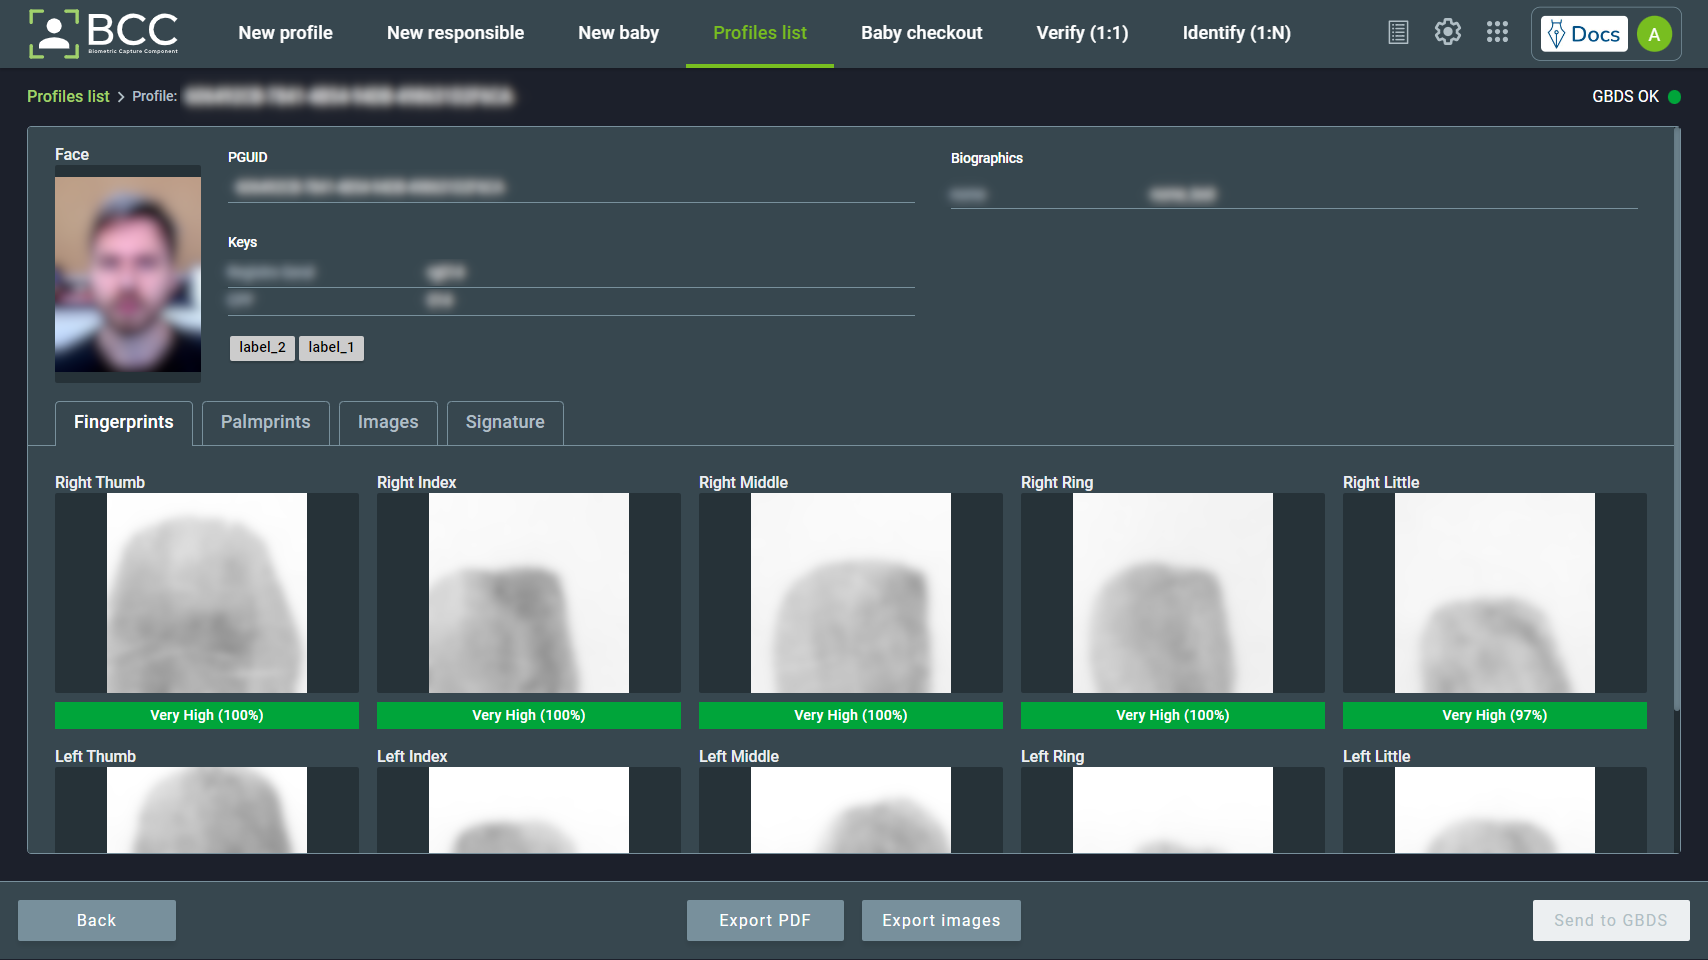
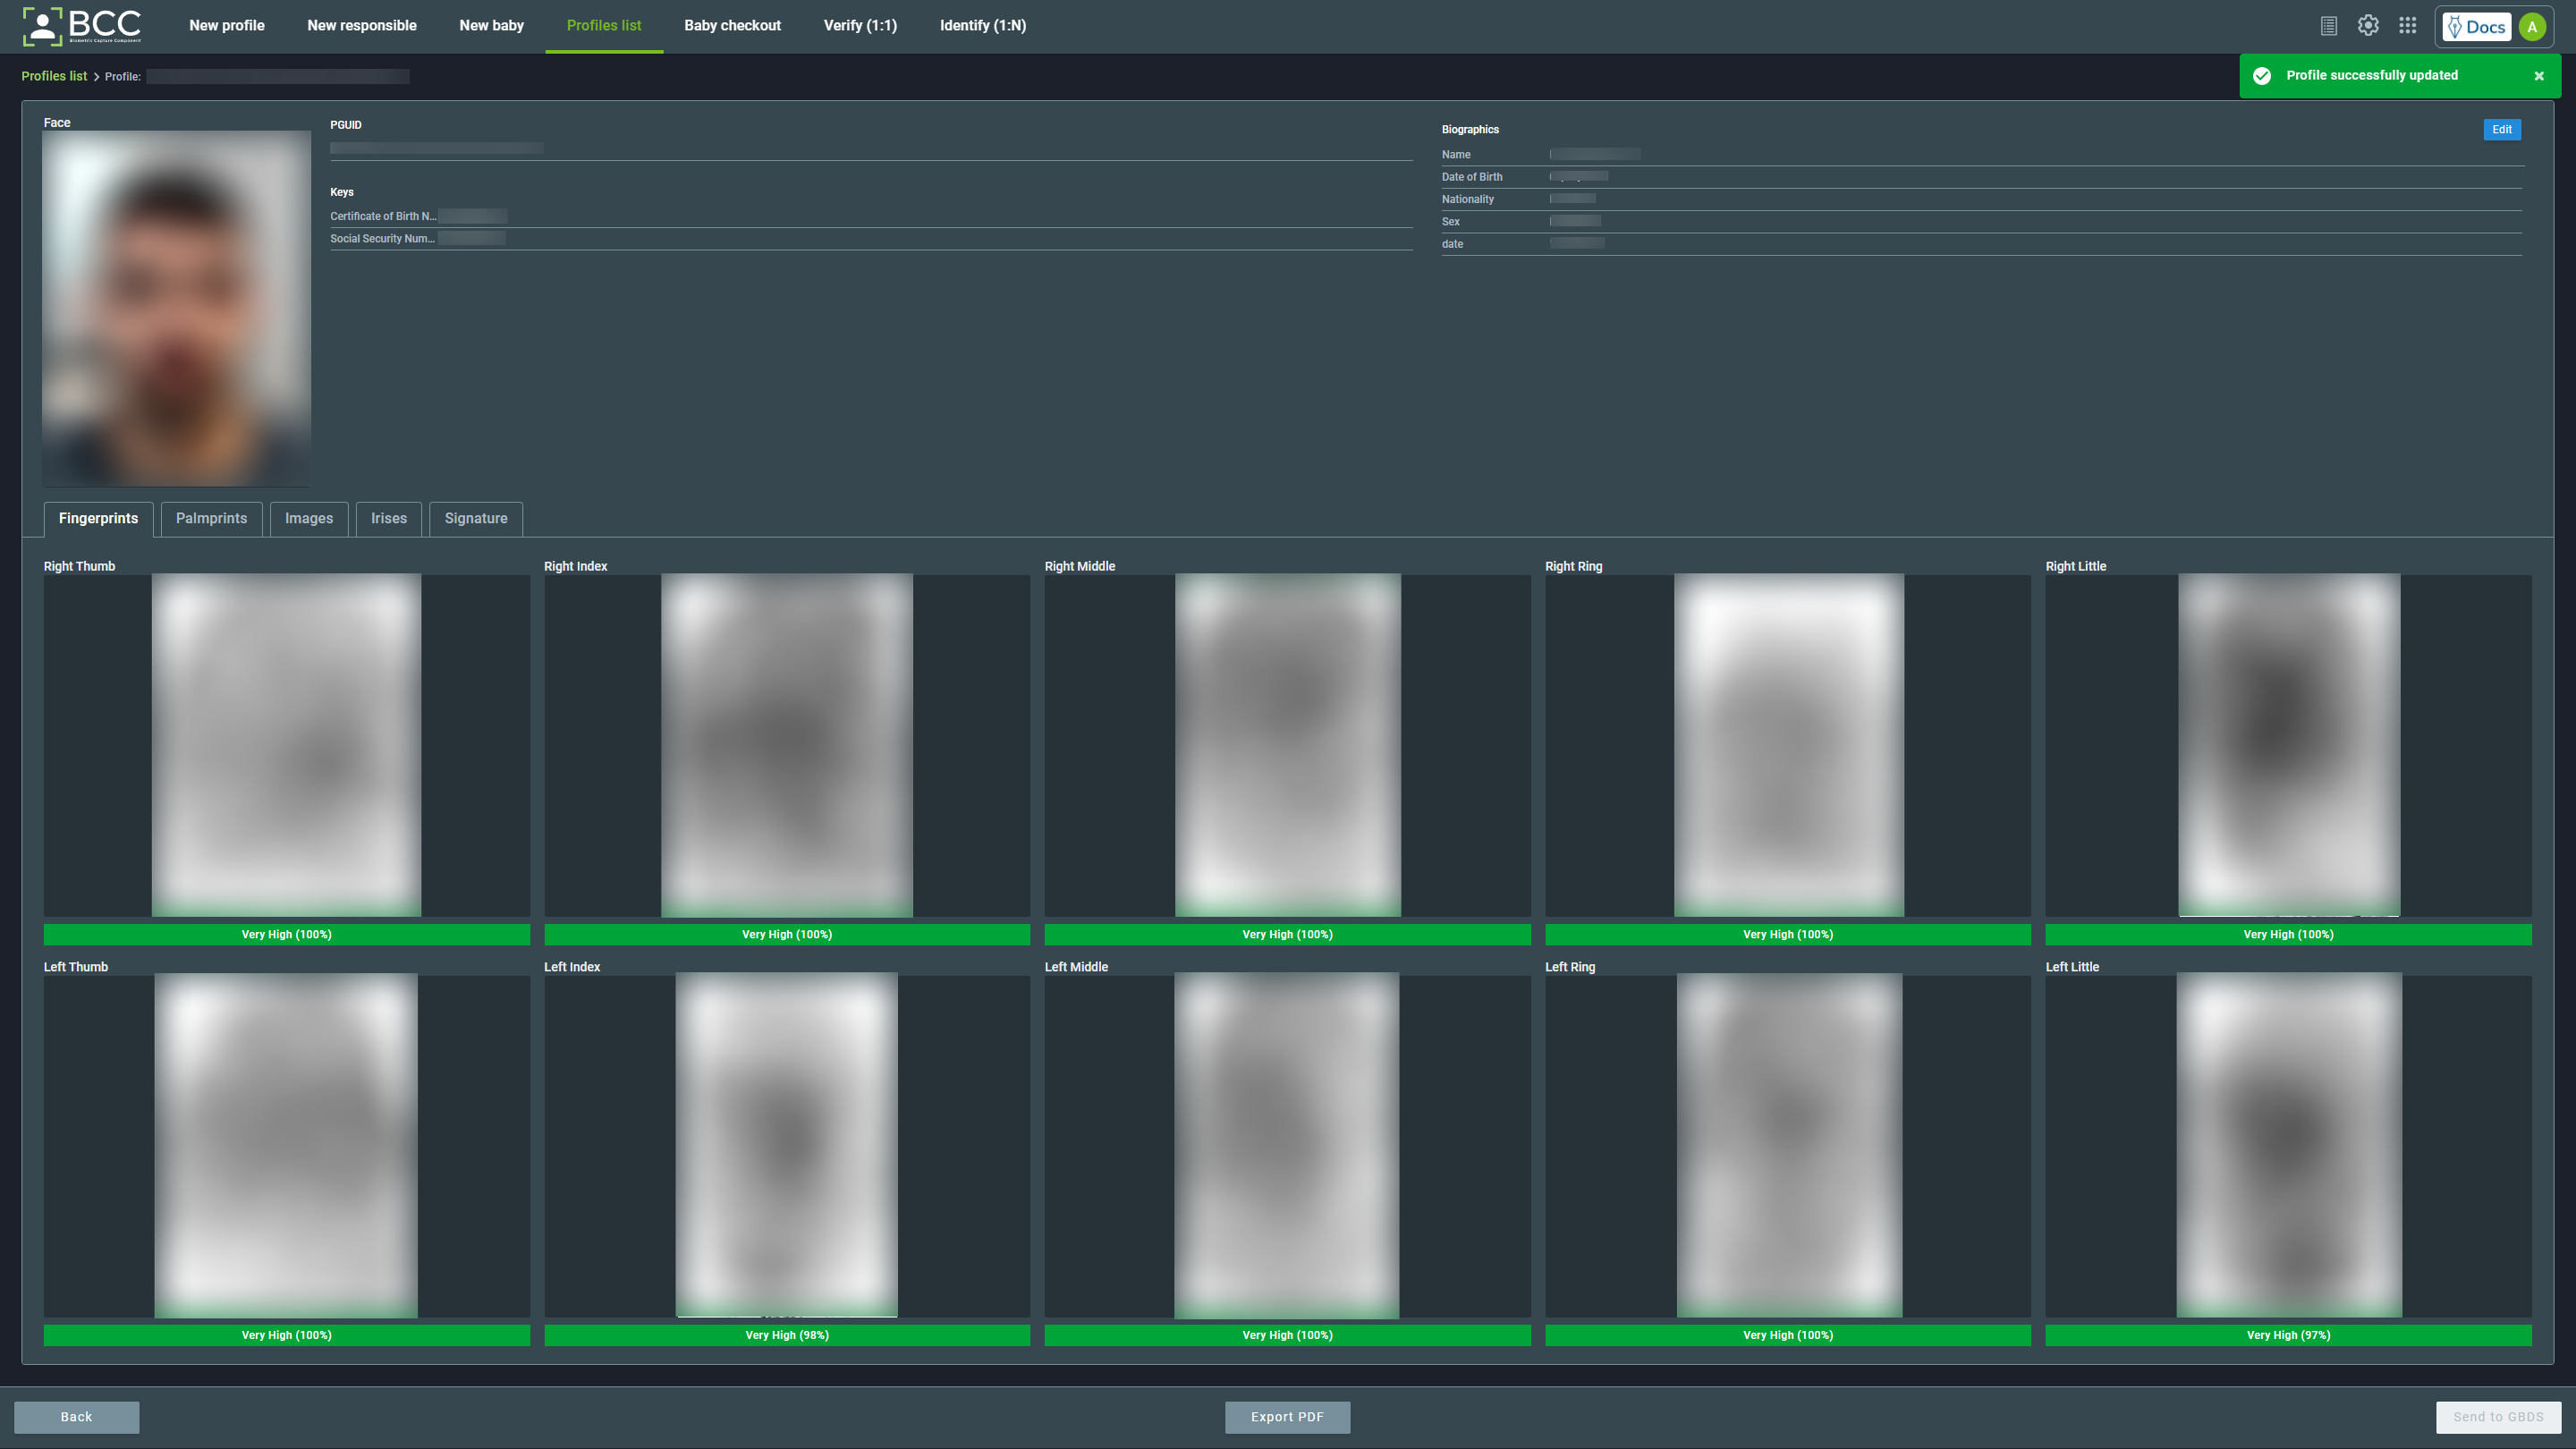
On this page, you can see the person’s complete profile. It is possible to hover over any biographic information and click to copy it. You can also click a biometric field to expand it.
Additionally, it is also possible to export the profile to a .pdf file by clicking on Export PDF. And, if you have the appropriate permissions, you can export the original profile images and metadata to a .zip file by clicking on Export images.
8.1. Editing GBDS OK Profiles
When a profile is in GBDS, it is marked as GBDS OK status. You can edit the biographic and biometric information in these profiles if you have the proper permissions. Also, the profile page will have two additional buttons: Edit and Send to GBDS.
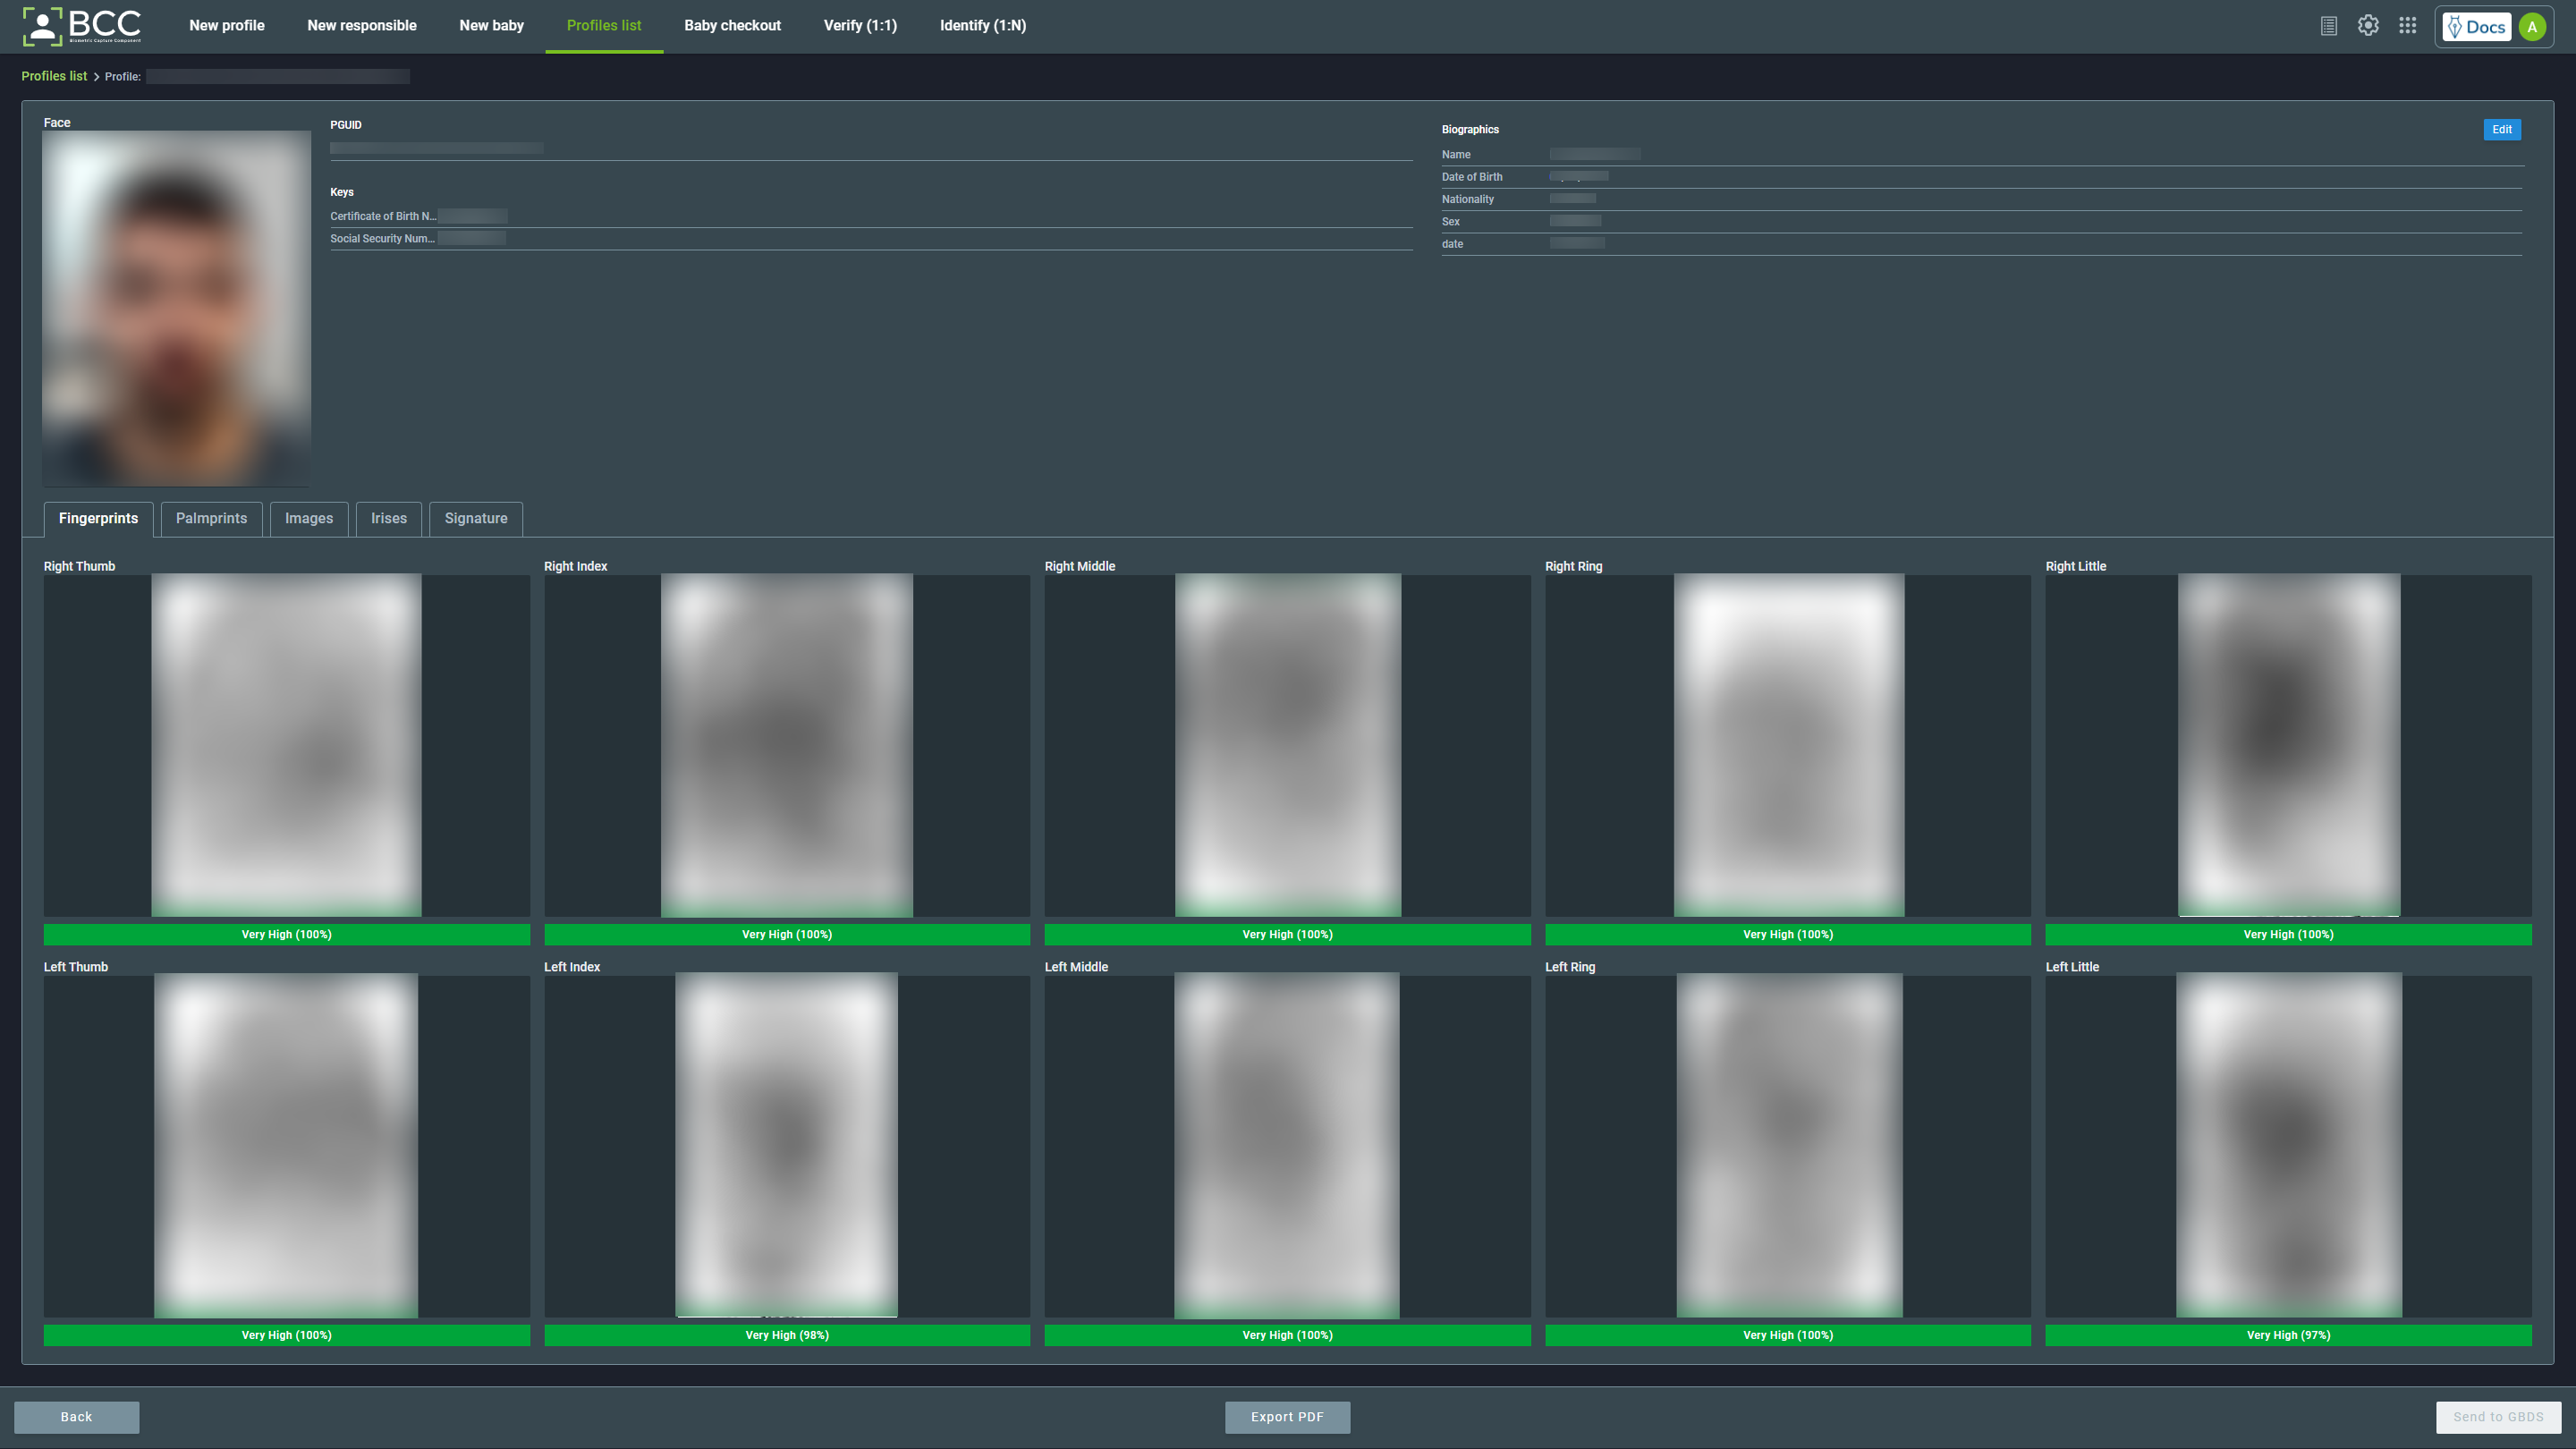
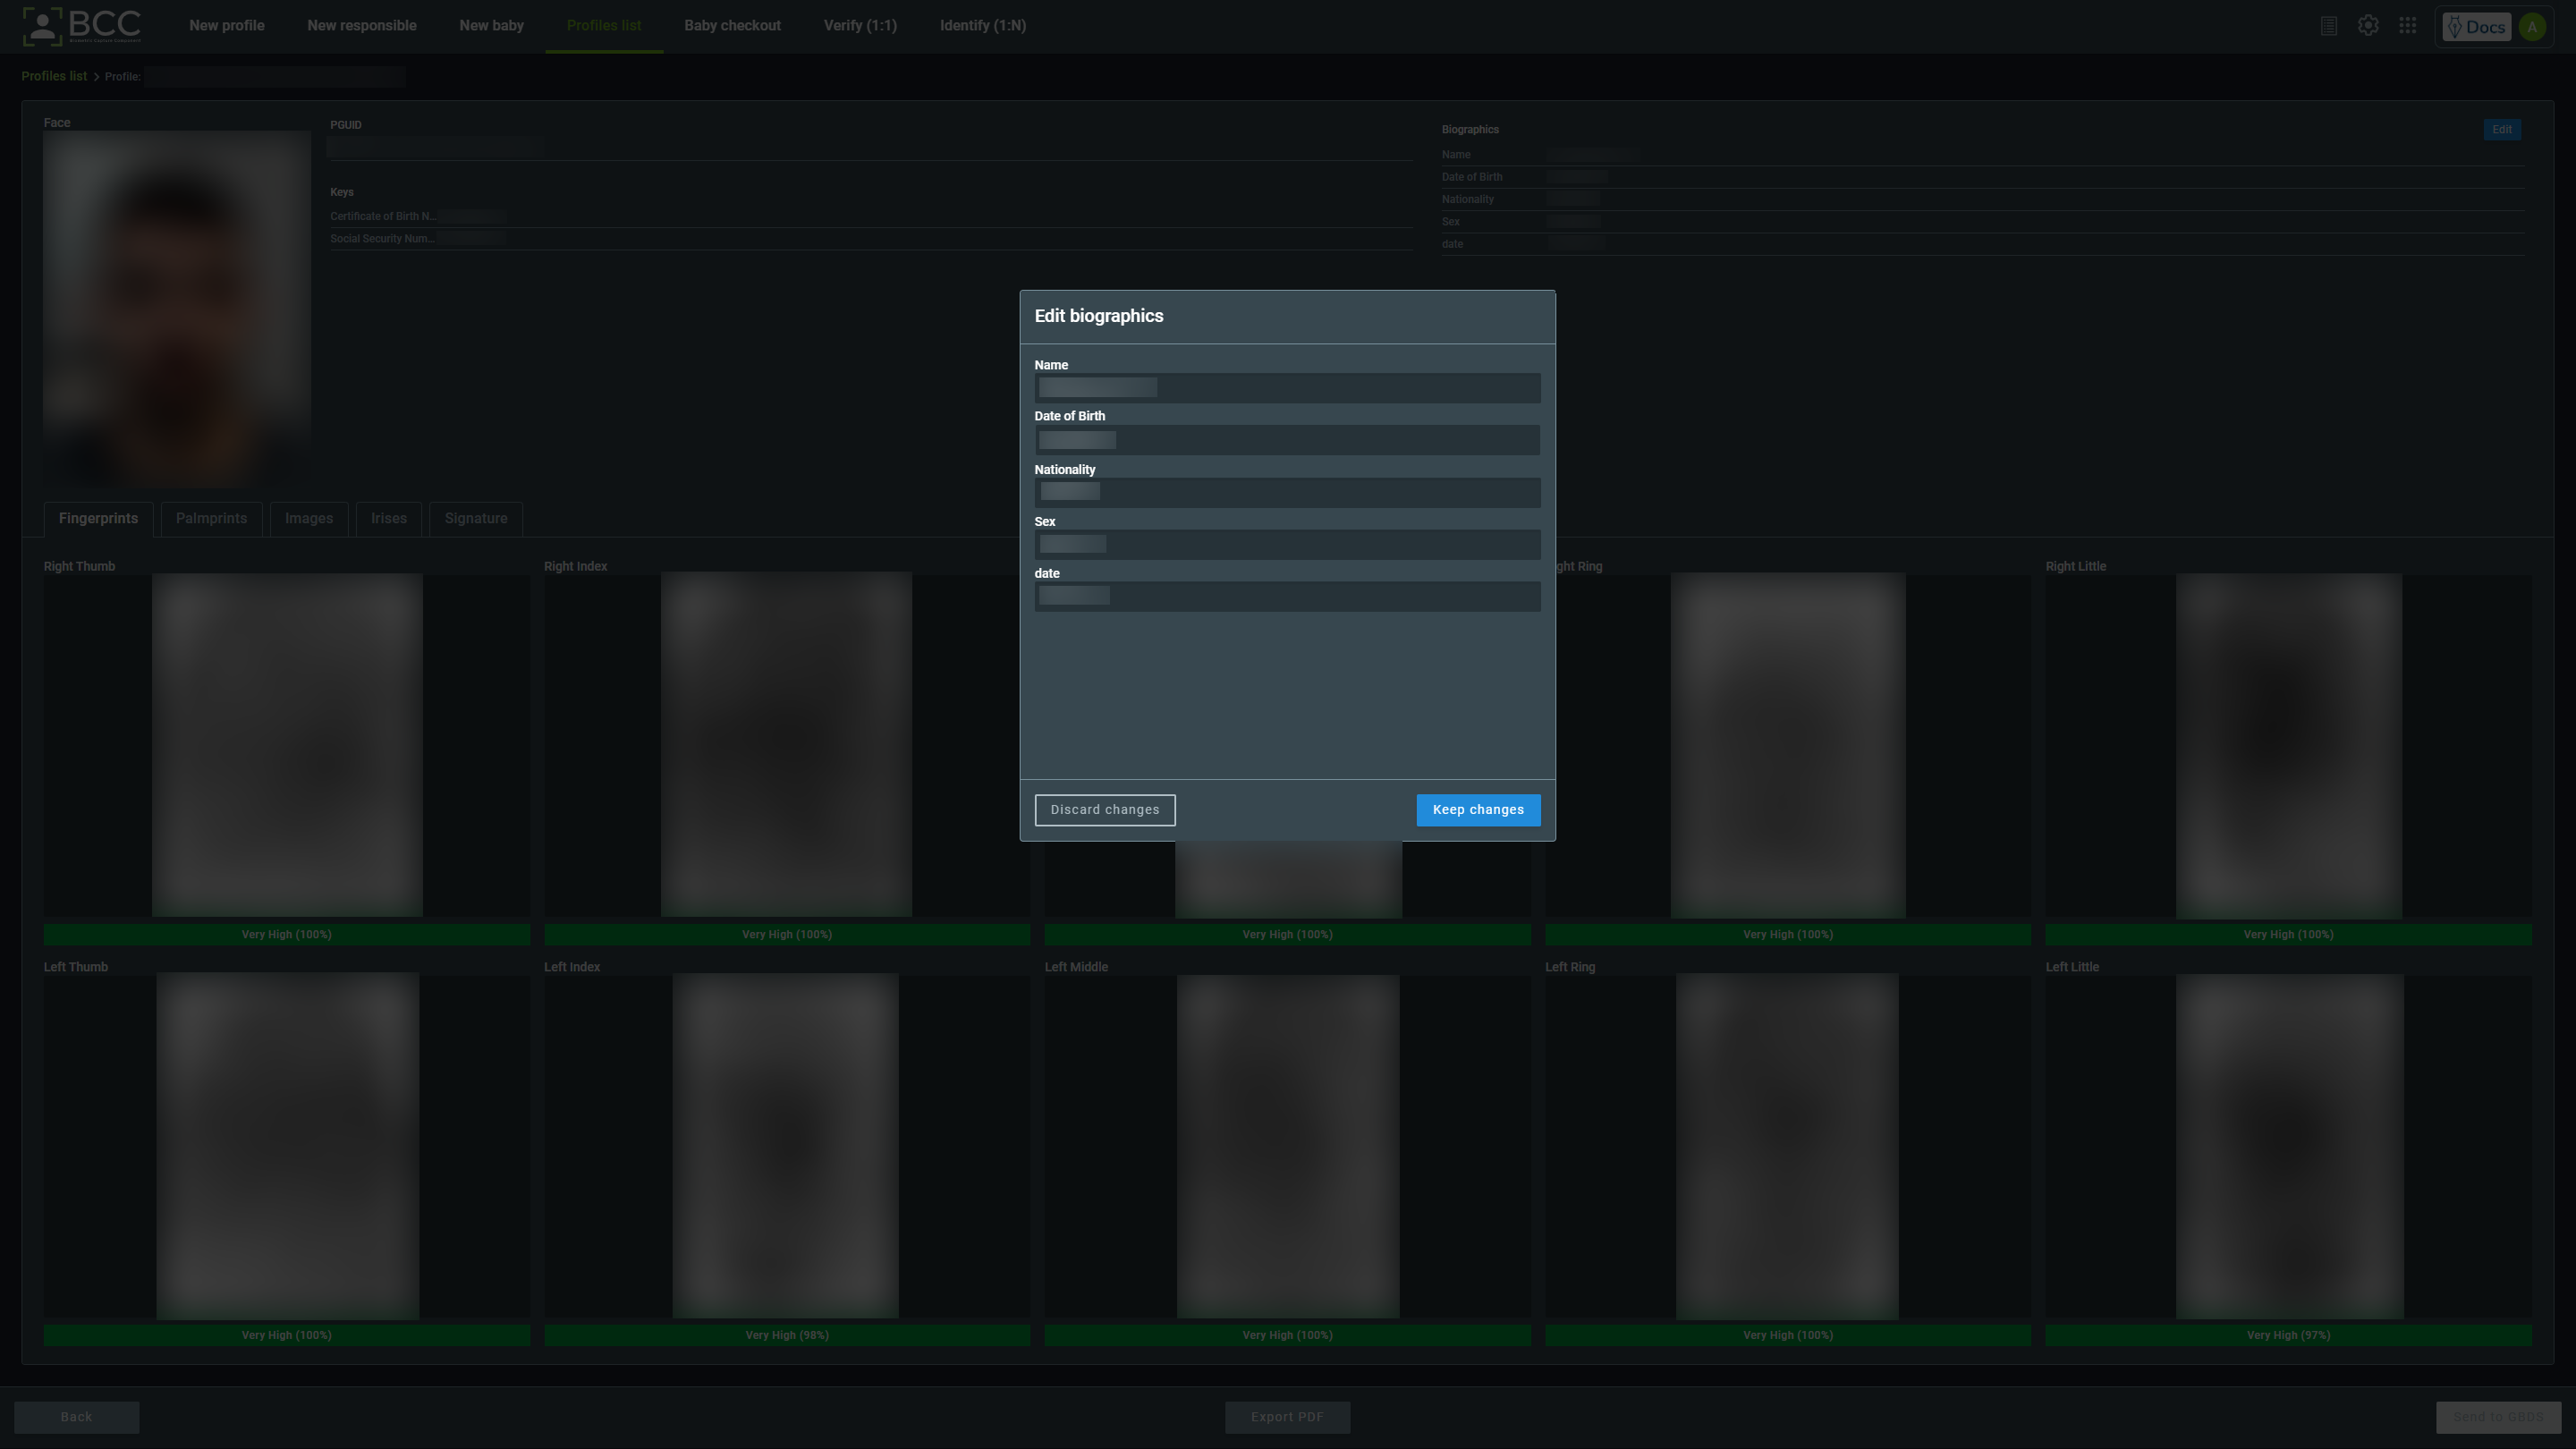
To edit the biographical information, click the Edit button at the top-right side of the page.
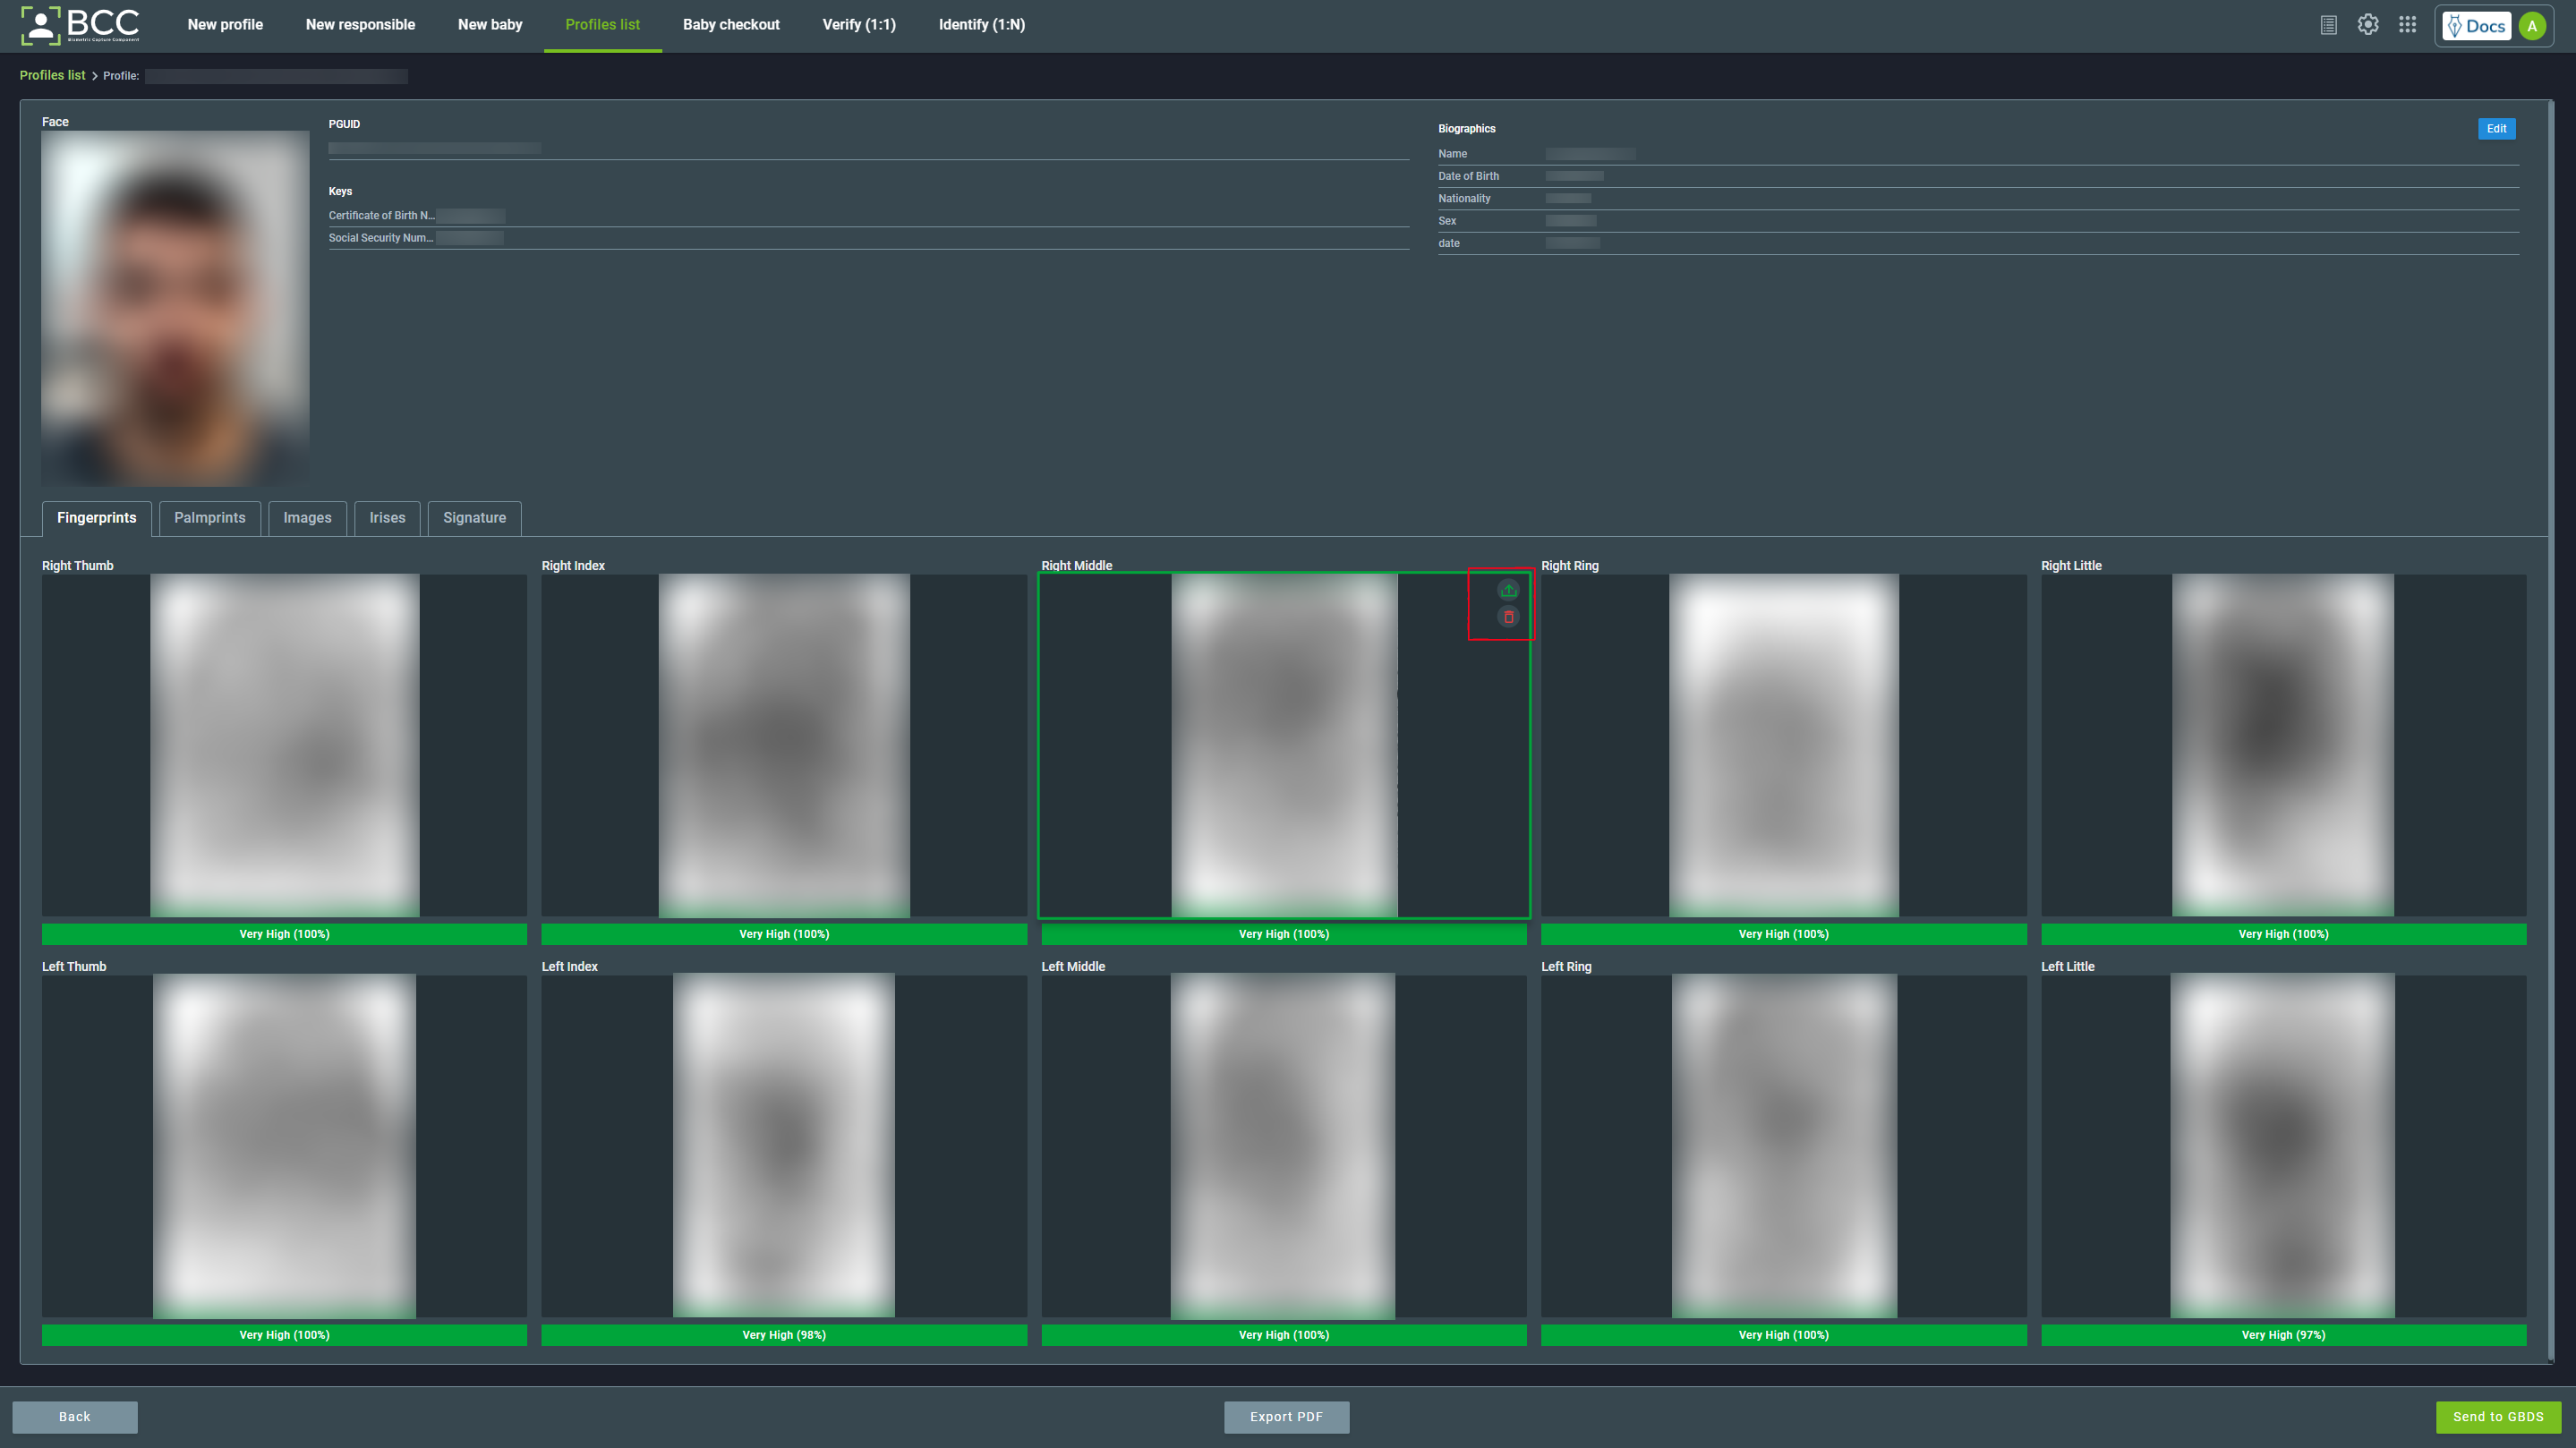
You may also recollect or remove a biometric field. Hover over the biometric, and the options should appear in the corner as highlighted in the image below. Clicking on the recollect option will open the capture window for the desired biometric.
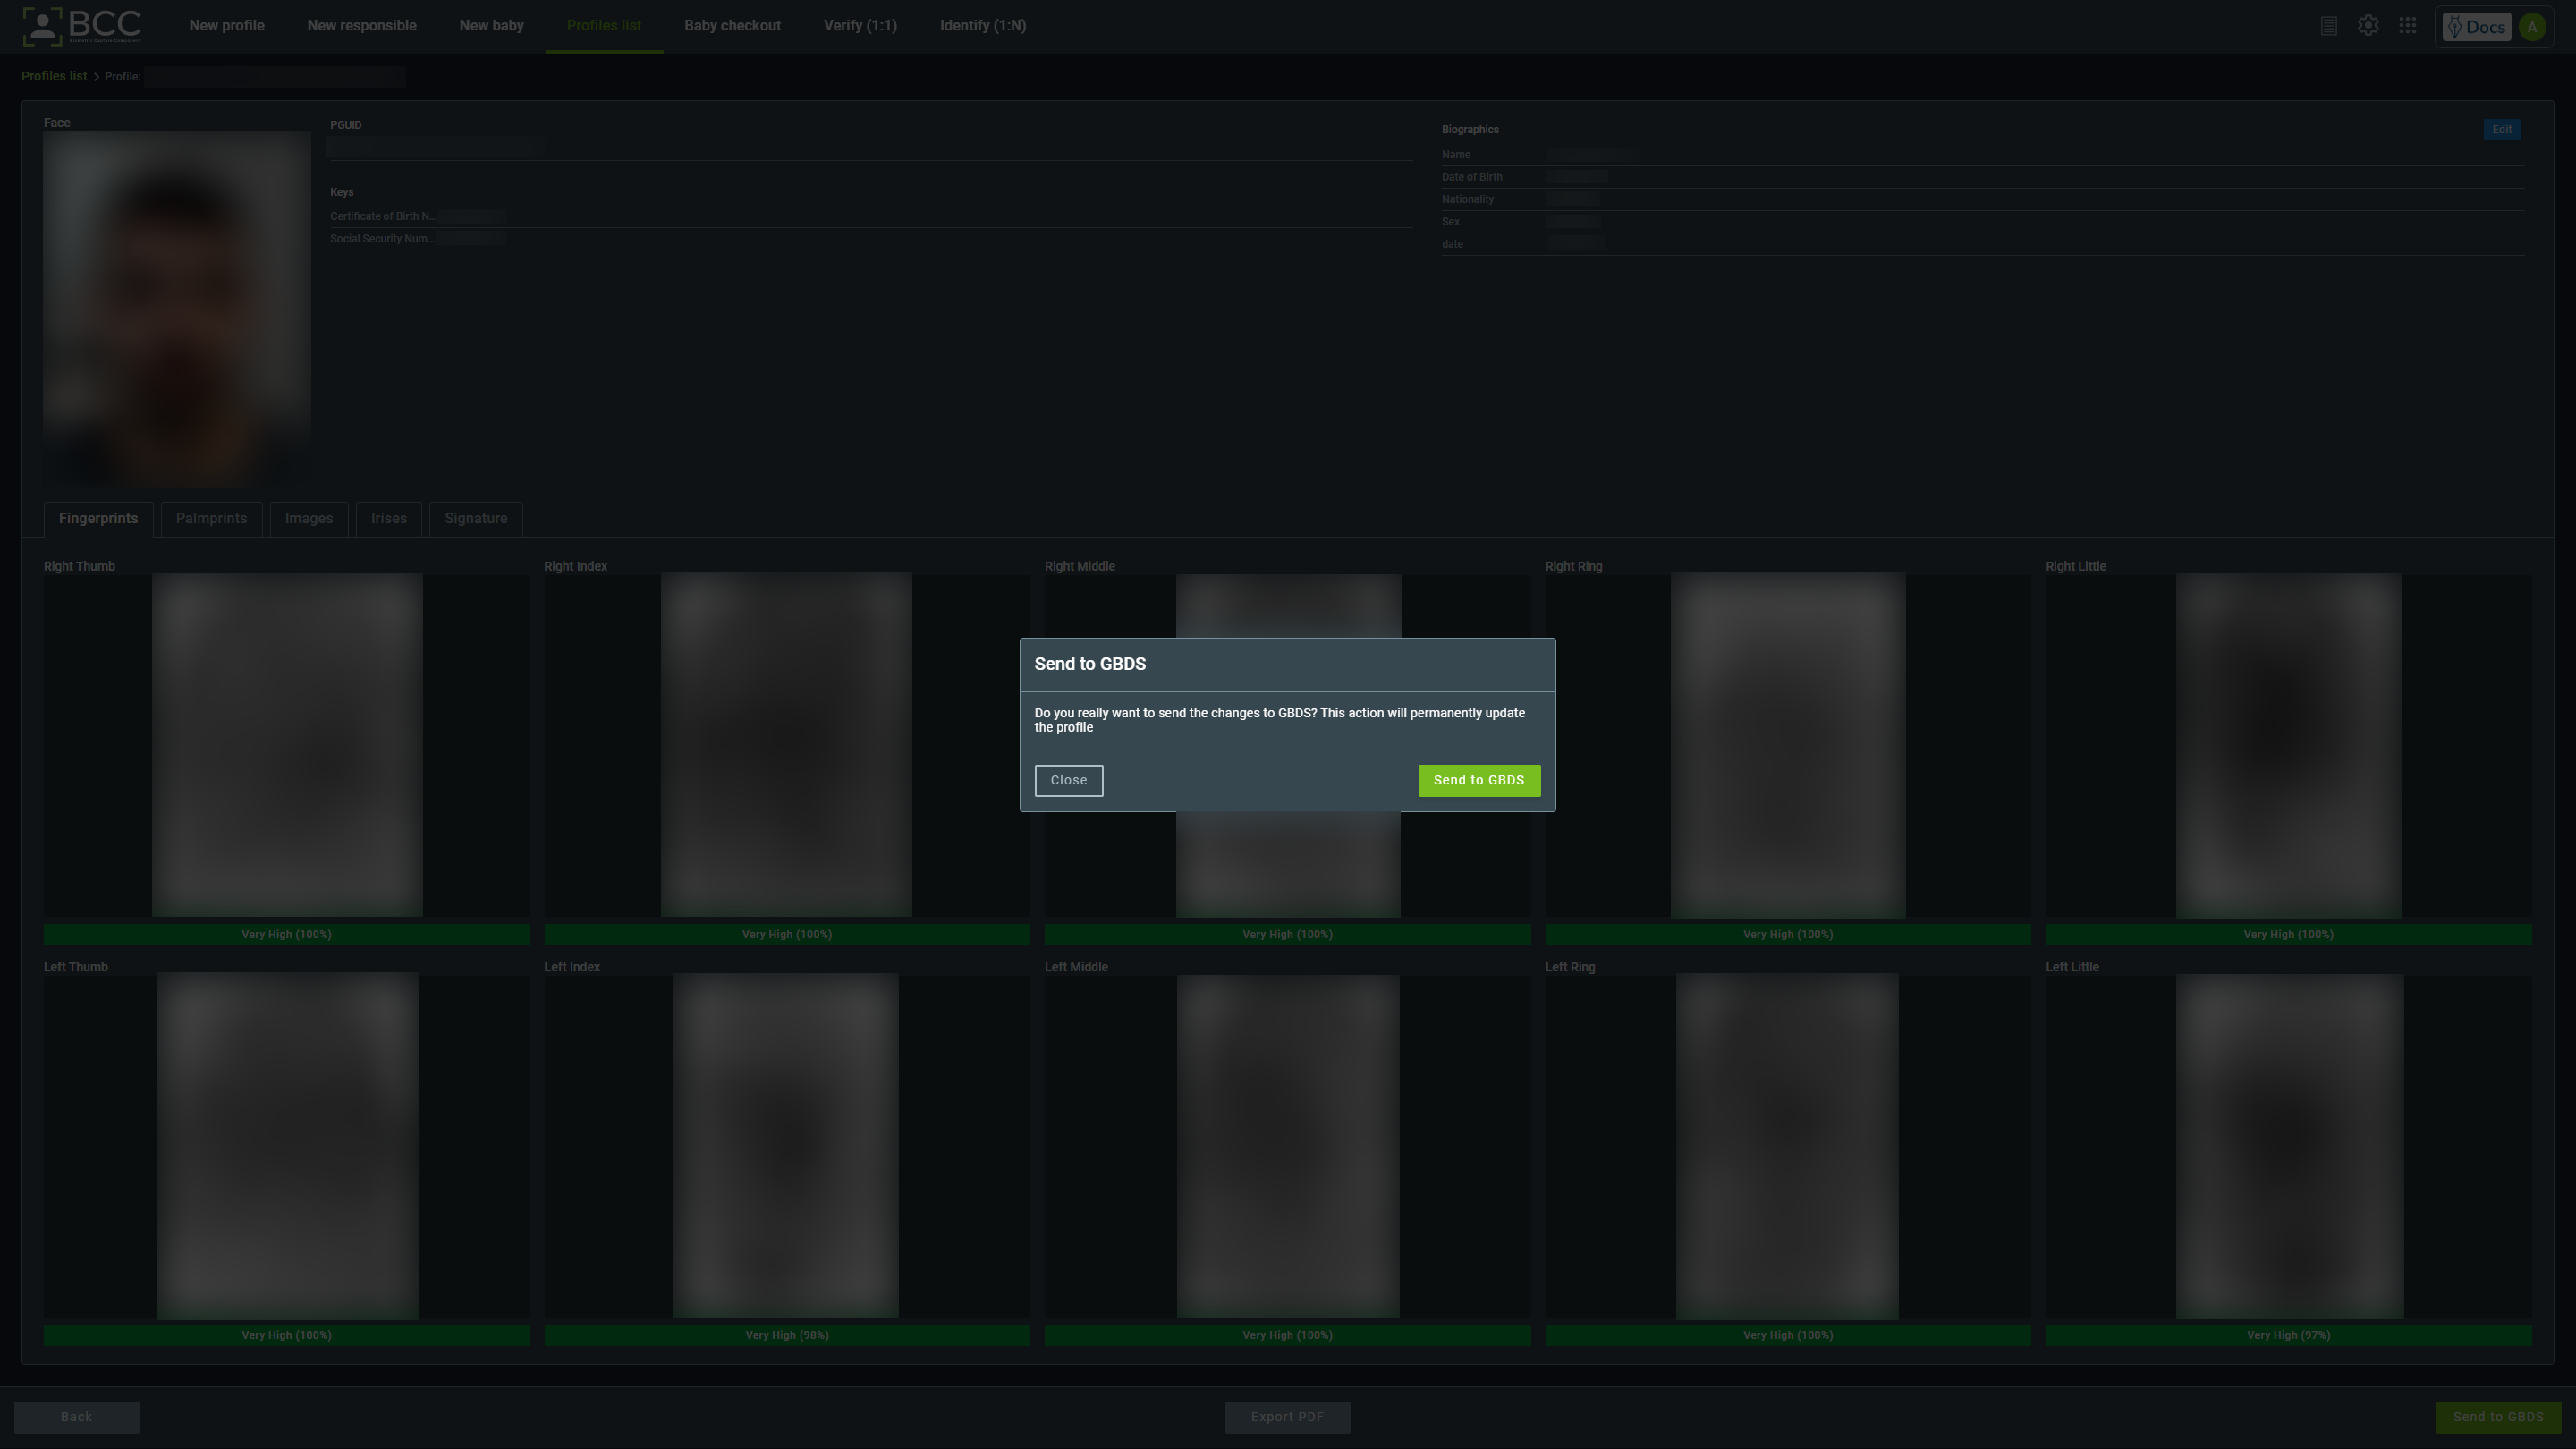
After modifying the profile, click the Send to GBDS button to resend the profile to GBDS. A confirmation window will open. Confirming will send the profile to GBDS. After that, BCC will display a notification indicating success.
9. Settings and Shortcuts
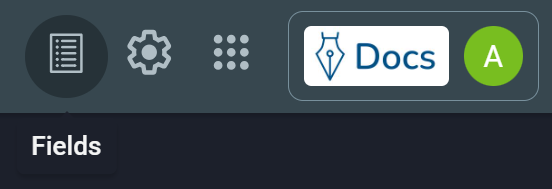
In the top right corner of the screen, there are four icons that provide access to:
9.1. Fields
To access the fields page, click on the list icon:
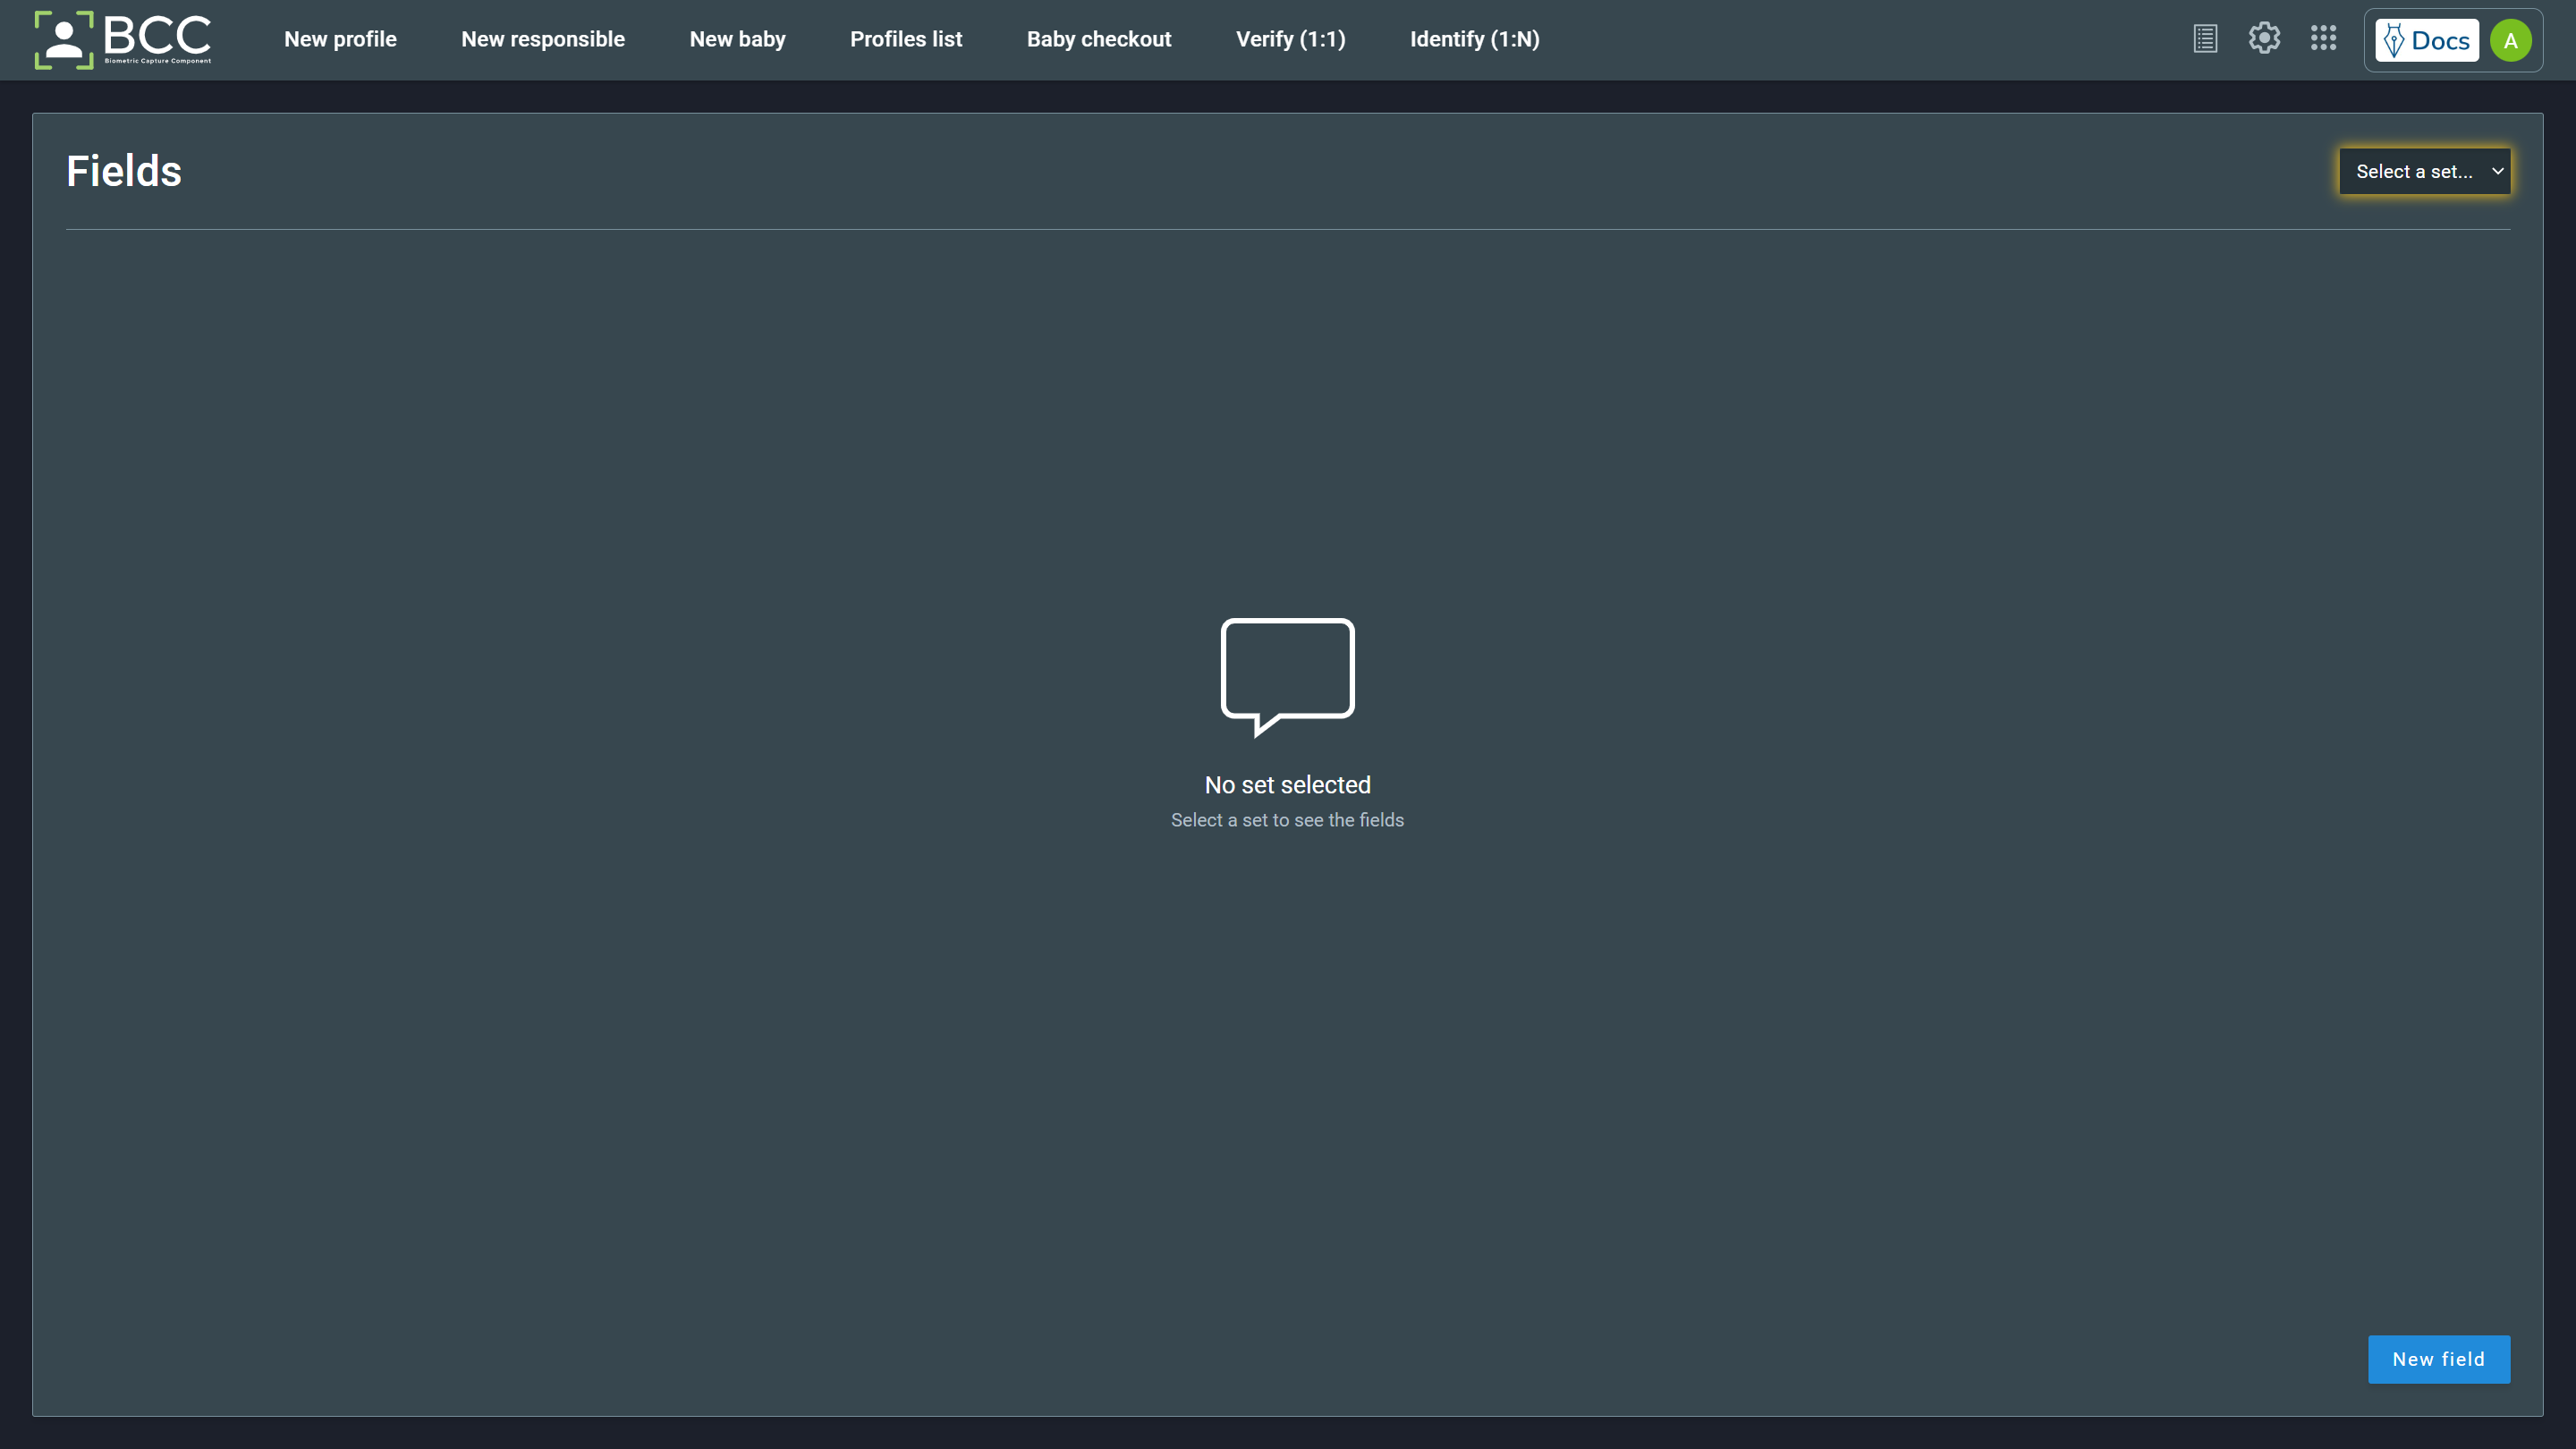
When you enter the fields page, you will see a yellow dropdown menu flashing. This menu will allow you to access the fields for babies, responsibles, and profiles.
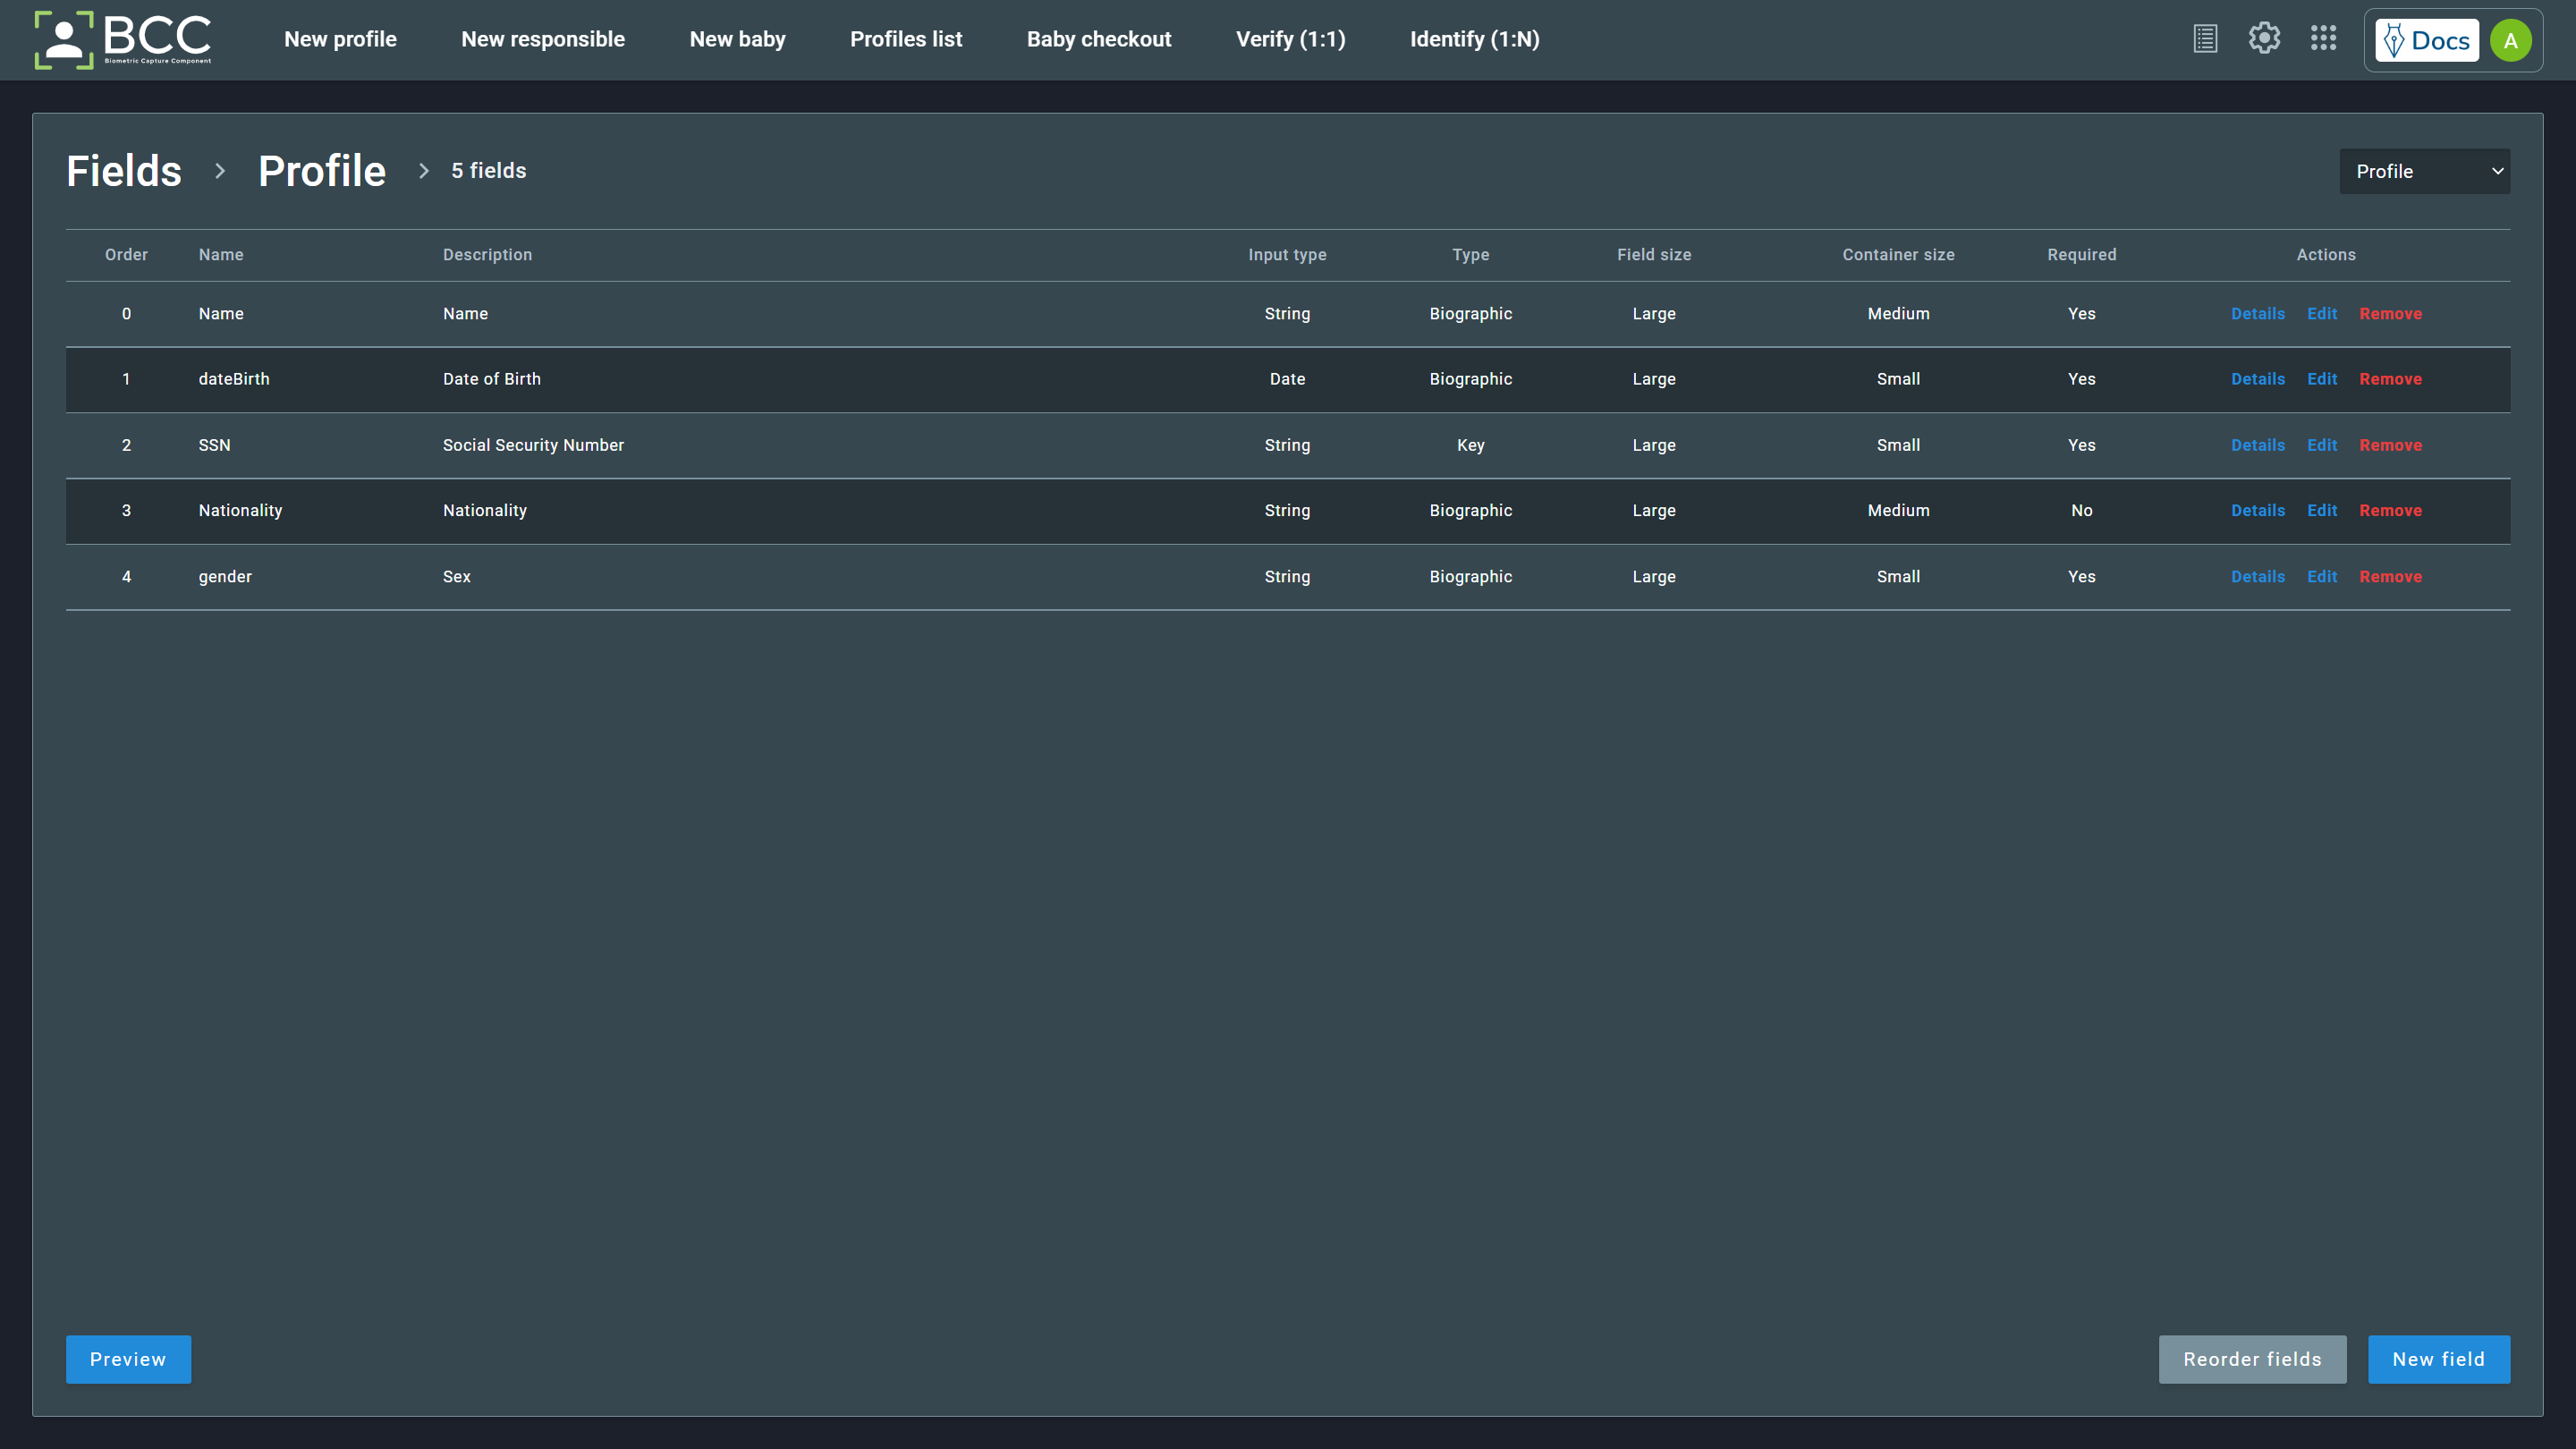
Clicking one of the profiles options will lead you to the profiles field page. You will see the fields’ names, descriptions, input types, types, size, container size, if required, and options to see the details, edit, or remove the field. Additionally, a Preview, a Reorder Fields, and a New Field button will be present at the bottom of the page.
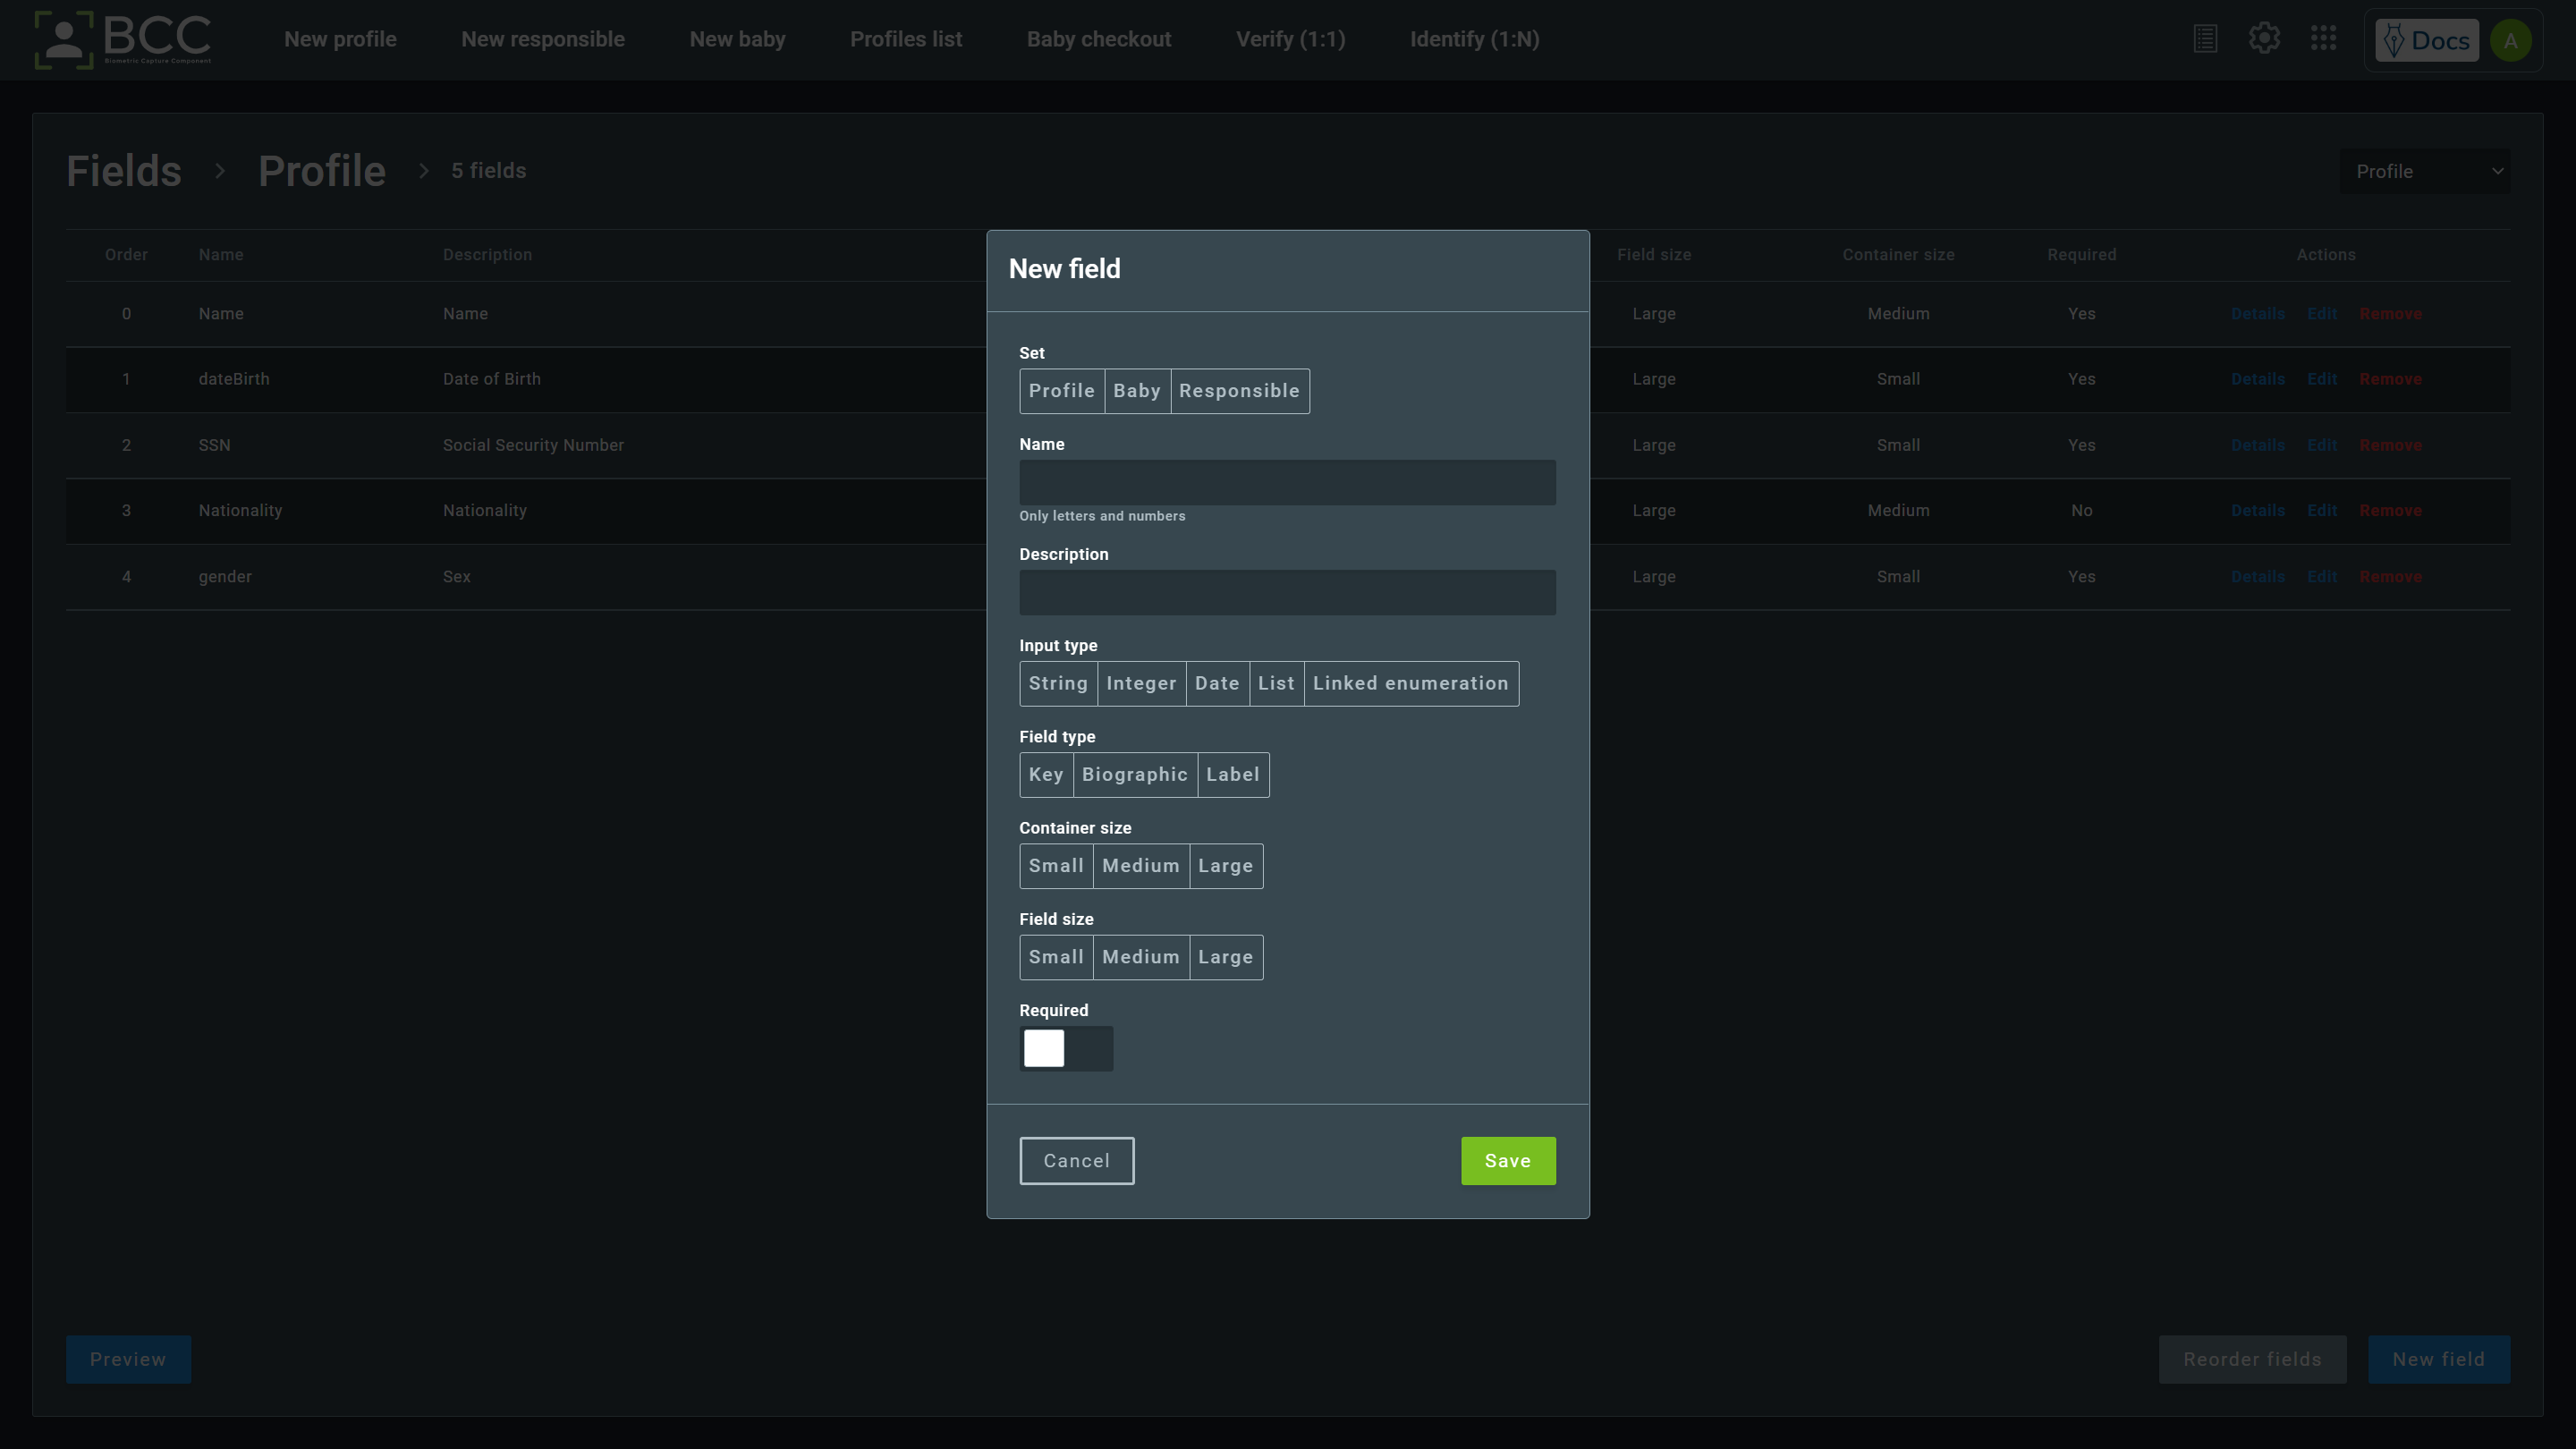
To add a new field, click the New Field button. This will open a new panel over the page. In this panel, you can insert the following information:
Set- Defines what profile will receive the new field (Baby, responsible, or civil profile).Id- Defines the database name of the field.Name- Defines the name that will be visible to the user.Input type- Defines the type of input. Date, list, and linked enumeration types have unique behavior, explained below.Date is a DD/MM/YYYY type of input. When providing this information in enrollment, a calendar will appear to select the date. You may write the date instead of picking it up in the calendar.
List where you may input your list to be displayed in a dropdown menu at the profile enrollment.
Linked Enumeration accepts a
.csvfile. This.csvneeds to follow a model, as shown in the example:id;State;City 001;California;Los Angeles 002;California;San Diego 003;California;San Jose 004;Florida;Jacksonville 005;Florida;Miami 006;Florida;Tampa
- This linked enumeration will create two complementary fields, one to select the state and the other to choose a corresponding city in the state. Note that you can change it to be any list, e.g., including a country first, so it will generate three fields and have your own linked enumeration list.
Field type- Defines the type of the field.Container size- Defines the space the field will take on the screen. You can see it as the dotted line around the field when previewing the fields.Field size- It is the size of the field on the screen, the size of the area where you fill the enrollment information.Required- Defines if it is needed to provide the information for the profile enrollment.
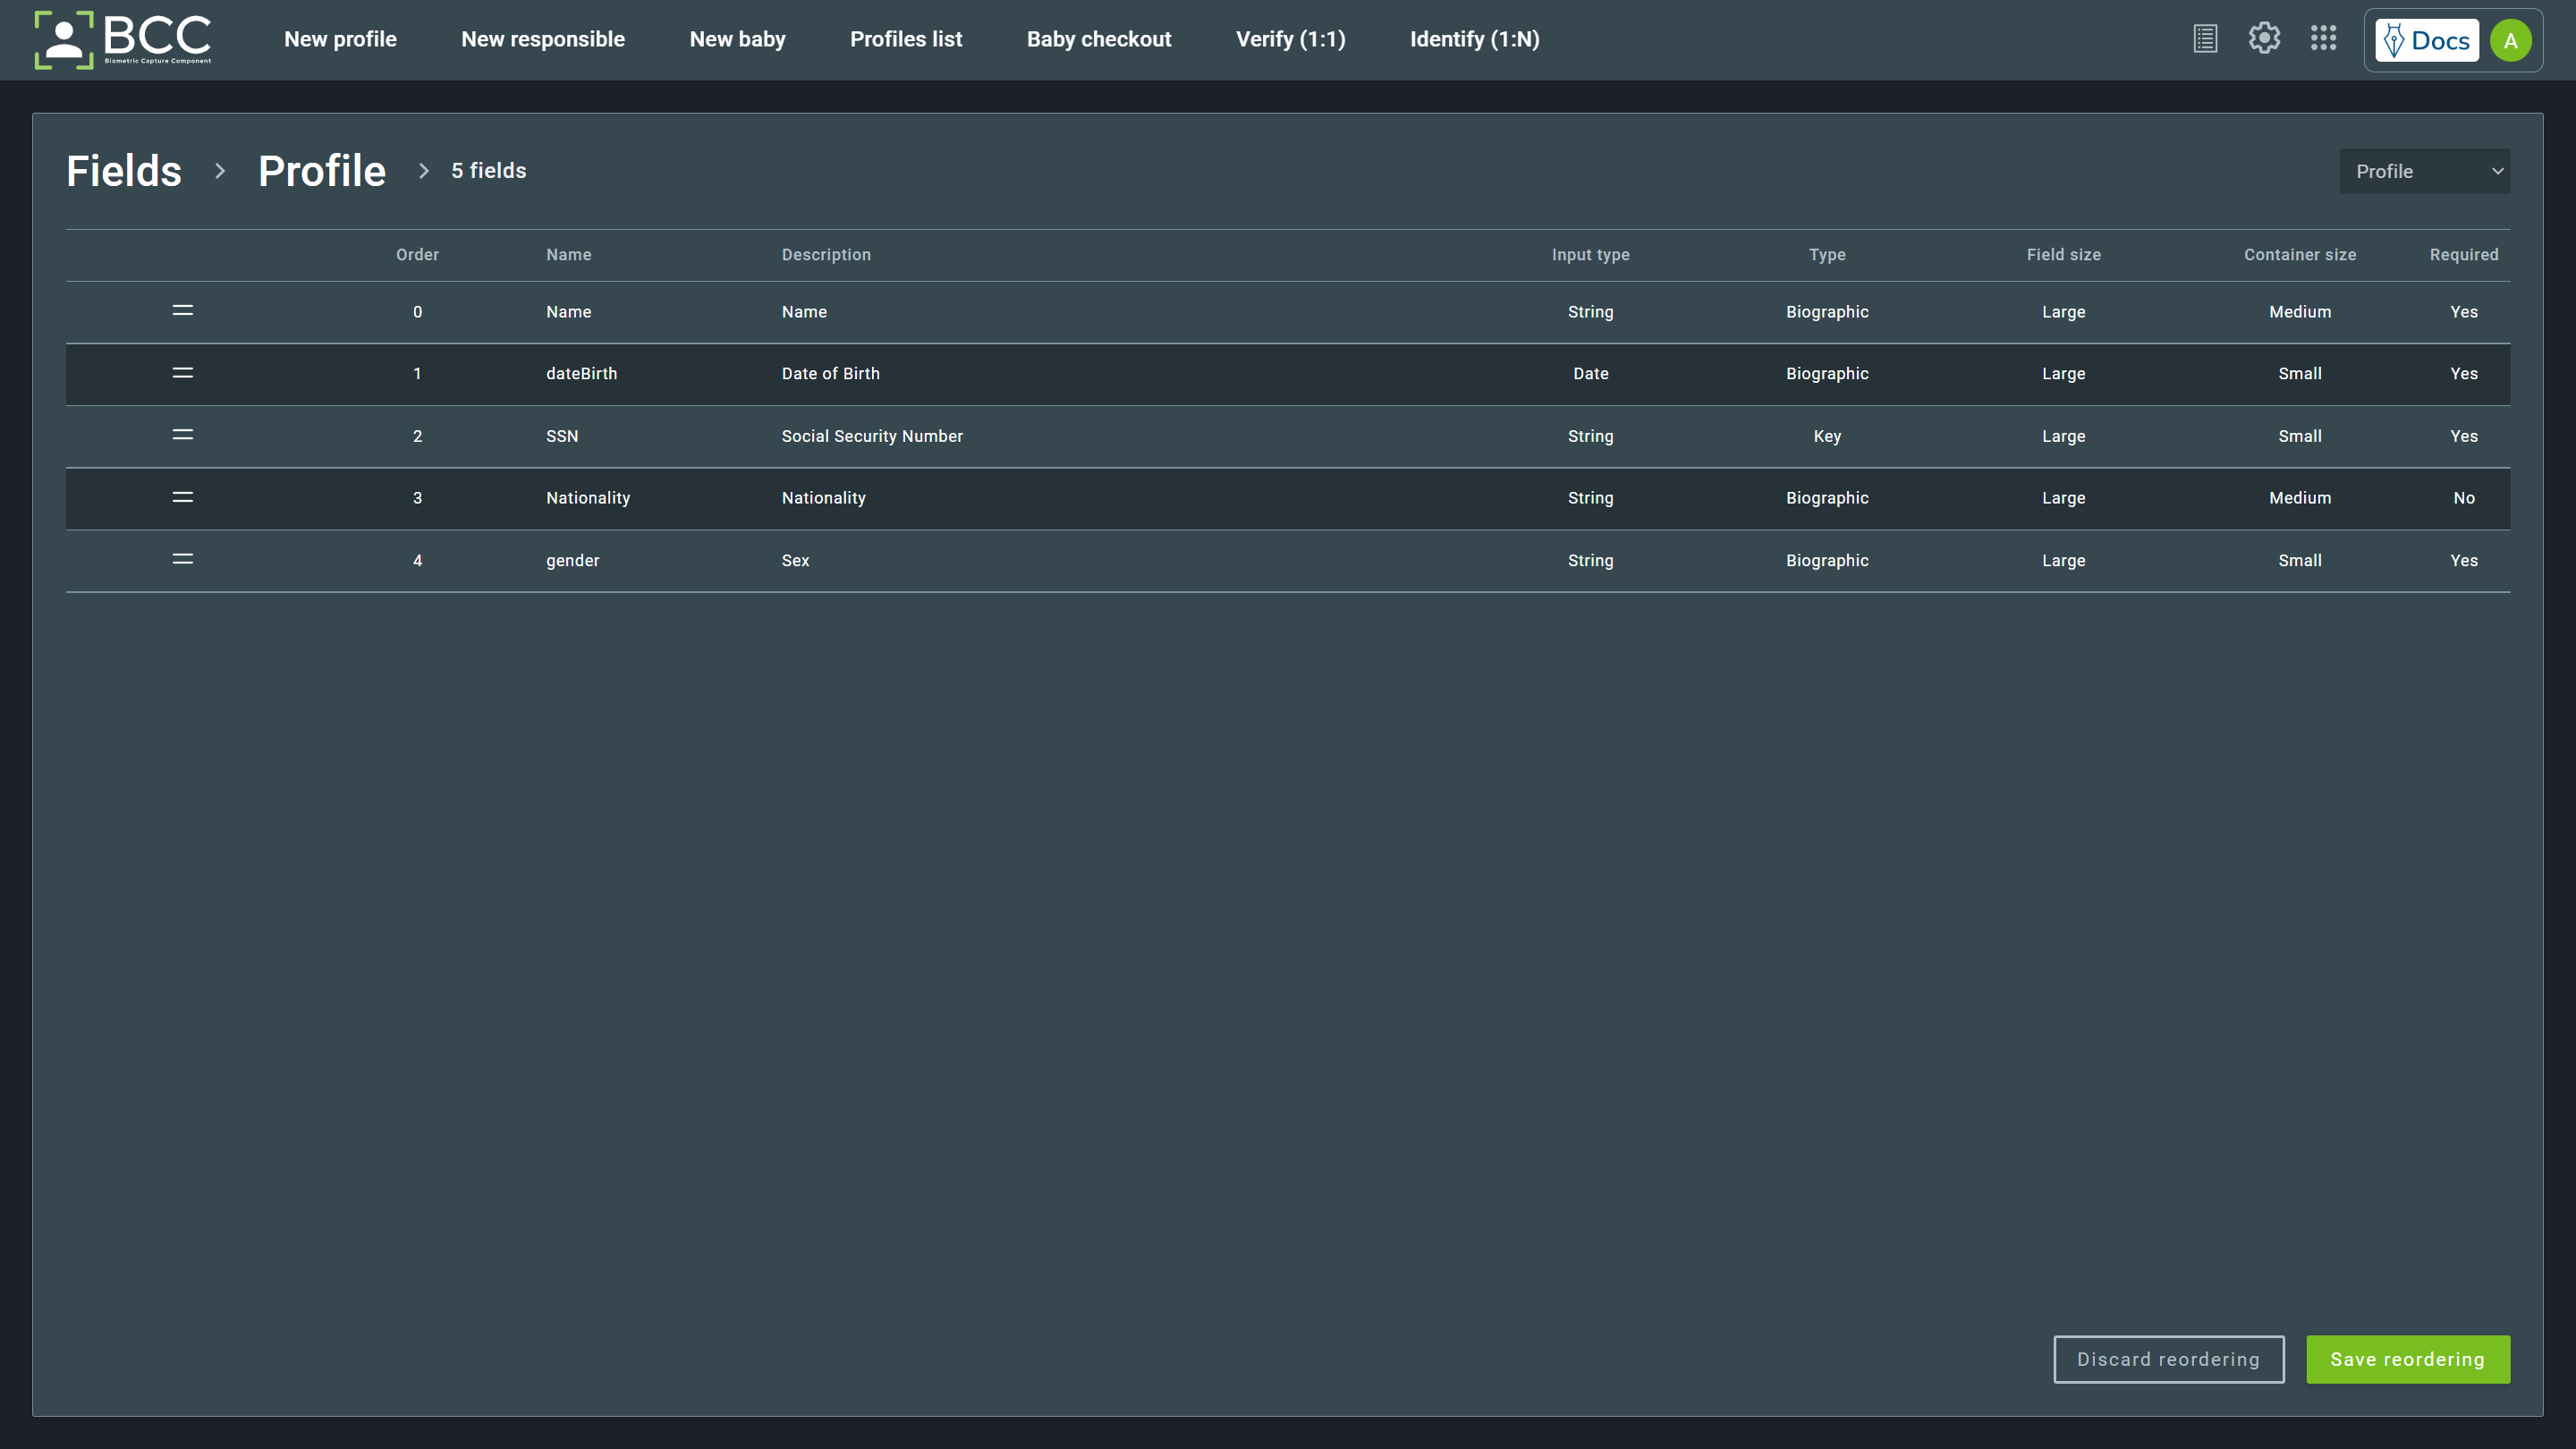
You can also reorder the fields. Click the Reorder fields button and drag and drop the field you want to reorder to the desired location. After it, save your changes by clicking Save reordering. If you want to revert your reordering, click the Discard reordering button.
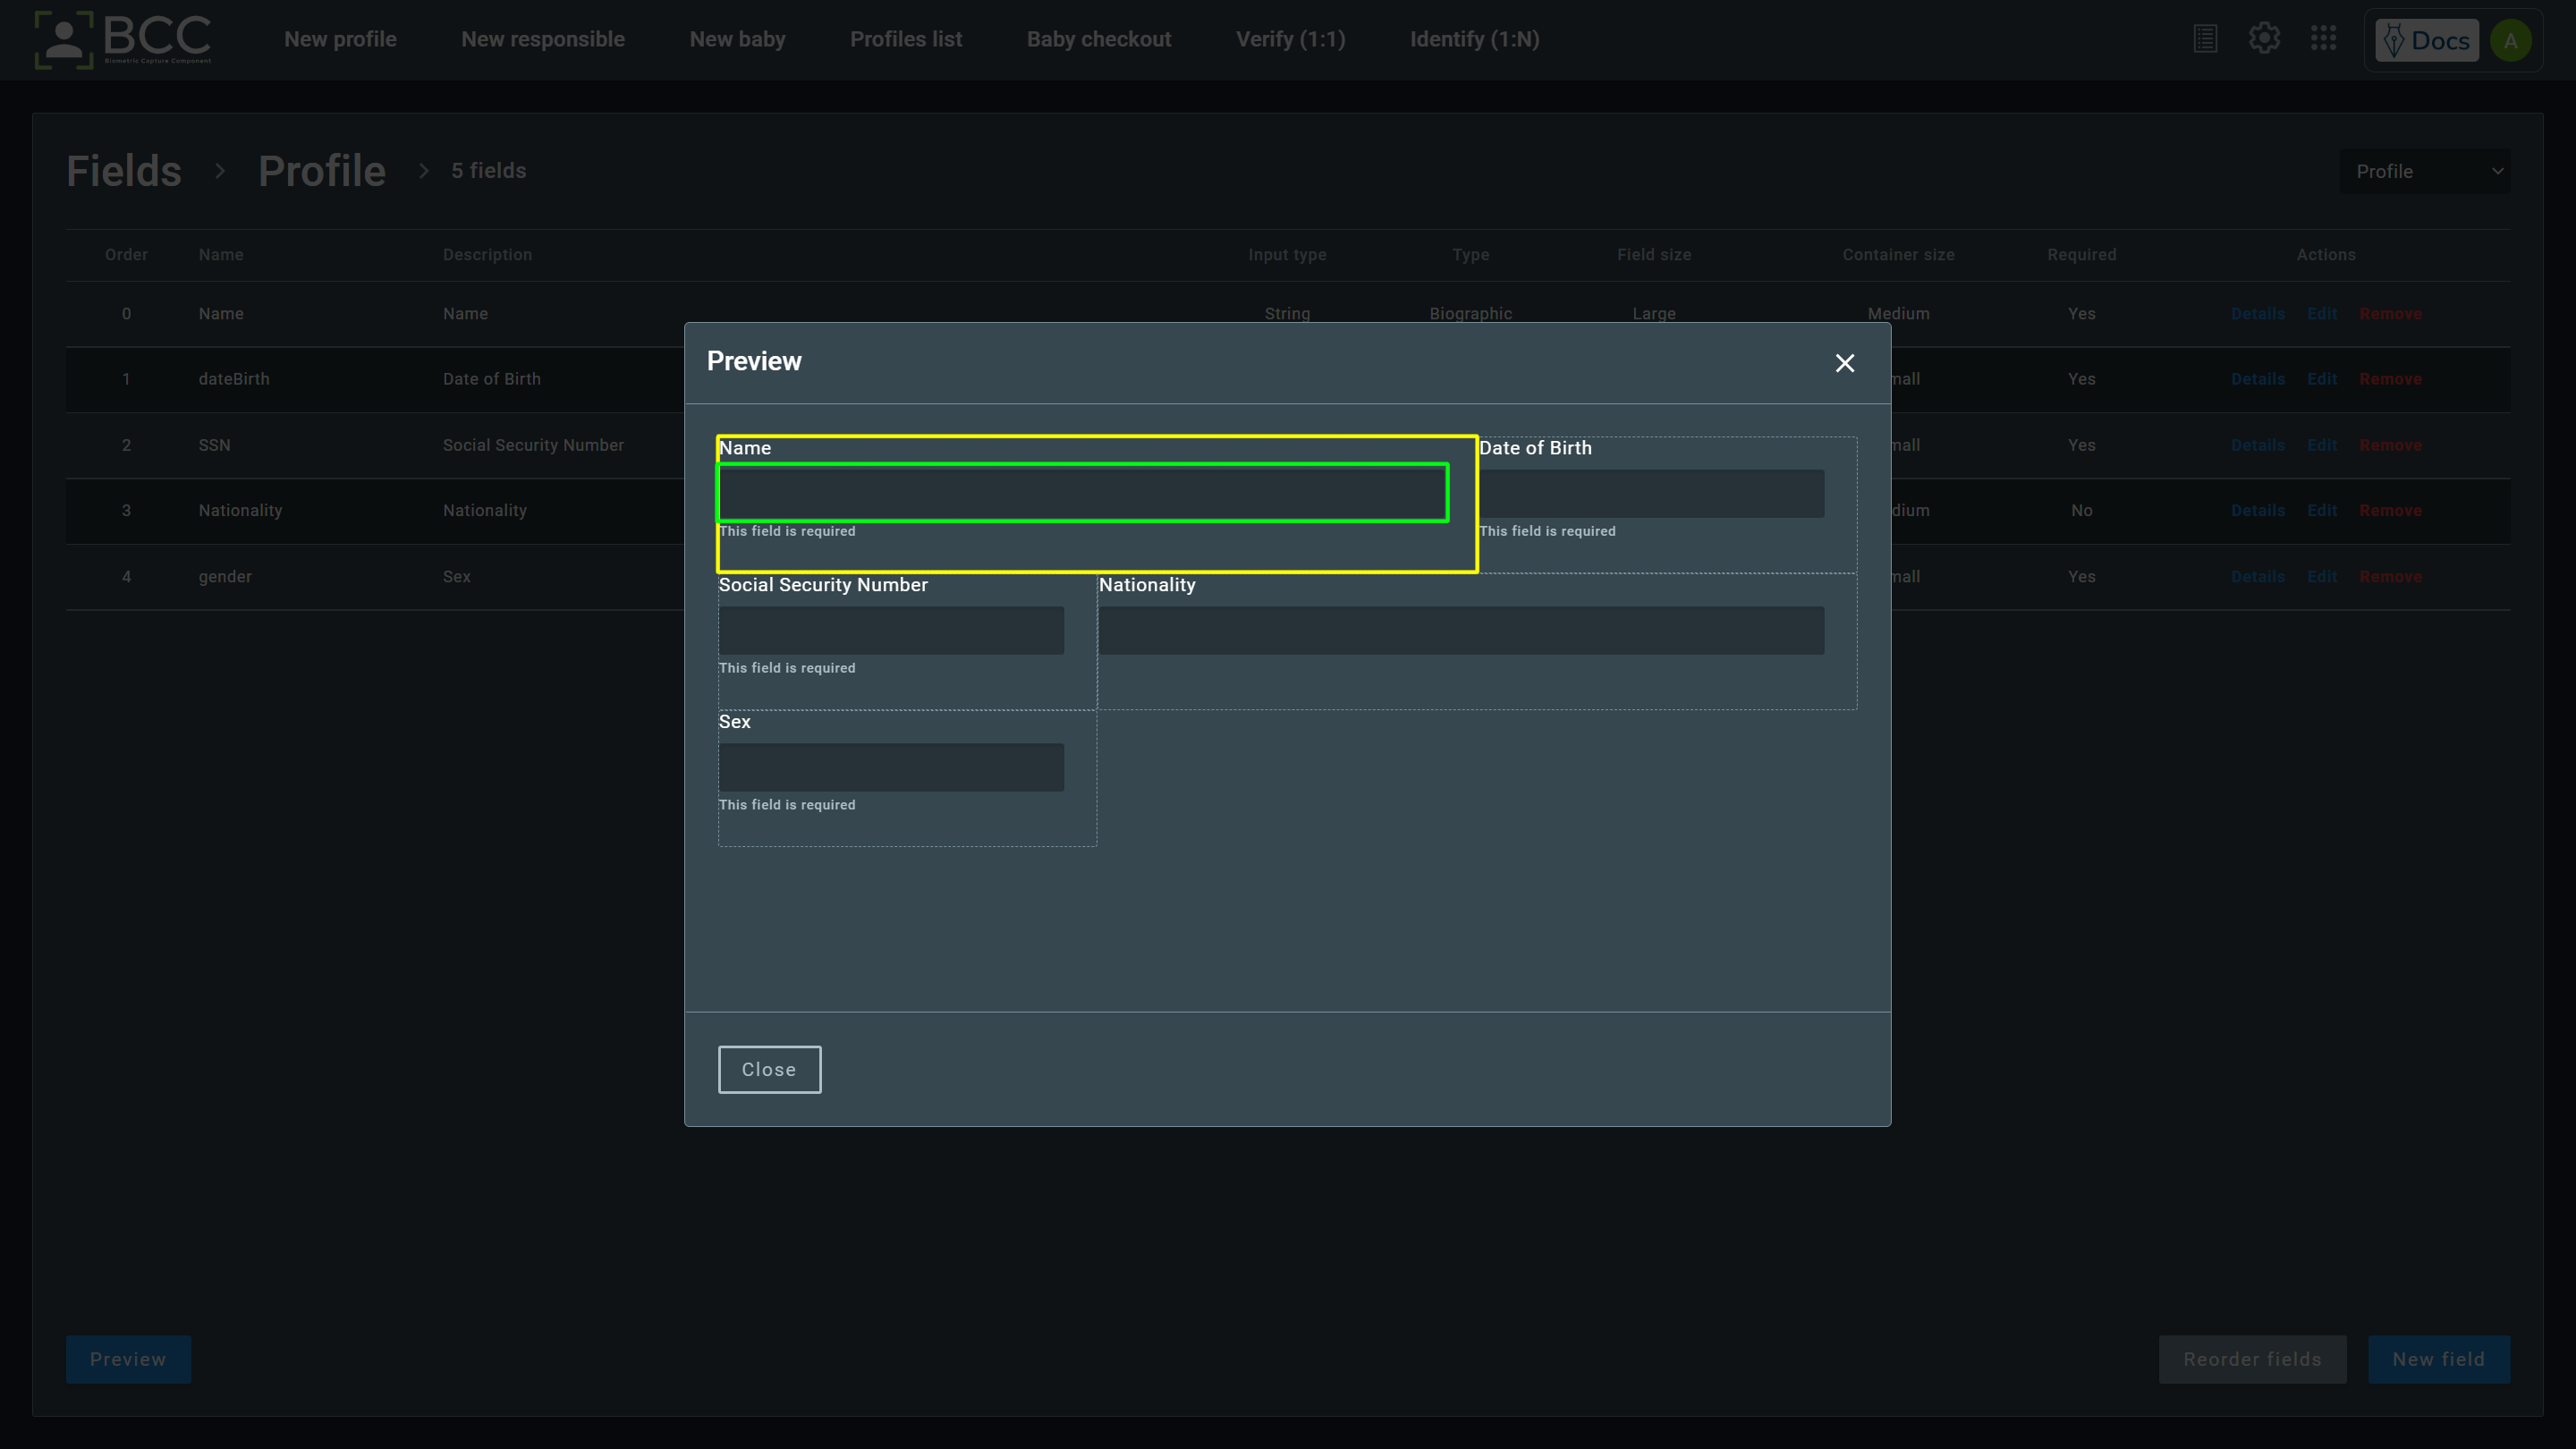
To preview how the fields will be on the enrollment page, click the Preview button. Clicking it will open a screen showing the arrangement of the fields by enumeration order. You can change the disposition by reordering the fields. The container (defined by container size) is highlighted in yellow in the following image. In contrast, the field (defined by the field size) is highlighted in green.
9.2. Settings
To access settings, click on the gear icon:
This section allows the user to change some aspects of the interface:

- Theme: Light or Dark;
- Language: Portuguese, English, or Spanish;
- Date Format: dd/mm/yyyy, mm/dd/yyyy, or yyyy/mm/dd;
- Time Format: 12-hour (AM/PM) or 24-hour clock.
9.3. Applications
To access the shortcuts to other GBS applications, click on:
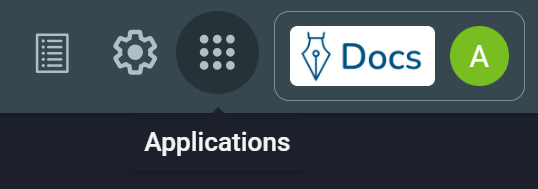
Then, click on the icon of the application you want to access:
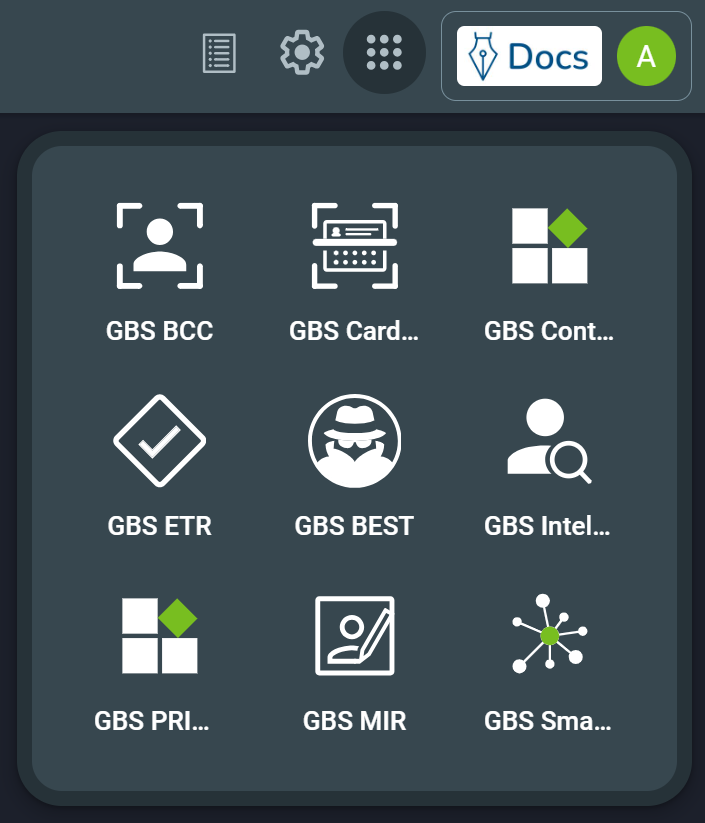
Note
Only the icons for the applications the user has access to will be displayed.
10. Supported Devices
This is the full list of devices supported by BCC.
10.1. Fingerprint and Palmprint Readers
| Cogent Cs500e |
| Crossmatch EF200 / Watson |
| Crossmatch LSCAN Guardian |
| Crossmatch Verifier 320 LC |
| Digent Izzix FD1000 |
| Digital Persona U.are.U 4000 |
| Digital Persona U.are.U 4500 |
| Digital Persona U.are.U 5100 |
| Futronic FS52 |
| Futronic FS64 |
| Futronic FS80 |
| Futronic FS80H |
| Futronic FS81H |
| Futronic FS88 |
| Futronic FS88H |
| Greenbit Multiscan 527 |
| Lumidigm M301 |
| Lumidigm V302 |
| Lumidigm V311 |
| Lumidigm V371 |
| IDTech Biomag IDT-4012-DP |
| IDTech Biomag IDT-4033-NG |
| Integrated Biometrics Sherlock |
| Integrated Biometrics Watson Mini |
| Integrated Biometrics Kojak |
| Nitgen eNBioScan-D |
| Nitgen Hamster DX |
| Nitgen Hamster II |
| Nitgen Hamster II DX / III |
| Secugen Hamster IV |
| Secugen Hamster Plus |
| Secugen Hamster Pro 20 |
| Suprema BioMini |
| Suprema BioMini Plus |
| Suprema BioMini Slim |
| Suprema RealScan-D |
| Suprema RealScan-G10 |
| Suprema RealScan S60 |
| Suprema SFU-S20 |
| TechMag Biopass |
| UPEK Eikon |
| UPEK Eikon Touch |
| Virdi FOH02 |
| Virdi FOH04 |
| Zvetco Verifi P5000 |
| Zvetco Verifi P6000-B |
See also
The fingerprint and palmprint capture is powered by Griaule Fingerprint SDK. For further information, see the Fingerprint SDK 2014 Manual.
10.2. Iris Readers
| Crossmatch I Scan 2 |
| IriTech IriShield-USB |
| Unique Biometrics Hummingbird USB Dual Iris Scanner |
10.3. Cameras
| Canon EOS 40D / 50D / 5D Mark II / 5D Mark III / 7D / 60D / 60Da / 70D |
| Canon EOS Rebel T1i / 500D |
| Canon EOS Rebel T2i / 550D |
| Canon EOS Rebel T3 / 1100D |
| Canon EOS Rebel T3i / 600D |
| Canon EOS Rebel T4i / 650D |
| Canon EOS Rebel T5 / 1200D / Hi(*) |
| Canon EOS Rebel T5i / 700D, EOS Rebel SL1 / 100D |
| Canon EOS Rebel T6 |
| Canon EOS Rebel T7 |
| Canon EOS Rebel XS / 1000D |
| Canon EOS Rebel XSi / 450D |
| Canon EOS-1D C / EOS 6D / EOS M / EOS M2(*) |
| Canon EOS-1D X / 1D Mark III / 1Ds Mark III / 1D Mark IV |
| Canon PowerShot SX 160 IS |
| Canon PowerShot SX 170 |
| Canon PowerShot SX 200 IS |
| Canon PowerShot SX 510 HS |
| Canon PowerShot SX 520 HS |
| Canon PowerShot SX110 IS |
| Windows 7 (or superior) compatible webcams |
| Akiyama AkysCam-Plus |
10.4. Signature Pads
| MIP MSP-4300 |
| Topaz SigGem Color 5.7 |
| Topaz SignatureGem1X5 |
| Topaz SignatureGem4X5 |
| Topaz SignatureGemLCD |
| Topaz SignatureGemLCD4X3New |
| Topaz SignatureGemLCD4X5 |
| Wacom STU-300 |
| Wacom STU-520 |
| Wacom STU-530 |
| Wacom STU-540 |
| Signotec Gamma |
| Akiyama AK-560 |
